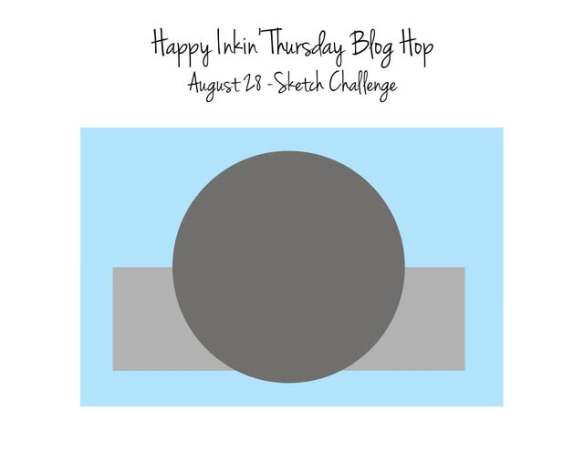
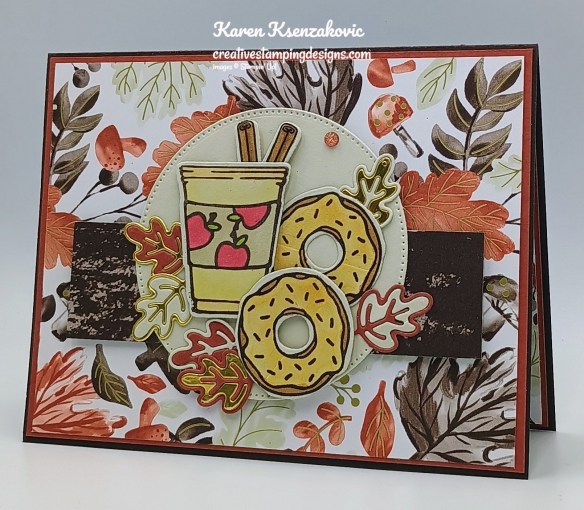
Good Thursday morning stamping friends and welcome to our Happy Inkin’ Thursday Blog Hop. If you are starting with me, thank you. I hope you will stop by everyone’s blog to see what they have created this week. If you are hopping over from Mary’s blog, thank you for stopping by. This week we have Sketch Challenge. If you’d like to see a quick video of how I made this card, Click Here to go to my Instagram Reels. Here is my card using this week’s sketch.
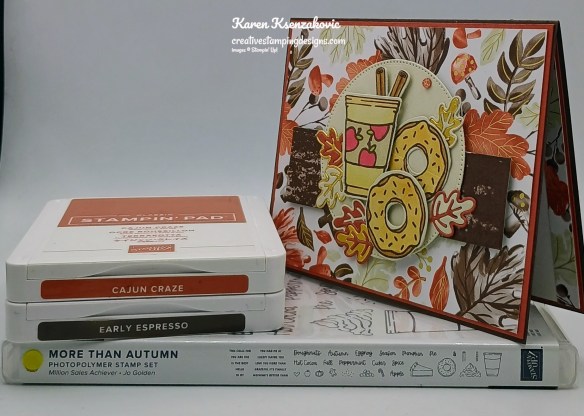
I used the Stampin’ Up! Online Exclusive More Than Autumn Bundle along with the Gathering Together Specialty Designer Series Paper (available Sept 3), Stylish Shapes Dies and Gold Foil for my card today.
This is our sketch for this week
Adhere a panel of Gathering Together DSP to a Cajun Craze mat with Stampin’ Seal. Adhere the layered panel to an Early Espresso card base with Stampin’ Seal. Using the largest circle from the Stylish Shapes Dies, cut a panel of Basic Beige. Adhere a panel of Gathering Together DSP to the back of the circle. Adhere the circle to the card front with Stampin’ Dimensionals.
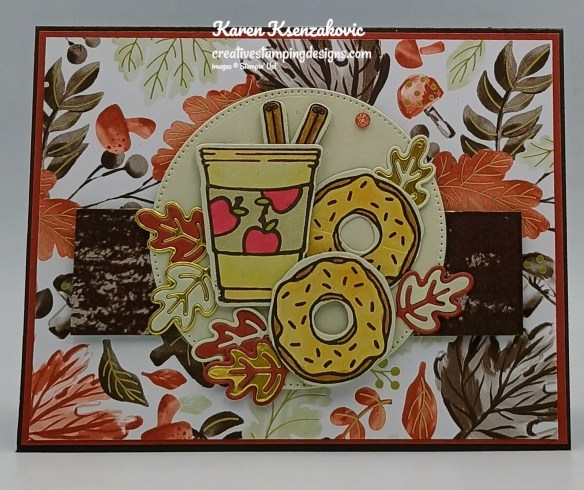
On a panel of Basic Beige, stamp the cup, donut and cinnamon stick images from the Stampin’ Up! More Than Autumn Photopolymer Stamp Set in Early Espresso Ink. Stamp the apple image from the More Than Autumn stamp set on the cup band in Early Espresso Ink. Color the images with Crumb Cake, Granny Apple Green, Pecan Pie, Real Red, Medium and Medium Light Stampin’ Blends Markers. Cut all the images out using the More Than Autumn Dies.
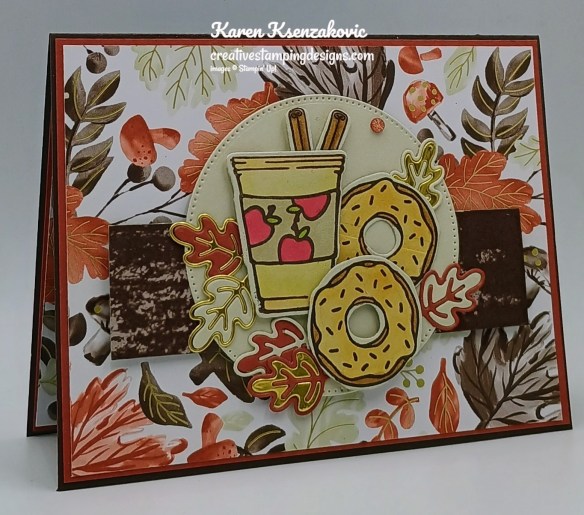
Arrange the die cuts on the circle using Stampin’ Dimensionals and Glue Dots. Using the More Than Autumn Dies, cut the leaf die 2 times each from panels of Basic Beige, Cajun Craze and Gold Foil. Mix the leaf veins and solid leaf sections. Adhere the leaves to the circle using Liquid Glue. Add a Cajun Craze & Gold Dot (available Sept 3) to the circle.
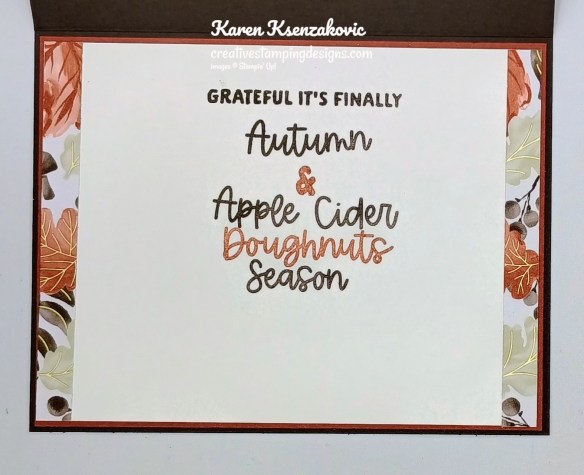
Stamp the sentiments from the More Than Autumn stamp set on a panel of Basic White in Cajun Craze and Early Espresso Ink. Adhere panels of Gathering Together DSP to the sides of the panel. Adhere the Basic White panel to a Cajun Craze mat the to the inside of the Early Espresso card base.
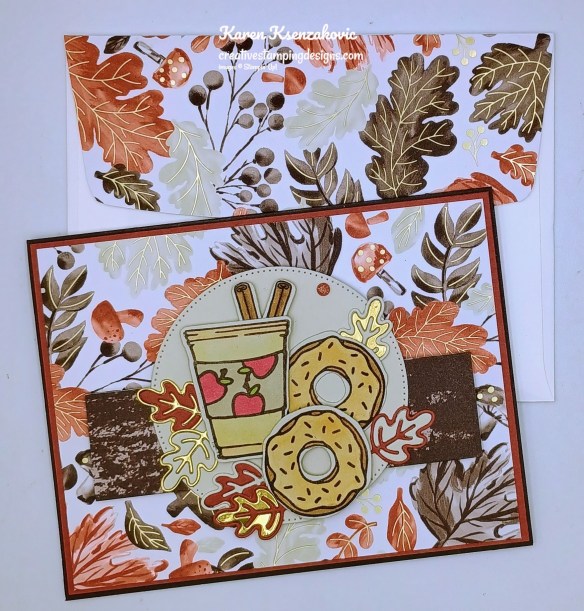
Decorate a Basic White Medium Envelope to complete your card. Stamp the cup, cinnamon sticks, apples and donut images from the More Than Autumn stamp set in Early Espresso Ink on the envelope front. Color images the same as for the card. Adhere a panel of Gathering Together DSP to the envelope flap.
Thank you for stopping by my blog today. Now that you’ve seen my card, let’s get on with the hop! Click the button below to hop over to see what Akiko has created. Happy Hopping!!
Just in case you get lost along the way, here is a list of the team members involved in the hop today.
If you need any stamping supplies, I’d love to be your Demonstrator. Just click HERE to go directly to my online store or drop me an email if you have any questions.
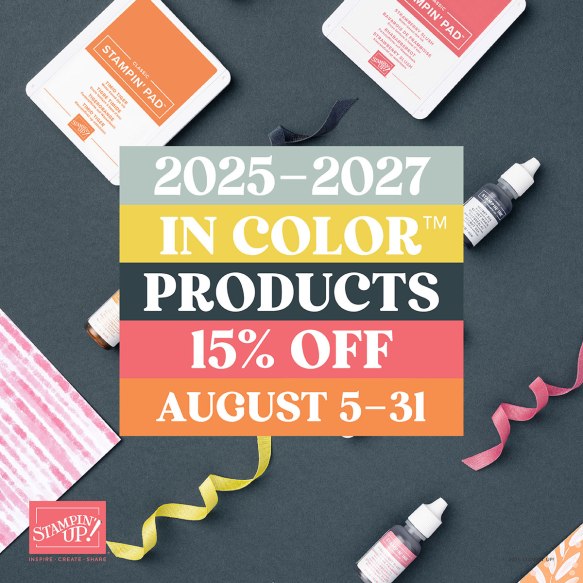
Starting August 5, select products that feature the new 2025–2027 In Colors™ are 15% off! This is a great opportunity to purchase new In Color products at a discount, so grab products you love—like ink, two-tone cardstock, and Designer Series Paper—and get everything you need to create projects that showcase Stampin’ Up!’s amazing color coordination!
Promotion Details:
Sales Period: August 5–31
Ordering Deadline: August 31, 2025, at 11:59 p.m. (MT)
Sale includes select inks, cardstock, Designer Series Paper, embellishments, and other products that include these new In Colors. Only products featured on the 2025–2027 In Colors page are included in this promotion.
Products are available only while supplies last.
You can find the 2025-2027 In Color sale items that will be on sale beginning August 5 right here! Get your list ready and shop early for the best selection!
Basic Beige Cardstock 3 1/4″ x 3 1/4″(die cut), 1″ x 2 1/2″(leaves), 2″ x 4 1/2″(artwork)
Basic White Cardstock 4″ x 5 1/4″(inner liner)
Cajun Craze Cardstock (2) – 4 1/8″ x 5 3/8″(card front & inner liner mats), 1: x 2 1/2″(leaves)
Early Espresso Cardstock 8 1/2″ x 5 1/2″(card base scored & folded at 4 1/4″)
Gathering Together Specialty Designer Series Paper 4″ x 5 1/4″(card front), 1 1/4″ x 4 1/2″(card front panel), (2) – 3/8″ x 4″(inner liner), 2 1/4″ x 6″(envelope flap)
Good Friday morning stamping friends!! Are you ready for the weekend? It’s the last day of January so I’ll be heading into the office at one point today to close everything up for the month, then it’s back first thing in the morning to print and send out all the bills.
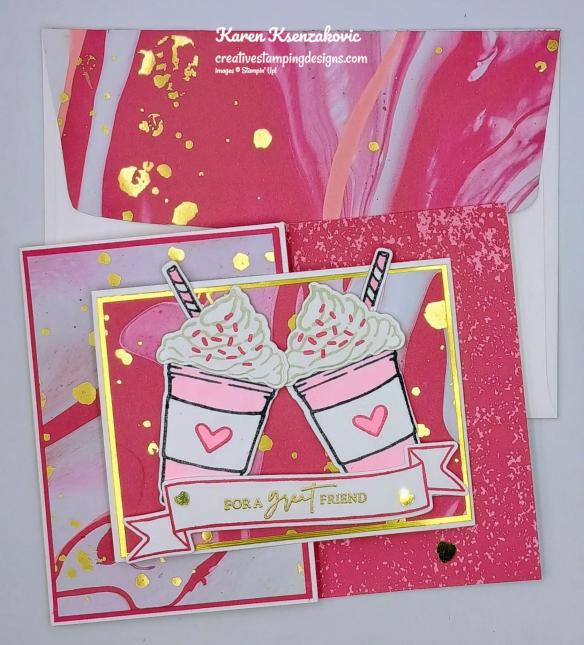
I have a joy fold for you today using some Online Exclusive products and a bundle that’s carrying over from the last mini catalog. This is one of those cards that I made with a specific person in mind that I’m going to mail it to. If you’d like to see a quick video of how I made this card, Click Here to go to my Instagram Reels. Here is my card for today.
I used the Stampin’ Up! More Than Autumn Bundle along with the Stampin’ Up! Online Exclusives Mixed Labels Bundle and Marbled Elegance Specialty Designer Series Paper for my card today.
Adhere a panel of Marbled Elegance DSP to a Brushed Gold Foil Specialty Paper mat using Stampin’ Seal. Adhere the layered panel to the small Basic White card base using Liquid Glue. On a panel of Basic White, stamp the sentiment from the Stampin’ Up! Mixed Labels Cling Stamp Set in Versamark Ink. Sprinkle the sentiment with Gold Embossing Powder and set it using the Heat Tool. Stamp the banner image from the Mixed Labels stamp set in Melon Mambo Ink over the sentiment. Cut the sentiment out using the Mixed Labels Dies.
Adhere a panel of Marbled Elegance DSP to a Melon Mambo mat using Stampin’ Seal. Adhere the layered panel to the front of the large card base using Liquid Glue.
On a panel of Basic White, stamp the cup and straw images from the Stampin’ Up! More Than Autumn Photopolymer Stamp Set in Tuxedo Black Ink 2 times. Stamp the whipped cream image from the More Than Autumn stamp set in Basic Beige Ink 2 times on the Basic White panel. Stamp the sprinkle image from the More Than Autumn stamp set in Melon Mambo Ink on the whipped cream images. Color the cups and straws using Bubble Bath Stampin’ Blends Markers. Stamp the small heart image from the More Than Autumn stamp set in Melon Mambo Ink on the center of the cups. Color the hearts with Bubble Bath Stampin’ Blends Markers. Cut the images out using the More Than Autumn Dies. Adhere the cups and whipped cream images to the small card front using Stampin’ Dimensionals. Adhere the sentiment to the small card front using Stampin’ Dimensionals. Add a few Adhesive-Backed Heart Sequins to the card front.
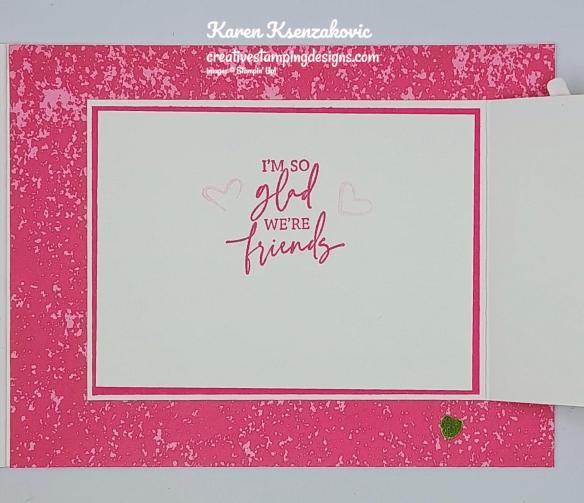
On a panel of Basic White, stamp the sentiment from the Mixed Labels stamp set in Melon Mambo Ink. Adhere the Basic White panel to a Melon Mambo mat then to the inside of the small Basic White card base. Adhere a panel of Marbled Elegance DSP to the inside of the large card base using Stampin’ Seal. Adhere the small card base to the inside of the large card base, on top of the DSP, using Liquid Glue.
Finish the card by decorating a Basic White Medium Envelope. Stamp the cup image from the More Than Autumn stamp set in Tuxedo Black Ink on the envelope front 2 times. Stamp the heart image from the More Than Autumn stamp set in Melon Mambo Ink on the cup. Stamp the whipped cream image from the More Than Autumn stamp set in Basic Beige Ink on top of the cups and the sprinkles in Melon Mambo Ink on the whipped cream. Stamp the straw image in Tuxedo Black Ink, and color the images using Bubble Bath Stampin’ Blends Markers. Adhere a panel of Marbled Elegance DSP to the envelope flap.
Thank you for stopping by my blog today. I hope you like my card and will give it a try. Happy Stamping!!
If you need any stamping supplies, I’d love to be your Demonstrator. Just click HERE to go directly to my online store or drop me an email if you have any questions.
MY CURRENT HOST CODE IS: ZZDPZRSF
Use this host code when placing an order with me. When you order $50 or greater you will receive a free gift from me! If your order is over $150, please do not use this code, but you’ll still get the free gift. The free gift is your choice of any 1 item valued up to $10.00 from the 2024 – 2025 Annual Catalog, January – April 2025 Mini Catalog or from the Online Exclusives! For any orders $50 or more I will also send you my monthly class tutorials. Click HERE or go to my Customer Rewards for more details and to see what this month’s tutorials are.
Please remember to use my current Host Code and make sure that you can see my name on the final checkout page listed as your Demonstrator when you order so that you know that you’re ordering with me, and you’ll get my rewards!
In response to changing policies at Stampin’ Up – I’m adjusting my Ordering Gift policy as well. I’m having to get a little more tough on the adding of Host codes when you place your order thru my Online Store.
Not to worry – you’re still going to get that $10 ordering gift for orders of $50 (before shipping & tax) or greater. And the gift is still any 1 SU! product up to that $10 value.
But – if you DO NOT use the Host code for your orders of less than $150 (this is the RETAIL total before Shipping & Handling), then you’ll have two options:
You’ll need to call Stampin’ Up! (1-800-Stamp-Up) and ask them to add it for you. They’re very helpful and will get it done quickly! OR….
If your order was over the $50 threshold but under $150, then…you’ll forfeit that $10 ordering gift and rewards – this is the Bummer Option – and I REALLY don’t want to do this, SO please remember to add my Current Host Code.
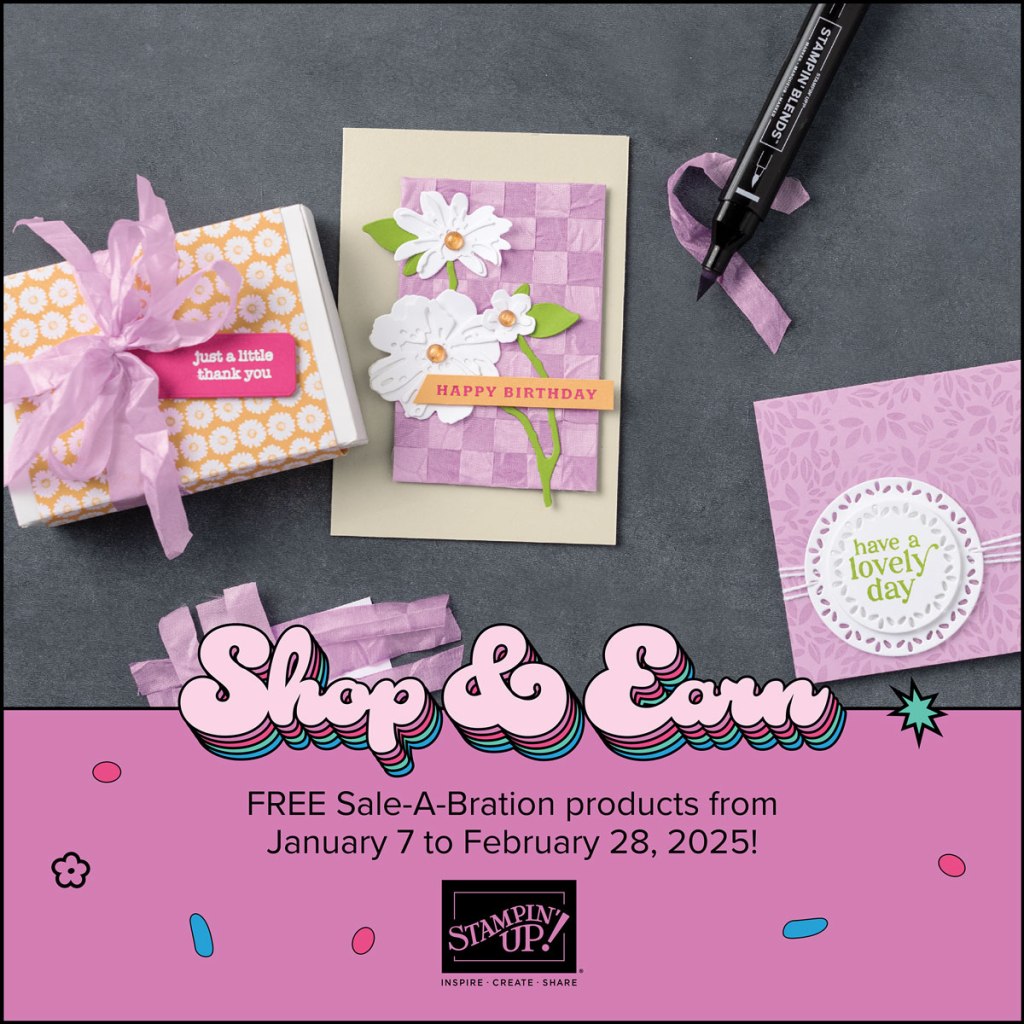
Sale-a-bration 2025 runs through Friday, February 28! There are some awesome new products that you can earn for FREE with orders of $60+ and orders of $120+ placed during Sale-a-bration as well as a great host bonus and a joining special!
SHOP
Spend $60 or more and pick from 12 new products (5 stamp sets,3 designer series paper packs, 1 embossing folder, 1 kit, 1 pack of embellishments and 1 spool of ribbon!) that are available as free items!
Spend $120 or more and pick from 2 new items (1 stamp bundle and 1 stamp set) that are available as free items!
HOST
Get an additional $30 in FREE Stampin’ Rewards with any party or individual order of $300 or greater during Sale-a-bration! You can spend your Stampin’ Rewards on any items currently available from Stampin’ Up! including (but not limited to) the host exclusive stamp sets!
JOIN
Sale-A-Bration is an excellent time you to join Stampin’ Up! In addition to the already great value of the Starter Kit, if you sign up as a Stampin’ Up! demonstrator during Sale-a-bration, you can choose from two incredible options:
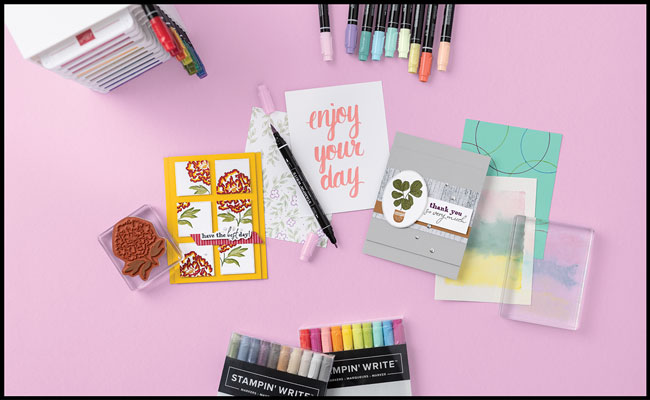
Option 1: Join Stampin’ Up! during Sale-a-bration as a new demonstrator and get $125 worth of products PLUS a choice of 2 Stampin’ Write Marker Assortments AND the Handmade Designs Cling Stamp Set, an exclusive stamp set designed to work with the markers. That’s a $216 value all for just $99!
Option 2: Join Stampin’ Up! during Sale-A-Bration and get $125 worth of product PLUS an additional $30 worth of product of your choice for just $99. That’s a $155 value!
Two joining options so you can pick the one that you like the best!!
There is never an obligation to sell. You can join just to enjoy the discount for yourself along with all the other Demonstrator benefits. Once you join, you’ll get at least a 20% discount on all of your Stampin’ Up! merchandise purchases and you get to order early from the upcoming catalogs! You will also be able to attend the OnStage Events and any other events Stampin’ Up! has and you get to be a part of our Stampin’ Up! team!
Unsure about this and want to talk? Contact me at creativestampingdesigns@gmail.com and we can talk. You can also find additional information Here at Join My Team. Being a part of the Stampin’ Up! Community is one of the best decisions I’ve ever made. I have made many friends along the way while doing what I love, Paper Crafting. This Joining offer is only good during Sale-a-bration which starts January 7 and ends on February 28. Why not give it a try? I’d love to have you on my team.
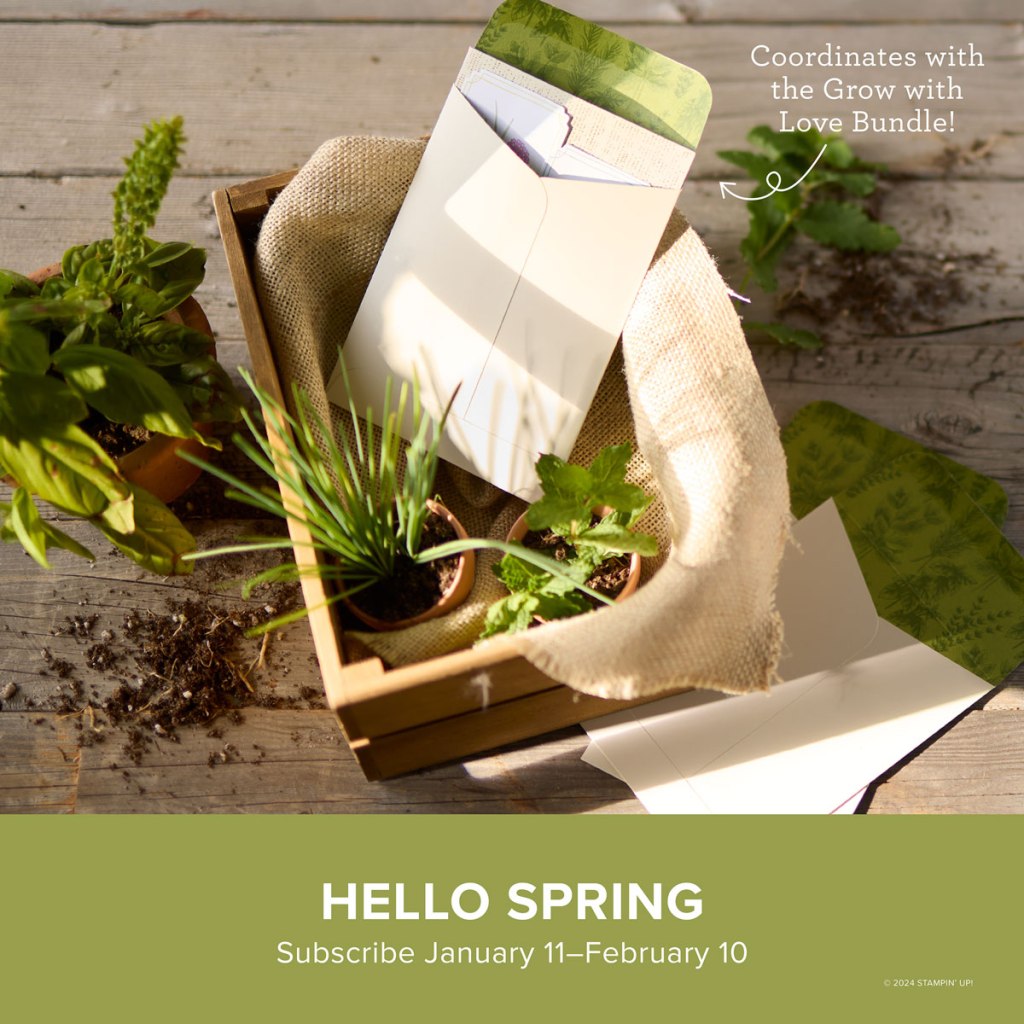
Plant the seeds of happiness with these lovely garden-inspired cards. • Makes 9 cards: 3 each of 3 designs • Precut pieces with bronze foil • Unique spring-themed envelopes • Coordinating colors: Basic Beige, Bubble Bath, Lemon Lime Twist, Lost Lagoon, Old Olive, Petunia Pop (Classic Stampin’ Spot)
Subscribe to the February Paper Pumpkin Kit between 11 January and 10 February by clicking here!
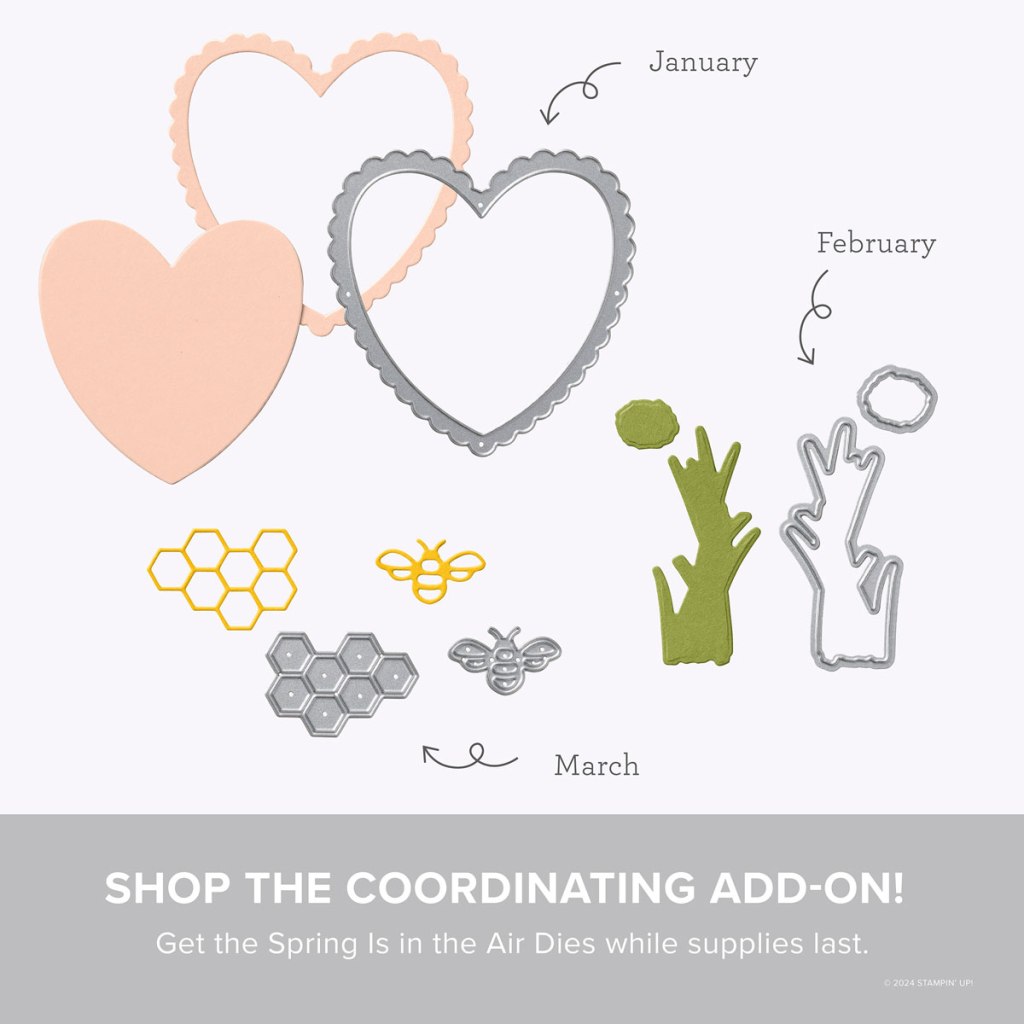
Don’t miss the coordinating Spring is in The Air Dies Add-On!
Make the most of your Paper Pumpkin kits with the Spring Is in the Air Dies add-on! Quickly and cleanly cut out a heart frame, flowering chive, honeycomb, or tiny bumblebee to elevate your crafting projects. These additional dies are designed to work with THREE Paper Pumpkin Kits: the Hearts for You Paper Pumpkin Kit, the Spring Is in the Air Paper Pumpkin Kit, and the Daisy Daydream Paper Pumpkin Kit. Pair these dies with other Stampin’ Up! products for even more creative options!
DETAILS – 5 dies – Largest die: 3″ x 3″ (7.6 x 7.6 cm) – Use with a Stampin’ Cut & Emboss Machine (sold separately)
You must be a current Paper Pumpkin subscriber to purchase this item. To become a subscriber, visit paperpumpkin.com.
#166237 $12
Note: Supplies may be limited toward the end of the subscription period.
Basic White Cardstock 4 1/4″ X 8″ (large card base scored & folded at 5 1/2″), 3″ X 8″(small card base scored & folded at 4″), 2 1/2″X 4 1/4″(die cuts), 1 1/2″X 5″(sentiment)
Melon Mambo Cardstock 2 7/8″ X 4 1/8″ (large card front mat), 2 7/8″ X 3 7/8″(small card base inner liner mat)
Marbled Elegance Specialty Designer Series Paper 2 3/4″ X 4″(large card front), 2 3/4″ X 3 3/4″(small card front), 4 1/4″X 5 1/2″(large inner liner), 2 1/4″ X 6″(envelope flap)
Brushed Silver & Gold Foil Specialty Paper 2 7/8″ X 3 7/8″(small card front mat)


![More Than Autumn Bundle (English) [ 164076 ]](https://assets1.tamsnetwork.com/images/EC042017NF/164076s.jpg "More Than Autumn Bundle (English) [ 164076 ]")
![More Than Autumn Photopolymer Stamp Set (English) [ 164228 ]](https://assets1.tamsnetwork.com/images/EC042017NF/164228s.jpg "More Than Autumn Photopolymer Stamp Set (English) [ 164228 ]")
![More Than Autumn Dies [ 164075 ]](https://assets1.tamsnetwork.com/images/EC042017NF/164075s.jpg "More Than Autumn Dies [ 164075 ]")
![Basic Beige 8 1/2" X 11" Cardstock [ 164511 ]](https://assets1.tamsnetwork.com/images/EC042017NF/164511s.jpg "Basic Beige 8 1/2\" X 11\" Cardstock [ 164511 ]")
![Basic White 8 1/2" X 11" Cardstock [ 166780 ]](https://assets1.tamsnetwork.com/images/EC042017NF/166780s.jpg "Basic White 8 1/2\" X 11\" Cardstock [ 166780 ]")
![Cajun Craze 8-1/2" X 11" Cardstock [ 119684 ]](https://assets1.tamsnetwork.com/images/EC042017NF/119684s.jpg "Cajun Craze 8-1/2\" X 11\" Cardstock [ 119684 ]")
![Early Espresso 8-1/2" X 11" Cardstock [ 119686 ]](https://assets1.tamsnetwork.com/images/EC042017NF/119686s.jpg "Early Espresso 8-1/2\" X 11\" Cardstock [ 119686 ]")
![Gold Foil Sheets [ 132622 ]](https://assets1.tamsnetwork.com/images/EC042017NF/132622s.jpg "Gold Foil Sheets [ 132622 ]")
![Cajun Craze Classic Stampin' Pad [ 147085 ]](https://assets1.tamsnetwork.com/images/EC042017NF/147085s.jpg "Cajun Craze Classic Stampin' Pad [ 147085 ]")
![Early Espresso Classic Stampin' Pad [ 147114 ]](https://assets1.tamsnetwork.com/images/EC042017NF/147114s.jpg "Early Espresso Classic Stampin' Pad [ 147114 ]")
![Crumb Cake Stampin' Blends Combo Pack [ 154882 ]](https://assets1.tamsnetwork.com/images/EC042017NF/154882s.jpg "Crumb Cake Stampin' Blends Combo Pack [ 154882 ]")
![Granny Apple Green Stampin' Blends Combo Pack [ 154885 ]](https://assets1.tamsnetwork.com/images/EC042017NF/154885s.jpg "Granny Apple Green Stampin' Blends Combo Pack [ 154885 ]")
![Pecan Pie Stampin’ Blends Combo Pack [ 161674 ]](https://assets1.tamsnetwork.com/images/EC042017NF/161674s.jpg "Pecan Pie Stampin’ Blends Combo Pack [ 161674 ]")
![Real Red Stampin' Blends Combo Pack [ 154899 ]](https://assets1.tamsnetwork.com/images/EC042017NF/154899s.jpg "Real Red Stampin' Blends Combo Pack [ 154899 ]")
![Stampin’ Blends Light Combo Pack [ 159465 ]](https://assets1.tamsnetwork.com/images/EC042017NF/159465s.jpg "Stampin’ Blends Light Combo Pack [ 159465 ]")
![Stampin’ Blends Medium Light Combo Pack [ 159463 ]](https://assets1.tamsnetwork.com/images/EC042017NF/159463s.jpg "Stampin’ Blends Medium Light Combo Pack [ 159463 ]")
![Stylish Shapes Dies [ 159183 ]](https://assets1.tamsnetwork.com/images/EC042017NF/159183s.jpg "Stylish Shapes Dies [ 159183 ]")
![Basic White Medium Envelopes [ 159236 ]](https://assets1.tamsnetwork.com/images/EC042017NF/159236s.jpg "Basic White Medium Envelopes [ 159236 ]")


![Take Your Pick [ 144107 ]](https://assets1.tamsnetwork.com/images/EC042017NF/144107s.jpg "Take Your Pick [ 144107 ]")


")
")


 Specialty Designer Series Paper")
 Specialty Paper")


")


