Good Saturday morning stamping friends and welcome to the weekend. Does anyone have any plans? It’s going to be a cold one here in NJ again today with temps in the teens and there’s a wind advisory; I’ll be at work all day today trying to stay warm. Who’s going to be watching the Super Bowl Sunday? I told my daughter I thought that would be a good time to go grocery shopping. Fun stuff huh?
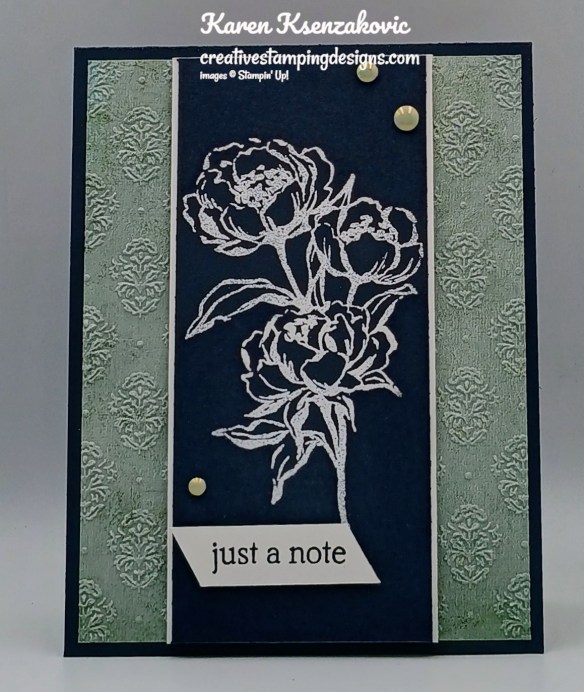
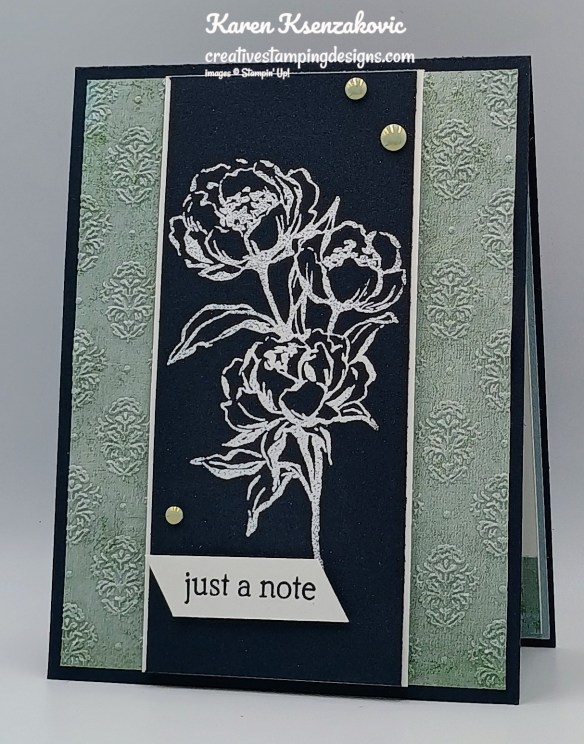
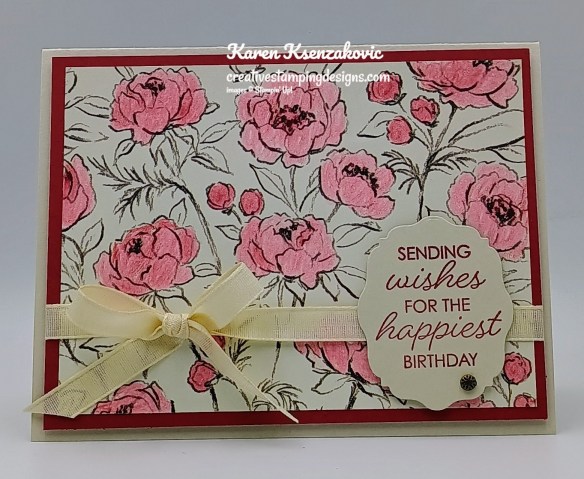
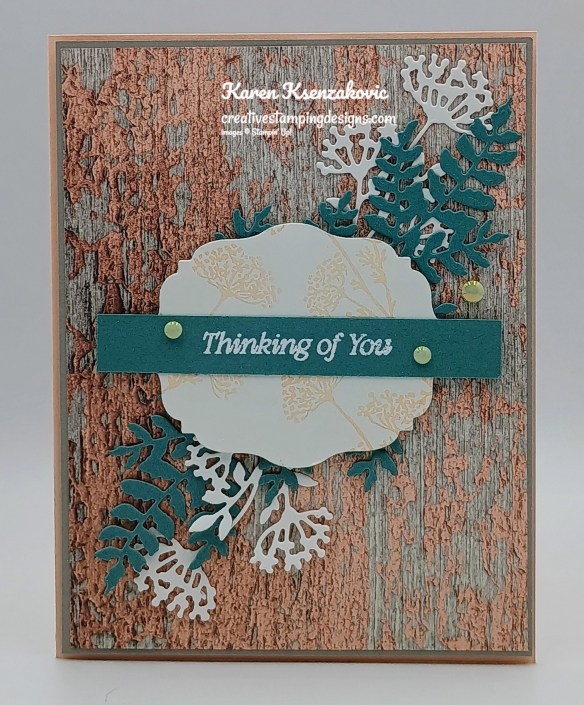
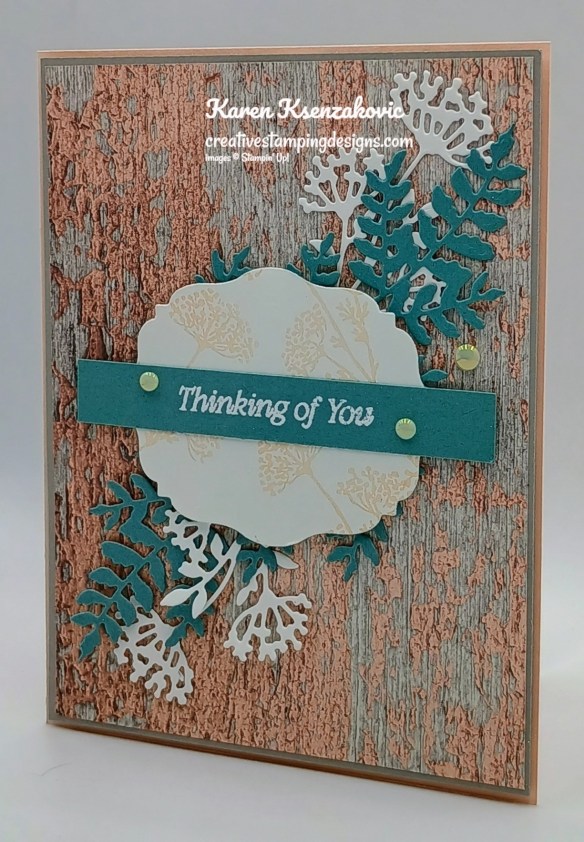
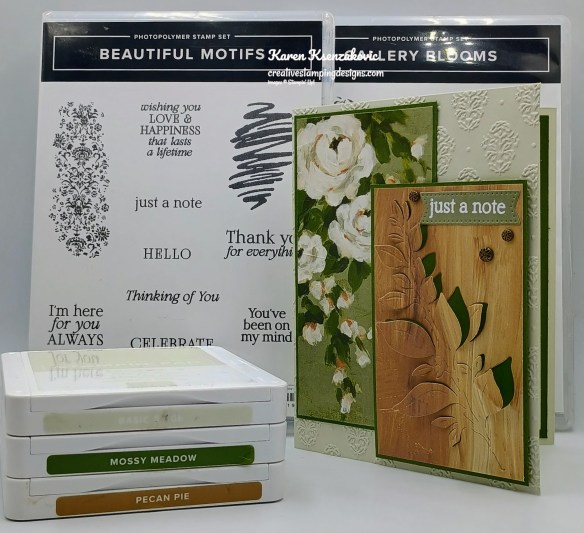
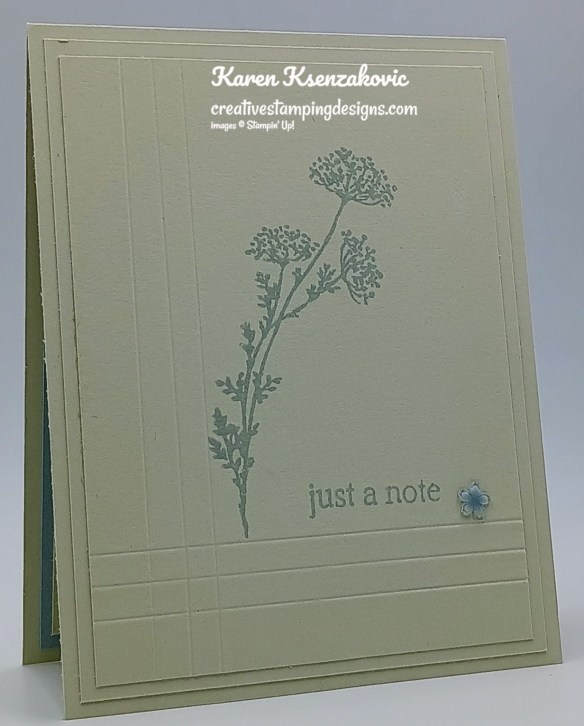
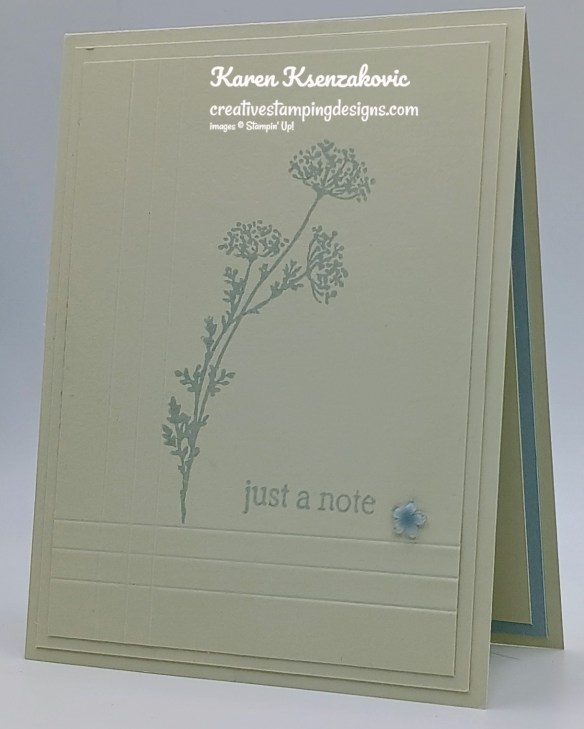
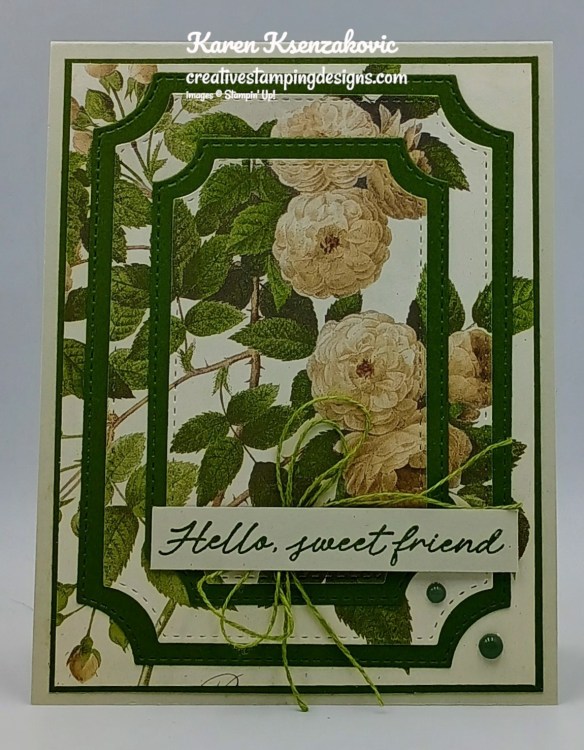
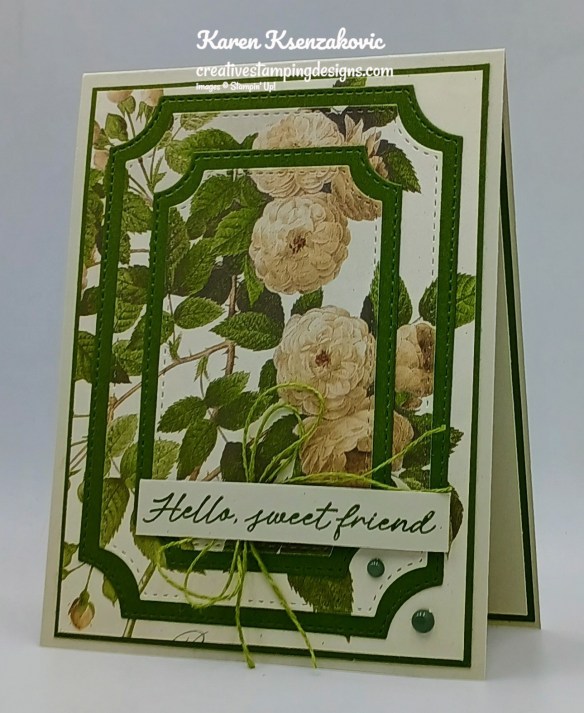
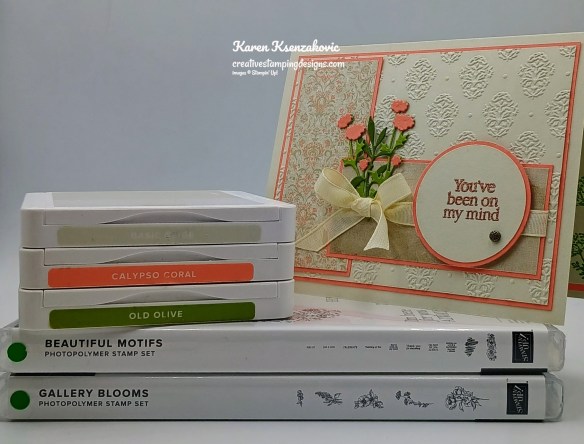
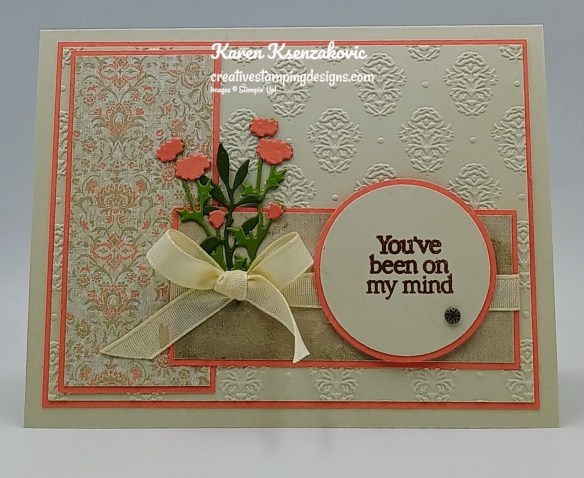
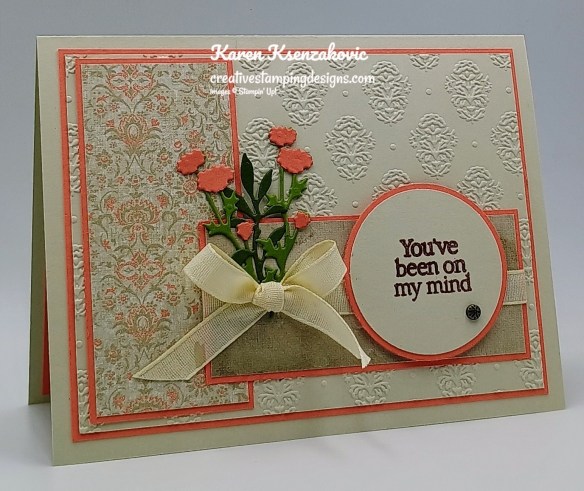
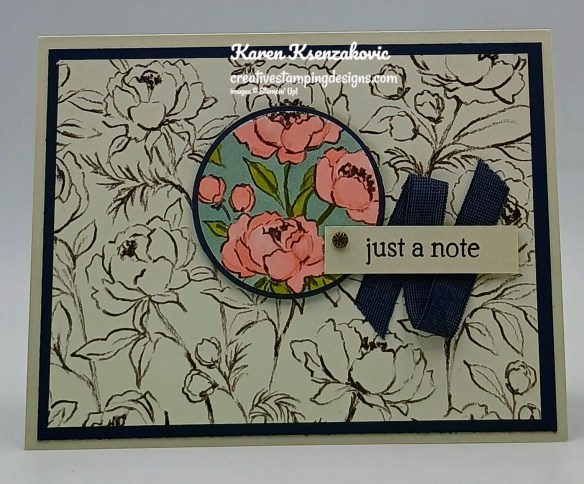
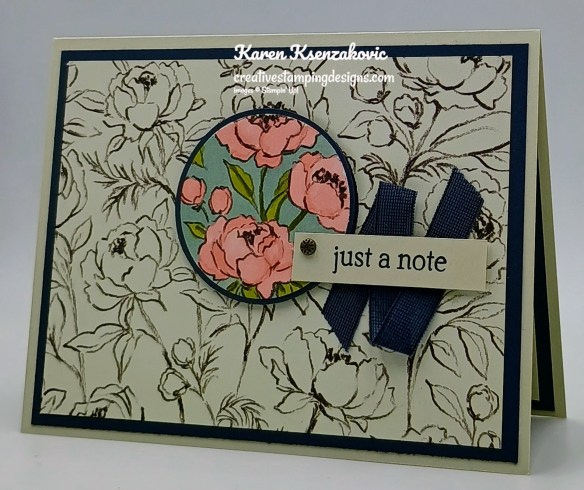
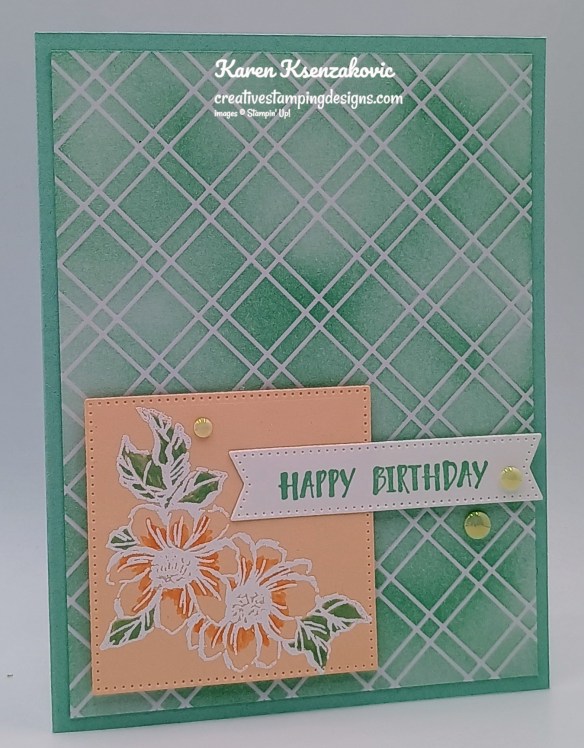
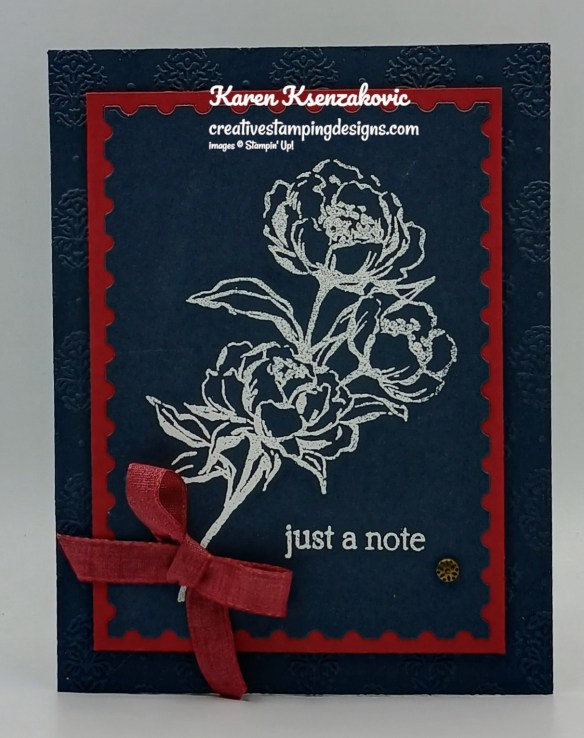
Today’s card has a sneak peek of a new set coming out with the March Online Exclusives on March 3rd. If you’d like to see a quick video on how I made this card, Click Here to go to my Instagram Reels. Here’s my card for today.
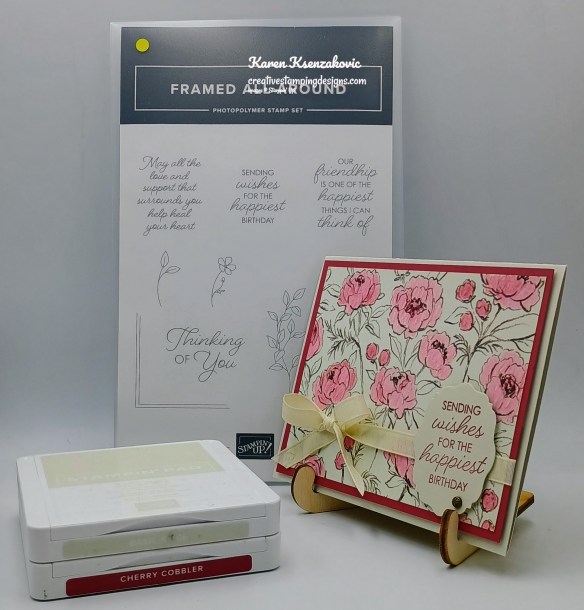
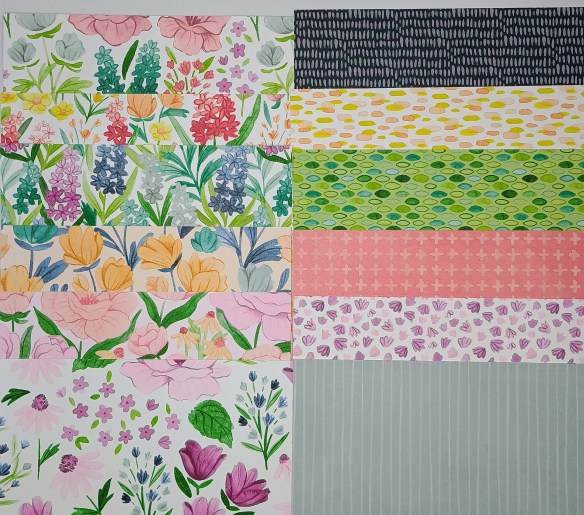
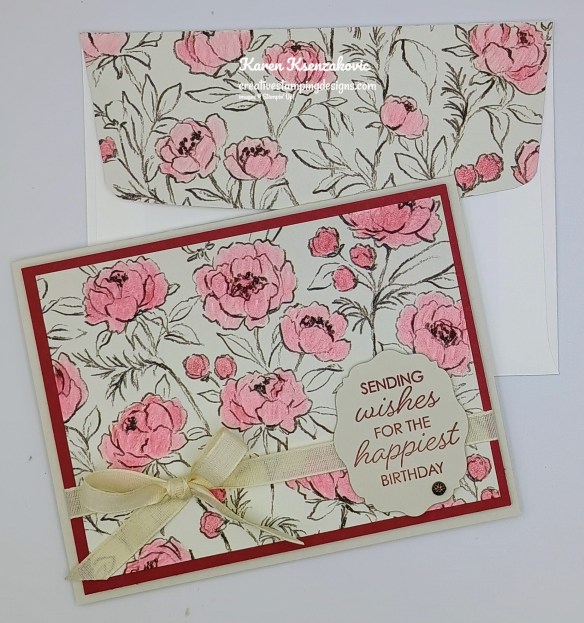
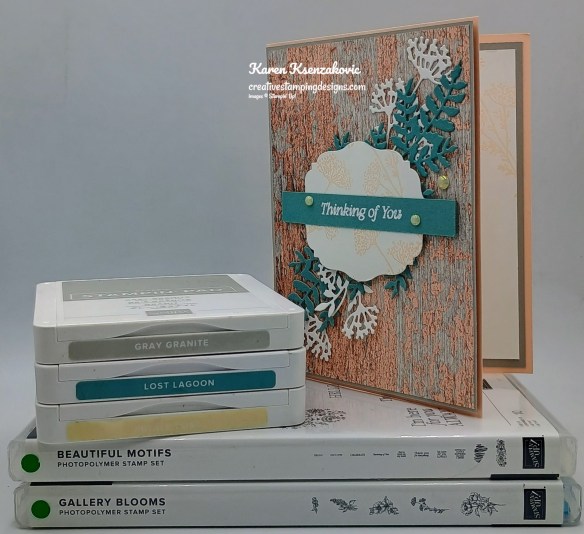
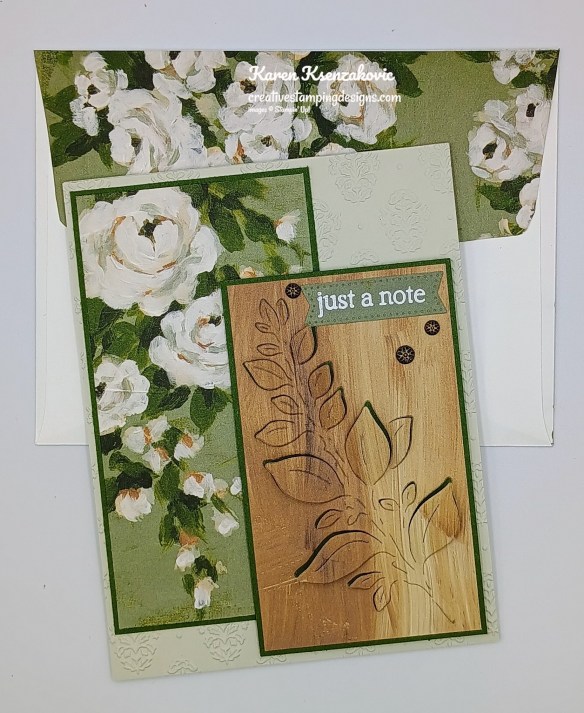
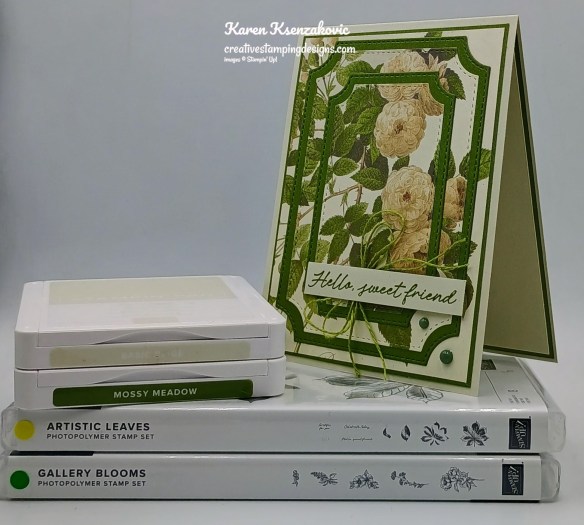
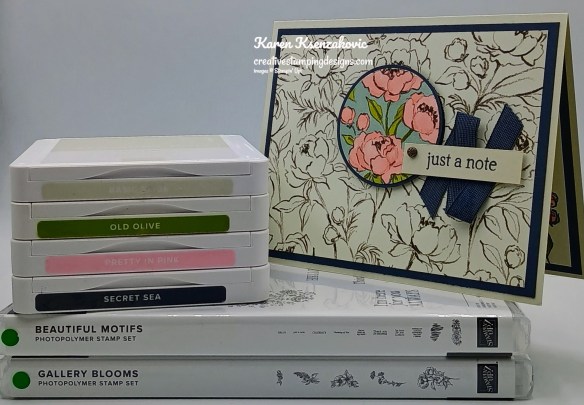
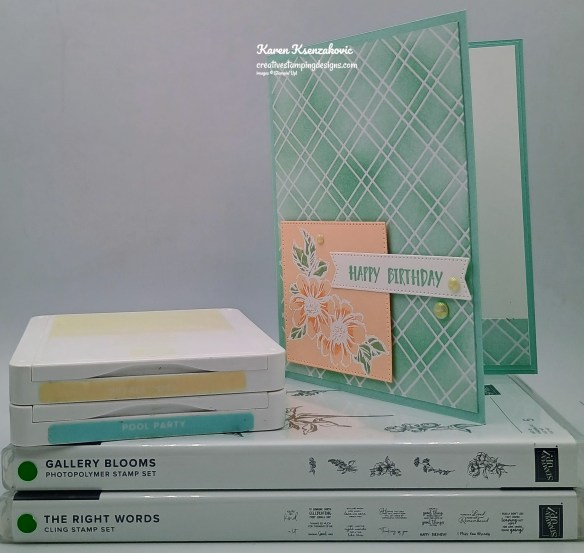
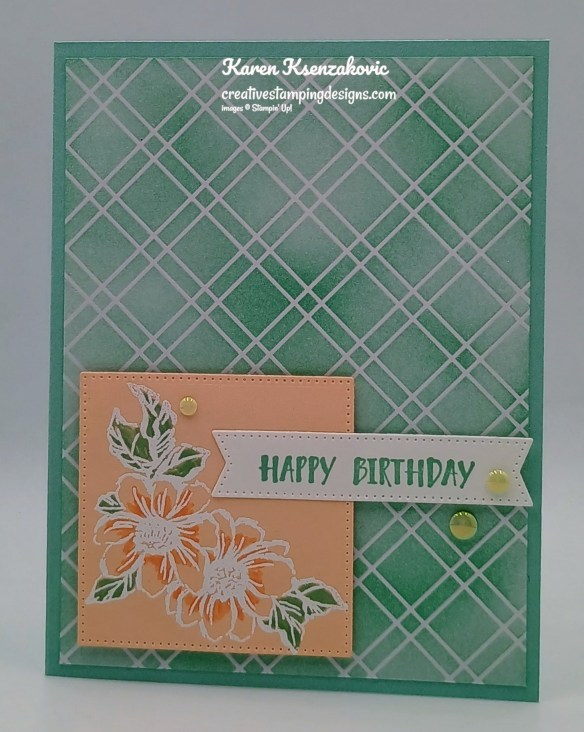
I used the new Framed All Around Stamp Set (avail Mar 3) along with the Gallery Blooms 6 x 6 Designer Series Paper and Beautifully Celebrated Dies for my card today.
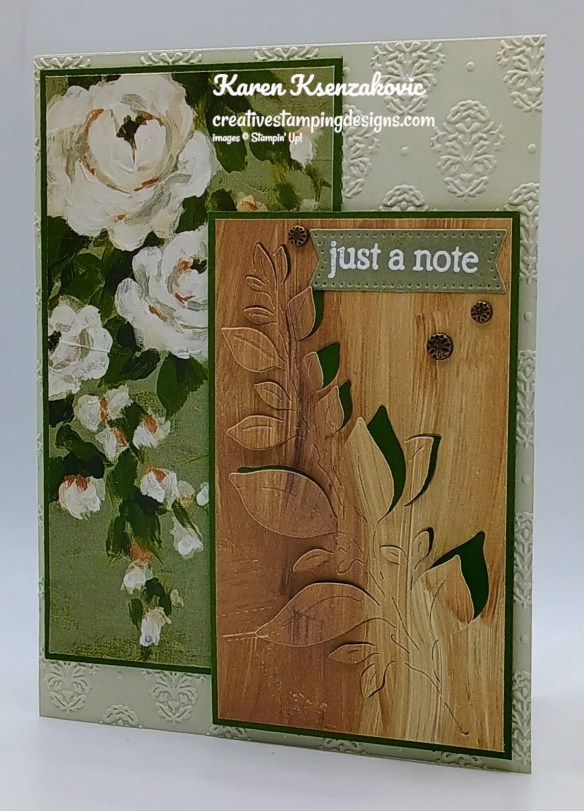
Color the flowers on a panel of Gallery Blooms DSP using the Cherry Cobbler Watercolor Pencil. go over the colored flowers using the Blender Pen to smooth the pencil streaks. Adhere the colored panel of Gallery Blooms DSP to a Cherry Cobbler mat.
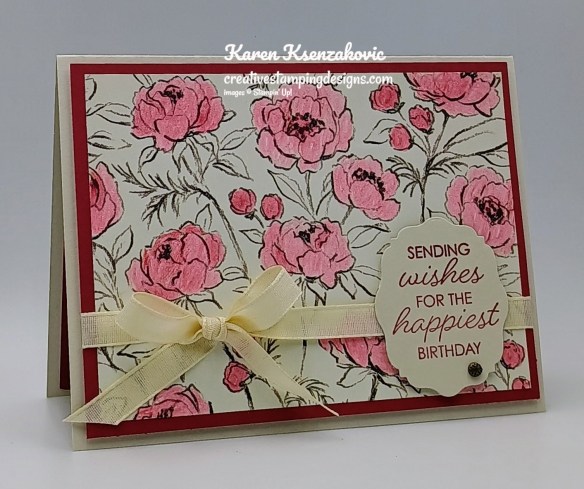
Wrap a piece of Basic Beige 3/8″ Classic Ribbon around the layered panel and tie a bow. Adhere the layered panel to a Basic Beige card base with Stampin’ Dimesionals.
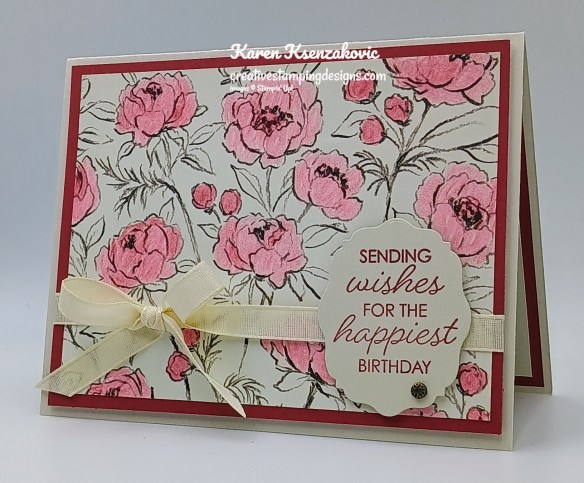
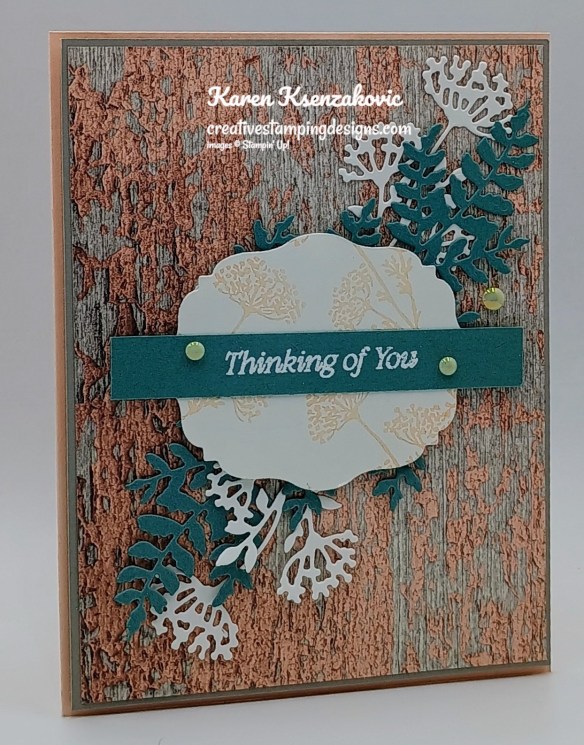
Stamp the sentiment from the new Framed All Around stamp set in cherry Cobbler Ink on a panel of Basic Beige. Cut the sentiment out using the Beautifully Celebrated Dies. Adhere the sentiment to the card front, over the ribbon, with Stampin’ Dimensionals. Add a Pressed Flower Motifs to the card front.
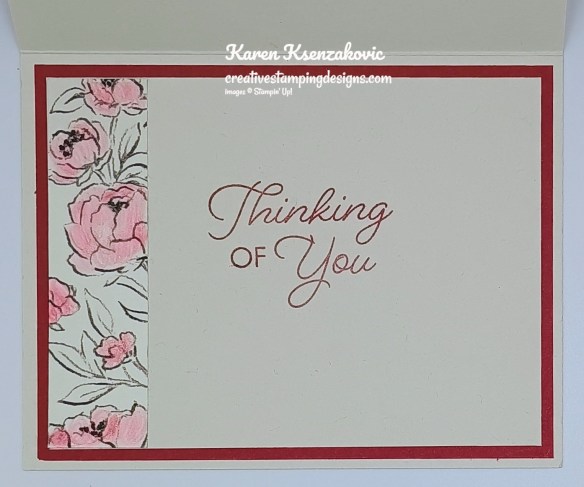
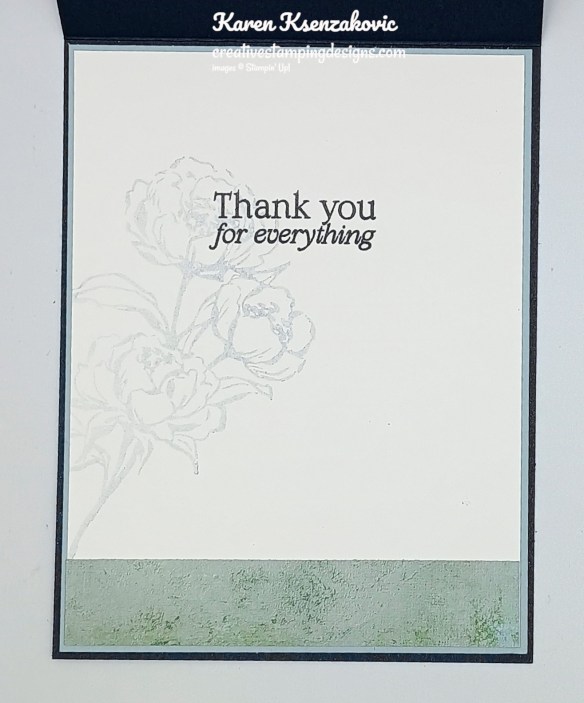
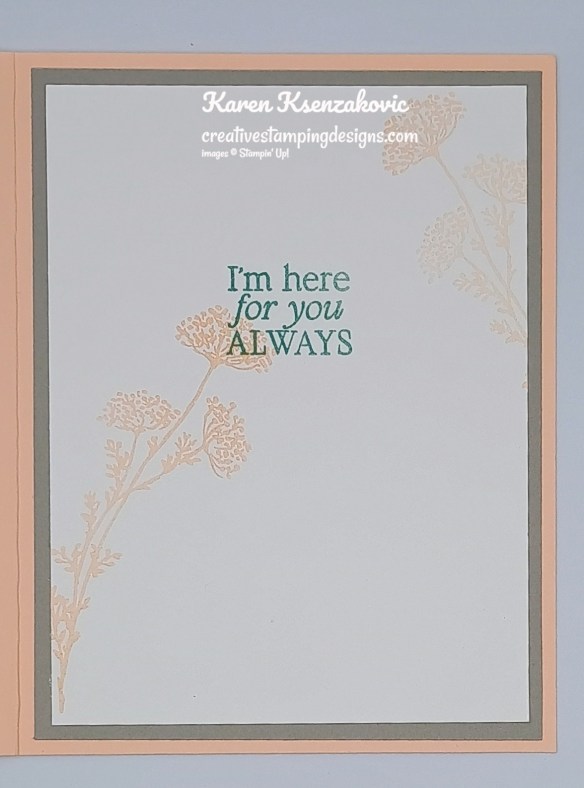
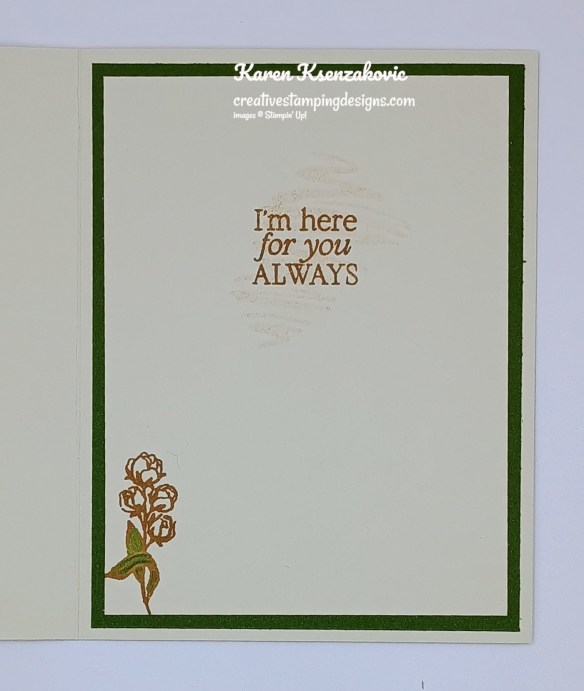
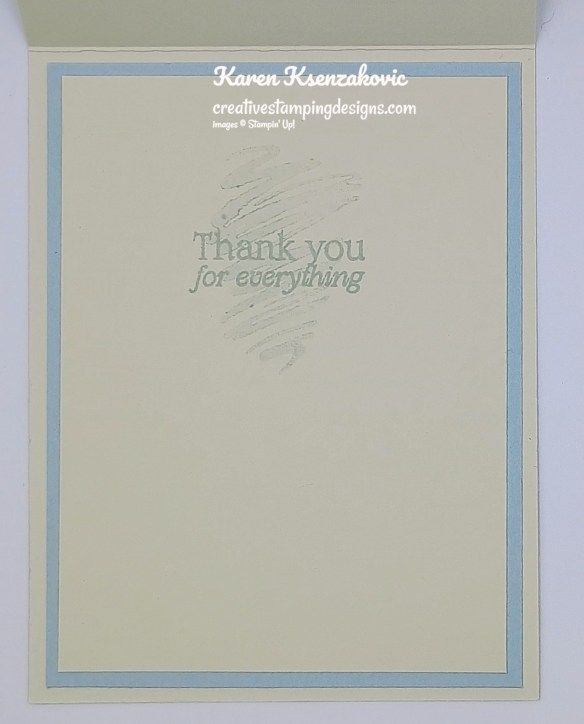
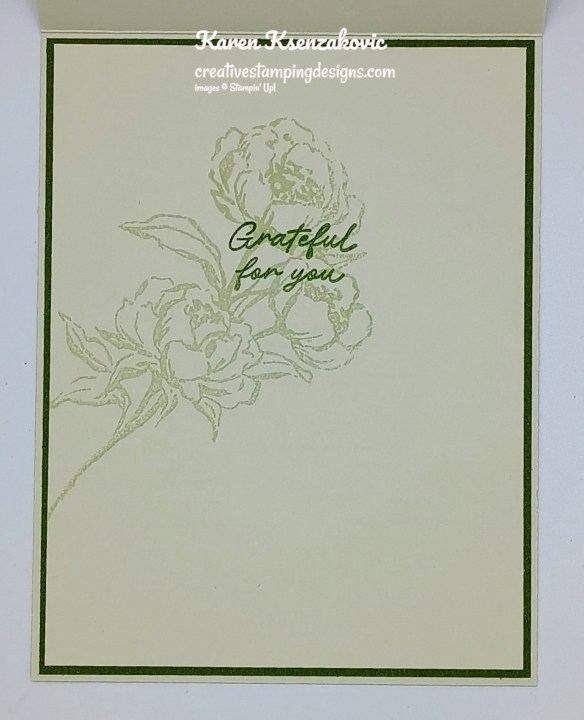
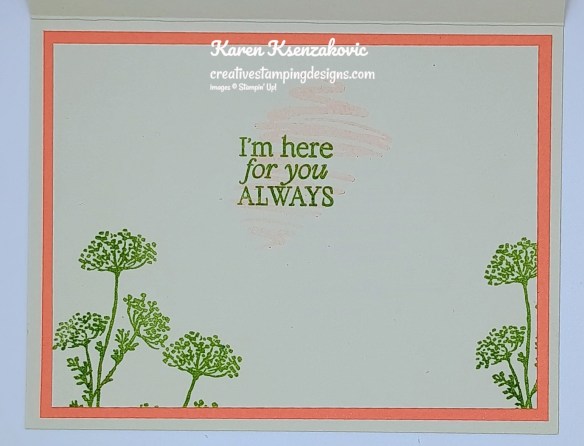
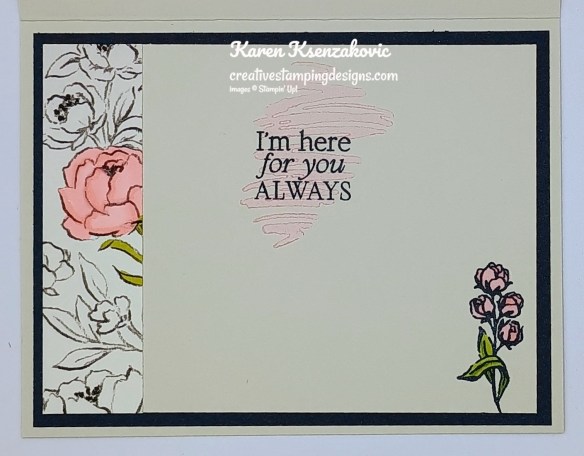
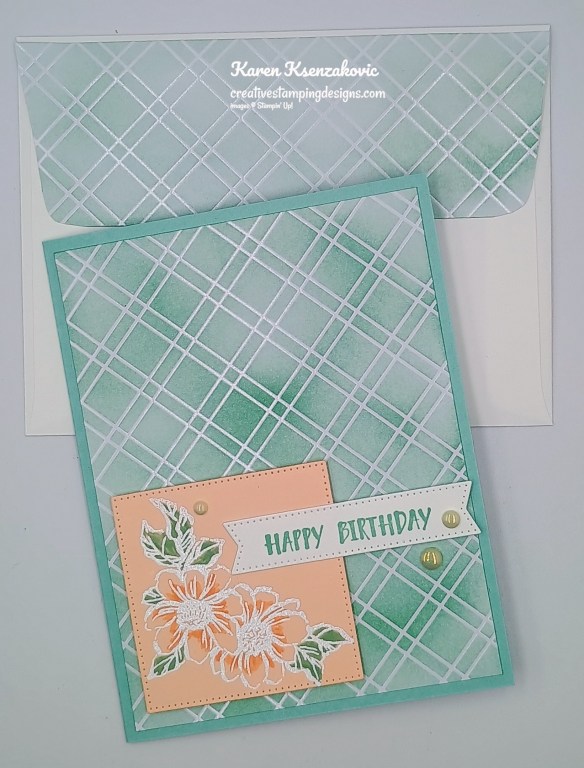
Stamp the sentiment from the Framed All Around stamp set in cherry cobbler Ink on a panel of Basic Beige. Adhere a panel of the Gallery Blooms DSP to the side of the panel. Adhere the Basic Beige panel to a Cherry Cobbler mat then to the inside of the Basic Beige card base.
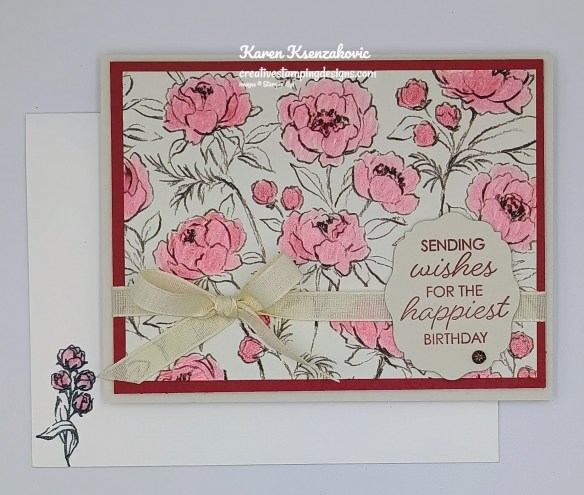
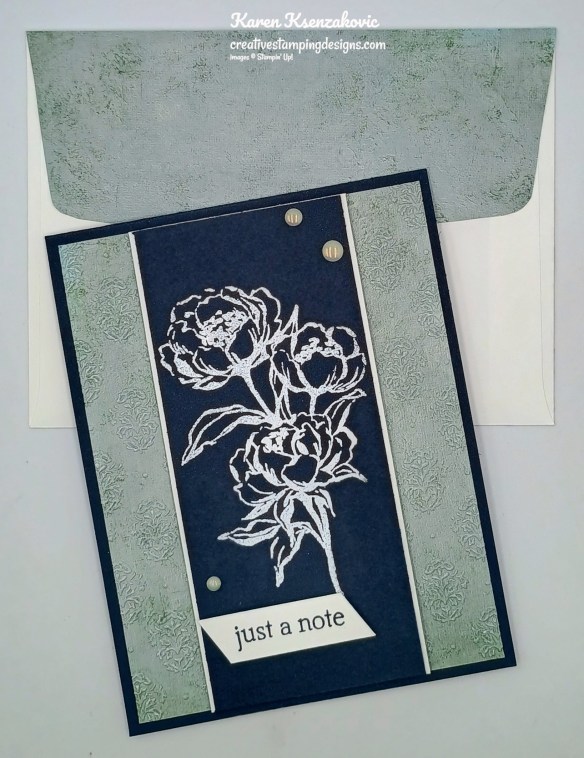
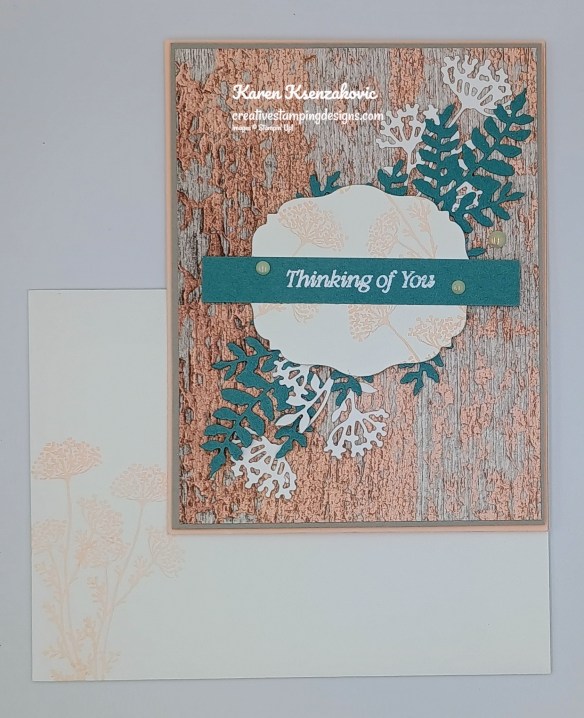
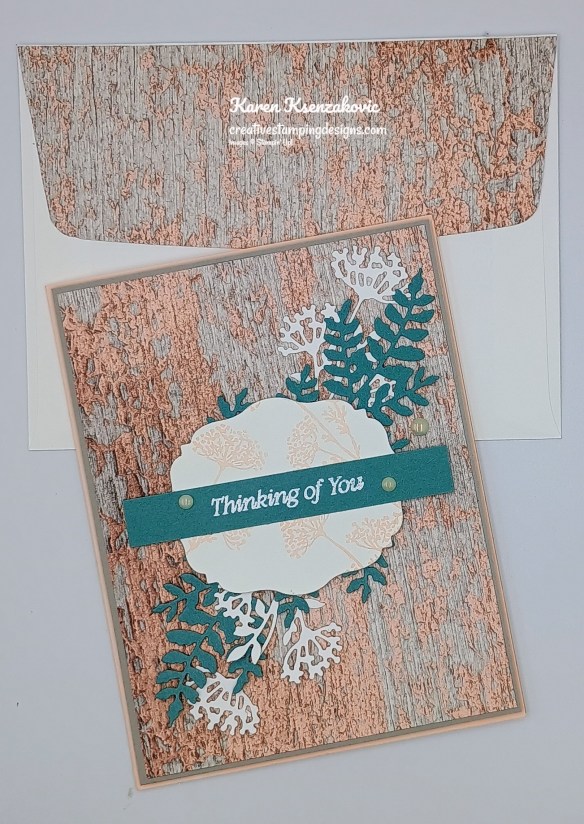
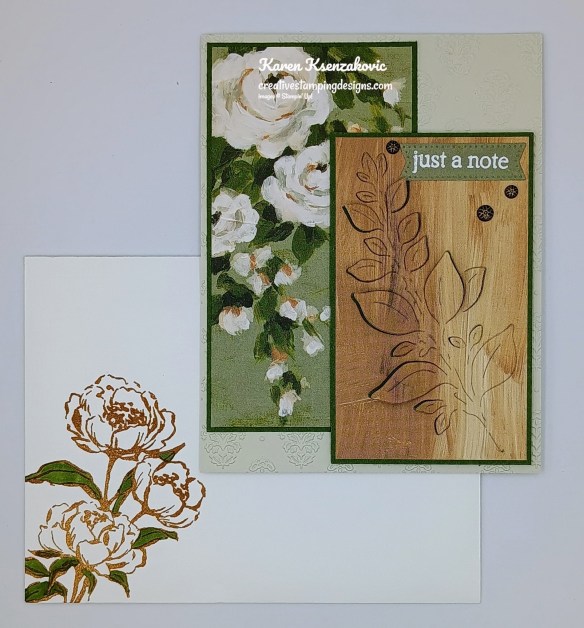
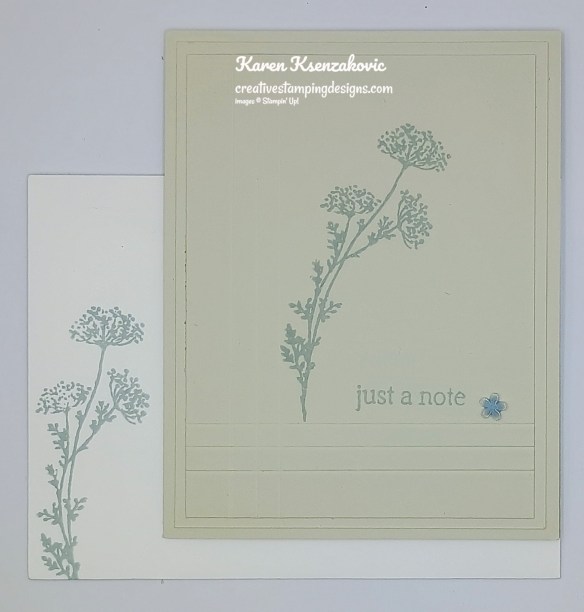
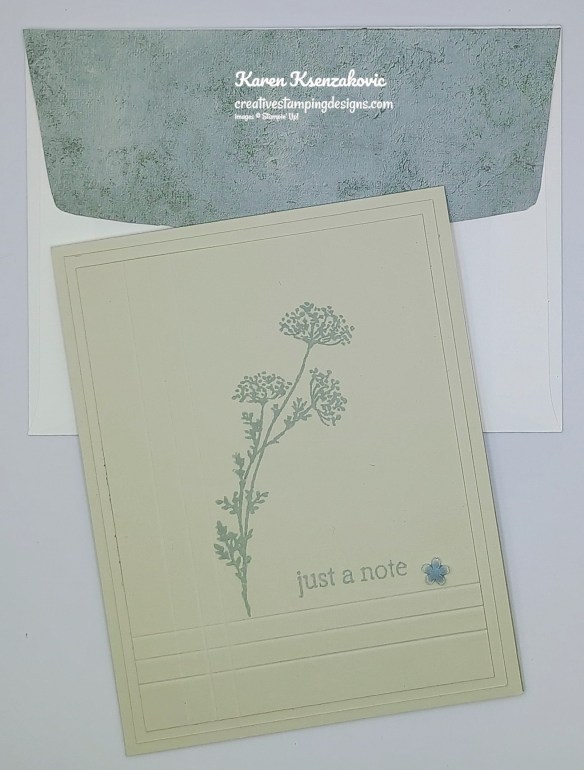
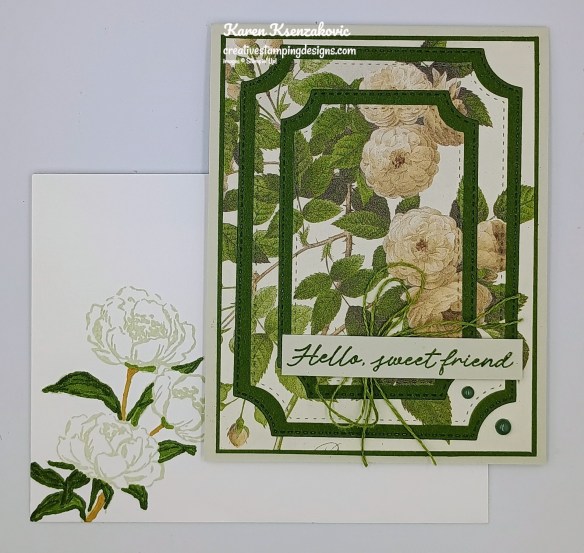
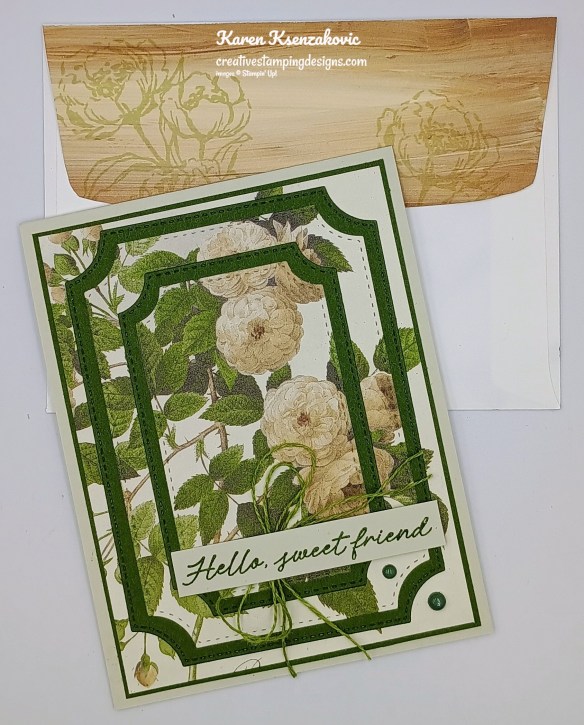
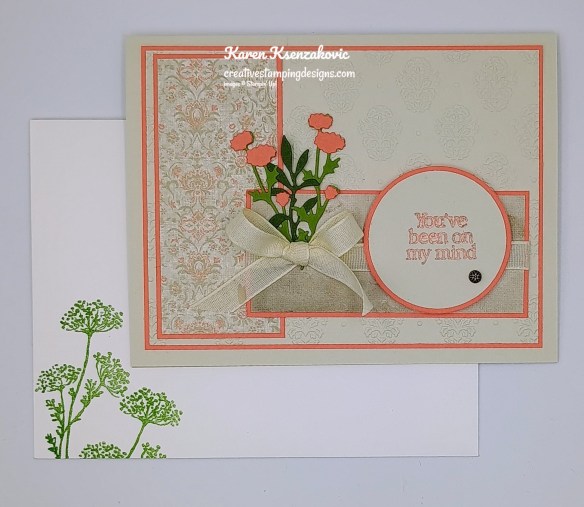
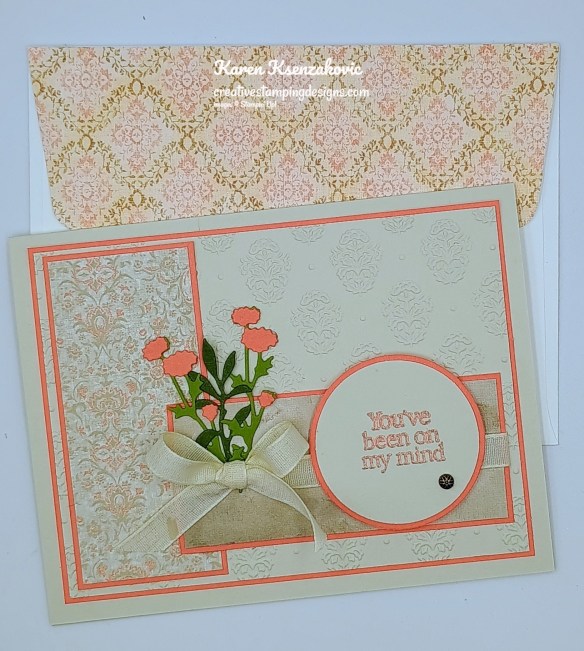
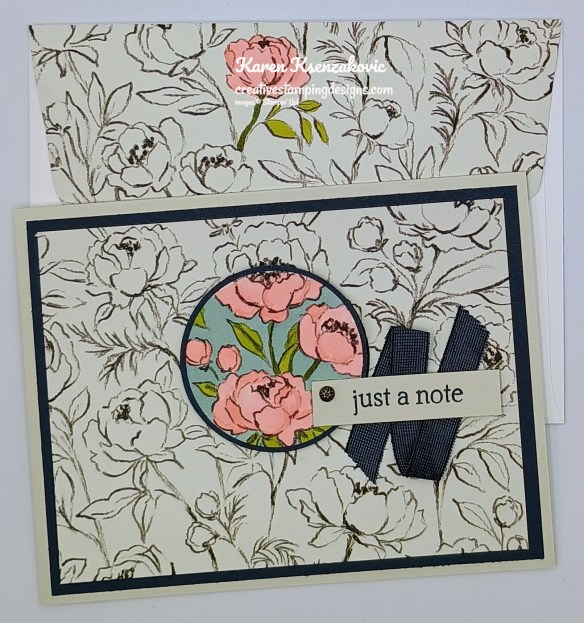
Decorate a Basic White Medium Envelope to finish the card. Stamp the small flower image from the Gallery Blooms stamp set in Tuxedo Black Ink on the envelope front. Color the flower using the Cherry Cobbler Watercolor Pencil. Adhere a panel of Gallery Blooms DSP, that was colored the same way as the card front, to the envelope flap.
Thank you for stopping by my blog today. I hope you like the card and will give it a try. Happy Stamping!!
*********************************************************************************************************
If you need any stamping supplies, I’d love to be your Demonstrator. Just click HERE to go directly to my online store or drop me an email if you have any questions.
*********************************************************************************************************
Stuck on You Ordering Special

I’m offering a little ordering special for Valentine’s Day again this year! I call it my “Stuck on You Valentine” ordering special! For all orders of $50 or greater (before shipping and taxes and after coupons) placed through me between now and Saturday, February 14, you’ll get your choice of a free adhesive!
This can be anything that Stampin’ Up! sells that could be used as an adhesive! And for the adhesives that are $5 or under, two packs will equal one choice (see the items with the (2) on the list below) so if you select those, you’ll get double!!
Here is a list of the adhesives that you can pick from:
- Adhesive Sheets – 152334
- Multipurpose Liquid Glue – 110755
- Mini Glue Dots – 103683
- Tear & Tape Adhesive – 154031
- Stampin’ Seal – 152813
- Stampin’ Seal Refill – 152814
- Stampin’ Seal + – 149699
- Stampin’ Seal + Refill – 152812
- Fine-Tip Glue Pen – 138309
- Silicone Craft Sheet (even though it’s not an adhesive…it is an awesome tool for adhesives!) – 127853
- Foam Adhesive Strips – 141825
- Stampin’ Dimensionals (2) – 104430
- Mini Stampin’ Dimensionals (2) – 144108
- Black Stampin’ Dimensionals Combo Pack – 150893
- Foam Adhesive Sheets – 152815
I’ll be placing the order for the adhesives on February 16th, so please be sure to send your selections right away when you order…otherwise I’ll pick one for you and send it out with your thank you gift!
*With Stampin’ Up!’s backorder policy where numbers are turned off for ordering if they go on backorder, if the adhesive that you pick is turned off for ordering when I place the order on the 16th, I’ll order Stampin’ Dimensionals for you instead.
Visit my Online Store Here and start shopping now!!
*********************************************************************************************************
February’s Free Online Fun Fold Class Registration Open

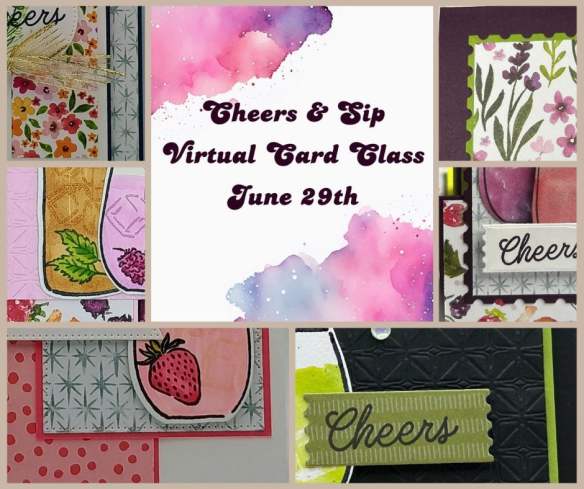
It’s time to cash in those Bonus Coupons (starting February 3), so Tara Carpenter and I are offering a Free Online Zoom Class for February. We will be creating 6 different Fun Fold cards; we’re hoping to show you how easy some fun folds can be. This class will be FREE with a $50 purchase from my Online Store. We will not be sharing the products we are using since the cards we make live will most likely be using new products that will be available in March (a week after the class).
The class requirements:
- Visit my Online Store and place a $50 or more order before tax and shipping and after coupon codes.
- Once you have made the purchase, fill out the Google Form HERE and submit.
What you will receive:
- Zoom class with complete step by step instructions to complete each card as we go.
- PDF with detailed directions and photos
- A Link to the recorded class after we are done so you can watch it again and make more cards.
A week before the class I will send you the complete PDF of the cards so you can cut all your cardstock gather your supplies, so you are ready to go. We will NOT be cutting cardstock or doing any die cutting live since all the cards will be different. Everyone’s cards will be unique since you will pick which color cardstock and ink you want to use along with the Designer Series Paper, Ribbon & Embellishments for each card.
The class will be held on Sunday February 22nd from 1pm – 4pm Eastern Time via Zoom. This will allow everyone all over the United States to participate live!
I will email you the Zoom link to the class a day before the event.
Click Here to Register.
Deadline to sign up is Sunday February 15th at 5pm ET
*********************************************************************************************************
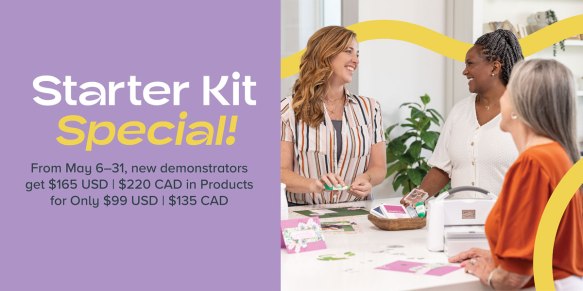
February 3 – March 2 – Stampin’ Up! Joining Special – Free Positioning Tool
Stampin’ Up! announced an amazing new tool that will be available for FREE with the purchase of a Starter Kit between February 3-March 2!! Anyone that purchases the Starter Kit during the promotion will get the awesome new Stampin’ Positioner with their Starter Kit absolutely FREE!!
Here are the Starter Kit promotion details:
- Promotion Period: February 3–March 2
- New team members who purchase their Starter Kit February 3–March 2 will also receive our new Stampin’ Positioner*.
- New demonstrators who submit their Independent Demonstrator Agreement (IDA) before February 3 or after March 2 will not be eligible for this offer.
- Joining deadline: March 2, 2026, at 11:59 p.m. (MT)
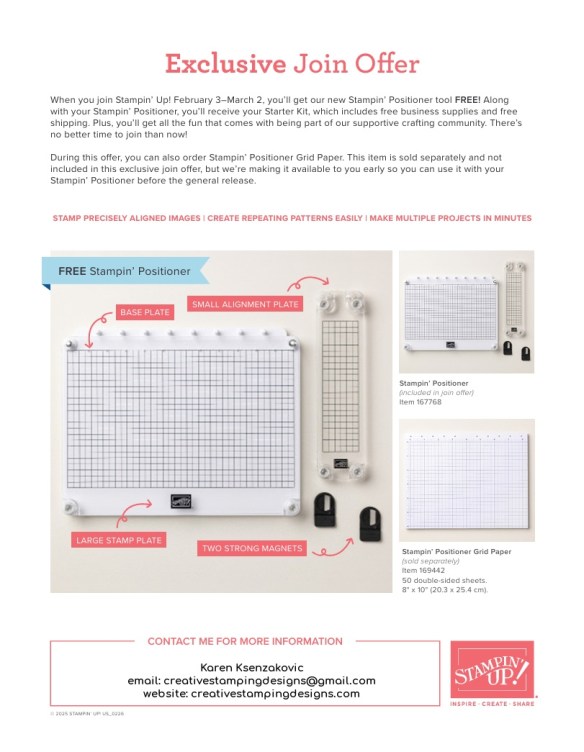
*What’s the Stampin’ Positioner?
It’s Stampin’ Up!’s new stamping alignment tool that makes stamping easier and more accurate. It allows you to stamp precisely aligned images, create repeating patterns and Two-Step Stampin’ images easily, and make multiple projects in minutes.
Stampin’ Positioner Grid Paper will also be available for to order but it is not included as part of this exclusive join offer.
A few other things to know:
- The Stampin’ Positioner WILL be available for purchase by everyone at a later date. We have not been given any details on when that will be.
- The Stampin’ Positioner is available for a limited time for current Demonstrators to purchase.
You can read more details about the joining offer on this PDF (click the image to open a full-size printable PDF):
We’d love to have you join our team!! Once you join, you get at least a 20% discount on all of your Stampin’ Up! purchases and you get to preorder from the upcoming catalogs and promotions!! You can attend the Stampin’ Up! events too. There’s never an obligation to sell, you can join to enjoy the discount for yourself. Contact me if you have any questions and we can talk. I’d love to have you on my team. I’d be more than happy to answer any of your questions, contact me at creativestampingdesigns@gmail.com
You can read a bit more information about the benefits of being a Demonstrator and a part of our team here. When you’re ready to join, you can get started here. Let me know if you have any questions.
*********************************************************************************************************
Redeem Those Bonus Days Coupons February 3 – 28

- Redemption Period: February 3–28, 2026
- There is no limit to the number of coupon codes you can redeem on an order during the redemption period. If you’re redeeming multiple codes, you must put a space between each code.
- You may only redeem coupon codes one time. You cannot redeem them after February 28.
- You can redeem Bonus Days coupon codes for month-to-month Paper Pumpkin subscriptions and new prepaid subscriptions.
- Some restrictions apply. Coupons can’t be redeemed towards Starter Kits and you cannot use them on exchanges.
- Redemption period ends: February 28, 2026, at 11:59 p.m. (MT)
*********************************************************************************************************
New Stampin’ Up! Product of The Month

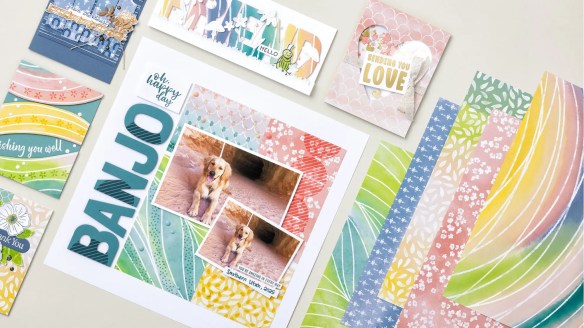
Add color and whimsy to your paper crafting with the Painted Illusions 12″ x 12″ (30.5 x 30.5 cm) Designer Series Paper! This craft paper features soft watercolor gradients in pink, green, blue, teal, and yellow, with white patterns that flow over the background. Layer with other Stampin’ Up! products in coordinating colors to create your own harmonious card making and scrapbooking designs. The Painted Illusions 12″ x 12″ (30.5 x 30.5 cm) Designer Series Paper is the exclusive Product of the Month for February 2026! Only available until stocks run out—don’t wait to get yours!
DETAILS
– February 2026 Product of the Month
– 12 sheets: 3 each of 4 double-sided designs
– 12″ x 12″ (30.5 x 30.5 cm)
– Acid and lignin free (this product is photo-safe)
– Colors: Darling Duckling, Flirty Flamingo, Granny Apple Green, Lost Lagoon, Misty Moonlight, Petal Pink, Pretty Peacock
DESIGNER SERIES PAPER
– Can be used for card making, scrapbooking, and other paper crafts!
– Features exclusive designs by in-house Stampin’ Up! artists.
– Complements other Stampin’ Up! products and colors.
PRODUCT OF THE MONTH
– Is a new exclusive product released each month!
– Can be unlocked for just $5 with orders over $75 (after discounts and rewards).
– Is only available while supplies last—they can sell out quickly!
– Is limited to one per customer (including language versions).
*********************************************************************************************************
Card stock cuts for this project:
- Basic Beige Cardstock 5 1/2″ x 8 1/2″(card base scored & folded at 4 1/4″), 2″ x 3″(sentiment), 3 3/4″ x 5″(inner liner)
- Cherry Cobbler Cardstock (2) – 4″ x 5 1/4″ (card front & inner liner mats)
- Beautiful Gallery 6 x 6 Designer Series Paper 3 3/4″ x 5″(card front), 1″ x 3 3/4″(inner liner), 2 1/4″ x 6″(envelope)
*********************************************************************************************************
Product List
![Gallery Blooms Photopolymer Stamp Set [ 165211 ]](https://assets1.tamsnetwork.com/images/EC042017NF/165211s.jpg "Gallery Blooms Photopolymer Stamp Set [ 165211 ]")
![Basic Beige 8 1/2" X 11" Cardstock [ 164511 ]](https://assets1.tamsnetwork.com/images/EC042017NF/164511s.jpg "Basic Beige 8 1/2\" X 11\" Cardstock [ 164511 ]")
![Cherry Cobbler 8-1/2" X 11" Cardstock [ 119685 ]](https://assets1.tamsnetwork.com/images/EC042017NF/119685s.jpg "Cherry Cobbler 8-1/2\" X 11\" Cardstock [ 119685 ]")
![Beautiful Gallery 6" X 6" (15.2 X 15.2 Cm) Designer Series Paper [ 165196 ]](https://assets1.tamsnetwork.com/images/EC042017NF/165196s.jpg "Beautiful Gallery 6\" X 6\" (15.2 X 15.2 Cm) Designer Series Paper [ 165196 ]")
![Cherry Cobbler Classic Stampin' Pad [ 147083 ]](https://assets1.tamsnetwork.com/images/EC042017NF/147083s.jpg "Cherry Cobbler Classic Stampin' Pad [ 147083 ]")
![Watercolor Pencils Assortment 2 [ 149014 ]](https://assets1.tamsnetwork.com/images/EC042017NF/149014s.jpg "Watercolor Pencils Assortment 2 [ 149014 ]")
![Blender Pens [ 102845 ]](https://assets1.tamsnetwork.com/images/EC042017NF/102845s.jpg "Blender Pens [ 102845 ]")
![Beautifully Celebrated Dies [ 166974 ]](https://assets1.tamsnetwork.com/images/EC042017NF/166974s.jpg "Beautifully Celebrated Dies [ 166974 ]")
![Basic Beige 3/8" (1 Cm) Classic Ribbon [ 165216 ]](https://assets1.tamsnetwork.com/images/EC042017NF/165216s.jpg "Basic Beige 3/8\" (1 Cm) Classic Ribbon [ 165216 ]")
![Pressed Flower Motifs [ 165215 ]](https://assets1.tamsnetwork.com/images/EC042017NF/165215s.jpg "Pressed Flower Motifs [ 165215 ]")
![Basic White Medium Envelopes [ 159236 ]](https://assets1.tamsnetwork.com/images/EC042017NF/159236s.jpg "Basic White Medium Envelopes [ 159236 ]")


![Tear & Tape Adhesive [ 154031 ]](https://assets1.tamsnetwork.com/images/EC042017NF/154031s.jpg "Tear & Tape Adhesive [ 154031 ]")

![Take Your Pick [ 144107 ]](https://assets1.tamsnetwork.com/images/EC042017NF/144107s.jpg "Take Your Pick [ 144107 ]")


![Beautiful Motifs Bundle (English) [ 165206 ]](https://assets1.tamsnetwork.com/images/EC042017NF/165206s.jpg "Beautiful Motifs Bundle (English) [ 165206 ]")
![Beautiful Motifs Photopolymer Stamp Set (English) [ 165198 ]](https://assets1.tamsnetwork.com/images/EC042017NF/165198s.jpg "Beautiful Motifs Photopolymer Stamp Set (English) [ 165198 ]")
![Beautiful Motifs Dies [ 165205 ]](https://assets1.tamsnetwork.com/images/EC042017NF/165205s.jpg "Beautiful Motifs Dies [ 165205 ]")
![Basic White 8 1/2" X 11" Cardstock [ 166780 ]](https://assets1.tamsnetwork.com/images/EC042017NF/166780s.jpg "Basic White 8 1/2\" X 11\" Cardstock [ 166780 ]")
![Gray Granite 8-1/2" X 11" Cardstock [ 146983 ]](https://assets1.tamsnetwork.com/images/EC042017NF/146983s.jpg "Gray Granite 8-1/2\" X 11\" Cardstock [ 146983 ]")
![Lost Lagoon 8-1/2" X 11" Cardstock [ 133679 ]](https://assets1.tamsnetwork.com/images/EC042017NF/133679s.jpg "Lost Lagoon 8-1/2\" X 11\" Cardstock [ 133679 ]")
![Petal Pink 8-1/2" X 11" Cardstock [ 146985 ]](https://assets1.tamsnetwork.com/images/EC042017NF/146985s.jpg "Petal Pink 8-1/2\" X 11\" Cardstock [ 146985 ]")
![Country Woods 12" X 12" (30.5 X 30.5 Cm) Designer Series Paper [ 163393 ]](https://assets1.tamsnetwork.com/images/EC042017NF/163393s.jpg "Country Woods 12\" X 12\" (30.5 X 30.5 Cm) Designer Series Paper [ 163393 ]")
![Lost Lagoon Classic Stampin' Pad [ 161678 ]](https://assets1.tamsnetwork.com/images/EC042017NF/161678s.jpg "Lost Lagoon Classic Stampin' Pad [ 161678 ]")
![Petal Pink Classic Stampin' Pad [ 147108 ]](https://assets1.tamsnetwork.com/images/EC042017NF/147108s.jpg "Petal Pink Classic Stampin' Pad [ 147108 ]")
![Versamark Pad [ 102283 ]](https://assets1.tamsnetwork.com/images/EC042017NF/102283s.jpg "Versamark Pad [ 102283 ]")
![Basics Wow! Embossing Powder [ 165679 ]](https://assets1.tamsnetwork.com/images/EC042017NF/165679s.jpg "Basics Wow! Embossing Powder [ 165679 ]")
![Heat Tool (Us And Canada) [ 129053 ]](https://assets1.tamsnetwork.com/images/EC042017NF/129053s.jpg "Heat Tool (Us And Canada) [ 129053 ]")
![Antique Pearls [ 164679 ]](https://assets1.tamsnetwork.com/images/EC042017NF/164679s.jpg "Antique Pearls [ 164679 ]")


![Mossy Meadow 8-1/2" X 11" Cardstock [ 133676 ]](https://assets1.tamsnetwork.com/images/EC042017NF/133676s.jpg "Mossy Meadow 8-1/2\" X 11\" Cardstock [ 133676 ]")
![Pecan Pie Classic Stampin' Pad [ 161665 ]](https://assets1.tamsnetwork.com/images/EC042017NF/161665s.jpg "Pecan Pie Classic Stampin' Pad [ 161665 ]")
![Damask Designs Embossing Folder [ 165214 ]](https://assets1.tamsnetwork.com/images/EC042017NF/165214s.jpg "Damask Designs Embossing Folder [ 165214 ]")
![Stylish Shapes Dies [ 159183 ]](https://assets1.tamsnetwork.com/images/EC042017NF/159183s.jpg "Stylish Shapes Dies [ 159183 ]")

![Cloud Cover 8 1/2" X 11" Cardstock [ 165621 ]](https://assets1.tamsnetwork.com/images/EC042017NF/165621s.jpg "Cloud Cover 8 1/2\" X 11\" Cardstock [ 165621 ]")
![Hues Of Blue Flowers [ 165930 ]](https://assets1.tamsnetwork.com/images/EC042017NF/165930s.jpg "Hues Of Blue Flowers [ 165930 ]")
![Adhesive Sheets [ 152334 ]](https://assets1.tamsnetwork.com/images/EC042017NF/152334s.jpg "Adhesive Sheets [ 152334 ]")


![Artistic Leaves Photopolymer Stamp Set (English) [ 166162 ]](https://assets1.tamsnetwork.com/images/EC042017NF/166162s.jpg "Artistic Leaves Photopolymer Stamp Set (English) [ 166162 ]")
![Basic Beige Classic Stampin Pad [ 163806 ]](https://assets1.tamsnetwork.com/images/EC042017NF/163806s.jpg "Basic Beige Classic Stampin Pad [ 163806 ]")
![Mossy Meadow Classic Stampin' Pad [ 147111 ]](https://assets1.tamsnetwork.com/images/EC042017NF/147111s.jpg "Mossy Meadow Classic Stampin' Pad [ 147111 ]")
![Muted Palette Dots [ 165155 ]](https://assets1.tamsnetwork.com/images/EC042017NF/165155s.jpg "Muted Palette Dots [ 165155 ]")


![Calypso Coral 8-1/2" X 11" Cardstock [ 122925 ]](https://assets1.tamsnetwork.com/images/EC042017NF/122925s.jpg "Calypso Coral 8-1/2\" X 11\" Cardstock [ 122925 ]")
![Old Olive 8-1/2" X 11" Cardstock [ 100702 ]](https://assets1.tamsnetwork.com/images/EC042017NF/100702s.jpg "Old Olive 8-1/2\" X 11\" Cardstock [ 100702 ]")
![Calypso Coral Classic Stampin' Pad [ 147101 ]](https://assets1.tamsnetwork.com/images/EC042017NF/147101s.jpg "Calypso Coral Classic Stampin' Pad [ 147101 ]")
![Old Olive Classic Stampin' Pad [ 147090 ]](https://assets1.tamsnetwork.com/images/EC042017NF/147090s.jpg "Old Olive Classic Stampin' Pad [ 147090 ]")
![Metallics Wow! Embossing Powder [ 165678 ]](https://assets1.tamsnetwork.com/images/EC042017NF/165678s.jpg "Metallics Wow! Embossing Powder [ 165678 ]")
![1-3/4" (4.4 Cm) Circle Punch [ 119850 ]](https://assets1.tamsnetwork.com/images/EC042017NF/119850s.jpg "1-3/4\" (4.4 Cm) Circle Punch [ 119850 ]")
![1 7/8" (4.8 Cm) Circle Punch [ 165259 ]](https://assets1.tamsnetwork.com/images/EC042017NF/165259s.jpg "1 7/8\" (4.8 Cm) Circle Punch [ 165259 ]")


![Secret Sea 8 1/2" X 11" Cardstock [ 165624 ]](https://assets1.tamsnetwork.com/images/EC042017NF/165624s.jpg "Secret Sea 8 1/2\" X 11\" Cardstock [ 165624 ]")
![Secret Sea Classic Stampin' Pad [ 165285 ]](https://assets1.tamsnetwork.com/images/EC042017NF/165285s.jpg "Secret Sea Classic Stampin' Pad [ 165285 ]")
![Cloud Cover Stampin’ Blends Combo Pack [ 165287 ]](https://assets1.tamsnetwork.com/images/EC042017NF/165287s.jpg "Cloud Cover Stampin’ Blends Combo Pack [ 165287 ]")
![Old Olive Stampin' Blends Combo Pack [ 154892 ]](https://assets1.tamsnetwork.com/images/EC042017NF/154892s.jpg "Old Olive Stampin' Blends Combo Pack [ 154892 ]")
![Pretty In Pink Stampin’ Blends Combo Pack [ 163824 ]](https://assets1.tamsnetwork.com/images/EC042017NF/163824s.jpg "Pretty In Pink Stampin’ Blends Combo Pack [ 163824 ]")
![2" (5.1 Cm) Circle Punch [ 133782 ]](https://assets1.tamsnetwork.com/images/EC042017NF/133782s.jpg "2\" (5.1 Cm) Circle Punch [ 133782 ]")
![Secret Sea 3/8" (1 Cm) Faux Linen Ribbon [ 165273 ]](https://assets1.tamsnetwork.com/images/EC042017NF/165273s.jpg "Secret Sea 3/8\" (1 Cm) Faux Linen Ribbon [ 165273 ]")


![The Right Words Cling Stamp Set (English) [ 165316 ]](https://assets1.tamsnetwork.com/images/EC042017NF/165316s.jpg "The Right Words Cling Stamp Set (English) [ 165316 ]")
![Pool Party 8-1/2" X 11" Cardstock [ 122924 ]](https://assets1.tamsnetwork.com/images/EC042017NF/122924s.jpg "Pool Party 8-1/2\" X 11\" Cardstock [ 122924 ]")
![Irresistible Designs 12" X 12" (30.5 X 30.5 Cm) Specialty Designer Series Paper [ 165305 ]](https://assets1.tamsnetwork.com/images/EC042017NF/165305s.jpg "Irresistible Designs 12\" X 12\" (30.5 X 30.5 Cm) Specialty Designer Series Paper [ 165305 ]")
![Pool Party Classic Stampin' Pad [ 147107 ]](https://assets1.tamsnetwork.com/images/EC042017NF/147107s.jpg "Pool Party Classic Stampin' Pad [ 147107 ]")
![Blending Brushes [ 153611 ]](https://assets1.tamsnetwork.com/images/EC042017NF/153611s.jpg "Blending Brushes [ 153611 ]")
![Subtles Stampin' Write Markers [ 161698 ]](https://assets1.tamsnetwork.com/images/EC042017NF/161698s.jpg "Subtles Stampin' Write Markers [ 161698 ]")


![Cherry Cobbler Stampin' Blends Combo Pack [ 154880 ]](https://assets1.tamsnetwork.com/images/EC042017NF/154880s.jpg "Cherry Cobbler Stampin' Blends Combo Pack [ 154880 ]")
![Perennial Postage Dies [ 162607 ]](https://assets1.tamsnetwork.com/images/EC042017NF/162607s.jpg "Perennial Postage Dies [ 162607 ]")