Good Tuesday morning my stamping friends welcome to Amy’s Inkin’ Krew Team Blog Hop. It’s the 2nd Tuesday of the month so that means Blog Hop Day!! If you are starting with me, be sure to hop around to see everyone’s beautiful projects. If you’ve hopped over from Karen’s blog, welcome to my blog and thank you for stopping by. The theme this month is “Love”. If you’d like to see a quick video on how I made this card, Click Here to go to my Instagram Reels. Here’s my card for today.
I used the Stampin’ Up! Bee My Valentine Stamp Set along with the Hearts of Love 3D Embossing Folder, Turtle-y Cute Designer Series Paper, Stylish Shapes Dies and Nested Essentials Dies for my card today.
Emboss a panel of Flirty Flamingo Two-Tone Cardstock using the Hearts of Love EF. Using a sanding block, go over the embossed panel. Adhere the embossed panel to a Flirty Flamingo card base. Adhere a panel of Turtle-y Cute DSP to a Basic Black mat. Adhere the layered panel to the card front.
Stamp the honeycomb image from the Bee My Valentine stamp set in Darling Duckling Ink on a panel of Darling Duckling. Cut a panel of Basic White using the 2nd largest circle from the Stylish Shapes Dies. Stamp the bumble bee body image from the Bee My Valentine stamp set in Daffodil Delight Ink, the stripes, antenna, face and dashed images in Tuxedo Black Ink. Stamp the wings in Pool Party Ink and the hearts in Flirty Flamingo Ink. Adhere the die cut to the panel of Darling Duckling. Adhere the layered panel to the card front with Stamin’ Dimensionals.
On a panel of Basic White, stamp the sentiment from the Bee My Valentine stamp set in Tuxedo Black Ink. Cut the sentiment out using the banner from the Nested Essentials Dies. Adhere the sentiment using Stampin’ Dimensionals. Add a few Rainbow Adhesive-Backed Dots to the card front.
Stamp the sentiment from Bee My Valentine stamp set in Tuxedo Black Ink on a panel of Basic White. Stamp the honeycomb image from the Bee My Valentine stamp set in Darling Duckling Ink next to the sentiment. Stamp the heart images in Flirty Flamingo Ink. Emboss a strip of Flirty Flamingo Two-Tone CS using the Hearts of Love EF, go over it with a sanding block and adhere it to the bottom of the panel. Adhere the Basic Whtie panel to a Basic Black mat then to the inside of the Flirty Flamingo card base.
Decorate a Basic White Medium Envelope to complete your card. Stamp the bee image on the front of the envelope the same as for the card. Adhere an embossed panel of Flirty Flamingo Two-Tone CAS to the envelope flap.
Thank you for stopping by my blog today. Now that you’ve seen my card, let’s get on with the hop! Click on the Next Blog button to move on to Charlene’s project. Happy Hopping.
Just in case you get lost along the way, here is a list of the team members involved in the hop today.
If you need any stamping supplies, I’d love to be your Demonstrator. Just click HERE to go directly to my online store or drop me an email if you have any questions.
Good Tuesday morning my stamping friends welcome to Amy’s Inkin’ Krew Team Blog Hop. It’s the 2nd Tuesday of the month so that means Blog Hop Day!! If you are starting with me, be sure to hop around to see everyone’s beautiful projects. If you’ve hopped over from Mary’s blog, welcome to my blog and thank you for stopping by. The theme this month is “Celebrate Summer”. We can interpret this however we want. If you’d like to see a quick video on how I made this card, Click Here to go to my Instagram Reels. Here’s my card for today.
I used the Stampin’ Up! bee My Valentine Photopolymer Stamp Set along with the Cute As Can Bee Designer Series Paper,Stampin’ Up! Sweet Blooms Photopolymer Stamp Set and Bee Builder Punch for my card today.
Fold the Petunia Pop card base on the 3″ & 7″ score lines as mountain folds and on the 6″ score line a valley fold. Adhere a panel of Cute as Can Bee DSP to the center section of the card base with Stampin’ Seal. Adhere the pop-up panel to the card base by adhering the longer part in the front adhering it to the bottom front panel with Tear & Tape. Adhere the shorter side to the back of the card base with Teat & Tape. Adhere a panel of Cute as Can Bee DSP to an Old Olive mat with Stampin’ Seal. Adhere the layered panel to the bottom of the card front, over the pop-up panel, with Liquid Glue.
On a panel of Basic White, add Pool Party Ink with a Blending Brush. Stamp the sentiment from Sweet Blooms stamp set in Tuxedo Black Ink on the top of the panel. Stamp the beehive image from Bee My Valentine stamp set in Pool Party Ink on either side of the sentiment. Stamp the dotted line image from Bee My Valentine stamp set in tuxedo Black Ink on the panel. Adhere the Basic White pane to the pop-up Petunia Pop panel with Stampin’ Seal. On a panel of Basic White, stamp the bee stripes image from the Bee My Valentine stamp set in Tuxedo Black Ink 2 times. Stamp the bee body image from the Bee My Valentine stamp set in Daffodil Delight Ink over the striped images. Cut the bees out using the Bee Builder Punch. Stamp the face on the bee in Tuxedo Black Ink. On another panel of Basic White, stamp the outlined wing image 2 times and cut them out with the Bee Builder Punch. Adhere the wings to the back of the bee with a Glue Dot. Stamp the antennae image from the Bee My Valentine stamp set in Tuxedo Black Ink on the inked panel of Basic White. Adhere the bee images to the Basic White panel, one with Liquid Glue and the other with Stampin’ Dimensionals. Add a few of the Shades of Green Hexagons to the stamped beehive images.
On a panel of Basic White, stamp the sentiment from Sweet Blooms stamp set in Tuxedo Black Ink. Stamp the dotted line image from the Bee My Valentine stamp set in Tuxedo Black Ink around the panel. Adhere the Basic White panel to an Old Olive mat then to the inside of the Petunia Pop card base.
On a panel of Basic White, stamp the large sentiment from Sweet Blooms stamp set in tuxedo Black Ink. Stamp the small sentiments from Sweet Blooms stamp set in Pool Party Ink. Stamp the bee image from Bee My Valentine stamp set in Daffodil Delight, Tuxedo Black and Pool Party Inks the same as for the card front. Adhere the Basic White panel to an Old Olive mat then to the back of the Petunia Pop card base.
Decorate a Basic White Medium Envelope to complete your card. Stamp the bee stripes image in Tuxedo Black Ink on the envelope front. Stamp the bee body in Daffodil Delight Ink on top of the striped image. Stamp the dotted line, face and antennae images from the Bee My Valentine stamp set in tuxedo Black Ink. Stamp the wings and beehive images from the Bee My Valentine stamp set in Pool Party Ink. Adhere a panel of Cute As Can Bee DSP to the envelope flap.
Thank you for stopping by my blog today. Now that you’ve seen my card, let’s get on with the hop! Click on the Next Blog button to move on to Ann Louise’s project or click the Previous Blog button to go back to see the project that Mary created. Happy Hopping.
Just in case you get lost along the way, here is a list of the team members involved in the hop today.
If you need any stamping supplies, I’d love to be your Demonstrator. Just click HERE to go directly to my online store or drop me an email if you have any questions.
Send your loved ones elevated cards with heartfelt sentiments! • Makes 9 cards: 3 each of 3 designs with 9 coordinating envelopes • Envelopes and card bases with decorative gold foil • Precut paper pieces and unique sentiment labels • Coordinating colors: Berry Burst, Cajun Craze, Early Espresso, Mossy Meadow, Pretty Peacock (Classic Stampin’ Spot), Timid Tiger Coordinates with the Floral Charm Suite Collection (item 166141)
Subscribe to the June Paper Pumpkin Kit between 11 May and 10 June by clicking here!
Don’t miss the coordinating Hugs Abloom Dies Add-On!
Make the most of your Paper Pumpkin kits with the Hugs Abloom Dies add-on! Quickly and cleanly cut out a flower, leaf sprig, sentiment label, or Hugs sentiment to elevate your crafting projects. These additional dies are designed to work with THREE Paper Pumpkin Kits: the Inked Occasions Paper Pumpkin Kit, the Mountain Majesties Paper Pumpkin Kit, and the Full of Charm Paper Pumpkin Kit. Pair these dies with other Stampin’ Up! products for even more creative options!
DETAILS – 4 dies – Largest die: 2-1/2″ x 1-1/4″ (6.4 x 3.2 cm) – Use with a Stampin’ Cut & Emboss Machine (sold separately)
You must be a current Paper Pumpkin subscriber to purchase this item. To become a subscriber, visit www.stampinup.com/paperpumpkin.
Note: Supplies may be limited toward the end of the subscription period.
Good Saturday morning stamping friends and welcome to the weekend. I hope you have some fun plans in the works. I’ll be at work all day today and I’m anticipating it being very busy. Last I heard there’s a snowstorm heading our way and it’s supposed to start today at 3pm and go through the night. Now, the weatherman has been wrong before, so we’ll see what happens.
Today’s card played with a new set from the Online Exclusives that’s coming on March 4th, along with some Online Exclusive DSP and an older set from the annual catalog. If you’d like to see a quick video of how I made this card, Click Here to go to my Instagram Reels. Here is my card for today.
I used the new Stampin’ Up! Online Exclusive Year of The Flowers Cling Stamp Set (available March 4th) and Cute As Can Bee Designer Series Paper along with the Stampin’ Up! Bee My Valentine Photopolymer Stamp Set for my card today.
This is the template I used for the card front. You can use scrap paper of cardstock if you want to save it to make it again.
Adhere a panel of Cute As Can Bee DSP to a Pool Party mat using Stampin’ Seal. Cut another panel of Cute As Can Bee DSP using the template from above.
Adhere the 2 cut panels of Cute As Can Bee DSP to the card front using Stampin’ Dimensionals. Tie a small bow using the Petunia Pop 3/8″ Bordered Ribbon and adhere it to where the DSP panels split using a Glue Dot. Adhere the layered card front to a Petunia Pop card base using Liquid Glue.
On a small panel of Basic White, stamp the sentiment from the Year of Flowers stamp set in Petunia Pop Ink. Adhere the sentiment to the open spot on the card front using Stampin’ Dimensionals. Add a 2024-2026 In-Color Shimmer Gem to the card front.
On a panel of Basic White, stamp the sentiment from the Year of Flowers stamp set in Petunia Pop Ink. Adhere a panel of Cute As Can Bee DSP to the bottom of the panel. Stamp the stem images from the Bee My Valentine stamp set in Old Olive Ink on the bottom of the panel. Stamp the flower images from the Bee my Valentine stamp set on the stems in Bubble Bath and Petunia Pop Inks, stamping off once on scrap paper. Stamp the bee image from the Bee My Valentine stamp set in Daffodil Delight, Pool Party and Tuxedo Black Inks on the top of the panel. Adhere the Basic White panel to a Pool Party mat then to the inside of the Petunia Pop card base.
Decorate a Basic White Medium Envelope to finish the card. Stamp the bee image from the Bee My Valentine stamp set on the envelope front in Daffodil Delight, Pool Party and Tuxedo Black Inks. Stamp the stem images in Old Olive Ink and the flower images from Bee My Valentine stamp set in Bubble Bath and Petunia Pop Ink. Adhere a panel of Cute As A Bee DSP to the envelope flap.
Thank you for stopping by my blog today. I hope you like my card and will give it a try. Happy Stamping!!
If you need any stamping supplies, I’d love to be your Demonstrator. Just click HERE to go directly to my online store or drop me an email if you have any questions.
MY CURRENT HOST CODE IS: ZZDPZRSF
Use this host code when placing an order with me. When you order $50 or greater you will receive a free gift from me! If your order is over $150, please do not use this code, but you’ll still get the free gift. The free gift is your choice of any 1 item valued up to $10.00 from the 2024 – 2025 Annual Catalog, January – April 2025 Mini Catalog or from the Online Exclusives! For any orders $50 or more I will also send you my monthly class tutorials. Click HERE or go to my Customer Rewards for more details and to see what this month’s tutorials are.
Please remember to use my current Host Code and make sure that you can see my name on the final checkout page listed as your Demonstrator when you order so that you know that you’re ordering with me, and you’ll get my rewards!
In response to changing policies at Stampin’ Up – I’m adjusting my Ordering Gift policy as well. I’m having to get a little more tough on the adding of Host codes when you place your order thru my Online Store.
Not to worry – you’re still going to get that $10 ordering gift for orders of $50 (before shipping & tax) or greater. And the gift is still any 1 SU! product up to that $10 value.
But – if you DO NOT use the Host code for your orders of less than $150 (this is the RETAIL total before Shipping & Handling), then you’ll have two options:
You’ll need to call Stampin’ Up! (1-800-Stamp-Up) and ask them to add it for you. They’re very helpful and will get it done quickly! OR….
If your order was over the $50 threshold but under $150, then…you’ll forfeit that $10 ordering gift and rewards – this is the Bummer Option – and I REALLY don’t want to do this, SO please remember to add my Current Host Code.
Ready for more? There are EVEN MORE PRODUCTS available to shop, earn, and redeem during Sale-A-Bration. We don’t want you to miss out on these great products and incredible deals, Click HERE for the Sale-A-Bration Additional Products Flyer.
Remember, you must use the item numbers in the flyer in order to redeem these products as Sale-A-Bration items. These products have different item numbers in the catalog, which won’t register as part of Sale-A-Bration.
We’ve included two kits as part of our Sale-A-Bration newly added products. Once the kits sell out, they will be discontinued. If they do not sell out during Sale-A-Bration, they may be discounted at a later date.
Note: The newly added products that are now redeemable during Sale-A-Bration are part of Stampin’ Up!’s existing product offering.
Sale-a-bration 2025 runs through Friday, February 28! There are some awesome new products that you can earn for FREE with orders of $60+ and orders of $120+ placed during Sale-a-bration as well as a great host bonus and a joining special!
SHOP
Spend $60 or more and pick from 12 new products (5 stamp sets,3 designer series paper packs, 1 embossing folder, 1 kit, 1 pack of embellishments and 1 spool of ribbon!) that are available as free items!
Spend $120 or more and pick from 2 new items (1 stamp bundle and 1 stamp set) that are available as free items!
HOST
Get an additional $30 in FREE Stampin’ Rewards with any party or individual order of $300 or greater during Sale-a-bration! You can spend your Stampin’ Rewards on any items currently available from Stampin’ Up! including (but not limited to) the host exclusive stamp sets!
JOIN
Sale-A-Bration is an excellent time you to join Stampin’ Up! In addition to the already great value of the Starter Kit, if you sign up as a Stampin’ Up! demonstrator during Sale-a-bration, you can choose from two incredible options:
Option 1: Join Stampin’ Up! during Sale-a-bration as a new demonstrator and get $125 worth of products PLUS a choice of 2 Stampin’ Write Marker Assortments AND the Handmade Designs Cling Stamp Set, an exclusive stamp set designed to work with the markers. That’s a $216 value all for just $99!
Option 2: Join Stampin’ Up! during Sale-A-Bration and get $125 worth of product PLUS an additional $30 worth of product of your choice for just $99. That’s a $155 value!
Two joining options so you can pick the one that you like the best!!
There is never an obligation to sell. You can join just to enjoy the discount for yourself along with all the other Demonstrator benefits. Once you join, you’ll get at least a 20% discount on all of your Stampin’ Up! merchandise purchases and you get to order early from the upcoming catalogs! You will also be able to attend the OnStage Events and any other events Stampin’ Up! has and you get to be a part of our Stampin’ Up! team!
Unsure about this and want to talk? Contact me at creativestampingdesigns@gmail.com and we can talk. You can also find additional information Here at Join My Team. Being a part of the Stampin’ Up! Community is one of the best decisions I’ve ever made. I have made many friends along the way while doing what I love, Paper Crafting. This Joining offer is only good during Sale-a-bration which starts January 7 and ends on February 28. Why not give it a try? I’d love to have you on my team.
Kits by Stampin’ Up! are perfect for new crafters, busy crafters, or crafters who want quick and easy projects. All-inclusive project kits have everything you need in one box! Give as a gift or try them yourself. Kits are while supplies last. Order today!
Heirloom Arrangements Kit
Do you love the convenience of crafting with an all-inclusive kit but wish it offered a little more wiggle room for creativity? Then the Heirloom Arrangements Kit is perfect for you! With detailed vintage designs, eight card options, and loosely choreographed instructions, you can let your creativity shine and still have everything you need for your projects right at your fingertips.
– Makes 8 cards: 1 each of 8 designs – Folded card size: 4-1/4″ x 5-1/2″ (10.5 x 14.9 cm) – Colors: Basic Black, Blueberry Bushel, Cajun Craze, Cherry Cobbler, Crumb Cake, Daffodil Delight, Garden Green, Old Olive, Pecan Pie, Pretty in Pink, Pretty Peacock – Also available in French
Kit includes one of each item listed below. – Heirloom Arrangements Photopolymer Stamp Set – Clear stamp block – Pecan Pie Classic Stampin’ Spot – Basic instructions – 8 printed envelopes – Precut elements – Specialty vellum – Adhesive – A 9-7/8″ x 6-1/2″ x 2-3/4″ (25.1 x 16.5 x 7 cm) printed box for storage or crafting on the go
So Much To Celebrate Kit – Temporarily Unavailable, Will Be Back In Stock Soon
Whether it’s for a graduation, a wedding, or welcoming a new baby, nothing says congratulations quite like a handmade card. With the all-inclusive So Much to Celebrate Kit featuring gold foil details, precut flowers, and puffy stickers, you can make beautiful cards to celebrate any occasion.
Makes 9 cards: 3 each of 3 designs – 2 folded card sizes – 4-1/4″ x 5-1/2″ (10.5 x 14.9 cm): 6 cards – 6″ x 3″ (15.2 x 7.6 cm): 3 cards – Sentiments printed in Dutch, English, French, and German – Colors: Balmy Blue, Old Olive, Pecan Pie, Petal Pink, Pumpkin Pie
Kit includes one of each item listed below. – Step-by-step instructions – 9 printed envelopes – Puffy stickers – Gold foil – Adhesive – A 9-7/8″ x 6-1/2″ x 2-3/4″ (25.1 x 16.5 x 7 cm) printed box for storage or crafting on the go
I’m offering a little ordering special for Valentine’s Day! I call it my “Stuck on You Valentine” ordering special!
For all orders of $50 or greater (before shipping and taxes) that have my Current Host Code ZZDPZRSF applied or for individual orders of $150 or greater placed through me between now and Friday, February 14, you’ll get your choice of a free adhesive! You MUST remember to add my Host Code to your orders.
This can be anything that Stampin’ Up! sells that could be used as an adhesive! And for the adhesives that are $5 or under, two packs will equal one choice (see the items with the (2) on the list below) so if you select those, you’ll get double!!
The adhesive will be in addition to the normal thank you gift that I order for you!! Plus, since your order will be over $50, you’ll earn Sale-A-Bration item(s) too. A big double YAY for more free goodies!!
***Please note, if your order is over $150, do not apply a host code. If you apply a host code to your order, it will take away your host benefits and we don’t want that! But don’t worry, you’ll still be eligible for the free gift and free adhesive offer!
Here is a list of the adhesives that you can pick from:
Adhesive Sheets
Multipurpose Liquid Glue
Mini Glue Dots
Tear & Tape Adhesive
Stampin’ Seal
Stampin’ Seal Refill
Stampin’ Seal +
Stampin’ Seal + Refill
Fine-Tip Glue Pen
Silicone Craft Sheet (even though it’s not an adhesive…it is an awesome tool for adhesives!)
Foam Adhesive Strips
Stampin’ Dimensionals (2)
Mini Stampin’ Dimensionals (2)
Black Stampin’ Dimensionals Combo Pack
Foam Adhesive Sheets
I’ll be placing the order for the adhesives on February 16th, so please be sure to send your selections right away when you order…otherwise I’ll pick one for you and send it out with your thank you gift!
*With Stampin’ Up!’s backorder policy where numbers are turned off for ordering if they go on backorder, if the adhesive that you pick is turned off for ordering when I place the order on the 16th, I’ll order Stampin’ Dimensionals for you instead.
Visit my Online Store Here and start shopping now!!
Plant the seeds of happiness with these lovely garden-inspired cards. • Makes 9 cards: 3 each of 3 designs • Precut pieces with bronze foil • Unique spring-themed envelopes • Coordinating colors: Basic Beige, Bubble Bath, Lemon Lime Twist, Lost Lagoon, Old Olive, Petunia Pop (Classic Stampin’ Spot)
Subscribe to the February Paper Pumpkin Kit between 11 January and 10 February by clicking here!
Don’t miss the coordinating Spring is in The Air Dies Add-On!
Make the most of your Paper Pumpkin kits with the Spring Is in the Air Dies add-on! Quickly and cleanly cut out a heart frame, flowering chive, honeycomb, or tiny bumblebee to elevate your crafting projects. These additional dies are designed to work with THREE Paper Pumpkin Kits: the Hearts for You Paper Pumpkin Kit, the Spring Is in the Air Paper Pumpkin Kit, and the Daisy Daydream Paper Pumpkin Kit. Pair these dies with other Stampin’ Up! products for even more creative options!
DETAILS – 5 dies – Largest die: 3″ x 3″ (7.6 x 7.6 cm) – Use with a Stampin’ Cut & Emboss Machine (sold separately)
You must be a current Paper Pumpkin subscriber to purchase this item. To become a subscriber, visit paperpumpkin.com.
#166237 $12
Note: Supplies may be limited toward the end of the subscription period.
Good Sunday morning stamping friends. How is your weekend going? I was at work all day yesterday and I’ll be working all day today too. It rained and rained all day yesterday. It was a slow day at work, which tends to make the day long. Luckily the people I work with are all fun and we like to talk.
I have a fun card with lots of layers. I LOVE making cards with layers. If you’d like to see a quick video on how I made today’s card, Click Here to go to my Instagram Reels. Here’s my card for today.
I used the Stampin’ Up! Sending Smiles Photopolymer Stamp Set along with the Stampin’ Up! Bee My Valentine Photopolymer Stamp Set, Sending Dies, Scalloped Contour Dies and Bee Mine Designer Series Paper for my card today. Because Valentine’s Day is over it doesn’t mean you can’t still use this adorable DSP.
I started by adhering a panel of Bee Mine DSP to a Petal Pink mat using Stampin’ Seal. I adhered the layered panel to a Sweet Sorbet card base using Liquid Glue.
I cut a panel of Petal Pink using the Scalloped Contours Dies. I adhered a panel of Bee Mine DSP to the center of the die cut panel using Liquid Glue. I adhered the layered panel to the center of the card front using Stampin’ Dimensionals. Using the Sending Dies, I cut the sentiment mat from a panel of Sweet Sorbet and the detailed sentiment from a panel of Basic Whtie.
I adhered the detailed die to the mat using Liquid Glue. I adhered the die cut sentiment to the top of the card front using Stampin’ Dimensionals. I stamped the sentiment from the Sending Smiles stamp set in Sweet Sorbet Ink on a strip of Basic White. I cut the sentiment out using the Sending Dies. I adhered the sentiment to the bottom of the card front using Stampin’ Dimensionals. I added a few Adhesive-Backed Hearts & Flowers to the card front.
On the inside, I stamped the sentiment from the Bee My Valentine stamp set in Sweet Sorbet Ink on a panel of Basic White. I stamped the bumblebee image from the Bee My Valentine stamp set in Daffodil Delight, Petal Pink and Tuxedo Black Ink above the sentiment. I adhered a strip of Bee Mine DSP to the bottom of the panel. I adhered the Basic White panel to a Petal Pink mat then to the inside of the Sweet Sorbet card base.
To finish my card, I decorated a Basic White Medium Envelope. I stamped the bumble bee image from the Bee My Valentine stamp set on the envelope front in Daffodil Delight, Petal Pink and Tuxedo Balck Inks. I adhered a panel of Bee Mine DSP to the envelope flap.
Thank you for stopping by my blog today. I hope you like the card and will give it a try. Happy Stamping!!
If you need any stamping supplies, I’d love to be your Demonstrator. Just click HERE to go directly to my online store or drop me an email if you have any questions.
MY CURRENT HOST CODE IS: AHZBFDC4
Use this host code when placing an order with me. When you order $50 or greater you will receive a free gift from me! If your order is over $150, please do not use this code, but you’ll still get the free gift. The free gift is your choice of any 1 item valued up to $10.00 from the 2023-2024 Annual Catalog, the January-April 2024 Mini Catalog or from the Online Exclusives! Unfortunately, packs of cardstock are no longer an option for a free gift. Shipping has become too expensive to ship and it’s costing me as much to ship as the cardstock costs. For any orders $50 or more I will also send you my monthly class tutorials. Click HERE or go to my Customer Rewards for more details and to see what this month’s tutorials are.
Please remember to use my current Host Code and make sure that you can see my name on the final checkout page listed as your Demonstrator when you order so that you know that you’re ordering with me, and you’ll get my rewards!
In response to changing policies at Stampin’ Up – I’m adjusting my Ordering Gift policy as well. I’m having to get a little more tough on the adding of Host codes when you place your order thru my Online Store.
Not to worry – you’re still going to get that $10 ordering gift for orders of $50 (before shipping & tax) or greater. And the gift is still any 1 SU! product up to that $10 value – which includes some of our fun Host Sets!
But – if you DO NOT use the Host code for your orders of less than $150 (this is the RETAIL total before Shipping & Handling), then you’ll have two options:
You’ll need to call Stampin’ Up! (1-800-Stamp-Up) and ask them to add it for you. They’re very helpful and will get it done quickly! OR….
If your order was over the $50 threshold but under $150, then…you’ll forfeit that $10 ordering gift and rewards – this is the Bummer Option – and I REALLY don’t want to do this, SO please remember to add my Current Host Code.
Share nature’s beauty with lovely all-occasion cards! • Makes 9 cards: 3 each of 3 designs with 9 coordinating envelopes • Precut vellum pieces & wood embellishments • Coordinates with the Meandering Meadows Suite Collection (item 162745) • Coordinating colors: Granny Apple Green, Garden Green (Classic Stampin’ Spot), Balmy Blue, Night of Navy, Gorgeous Grape, Fresh Freesia
Don’t miss the coordinatingLove of Spring Dies add-on!
The dies will coordinate with the January, February and March Paper Pumpkin Kit.
The Love of Spring Dies Add-On—available only while supplies last!
Item # 164396 $12.00
This exclusive add-on coordinates with the three upcoming kits! Paper Pumpkin subscribers can purchase it beginning 11 December. The add-on is available only while supplies last, so it’s best to shop early!
Subscribe to the February Paper Pumpkin Kit between 11 January and 10 February by clicking here!
Note: Supplies may be limited toward the end of the subscription period.
Good Thursday morning my stamping friends welcome to our Happy Inkin’ Thursday Blog Hop. If you are starting with me, thank you, I hope you will stop by everyone’s blog to see what they have created this week. If you are hopping over from Akiko’s blog, thank you for stopping by. This week we have Color Challenge. If you’d like to see a quick video on how I made this card, Click Here to go to my Instagram Reels. Here is my card using this week’s colors.
I used the Stampin’ Up! Bee My Valentine Photopolymer Stamp Set along with the Stampin’ Up! Sale-a-bration Heartfelt Hellos Cling Stamp Set,Bee Mine Designer Series Paper and Hot Air Balloons Dies for my card today.
I started by adhering a panel of Bee Mine DSP to a Pool Party card base using Stampin’ Seal. I adhered 2 more panels of Bee Mine DSP to Pool Party mats using Stampin’ Seal.
I adhered the larger layered panel to the card front using Liquid Glue. I adhered the smaller layered panel to the card front using Stampin’ Dimensionals.
Using the Hot Air Balloons Dies, I cut a heart from a panel of Sweet Sorbet. I stamped the honeycomb image from the Bee My Valentine stamp set in Sweet Sorbet Ink on the heart. I adhered the heart to the card front using Stampin’ Dimensionals. On a strip of Basic White, I stamped the sentiment from the Bee My Valentine stamp set in Sweet Sorbet Ink. I cut the ends on an angle using Paper Snips. I adhered the sentiment to the card front using Stampin’ Dimensionals. I added a few of the Tinsel Gems Four Pack to the card front.
On the inside, I stamped the sentiment from the Sale-a-bration Heartfelt Hellos stamp set in Sweet Sorbet Ink on a panel of Basic White. I adhered 2 strips of Bee Mine DSP on either side of the panel. I adhered the Basic White panel to a Pool Party mat then to the inside of the Pool Party card base.
To complete my card, I decorated a Basic White Medium Envelope. I stamped the honeycomb image from the Bee My Valentine stamp set in Sweet Sorbet Ink on the envelope front. I adhered a panel of Bee Mine DSP to the envelope flap.
Thank you for stopping by my blog today. Now that you’ve seen my card, take a minute to hop through and see everyone’s projects today. If you click on the Next Blog button, you’ll go to Tara’s page. Or you can just click on the names below to go directly to all their blogs! Happy Hopping!
If you need any stamping supplies, I’d love to be your Demonstrator. Just click HERE to go directly to my online store or drop me an email if you have any questions.
MY CURRENT HOST CODE IS: D9EX7ZXG
Use this host code when placing an order with me. When you order $50 or greater you will receive a free gift from me! If your order is over $150, please do not use this code, but you’ll still get the free gift. The free gift is your choice of any 1 item valued up to $10.00 from the 2023-2024 Annual Catalog, the January-April 2024 Mini Catalog or from the Online Exclusives! Unfortunately, packs of cardstock are no longer an option for a free gift. Shipping has become too expensive to ship and it’s costing me as much to ship as the cardstock costs. For any orders $50 or more I will also send you my monthly class tutorials. Click HERE or go to my Customer Rewards for more details and to see what this month’s tutorials are.
Please remember to use my current Host Code and make sure that you can see my name on the final checkout page listed as your Demonstrator when you order so that you know that you’re ordering with me, and you’ll get my rewards!
In response to changing policies at Stampin’ Up – I’m adjusting my Ordering Gift policy as well. I’m having to get a little more tough on the adding of Host codes when you place your order thru my Online Store.
Not to worry – you’re still going to get that $10 ordering gift for orders of $50 (before shipping & tax) or greater. And the gift is still any 1 SU! product up to that $10 value – which includes some of our fun Host Sets!
But – if you DO NOT use the Host code for your orders of less than $150 (this is the RETAIL total before Shipping & Handling), then you’ll have two options:
You’ll need to call Stampin’ Up! (1-800-Stamp-Up) and ask them to add it for you. They’re very helpful and will get it done quickly! OR….
If your order was over the $50 threshold but under $150, then…you’ll forfeit that $10 ordering gift and rewards – this is the Bummer Option – and I REALLY don’t want to do this, SO please remember to add my Current Host Code.
New Joining Special Starting January 4 – February 29
Starter Kit Special during Sale-A-bration! Shop for up to $125 worth of anything you want, Pay $99 plus tax get FREE Shipping, and A FREE Stampin’ Glass Mat Studio!
The Stampin’ Glass Mat Studio is a paper crafter’s dream! The heavy-duty glass mat comes printed with a ruler and grid lines for easy measuring, while the large surface space gives ample room for spreading out while paper crafting. The safety-tempered glass has a heat and scratch resistant surface that wipes clean with the included cloth and water—no chemicals needed. The reusable cloth also cleans ink off your stamps! The nonslip, heat resistant, waterproof silicone mat features four palette squares for mixing custom ink colors or for holding small ink spots in place while crafting. Each component can be used separately, or you can use all three items together for a multipurpose paper crafting studio that’s both functional and elegant.
Option 2 – Instead of the Glass Mat Studio you can choose $125 worth of product PLUS an additional $30 worth of product of your choice when you join for $99. That’s a $155 value!
There is never an obligation to sell. You can join just to enjoy the discount for yourself along with all the other Demonstrator benefits. You get early access to all the upcoming catalogs along with being able to preorder. You can attend the OnStage Event and any other events Stampin’ Up! has. Unsure about this? Contact me at creativestampingdesigns@gmail.com and we can talk. Being a part of the Stampin’ Up! Community is one of the best decisions I’ve ever made. I have made many friends along the way while doing what I love, Paper Crafting. This Joining offer is only good during Sale-a-bration which starts January 4 and ends on February 29.
Create handmade cards for all the rockstars in your life with the Rock Legend Kit! This all-occasion paper crafting kit comes with everything you need to make cards that totally rock. Get crafting with die-cut paper pieces of electric guitars, lightning bolts, stars, and other awesome designs. Make eight cards (four each of two designs) with bold colors and preprinted sentiments to celebrate birthdays and more!
Kit includes: *Predesigned projects *Step-by-step instructions *Precut pieces (No prep work! Get right to crafting) *Printed sentiment labels in Dutch, English, French, and German *Makes 8 cards: 4 each of 2 designs *Folded card size: 5-1/2″ x 4-1/4″ (14 x 10.8 cm) *8 preprinted envelopes *Enough adhesive to complete projects *Adhesive-Backed Star Embellishments *A 9-7/8″ x 6-1/2″ x 1-3/4″ (25.1 x 16.5 x 4.4 cm) printed designer box for storage or crafting on the go
Product colors: Basic Black, Coastal Cabana, Crumb Cake, Crushed Curry, Real Red
Send adorable cards filled with love with the Panda Friends Kit! These irresistible pandas are perfect for celebrating love and friendship throughout the year. This kit includes cards in two different sizes to keep your crafting versatile and fresh. Use the preprinted sentiments to make quick multiples and send happy hello greetings to those you care about!
Kit includes: *Predesigned projects *Step-by-step instructions *Precut pieces (No prep work! Get right to crafting) *Printed sentiment labels in Dutch, English, French, and German *Makes 8 cards: 4 each of 2 designs *Folded card size: 4-1/4″ x 5-1/2″ (10.8 cm x 14 cm), 8-1/2″ x 3-1/2″ (21.6 cm x 8.9 cm) *8 preprinted envelopes *Enough adhesive to complete all projects *Iridescent Sequin Embellishments *A 9-7/8″ x 6-1/2″ x 1-3/4″ (25.1 x 16.5 x 4.4 cm) printed designer box for storage or crafting on the go.
Celebrate Easter and Spring with adorable cards and treat boxes! • Makes 9 projects: 3 each of 3 designs • Projects include printed cards, coordinating envelopes, and gift boxes • Precut paper pieces, baker’s twine, and embellishments • Coordinating colors: Petal Pink, Daffodil Delight, Granny Apple Green, Berry Burst, Early Espresso (Classic Stampin’ Spot), Crumb Cake
Don’t miss the coordinatingLove of Spring Dies add-on!
The dies will coordinate with the January, February and March Paper Pumpkin Kit.
The Love of Spring Dies Add-On—available only while supplies last!
Item # 164396 $12.00
This exclusive add-on coordinates with the three upcoming kits! Paper Pumpkin subscribers can purchase it beginning 11 December. The add-on is available only while supplies last, so it’s best to shop early!
Subscribe to the February Paper Pumpkin Kit between 11 January and 10 February by clicking here!
Note: Supplies may be limited toward the end of the subscription period.
Basic White Cardstock 3/8″ X 3 1/2″ (sentiment), 4″ X 5 1/4″ (inner loner)
Pool Party Cardstock 4 1/4″ x 11″ (card base scored & folded at 5 1/2″), 3 1/2″ X 4 3/4″, 1 7/8″ x 3 1/8″ (card front mats), 4 1/8″ X 5 3/8″ (inner liner mat)
Sweet Sorbet Cardstock 2 1/4″ X 2 1/2″ (heart)
Bee Mine Designer Series Paper 4 1/8″ X 5 3/8″ (card front), 3 3/8″ X 4 5/8″ & 1 3/4″ X 3″ (card front panels), 2 – 1/2″ x 5 1/4″ (inner liner), 2 1/4″ X 6″ (envelope flap)
Good Tuesday morning my stamping friends welcome to Amy’s Inkin’ Krew Team Blog Hop. It’s the 2nd Tuesday of the month so that means Blog Hop Day!! If you are starting with me, be sure to hop around to see everyone’s beautiful projects. If you’ve hopped over from Ann Louise’s blog, welcome to my blog and thank you for stopping by. The theme this month is “Love”. We can interpret this however we want. If you’d like to see a quick video of how I made this card, Click Here to go to my Instagram Reels. Here’s my card for today.
I used the Stampin’ Up! Bee My Valentine Bundle along with the Bee Mine Designer Series Paper and Countryside Corners Dies for my card today.
I started by cutting a panel of Basic White using the Countryside Corners Dies. I stamped the sentiment from the Stampin’ Up! Bee My Valentine Photopolymer Stamp Set in Tuxedo Black Ink on the bottom of the panel. I adhered the die cut panel to a Bee Mine DSP card front using Liquid Glue.
I adhered strips of Petal Pink along all the edges of the die cut up to the sides of the DSP, letting the excess hang over. Once I went all the way around with the strips of Petal Pink, I flipped the panel over and trimmed off the excess with Paper Snips. I adhered the card front to a Petal Pink card base using Liquid Glue.
On a panel of Basic White, I stamped the solid bee image from the Bee My Valentine stamp set in Daffodil Delight Ink. I stamped the bee stripes and face from the Bee My Valentine stamp set on the solid image in Tuxedo Black Ink. I punched the image out using the Bee Builder Punch. I stamped the detailed wings image from the Bee My Valentine stamp set in Petal Pink Ink on the Basic White panel. I cut the wings out using the Bee Builder Punch. I adhered the wings to the back of the bee body using a Glue Dot. I stamped the dotted image and the antenna from the Bee My Valentine stamp set to the sentiment panel in Tuxedo Black Ink. I adhered the bee to the panel using Stampin’ Dimensionals. I added a heart from the Adhesive-Backed Hearts & Flowers to the bottom of the panel.
On the inside, I stamped the sentiment from the Bee My Valentine stamp set in Tuxedo Black Ink on a Basic White panel. I stamped the solid bee image from the Bee My Valentine stamp set in Daffodil Delight Ink on the top of the panel. I stamped the bees stripes and antenna in Tuxedo Black Ink on the bee body. I stamped the wings image from the Bee My Valentine stamp set in Petal Pink Ink on top of the bee. I stamped the dotted image from the Bee My Valentine stamp set in Tuxedo Black Ink all around the panel. I adhered the Basic Whtie panel to a Petal Pink mat then to the inside of the Petal Pink card base.
To complete my card, I decorated a Basic White Medium Envelope. I stamped the bee image from the Bee My Valentine stamp set on the envelope front in Daffodil Delight, Petal Pink and Tuxedo Black Inks. I adhered a panel of Bee Mine DSP to the envelope flap.
Thank you for visiting by my blog today, I hope you liked my card and will give it a try. Now that you’ve seen my card, be sure to hop around to see everyone’s beautiful projects. Hit Previous to hop back to Ann Louise’s blog or hit Next to head over to Tara’s blog. You can also click on each of the names and hop around that way. I hope you enjoy seeing everyone’s projects. Happy Hopping!!
If you need any stamping supplies, I’d love to be your Demonstrator. Just click HERE to go directly to my online store or drop me an email if you have any questions.
MY CURRENT HOST CODE IS: D9EX7ZXG
Use this host code when placing an order with me. When you order $50 or greater you will receive a free gift from me! If your order is over $150, please do not use this code, but you’ll still get the free gift. The free gift is your choice of any 1 item valued up to $10.00 from the 2023-2024 Annual Catalog, the January-April 2024 Mini Catalog or from the Online Exclusives! Unfortunately, packs of cardstock are no longer an option for a free gift. Shipping has become too expensive to ship and it’s costing me as much to ship as the cardstock costs. For any orders $50 or more I will also send you my monthly class tutorials. Click HERE or go to my Customer Rewards for more details and to see what this month’s tutorials are.
Please remember to use my current Host Code and make sure that you can see my name on the final checkout page listed as your Demonstrator when you order so that you know that you’re ordering with me, and you’ll get my rewards!
In response to changing policies at Stampin’ Up – I’m adjusting my Ordering Gift policy as well. I’m having to get a little more tough on the adding of Host codes when you place your order thru my Online Store.
Not to worry – you’re still going to get that $10 ordering gift for orders of $50 (before shipping & tax) or greater. And the gift is still any 1 SU! product up to that $10 value – which includes some of our fun Host Sets!
But – if you DO NOT use the Host code for your orders of less than $150 (this is the RETAIL total before Shipping & Handling), then you’ll have two options:
You’ll need to call Stampin’ Up! (1-800-Stamp-Up) and ask them to add it for you. They’re very helpful and will get it done quickly! OR….
If your order was over the $50 threshold but under $150, then…you’ll forfeit that $10 ordering gift and rewards – this is the Bummer Option – and I REALLY don’t want to do this, SO please remember to add my Current Host Code.
New Joining Special Starting January 4 – February 29
Starter Kit Special during Sale-A-bration! Shop for up to $125 worth of anything you want, Pay $99 plus tax get FREE Shipping, and A FREE Stampin’ Glass Mat Studio!
The Stampin’ Glass Mat Studio is a paper crafter’s dream! The heavy-duty glass mat comes printed with a ruler and grid lines for easy measuring, while the large surface space gives ample room for spreading out while paper crafting. The safety-tempered glass has a heat and scratch resistant surface that wipes clean with the included cloth and water—no chemicals needed. The reusable cloth also cleans ink off your stamps! The nonslip, heat resistant, waterproof silicone mat features four palette squares for mixing custom ink colors or for holding small ink spots in place while crafting. Each component can be used separately, or you can use all three items together for a multipurpose paper crafting studio that’s both functional and elegant.
Option 2 – Instead of the Glass Mat Studio you can choose $125 worth of product PLUS an additional $30 worth of product of your choice when you join for $99. That’s a $155 value!
There is never an obligation to sell. You can join just to enjoy the discount for yourself along with all the other Demonstrator benefits. You get early access to all the upcoming catalogs along with being able to preorder. You can attend the OnStage Event and any other events Stampin’ Up! has. Unsure about this? Contact me at creativestampingdesigns@gmail.com and we can talk. Being a part of the Stampin’ Up! Community is one of the best decisions I’ve ever made. I have made many friends along the way while doing what I love, Paper Crafting. This Joining offer is only good during Sale-a-bration which starts January 4 and ends on February 29.
Create handmade cards for all the rockstars in your life with the Rock Legend Kit! This all-occasion paper crafting kit comes with everything you need to make cards that totally rock. Get crafting with die-cut paper pieces of electric guitars, lightning bolts, stars, and other awesome designs. Make eight cards (four each of two designs) with bold colors and preprinted sentiments to celebrate birthdays and more!
Kit includes: *Predesigned projects *Step-by-step instructions *Precut pieces (No prep work! Get right to crafting) *Printed sentiment labels in Dutch, English, French, and German *Makes 8 cards: 4 each of 2 designs *Folded card size: 5-1/2″ x 4-1/4″ (14 x 10.8 cm) *8 preprinted envelopes *Enough adhesive to complete projects *Adhesive-Backed Star Embellishments *A 9-7/8″ x 6-1/2″ x 1-3/4″ (25.1 x 16.5 x 4.4 cm) printed designer box for storage or crafting on the go
Product colors: Basic Black, Coastal Cabana, Crumb Cake, Crushed Curry, Real Red
Send adorable cards filled with love with the Panda Friends Kit! These irresistible pandas are perfect for celebrating love and friendship throughout the year. This kit includes cards in two different sizes to keep your crafting versatile and fresh. Use the preprinted sentiments to make quick multiples and send happy hello greetings to those you care about!
Kit includes: *Predesigned projects *Step-by-step instructions *Precut pieces (No prep work! Get right to crafting) *Printed sentiment labels in Dutch, English, French, and German *Makes 8 cards: 4 each of 2 designs *Folded card size: 4-1/4″ x 5-1/2″ (10.8 cm x 14 cm), 8-1/2″ x 3-1/2″ (21.6 cm x 8.9 cm) *8 preprinted envelopes *Enough adhesive to complete all projects *Iridescent Sequin Embellishments *A 9-7/8″ x 6-1/2″ x 1-3/4″ (25.1 x 16.5 x 4.4 cm) printed designer box for storage or crafting on the go.
Make love-themed cards for special occasions, Valentine’s Day, anniversaries, and more!
This kit includes: • Makes 8 cards: 4 each of 2 designs with 8 coordinating envelopes • 4 bonus tags that punch out from the card front • Precut paper pieces and linen thread • Coordinating colors: Garden Green, Pretty Peacock, Lost Lagoon, Highland Heather, Gorgeous Grape (Classic Stampin’ Spot), Berry Burst
Don’t miss the coordinatingLove of Spring Dies add-on!
The dies will coordinate with the January, February and March Paper Pumpkin Kit.
The Love of Spring Dies Add-On—available only while supplies last!
Item # 164396 $12.00
This exclusive add-on coordinates with the three upcoming kits! Paper Pumpkin subscribers can purchase it beginning 11 December. The add-on is available only while supplies last, so it’s best to shop early!
Subscribe to the January Paper Pumpkin Kit between 11 December and 10 January by clicking here!
Note: Supplies may be limited toward the end of the subscription period.
Good Saturday morning stamping friends and welcome to the weekend. I hope you have some fun plans in the works. I’ll be working today and tomorrow we have out quarterly meeting that I’ll be going to.
I played with a new set from the upcoming January-April 2024 Mini Catalog for today’s card. This is such an adorable suite. I just received my catalog in the mail yesterday. There’s something about having a printed copy in front of me that I just love. I love the idea of being able to flip back and forth between pages to see things. I’ll be ordering my catalogs for my customers on Tuesday and packing them up and shipping them out as soon as I get them. Here’s my card for today.
I used the Stampin’ Up! Bee My Valentine Bundle and Bee Mine Designer Series Paper for my card today. These items will be available for purchase starting January 4th.
I started by adhering the beehive panel of Bee Mine DSP to the top of the Basic White panel using Stampin’ Seal. I adhered the plaid panel of Bee Mine DSP to the bottom of the Basic White panel using Stampin’ Seal. I adhered the layered panel to the Basic White Thick card base using Stampin’ Dimensionals.
On a panel of Pool Party, I stamped the sentiment from the Stampin’ Up! Bee My ValentinePhotopolymer Stamp Set in Versamark Ink. I sprinkled it with Black Embossing Powder and set it using the Heat Tool. I stamped the dotted image from the Bee My Valentine stamp set in Pool Party Ink on the top and bottom of the panel. I adhered the sentiment panel to the card front using Stampin’ Dimensionals.
On a small panel of Basic White, I stamped the bumble bee image from the Bee My Valentine stamp set in Daffodil Delight Ink. I stamped the bees’ strips and face from the Bee My Valentine stamp set in Tuxedo Black Ink over the bee image. I cut the image out using the Bee Builder Punch. I stamped the antenna image from the Bee My Valentine stamp set in Tuxedo Black Ink on the panel and cut them out using the Bee Builder Punch. I stamped the wings image from the Bee My Valentine stamp set in Pool Party Ink on a panel of Vellum paper. I cut the wings out using the Bee Builder Punch. I adhered the antenna and wings to the back of the bee using Glue Dots. I adhered the bee to the card front using Stampin’ Dimensionals. I tied a small bow using the Sweet Sorbet 1/4″ Bordered Ribbon (part of the Bee Mine Suite available in January) and adhered it to the card front using a Glue Dot. I added a few Adhesive-Backed Hearts & Flowers to the card front.
On the inside, I stamped the sentiment from the Bee My Valentine stamp set in Tuxedo Balck Ink on a panel of Basic White. I stamped the dotted image from the Bee My Valentine stamp set in Pool Party Ink on either side of the panel. I adhered the Basic White panel to a Pool Party mat then to the inside of the Basic White Thick card base.
To finish my card, I decorated a Basic White Medium Envelope. I stamped the bumble bee image from the Bee My Valentinestamp set on the envelope front in Daffodil Delight Ink. I stamped the bees’ stripes, wings antenna and face images from the Bee My Valentine stamp set in Tuxedo Black Ink. I adhered a panel of Bee Mine DSP to the envelope flap.
Thank you for stopping by my blog today. I hope you like the card, and this might happen to be a suite that’s on your wish list for the new catalog when it goes live on January 4th. Happy Stamping!!
If you need any stamping supplies, I’d love to be your Demonstrator. Just click HERE to go directly to my online store or drop me an email if you have any questions.
MY CURRENT HOST CODE IS: SMAQYYMJ
Use this host code when placing an order with me. When you order $50 or greater you will receive a free gift from me! If your order is over $150, please do not use this code, but you’ll still get the free gift. The free gift is your choice of any 1 item valued up to $10.00 from the 2023-2024 Annual Catalog! Unfortunately, packs of cardstock are no longer an option for a free gift. Shipping has become too expensive to ship and it’s costing me as much to ship as the cardstock costs. For any orders $50 or more I will also send you my monthly class tutorials. Click HERE or go to my Customer Rewards for more details and to see what this month’s tutorials are.
Please remember to use my current Host Code and make sure that you can see my name on the final checkout page listed as your Demonstrator when you order so that you know that you’re ordering with me, and you’ll get my rewards!
In response to changing policies at Stampin’ Up – I’m adjusting my Ordering Gift policy as well. I’m having to get a little more tough on the adding of Host codes when you place your order thru my Online Store.
Not to worry – you’re still going to get that $10 ordering gift for orders of $50 (before shipping & tax) or greater. And the gift is still any 1 SU! product up to that $10 value – which includes some of our fun Host Sets!
But – if you DO NOT use the Host code for your orders of less than $150 (this is the RETAIL total before Shipping & Handling), then you’ll have two options:
You’ll need to call Stampin’ Up! (1-800-Stamp-Up) and ask them to add it for you. They’re very helpful and will get it done quickly! OR….
If your order was over the $50 threshold but under $150, then…you’ll forfeit that $10 ordering gift and rewards – this is the Bummer Option – and I REALLY don’t want to do this, SO please remember to add my Current Host Code.
January-April 2024 Mini Catalog Paper Shares Ordering Is Open
Do you want all of the gorgeous new Designer Series Papers in the Stampin’ Up! January-April 2024 Mini Catalog but can’t afford everything? I’m doing a Designer Series Paper Share! What is a Paper Share you ask? It’s a sample of each of the new Designer Series Papers from the Stampin’ Up! January-April 2024 Minil Catalog. If you were to purchase all of the DSP in the new Mini Catalog, it would cost you $108.00 plus shipping.
New Designer Series Paper Share – $15.00 plus $8.50 for Priority Mail Shipping
I’m offering a Designer Series Paper share from the Stampin’ Up! January-April 2024 Mini Catalog and I’d love to have you join!! I’m placing my share order early on January 4th. I’m going to use the expedited shipping option so I should be able to have the shares cut, bundled and back out to you during the week of January 15th.
How my shares work: I order full packs of all of the Designer Series Papers listed below, I cut them into 6″ x 6″ pieces (or 6″ x 12″ pieces for double shares) and give you one panel of each design from each pack on the list. I pack up the paper in a cellophane bag with labels listing the Name, Item # and Colors in the pack and mail it back out to you just as quickly as I can! Shares give you a good working sample of all of the papers so that you can decide which ones to order in full packs!
New Designer Series Paper Share – $15.00 plus $8.50 for Priority Mail shipping
You will receive one 6×6 sheet of each design from the following DSP packs (the number after the name indicates how many 6×6 sheets of that paper pack you will receive):
Bee Mine – 6
Forever Love – 6
Just Kiddin’ -6
Light Than Air 6″ X 6″ – 8
Nature’s Sweetest – 6
Perennial Lavender – 6
Poetic Expressions – 6
Rock & Roll – 6
In all, you’ll receive 50 – 6” x 6” sheets of designer or specialty paper!
Double DSP Share – $30 + $8.50 Shipping by Priority Mail – if you’d like double shares of the designer paper, I’m offering those too! I’ll cut the 12″ x 12″ designer paper sheets into 6″ × 12″ so that you’ll be able to get 3 full A2 size card fronts from each sheet and you’ll get double sheets of the 6″ x 6″ since they’re already precut.
As a Thank you gift for joining in on my paper share, I will be including a sampling of some of the new Sale-a-bration DSP that will be available with qualifying orders. I believe there are 5 different DSPs in the Sale-a-bration catalog. I’m not sure yet which ones I’ll be including, it might be 1, 3 or all 5.
Anyone is welcome to join in my share (please note, I can only ship to addresses within the US). If you’d like to join, email the following information to creativestampingdesigns@gmail.com
Your first and last name
Your mailing address for paper to be shipped to.
The email address that is connected to your PayPal account or let me know if you’d like to use Zelle. I will accept Zelle or PayPal for payment. ***You do not need to have a PayPal account to pay the invoice, you can choose to pay by credit card without having a PayPal account. If you’d like to use Zelle, email me and I’ll give you the number associated with my account.
Deadline to sign up for my share is Tuesday, January 2nd at 5:00 PM ET.
January – April 2024 Mini Catalog and Sale-a-bration Coming Soon
With the Retiring List posted and the Last Chance Sale going on that means a new catalog will be arriving soon. Are you a current customer of mine? If you have placed an order with me in the past year of $50 or more, you will automatically be receiving a copy of the catalogs as soon as I receive them. I’ll be ordering them the beginning of December and will ship them out to you as soon as I get them.
If you are not a customer of mine and would like to be, place an order from my Online Store and a catalog will be on its way to you as soon as I receive them. If you are not sure, please feel free to drop me a line at creativestampingdesigns@gmail.com and I will be happy to let you know.
Stampin’ Up! September-December 2023 Mini Catalog Retiring List and Last Chance Products Sale Going On
The September -December 2023 Mini Catalog will be coming to an end soon. It’s always a bittersweet time when a catalog ends and we have to say goodbye to items we love. It’s also an exciting time because a new catalog will be starting.
Starting November 21, 2023 through January 3, 2024 some of your favorite Stampin’ Up! products from the mini catalog will be on sale for up to 60% off. Click Here to view the Last Chance Products in a printable PDF.
You can find the items that will be carrying over from the September -December 2023 Mini Catalog by Clicking Here.
Get those shopping lists ready and start shopping early so you don’t miss out on items you’ve been wanting. Don’t forget the retiring items are only available While Supplies Last!!
Go check out my Online Store for the NEW Online Exclusive products available. Get those orders placed early so you don’t miss out on the pretty new suite and new bundles.
Send a wish to all your loved ones with the December Paper Pumpkin Kit! It comes with nine card fronts, three each of three designs, and nine coordinating envelopes. It has paper pieces detailed with gold foil, embellishments, an all-occasion stamp set, and an acetate box where you can store your finished cards! You can gift the kit itself or the finished product in the acetate box; either way, it’s the perfect last-minute gift for any occasion.
The paper pieces in the December Paper Pumpkin kit have gold foil detailing. Whether it’s an elegant boarder, or woven into the floral artwork, it’s a detail that will surely catch your recipient’s eye! It’s the perfect way to take any paper craft to the next level.
The beauty of the December Paper Pumpkin Kit lies in the hand drawn artwork. The bright blue skies and elegant yellow flowers compliment the different design elements perfectly. It’s a simple yet sophisticated design that will catch any recipient’s eye!
This kit includes:
9 cards; 3 each of 3 designs.
9 coordinating envelopes.
1 Acetate box to fit cards and envelopes from the kit.
1 Pebbled Path Stampin’ Spot.
1 photopolymer stamp set.
Embellishments.
Specialty gold foil die cuts.
Enough adhesive to finish the project.
Finished card size: 4-1/4″ x 5-1/2″ (10.8 x 14 cm)
Good Wednesday morning stamping friends. We’re halfway through the week already. Time is just flying by too quickly.
This past Saturday was out Virtual OnStage At Home event. It’s kind of like a convention that Stampin’ Up! has every year. We get to do some make and takes, listen to what’s going on with Stampin’ Up! and BEST OF All we get to see the new upcoming January-April 2024 Mini Catalog. Can I tell you how awesome it is. My list is growing every time I look at it. We also got to see the January-February Sale-A-Bration catalog that’s filled with lots of FREE goodies. Today’s card is one that we made durint the event. I did my own thing as we went along. Here’s my card for today.
I used the Stampin’ Up! Bee My Valentine Bundle along with the Bee Mine Designer Series Paper for my card today. These items will be available starting January 4, 2024.
I started by stamping the honeycomb image from the Stampin’ Up! Bee My Valentine Photopolymer Stamp Set on a panel of Daffodil Delight in Daffodil Delight Ink. I adhered the 2 panels of Bee Mine DSP to the panel using Liquid Glue. I adhered the layered panel to a Daffodil Delight card base using Stampin’ Dimensionals.
On the panel of Basic Whtie Thick cardstock, I stamped the bee stripes and antenna images from the Bee My Valentine stamp set in Tuxedo Black Ink. I I punched the images out using the Bee Builder Punch. I stamped the bees face image from the Bee My Valentine stamp set in Tuxedo Balck Ink on the punched-out bee. On the panel of Vellum Paper, I stamped the wing image from the Bee My Valentine stamp set 2 times and let it dry. I cut the wings out using the Bee Builder Punch. I adhered the antenna and wings to the back of the bee using Glue Dots. I colored the bees body using the Daffodil Delight Stampin’ Blends Markers. I adhered the bee to the card front using Stampin’ Dimensionals.
On a strip of Basic White, I stamped the sentiment from the Bee My Valentine stamp set in Sweet Sorbet Ink. I cut the strip on an angle using Paper Snips. I adhered the sentiment to the card front using Stampin’ Dimensionals. I added a small heart from the Adhesive-Backed Hearts & Flowers to the card front.
On the inside, I stamped the sentiment from Bee My Valentine stamp set in Sweet Sorbet Ink on a panel of Basic White. I stamped the honeycomb image from the Bee My Valentine stamp set in Daffodil Delight Ink in the corners. I adhered the Basic White panel to a Sweet Sorbet mat then to the inside of the Daffodil Delight card base.
To finish my card, I decorated a Basic White Medium Envelope. I stamped the honeycomb image from the Bee My Valentine stamp set in Daffodil Delight Ink on the envelope front. I adhered a panel of Bee Mine DSP to the envelope flap.
Thank you for stopping by my blog today. I hope you like the card, and this bundle might be going on your wish list to order from the January-April 2024 Mini Catalog starting in January. Happy Stamping!!
If you need any stamping supplies, I’d love to be your Demonstrator. Just click HERE to go directly to my online store or drop me an email if you have any questions.
MY CURRENT HOST CODE IS: BX4UV6HE
Use this host code when placing an order with me. When you order $50 or greater you will receive a free gift from me! If your order is over $150, please do not use this code, but you’ll still get the free gift. The free gift is your choice of any 1 item valued up to $10.00 from the 2023-2024 Annual Catalog! Unfortunately, packs of cardstock are no longer an option for a free gift. Shipping has become too expensive to ship and it’s costing me as much to ship as the cardstock costs. For any orders $50 or more I will also send you my monthly class tutorials. Click HERE or go to my Customer Rewards for more details and to see what this month’s tutorials are.
Please remember to use my current Host Code and make sure that you can see my name on the final checkout page listed as your Demonstrator when you order so that you know that you’re ordering with me, and you’ll get my rewards!
In response to changing policies at Stampin’ Up – I’m adjusting my Ordering Gift policy as well. I’m having to get a little more tough on the adding of Host codes when you place your order thru my Online Store.
Not to worry – you’re still going to get that $10 ordering gift for orders of $50 (before shipping & tax) or greater. And the gift is still any 1 SU! product up to that $10 value – which includes some of our fun Host Sets!
But – if you DO NOT use the Host code for your orders of less than $150 (this is the RETAIL total before Shipping & Handling), then you’ll have two options:
You’ll need to call Stampin’ Up! (1-800-Stamp-Up) and ask them to add it for you. They’re very helpful and will get it done quickly! OR….
If your order was over the $50 threshold but under $150, then…you’ll forfeit that $10 ordering gift and rewards – this is the Bummer Option – and I REALLY don’t want to do this, SO please remember to add my Current Host Code.
Stampin’ Up! let us know about the upcoming sale starting Tuesday November 14th through Thursday November 16th. Take advantage of this sale by stocking up on items that you use for every handmade craft!
Create more by spending less during the Seasonal Sale! Between 14–16 November, you can get select products from the 2023–2024 Annual Catalog up to 20% off. Have your eye on something from our new color collection? Don’t miss your opportunity to shop the colors you’ve been craving during this phenomenal sale!
You can stock up on supplies for all your upcoming handmade projects or embrace the season of giving and buy something for your fellow crafting enthusiasts. Make sure to act quickly on this limited time only deal!
Sales Period: November 14 – 16 2023
10% off ribbons and trims.
15% off inks, including pads, refills, markers, and Blends. Bundles are not included.
20% off papers, including cardstock, specialty paper, and Designer Series Paper.
Shop online to see the full selection of discounted products available. This is a limited time offer.
Discounts are automatically applied when sale items are added to any order, including Starter Kits.
Please keep in mind that due to the high volume of orders, the distribution center may fall behind our typical shipping timeframes. We will do everything we can to return to our regular service levels as quickly as possible.
Please note: Some items may sell out due to high demand. The discount will automatically be applied to qualifying items that are in stock. Per our updated policy, backorders are not available.
Go check out my Online Store for the NEW Online Exclusive products available. Get those orders placed early so you don’t miss out on the pretty new suite and new bundles.
Plan a crafting getaway today with the all-inclusive The Best Destination Kit! This kit lets you make nine tri-fold cards with a colorful, nostalgic, travel vibe. Resort-hopping was never so easy!
This month’s kit includes:
Enough supplies to create 9 cards—3 each of 3 designs
9 coordinating envelopes
Best Destination Photopolymer Stamp Set
One Gorgeous Grape Ink Spot
Printed card bases, printed die cuts, adhesive, embellishments, and a clear block
Finished card size: 5-1/2″ x 4-1/4″ (14 x 10.8 cm)
Send a wish to all your loved ones with the December Paper Pumpkin Kit! It comes with nine card fronts, three each of three designs, and nine coordinating envelopes. It has paper pieces detailed with gold foil, embellishments, an all-occasion stamp set, and an acetate box where you can store your finished cards! You can gift the kit itself or the finished product in the acetate box; either way, it’s the perfect last-minute gift for any occasion.
The paper pieces in the December Paper Pumpkin kit have gold foil detailing. Whether it’s an elegant boarder, or woven into the floral artwork, it’s a detail that will surely catch your recipient’s eye! It’s the perfect way to take any paper craft to the next level.
The beauty of the December Paper Pumpkin Kit lies in the hand drawn artwork. The bright blue skies and elegant yellow flowers compliment the different design elements perfectly. It’s a simple yet sophisticated design that will catch any recipient’s eye!
This kit includes:
9 cards; 3 each of 3 designs.
9 coordinating envelopes.
1 Acetate box to fit cards and envelopes from the kit.
1 Pebbled Path Stampin’ Spot.
1 photopolymer stamp set.
Embellishments.
Specialty gold foil die cuts.
Enough adhesive to finish the project.
Finished card size: 4-1/4″ x 5-1/2″ (10.8 x 14 cm)
Good Friday morning stamping friends and welcome to my Fun Fold Friday. Are you all ready for the weekend. I’ll be prepping all day today for next weekend’s retreat and my Stamp Camp Card Class that I’ll be having the day after I et home from the retreat.
Today’s card I made on YouTube Live on Wednesday. If you were able to join me or watched the replay, thank you. If you’d like to watch my video and stamp along, the measurements are below, just above the supply list, along with the link to my YouTube channel. Here is my card for today.
I used the Online Exclusive Stampin’ Up! Fluffiest Friends Bundle (available November 7th) along with the Stampin’ Up! Bee My Valentine Photopolymer Stamp Set and Bee Mine Designer Series Paper (available in the January-April 2024 Mini Catalog), Stampin’ Up! Zany Zoo Cling Stamp Set and Stylish Shapes Dies for my card today.
I started by scoring and folding a Pool Party card base. The 3″, 7 1/2″ & 10″ score lines are all Mountain folds. The 6″ & 9 ” score lines are Valley folds. I adhered the 3 panels of Bee Mine DSP to the card base using Multipurpose Liquid Glue.
I adhered the 3 Sweet Sorbet panels to the 3 coordinating Petal ink mats using Stampin’ Seal. I adhered the 3″ diamond to the center back, butting the corner right in the center fold. I lined the 2 3/4″ diamond in the center folded area and 2 1/2″ diamond on the front folded panel, lining up all 3 diamonds.
On a panel of Basic White, I stamped the bear, cat and hamster images from the Stampin’ Up! Fluffiest Friends Cling Stamp Set in tuxedo Black Ink. I colored all the images using Copper Clay, Crumb Cake, Daffodil Delight, Ivory, Lemon Lime Twist, Natural Tones, Petal pink, Pool party, Smoky Slate and Sweet Sorbet Stampin’ Blends Markers. I cut all the images out using the Fluffiest Friends Dies. Using Glue Dots, I adhered the bear to the back panel, cat to the center and hamster to the front panel.
I cut 6 pieces of grass from a panel of Lemon Lime Twist using the Fluffiest Friends Dies. On the Basic White panel, I stamped the sentiments from the Zany Zoo stamp set in tuxedo Black Ink. I cut the sentiments out using the Stylish Shapes Dies. I adhered the grass die cuts below the animals using Stampin’ Dimensionals. I adhered the sentiments to the 1st and center images using Stampin’ Dimensionals. I added a few Adhesive-Backed Hearts & Flowers (available January 2024) to the sentiments.
On the inside, I stamped the sentiment from the Bee My Valentine stamp set in Tuxedo Black Ink. I stamped the bunny image from the Fluffiest Friends stamp set on the bottom of the panel in Tuxedo Black Ink. I colored the image using Lemon Lime Twist, Petal Pink, Smoky Slate & Sweet Sorbet Stampin’ Blends Markers. I adhered the Basic White panel to a Petal Pink mat then to the inside of the Pool Party card base.
To finish my card, I decorated a Basic White Medium Envelope. I stamped the bunny and hamster image from the Fluffiest Friends stamp set in Tuxedo Black Ink on the envelope front. I colored the images with Lemon Lime Twist, Naturals Tone, Petal Pink, Pool Party, Smoky Slate & Sweet Sorbet Stampin’ Blends Markers. I adhered a panel of Bee Mine DSP to the envelope flap.
Thank you for stopping by my blog today. I hope you liked my card and will give it a try. I hope you will CASE this card and please feel free to post it in the comments of my Facebook page under my post. I’d love to see your take on the card. The list of measurements are below if you’d like to stamp along while watching the video. You can watch my video on my YouTube Channel Here.
If you watch this on my YouTube channel, please remember to subscribe so that you will get notified when a new video goes live. Thank you to those that have subscribed already. Happy Stamping!!
If you need any stamping supplies, I’d love to be your Demonstrator. Just click HERE to go directly to my online store or drop me an email if you have any questions.
MY CURRENT HOST CODE IS: WRAGYZRS
Use this host code when placing an order with me. When you order $50 or greater you will receive a free gift from me! If your order is over $150, please do not use this code, but you’ll still get the free gift. The free gift is your choice of any 1 item valued up to $10.00 from the 2023-2024 Annual Catalog! Unfortunately, packs of cardstock are no longer an option for a free gift. Shipping has become too expensive to ship and it’s costing me as much to ship as the cardstock costs. For any orders $50 or more I will also send you my monthly class tutorials. Click HERE or go to my Customer Rewards for more details and to see what this month’s tutorials are.
Please remember to use my current Host Code and make sure that you can see my name on the final checkout page listed as your Demonstrator when you order so that you know that you’re ordering with me, and you’ll get my rewards!
In response to changing policies at Stampin’ Up – I’m adjusting my Ordering Gift policy as well. I’m having to get a little more tough on the adding of Host codes when you place your order thru my Online Store.
Not to worry – you’re still going to get that $10 ordering gift for orders of $50 (before shipping & tax) or greater. And the gift is still any 1 SU! product up to that $10 value – which includes some of our fun Host Sets!
But – if you DO NOT use the Host code for your orders of less than $150 (this is the RETAIL total before Shipping & Handling), then you’ll have two options:
You’ll need to call Stampin’ Up! (1-800-Stamp-Up) and ask them to add it for you. They’re very helpful and will get it done quickly! OR….
If your order was over the $50 threshold but under $150, then…you’ll forfeit that $10 ordering gift and rewards – this is the Bummer Option – and I REALLY don’t want to do this, SO please remember to add my Current Host Code.
Final Days for the Joining Special October 3 – October 31
If you’ve been thinking about joining the Stampin’ Up! community October is the perfect time. You can add new Online Exclusive products to your Starter Kit, and still have more money to spend. This is really an awesome deal and I’d love to have you on my team. The added free registration to OnStage is a great bonus and then you can order the Bee Mine Suite collection for your 1st order.
We want to celebrate our 35th anniversary in style! From October 3 – October 31, anyone who joins our fun crafting community as a new demonstrator can choose either 35% OFF the cost of their Starter Kit or get 35% MORE product with their Starter Kit! What a deal!
Promotion Period: 3–31 October
New demonstrators can choose one of the following options for your Starter Kit:
Option 1: Get 35% OFF the normal cost of a Stampin’ Up! Starter Kit. Those who select this option will receive $125 USD worth of product for only $64.35 USD!
Option 2: Get 35% MORE product with their Starter Kit. Those who select this option will receive $168.75 USD worth of product by spending $99 USD!
No matter which option you choose for your Starter Kit, both provide free business supplies and free shipping on your Starter Kit—not to mention all the fun that comes with being part of Stampin’ Up!
FREE OnStage @Home Registration
It gets better! Those who sign up for a Starter Kit during this offer will also be automatically registered for FREE* to our virtual OnStage event on 11 November—a $77 USD value!
Those who sign up for this offer have the opportunity to watch the event independently, gathered together with other demonstrators, or with their Team Leader.
Demonstrators who join during this promotion will be automatically added to the OnStage attendees; they do not need to register separately.
Demonstrators who join during this promotion will also receive an email with all the information about this event.
*Please note that free registration will not include the gift box.
Stampin’ Up! events are always SO much fun!! Bonus that you can join and attend your first even for free!!
Come join my team.
We welcome all types of Demonstrators from those only purchasing to get the discount for themselves to those who want to run a business and anywhere in between! There’s never any pressure to sell! We’re a group that loves to stamp and share what you create. Demonstrators get lots of perks including at least a 20% discount on all orders that you place as a Demonstrator, invitations to Stampin’ Up! Demonstrator events and preordering from upcoming catalogs and promotions (like the new Online Exclusives coming in November!!)! The new Online Exclusive items ARE available to pick as part of your Starter Kit (or you can order them later and get your 20% discount!).
Light up the Christmas season with this month’s Paper Pumpkin kit! With traditional Christmas home designs and warm Christmas wishes, spread the light of Christmas with a gift box. Plus, you can get the Warm Wishes Cards & Envelopes Add-On to take your Christmas crafting even further (available while supplies last). This month’s kit coordinates with the October Home for the Holidays Paper Pumpkin Kit! If you can’t get enough of this traditional Christmas scene and need more cozy crafts, then make sure to check the October Refill’s availability and spend more time crafting this holiday season!
This month’s kit comes with everything you need to make traditional Christmas treat packaging boxes that you can fill up with all sorts of small goodies, treats, gifts, and more. Subscribe today so you can take part in spreading the light of Christmas around you!
This kit includes:
8 boxes; 4 each of 2 designs
1 Mossy Meadow Stampin’ Spot
Iridescent glitter accents on paper
Precut paper pieces
Linen thread
Treat bags
Warm Wishes photopolymer stamp set
Completed box size: 4-1/4″ x 4-1/2″ x 1-1/2″ (10.8 x 11.4 x 3.8 cm) and 4/1/4″ x 3-3/4″ x 1-1/2″ (10.8 x 9.5 x 3.8 cm)
Coordinating Stampin’ Up! colors: Balmy Blue, Blueberry Bushel, Cherry Cobbler, Crushed Curry, Daffodil Delight, Lemon Lolly, Mossy Meadow, Night of Navy, Old Olive, Pecan Pie, Real Red
ADD-ON DETAILS
Warm Wishes Cards & Envelopes Available for purchase starting 11 October; only while supplies last. Item number: 163985 $14.00 USD
This add-on includes: • 20 Cards & Envelopes • Iridescent glitter accents on paper • Folded card size: 5″ x 7″ (12.7 x 17.8 cm)
Subscribe to the November Paper Pumpkin Kit between 11 October and 10 November by clicking here!
Note: Supplies may be limited toward the end of the subscription period.
Good Sunday morning stamping friends. I hope you are all having a wonderful weekend. Were you able to join us for our World Card Making Day presentations yesterday? How about the Stampin’ Up! event? I was glued to my computer all day yesterday.
Today’s card I made on our Facebook Live event yesterday. If you were able to join me or watched the replay, thank you. If you’d like to watch my video and stamp along, the measurements are below, just above the supply list, along with the link to my YouTube channel. Here is my card for today.
I used the new Online Exclusive Stampin’ Up! Fluffiest Friends Bundle which will be available to customers starting in November. I used the Stampin’ Up! Bee My Valentine Photopolymer Stamp Set and Bee Mine Designer Series Paper, which will be available in the January-April 2024 Mini Catalog. Lastly, I used the Stampin; Up! Happy Labels Photopolymer Stamp Set for my card today.
I started by adhering a panel of Bee Mine DSP to a Petal Pink card base using Multipurpose Liquid Glue. Using the Fluffiest Friends Dies, I cut the hive from the center of another panel of Bee Mine DSP. I adhered pieces of the Foam Adhesive Sheet to the back of the die cut DSP. Using the Fluffiest Friends Dies I cut the beehive from a panel of Daffodil Delight, the leaves & grass from a panel of Granny Apple Green and the branch from a panel of Pecan Pie.
On the larger panel of Basic White, I stamped the bee image from the Stampin’ Up! Fluffiest Friends Cling Stamp Set in Tuxedo Black Ink. I colored the bees using Daffodil Delight Stampin’ Blends Markers and Clear Wink Of Stella on the wings. On the smaller panel of Basic Whtie, I stamped the bear image from the Fluffiest Friends stamp set. I colored the bear using Crumb Cake, Daffodil Delight, Ivory and Sweet Sorbet Stampin’ Blends Markers. I cut the image out using the Fluffiest Friends Dies.
I adhered the die cut grass to the inside of the die cut hive panel using Multipurpose Liquid Glue. I adhered the beehive and leaves to the tree branch using Multipurpose Liquid Glue. I adhered the Basic Whtie panel (with the bees stamped on it) to the center of the card front. I adhered the die cut DSP panel on top of the Basic White panel. I adhered the bear inside the hive, behind the grass using Multipurpose Liquid Glue. I adhered the branch to the top of the panel using Stampin’ Dimensionals. I stamped the sentiment from the Bee My Valentine stamp set on a strip of Basic White in Sweet Sorbet Ink. I cut the ends on an angle. I adhered the sentiment using Stampin’ Dimensionals.
On the inside, I stamped the sentiment from the Happy Labels stamp set in Sweet Sorbet Ink on a panel of Basic White. I stamped the bee image from the Fluffiest Friends stamp set in Tuxedo Black Ink on either side of the sentiment. I colored the bees using Daffodil Delight Stampin’ Blends Markers and Clear Wink of Stella for the wings. I adhered the Basic White panel to a Sweet Sorbet mat then to the inside of the Petal Pink card base.
To complete my card, I decorated a Basic White Medium Envelope. I stamped the bear & bee images from the Fluffiest Friends stamp set in Tuxedo Black Ink on the envelope front. I colored the images the same as I did for the card. I adhreed a panel of Bee Mine DSP to the envelope flap.
Thank you for stopping by my blog today. These products will be available in November and January unless you would like to join as a demonstrator, and you can get them early. If you are interested in joining, you can add the Online Exclusive items to your starter kit. Stampin’ up will register you for the OnStage event in November and you can purchase the Bee My Valentine Bundle with your first order. Information about joining is below. The list of measurements are below if you’d like to stamp along while watching the video. You can watch my video on my YouTube Channel Here. You can also watch the video on our World Card Making Day Facebook page Here.
If you watch this on my YouTube channel, please remember to subscribe so that you will get notified when a new video goes live. Thank you to those that have subscribed already. Happy Stamping!!
If you need any stamping supplies, I’d love to be your Demonstrator. Just click HERE to go directly to my online store or drop me an email if you have any questions.
MY CURRENT HOST CODE IS: WRAGYZRS
Use this host code when placing an order with me. When you order $50 or greater you will receive a free gift from me! If your order is over $150, please do not use this code, but you’ll still get the free gift. The free gift is your choice of any 1 item valued up to $10.00 from the 2023-2024 Annual Catalog! Unfortunately, packs of cardstock are no longer an option for a free gift. Shipping has become too expensive to ship and it’s costing me as much to ship as the cardstock costs. For any orders $50 or more I will also send you my monthly class tutorials. Click HERE or go to my Customer Rewards for more details and to see what this month’s tutorials are.
Please remember to use my current Host Code and make sure that you can see my name on the final checkout page listed as your Demonstrator when you order so that you know that you’re ordering with me, and you’ll get my rewards!
In response to changing policies at Stampin’ Up – I’m adjusting my Ordering Gift policy as well. I’m having to get a little more tough on the adding of Host codes when you place your order thru my Online Store.
Not to worry – you’re still going to get that $10 ordering gift for orders of $50 (before shipping & tax) or greater. And the gift is still any 1 SU! product up to that $10 value – which includes some of our fun Host Sets!
But – if you DO NOT use the Host code for your orders of less than $150 (this is the RETAIL total before Shipping & Handling), then you’ll have two options:
You’ll need to call Stampin’ Up! (1-800-Stamp-Up) and ask them to add it for you. They’re very helpful and will get it done quickly! OR….
If your order was over the $50 threshold but under $150, then…you’ll forfeit that $10 ordering gift and rewards – this is the Bummer Option – and I REALLY don’t want to do this, SO please remember to add my Current Host Code.
Time to stock up and save on your favorite Stampin’ Up! products! What’s the big occasion? From 9–11 October, we are offering FREE shipping on orders subtotaling $75 USD or more. This incredible deal lasts for three days only, so don’t miss out!
Here are the details:
Free shipping offer begins: October 9 at 12:01 AM MT
Ordering Deadline: October 11 at 11:59 PM MT
Free shipping applies after the qualifying amount has been met.
The minimum qualifying amount to receive free shipping is $75 or more (before tax).
Free shipping only applies during the three-day period the promotion is live in each market; this means that the order must be opened and closed between October 9-11.
With the exception of a one-time monthly Paper Pumpkin subscription, all Stampin’ Up! products qualify for the promotion. Subscriptions billed and shipped this month will be charged for the normal amount ($24.50 shipping included) + tax.
Prepaid 3, 6, or 12 month Paper Pumpkin subscriptions are eligible for FREE shipping under the same rules as all other Stampin’ Up! items during the promotion.
The free shipping promotion does not cover the additional cost for expedited shipping.
Please keep in mind, that with any product launch, the distribution center may fall behind our typical shipping timeframes.
If you have any questions, please feel free to contact me at: creativestampingdesigns@gmail.com
If you’ve been thinking about joining the Stampin’ Up! community October is the perfect time.
We want to celebrate our 35th anniversary in style! From October 3 – October 31, anyone who joins our fun crafting community as a new demonstrator can choose either 35% OFF the cost of their Starter Kit or get 35% MORE product with their Starter Kit! What a deal!
Promotion Period: 3–31 October
New demonstrators can choose one of the following options for your Starter Kit:
Option 1: Get 35% OFF the normal cost of a Stampin’ Up! Starter Kit. Those who select this option will receive $125 USD worth of product for only $64.35 USD!
Option 2: Get 35% MORE product with their Starter Kit. Those who select this option will receive $168.75 USD worth of product by spending $99 USD!
No matter which option you choose for your Starter Kit, both provide free business supplies and free shipping on your Starter Kit—not to mention all the fun that comes with being part of Stampin’ Up!
FREE OnStage@Home Registration
It gets better! Those who sign up for a Starter Kit during this offer will also be automatically registered for FREE* to our virtual OnStage event on 11 November—a $77 USD value!
Those who sign up for this offer have the opportunity to watch the event independently, gathered together with other demonstrators, or with their Team Leader.
Demonstrators who join during this promotion will be automatically added to the OnStage attendees; they do not need to register separately.
Demonstrators who join during this promotion will also receive an email with all the information about this event.
*Please note that free registration will not include the gift box.
Stampin’ Up! events are always SO much fun!! Bonus that you can join and attend your first even for free!!
I’d Love to have you on my team
If you’d like to join my team, I’d love to have you! Once you join, you’ll get at least a 20% discount on all of your Stampin’ Up! purchases and you can preorder from the upcoming catalogs!
We welcome all types of Demonstrators from those only purchasing to get the discount for themselves to those who want to run a business and anywhere in between! There’s never any pressure to sell! We’re a group that loves to stamp and share what you create.
If you have been back and forth about joining, drop me a note at creativestampingdesigns@gmail.com and we can talk about you joining.
The Rustic Christmas Countdown Kit has all you need to make a rustic, 25 day paper advent calendar. What a great way to bring a classic, cozy Christmas feeling to your home this season!
This kit includes:
Enough supplies to create 25 individual envelopes
Printed die cuts, printed labels, adhesive, embellishments, clothespins, and twine
Folded envelope size: 4″ x 3″ (10.2 x 7.6 cm)
Coordinating colors: Cherry Cobbler, Crumb Cake, Mossy Meadow, Old Olive
Create dazzling traditional Christmas cards with the Home for the Holidays Paper Pumpkin Kit! This kit includes eight beautiful cards—four each of two designs. Whether you want to send a few to your loved ones or fill your home with some extra special Christmas cheer, this kit has everything you need to make some sparkly, festive cards. Keep reading to learn more!
One extra fun feature of the Home for the Holidays Paper Pumpkin Kit is the bottle of glitter glue! You can use this glue to add shimmery, shiny details to the Christmas scenes on their cards. You can add some glitter to the trees, houses, snow, and more. There are endless possibilities you will have with this glue and the kit.
Bring some inspiration to your creations with the coordinating box design! This box could help create a cute village Christmas scene with your cards, and more. You could even use the box as a photo op prop! This is a fun way to make the most of the kit. Don’t let the Christmas crafts end once you finish with this kit! Since the Home for the Holidays Kit perfectly coordinates with the November Paper Pumpkin Kit, you and you will be able to extend your holiday crafting experience even further. So make sure your subscription is up to date!
This kit includes:
All the supplies you’ll need to create 8 sparkly and dazzling Christmas cards—4 each of 2 designs—and eight coordinating envelopes.
A coordinating photopolymer stamp set with endearing holiday sentiments and festive designs.
A Real Red Stampin’ Spot
A bottle of Glitter Glue
Beautiful Christmasy-themed precut pieces
Finished folded card size: 4-1/4″ x 5-1/2″ (10.8 x 14 cm)
Coordinating Stampin’ Up! colors: Balmy Blue, Blueberry Bushel, Cherry Cobbler, Crumb Cake, Crushed Curry, Daffodil Delight, Lemon Lolly, Mossy Meadow, Night of Navy, Old Olive, Pecan Pie, Real Red
Subscribe to the October Paper Pumpkin Kit between 11 September and 10 October by clicking here!
Note: Supplies may be limited toward the end of the subscription period.


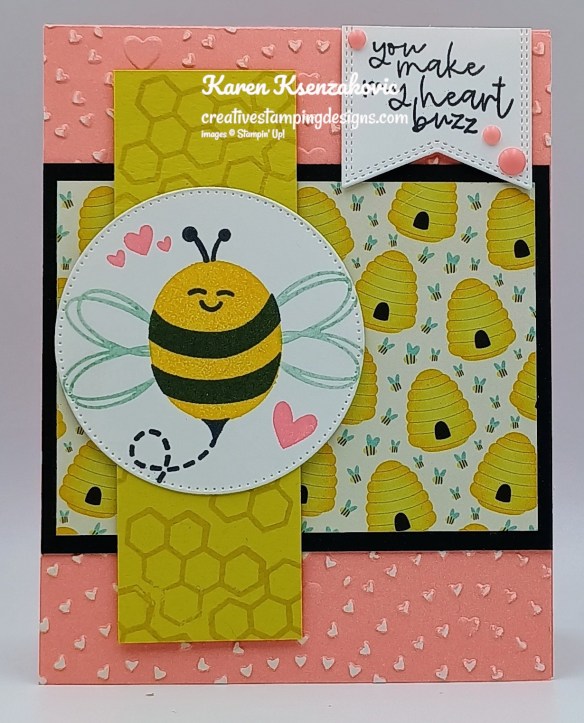
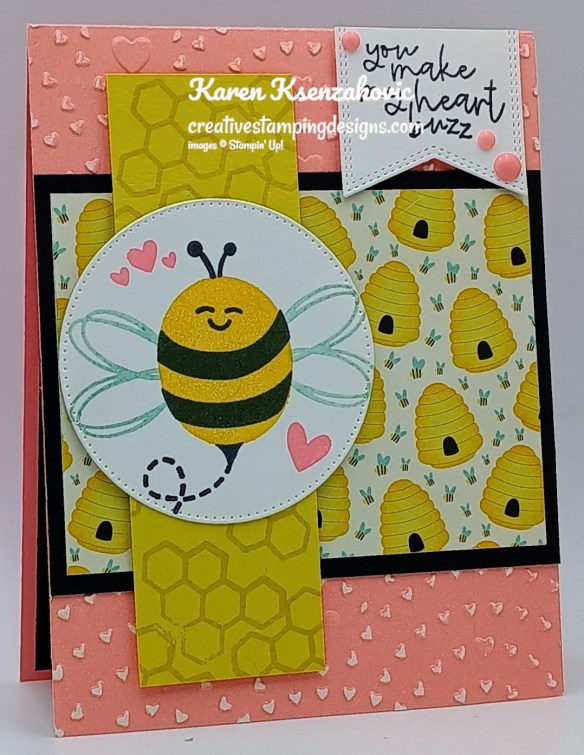
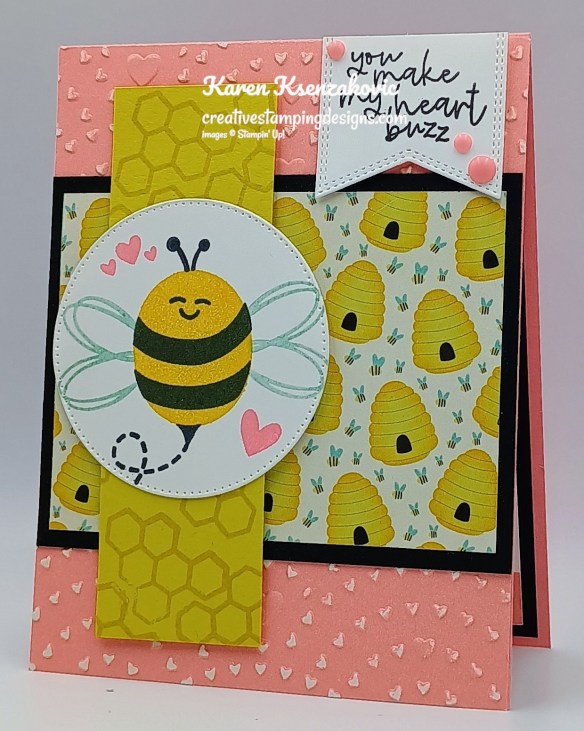
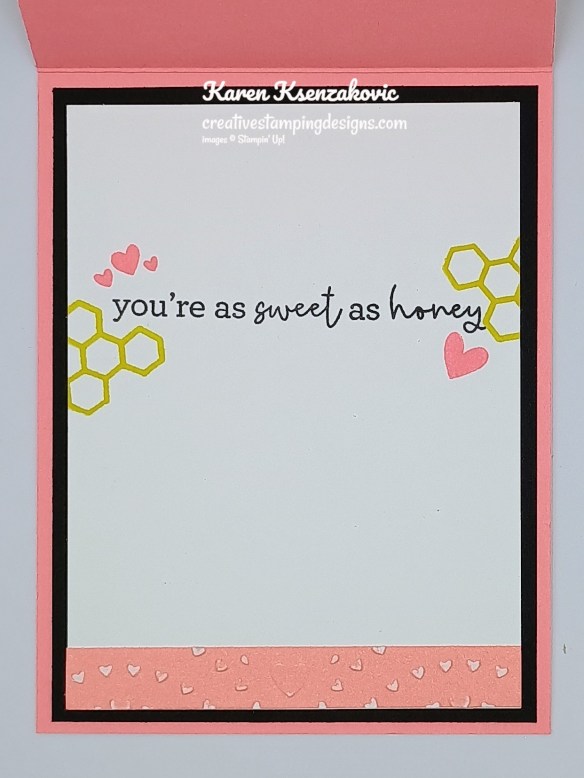
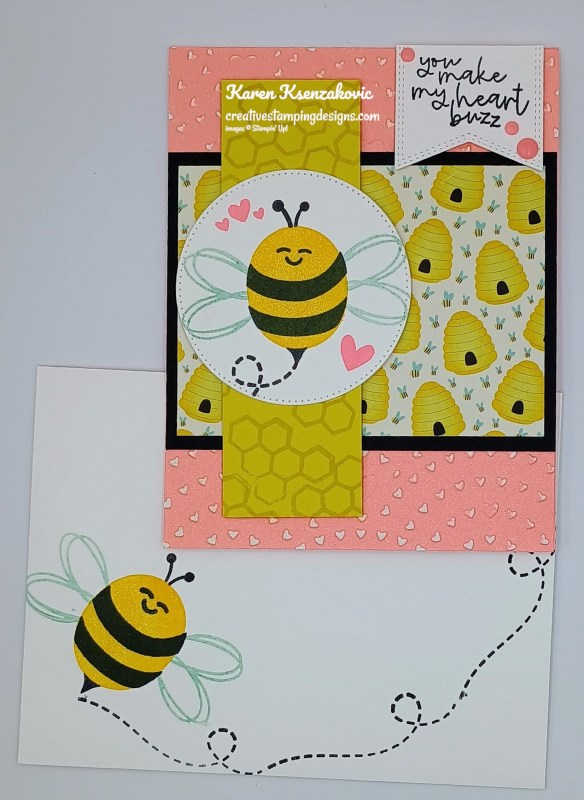
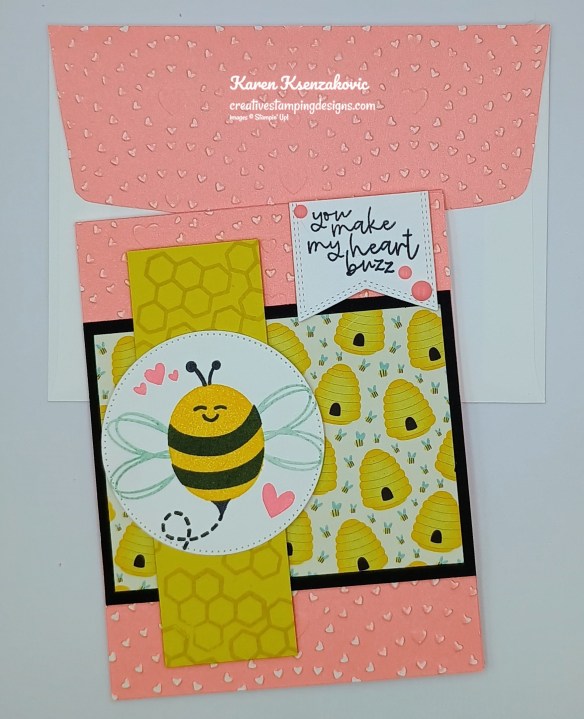

![Bee My Valentine Photopolymer Stamp Set (English) [ 162547 ]](https://assets1.tamsnetwork.com/images/EC042017NF/162547s.jpg "Bee My Valentine Photopolymer Stamp Set (English) [ 162547 ]")
![Basic Black 8-1/2" X 11" Cardstock [ 121045 ]](https://assets1.tamsnetwork.com/images/EC042017NF/121045s.jpg "Basic Black 8-1/2\" X 11\" Cardstock [ 121045 ]")
![Basic White 8 1/2" X 11" Cardstock [ 166780 ]](https://assets1.tamsnetwork.com/images/EC042017NF/166780s.jpg "Basic White 8 1/2\" X 11\" Cardstock [ 166780 ]")
![Darling Duckling 8 1/2" X 11" Cardstock [ 165622 ]](https://assets1.tamsnetwork.com/images/EC042017NF/165622s.jpg "Darling Duckling 8 1/2\" X 11\" Cardstock [ 165622 ]")
![Flirty Flamingo 8-1/2" X 11" Cardstock [ 141416 ]](https://assets1.tamsnetwork.com/images/EC042017NF/141416s.jpg "Flirty Flamingo 8-1/2\" X 11\" Cardstock [ 141416 ]")
![Flirty Flamingo 12" X 12" (30.5 X 30.5 Cm) Two Tone Cardstock [ 166667 ]](https://assets1.tamsnetwork.com/images/EC042017NF/166667s.jpg "Flirty Flamingo 12\" X 12\" (30.5 X 30.5 Cm) Two Tone Cardstock [ 166667 ]")
![Turtle Y Cute 12" X 12" (30.5 X 30.5 Cm) Designer Series Paper [ 165221 ]](https://assets1.tamsnetwork.com/images/EC042017NF/165221s.jpg "Turtle Y Cute 12\" X 12\" (30.5 X 30.5 Cm) Designer Series Paper [ 165221 ]")
![Daffodil Delight Classic Stampin' Pad [ 147094 ]](https://assets1.tamsnetwork.com/images/EC042017NF/147094s.jpg "Daffodil Delight Classic Stampin' Pad [ 147094 ]")
![Darling Duckling Classic Stampin' Pad [ 165277 ]](https://assets1.tamsnetwork.com/images/EC042017NF/165277s.jpg "Darling Duckling Classic Stampin' Pad [ 165277 ]")
![Flirty Flamingo Classic Stampin' Pad [ 147052 ]](https://assets1.tamsnetwork.com/images/EC042017NF/147052s.jpg "Flirty Flamingo Classic Stampin' Pad [ 147052 ]")
![Pool Party Classic Stampin' Pad [ 147107 ]](https://assets1.tamsnetwork.com/images/EC042017NF/147107s.jpg "Pool Party Classic Stampin' Pad [ 147107 ]")
![Tuxedo Black Memento Ink Pad [ 132708 ]](https://assets1.tamsnetwork.com/images/EC042017NF/132708s.jpg "Tuxedo Black Memento Ink Pad [ 132708 ]")
![Hearts Of Love 3 D Embossing Folder [ 167071 ]](https://assets1.tamsnetwork.com/images/EC042017NF/167071s.jpg "Hearts Of Love 3 D Embossing Folder [ 167071 ]")
![Nested Essentials Dies [ 161597 ]](https://assets1.tamsnetwork.com/images/EC042017NF/161597s.jpg "Nested Essentials Dies [ 161597 ]")
![Stylish Shapes Dies [ 159183 ]](https://assets1.tamsnetwork.com/images/EC042017NF/159183s.jpg "Stylish Shapes Dies [ 159183 ]")
![Rainbow Adhesive Backed Dots [ 162758 ]](https://assets1.tamsnetwork.com/images/EC042017NF/162758s.jpg "Rainbow Adhesive Backed Dots [ 162758 ]")
![Basic White Medium Envelopes [ 159236 ]](https://assets1.tamsnetwork.com/images/EC042017NF/159236s.jpg "Basic White Medium Envelopes [ 159236 ]")


![Tear & Tape Adhesive [ 154031 ]](https://assets1.tamsnetwork.com/images/EC042017NF/154031s.jpg "Tear & Tape Adhesive [ 154031 ]")


![Take Your Pick [ 144107 ]](https://assets1.tamsnetwork.com/images/EC042017NF/144107s.jpg "Take Your Pick [ 144107 ]")


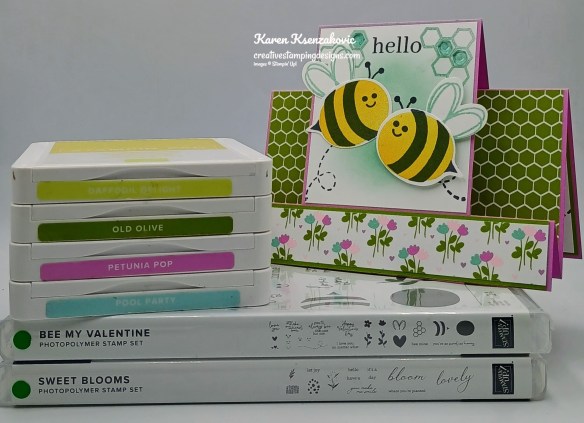
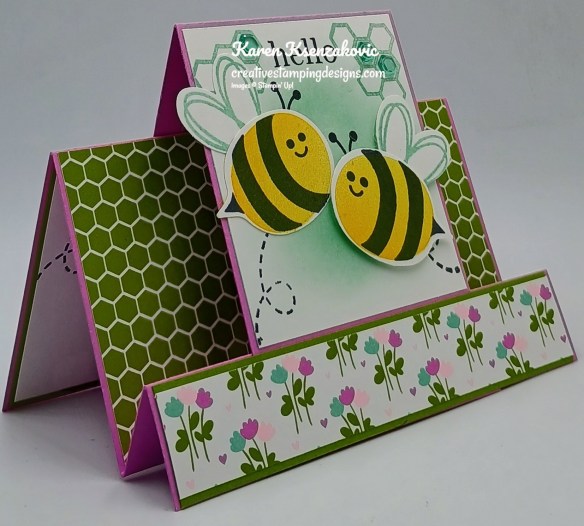
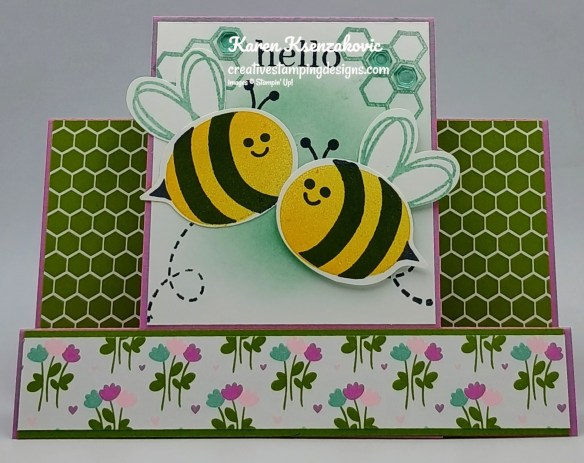
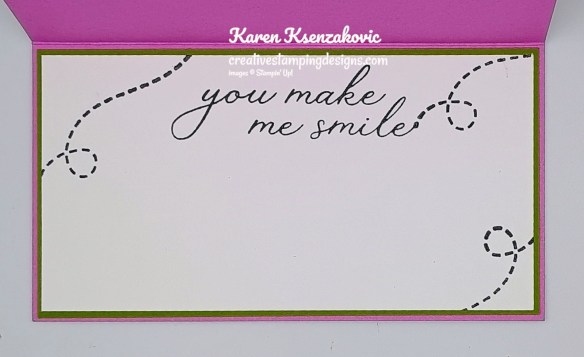
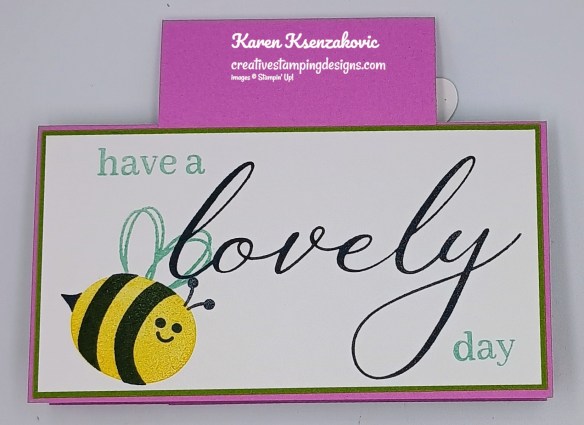
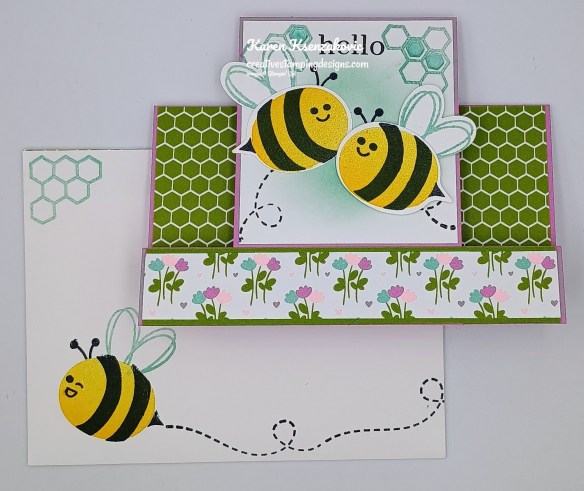
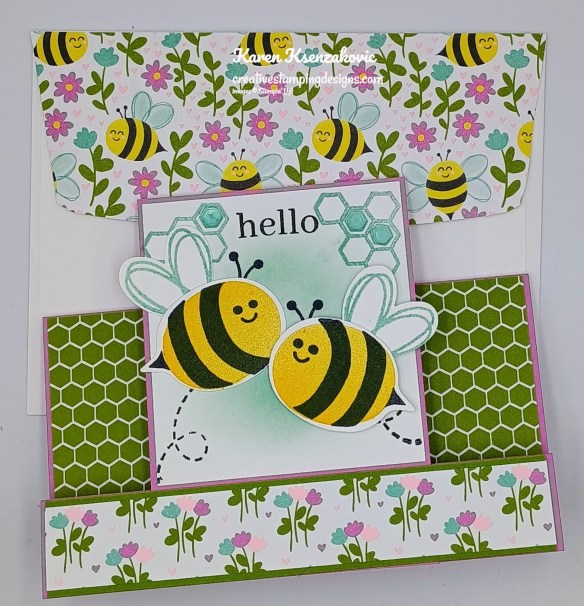


![Sweet Blooms Photopolymer Stamp Set (English) [ 165181 ]](https://assets1.tamsnetwork.com/images/EC042017NF/165181s.jpg "Sweet Blooms Photopolymer Stamp Set (English) [ 165181 ]")
![Old Olive 8-1/2" X 11" Cardstock [ 100702 ]](https://assets1.tamsnetwork.com/images/EC042017NF/100702s.jpg "Old Olive 8-1/2\" X 11\" Cardstock [ 100702 ]")
![Petunia Pop 8 1/2" X 11" Cardstock [ 163801 ]](https://assets1.tamsnetwork.com/images/EC042017NF/163801s.jpg "Petunia Pop 8 1/2\" X 11\" Cardstock [ 163801 ]")
![Cute As Can Bee 12" X 12" (30.5 X 30.5 Cm) Designer Series Paper [ 166621 ]](https://assets1.tamsnetwork.com/images/EC042017NF/166621s.jpg "Cute As Can Bee 12\" X 12\" (30.5 X 30.5 Cm) Designer Series Paper [ 166621 ]")
![Blending Brushes [ 153611 ]](https://assets1.tamsnetwork.com/images/EC042017NF/153611s.jpg "Blending Brushes [ 153611 ]")
![Bee Builder Punch [ 162553 ]](https://assets1.tamsnetwork.com/images/EC042017NF/162553s.jpg "Bee Builder Punch [ 162553 ]")
![Shades Of Green Hexagons [ 165233 ]](https://assets1.tamsnetwork.com/images/EC042017NF/165233s.jpg "Shades Of Green Hexagons [ 165233 ]")


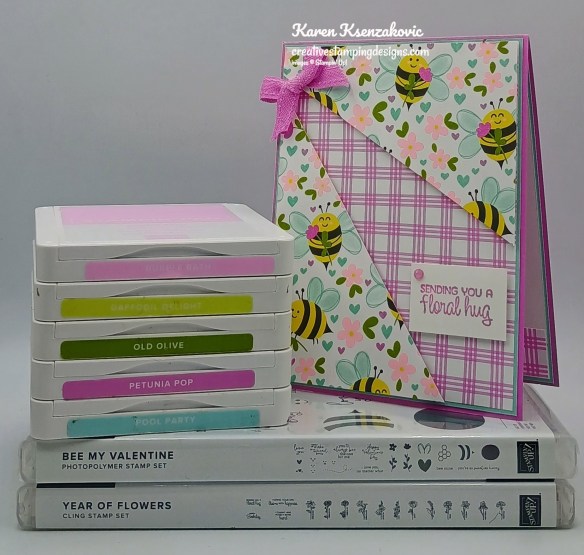
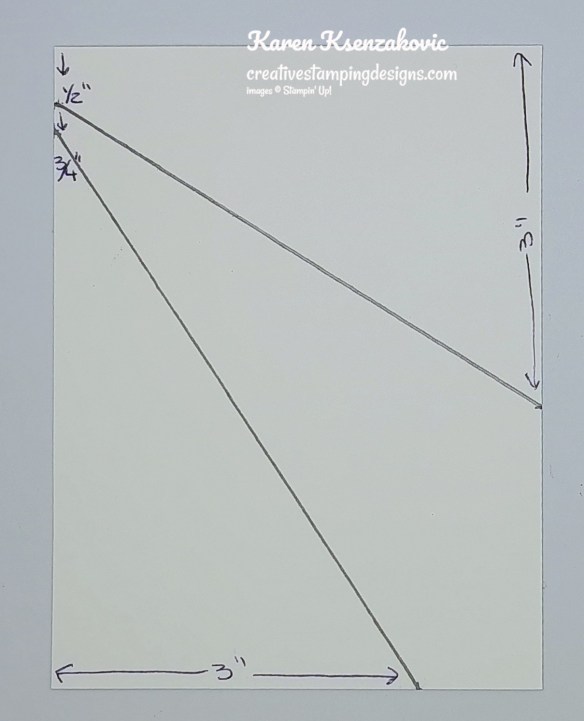
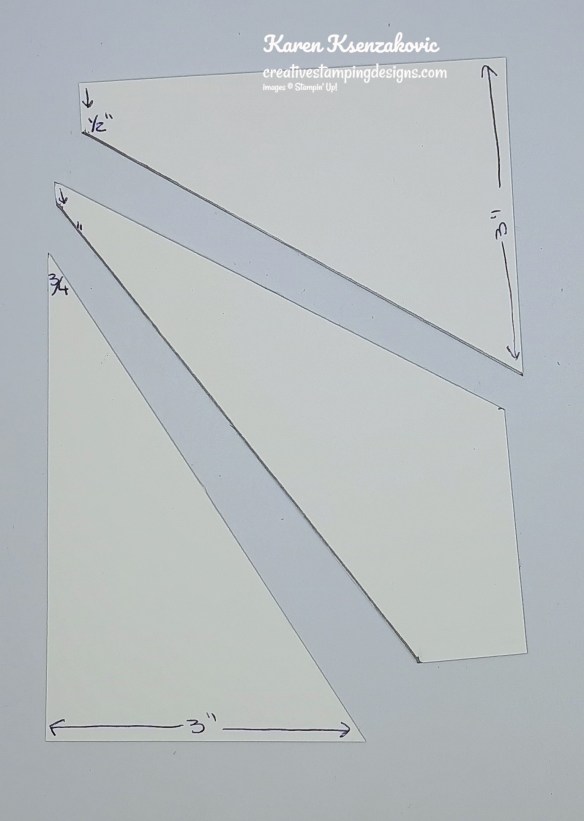
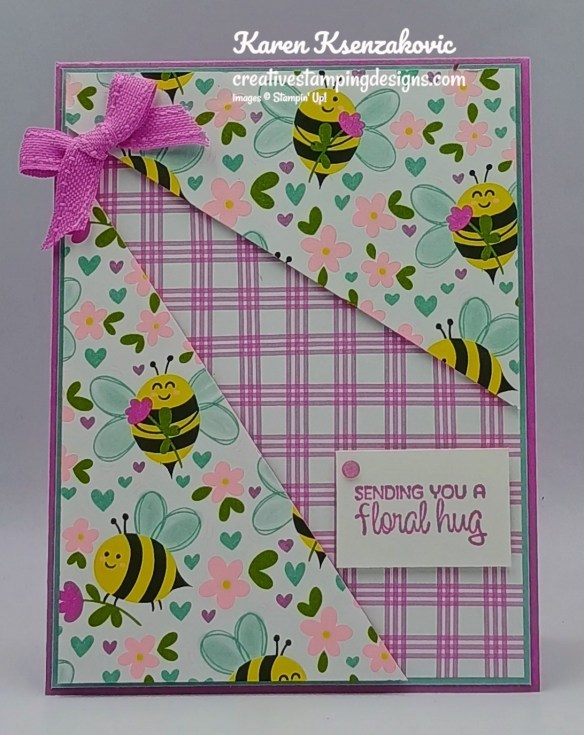
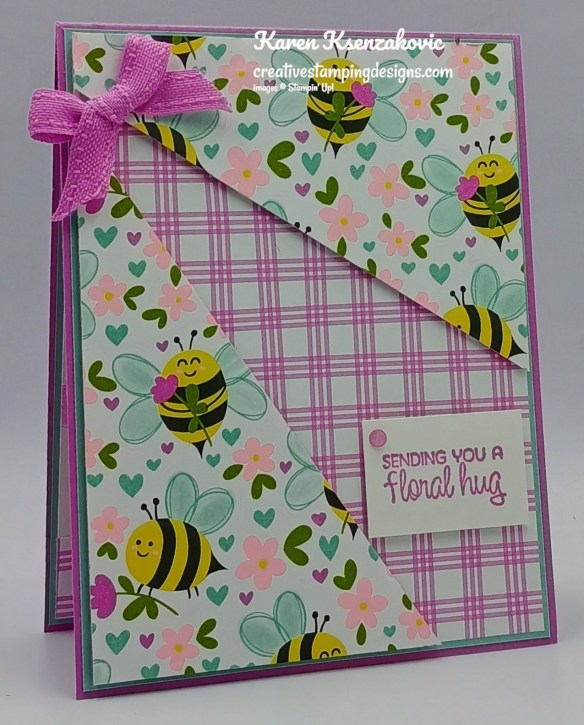
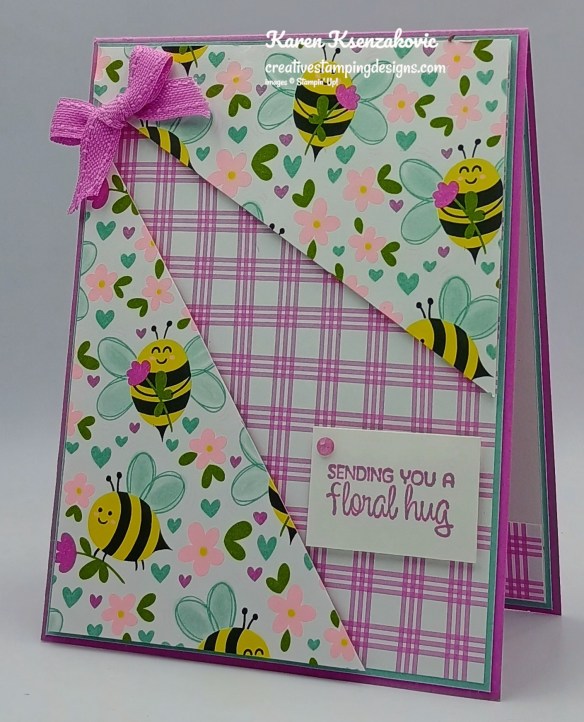
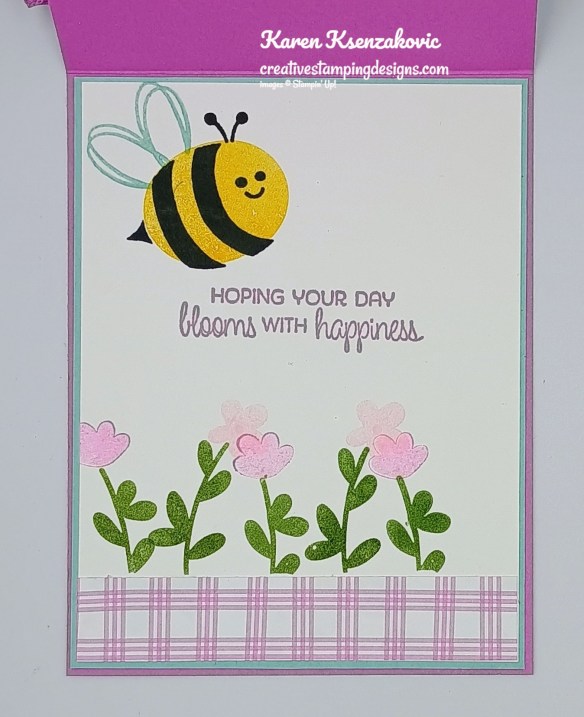
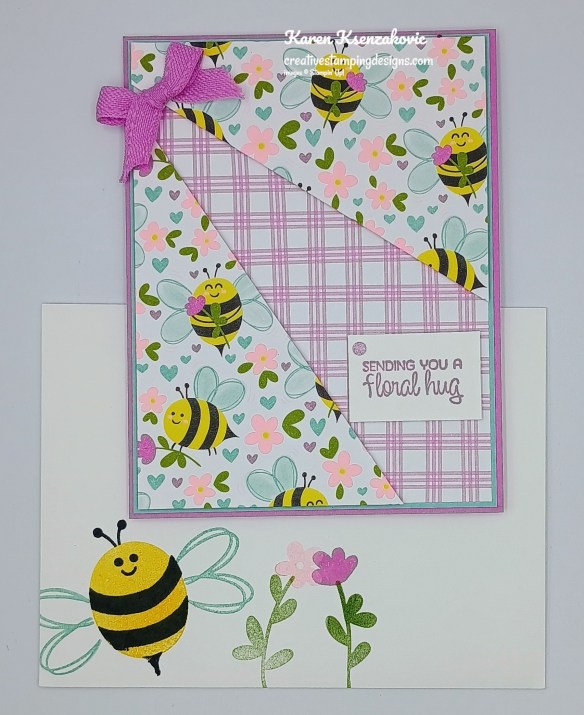
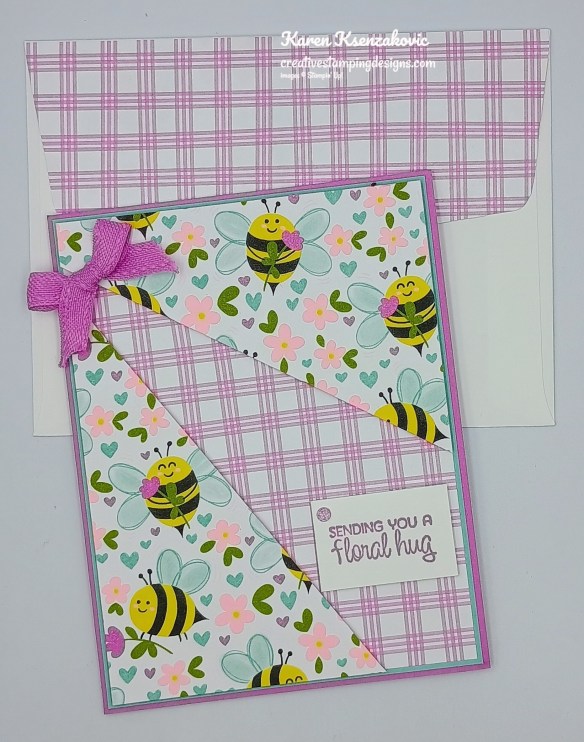
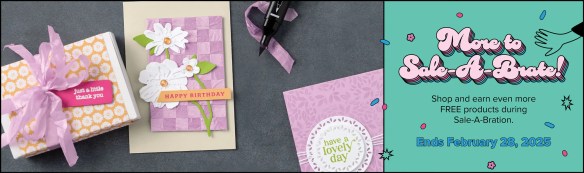
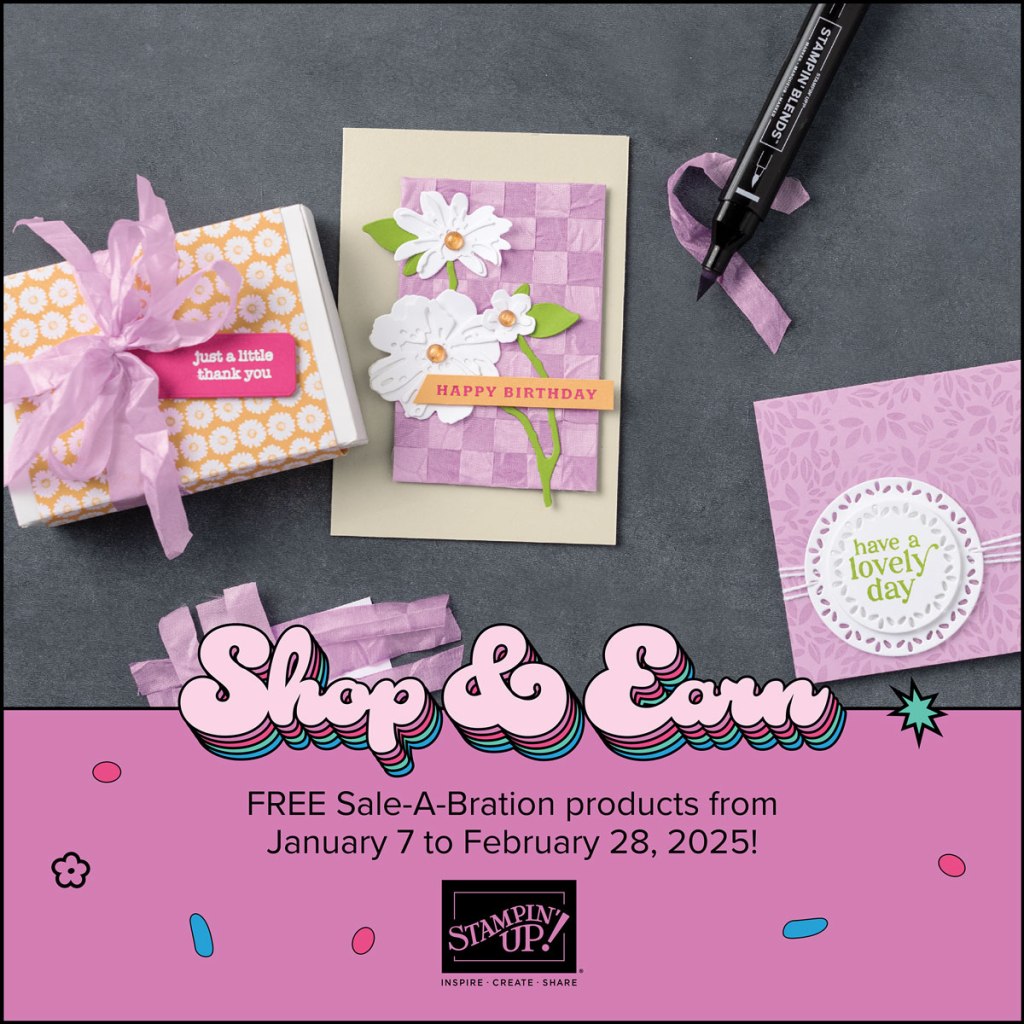

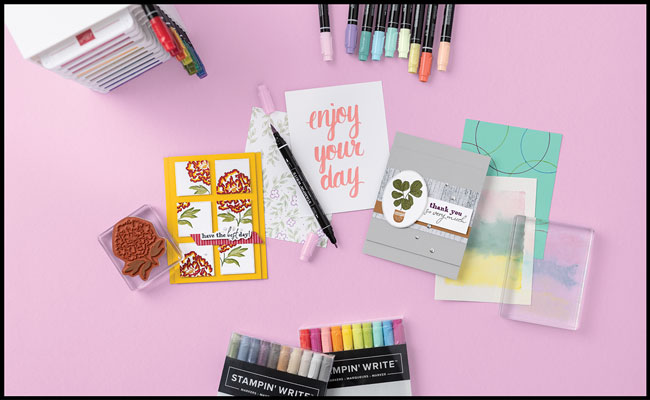

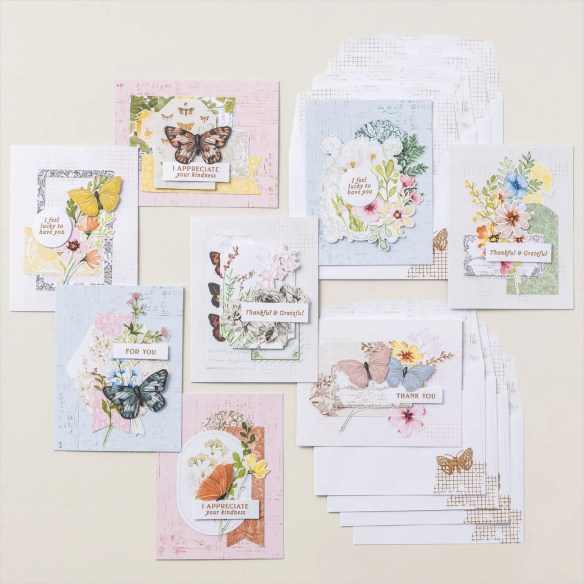
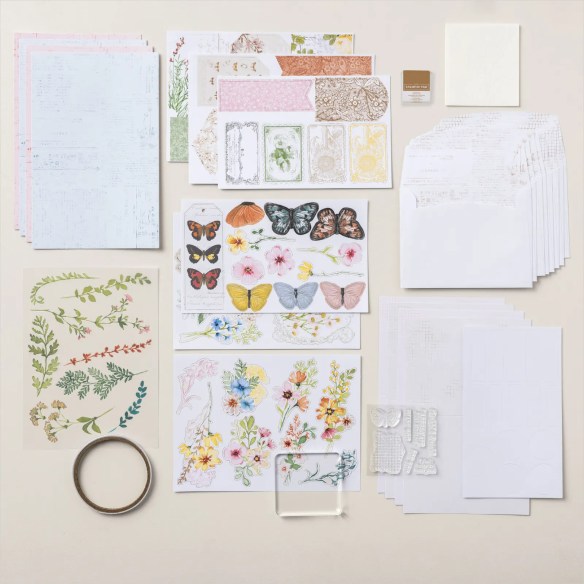

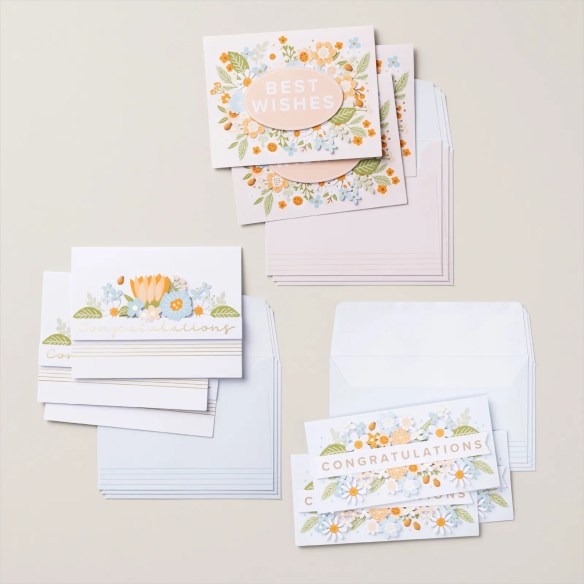
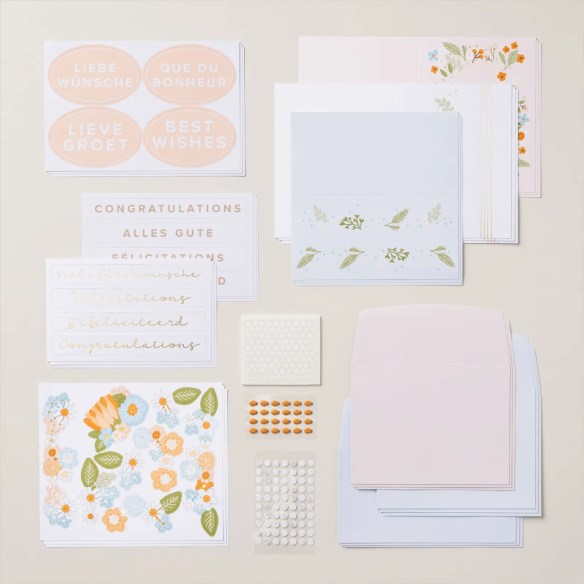

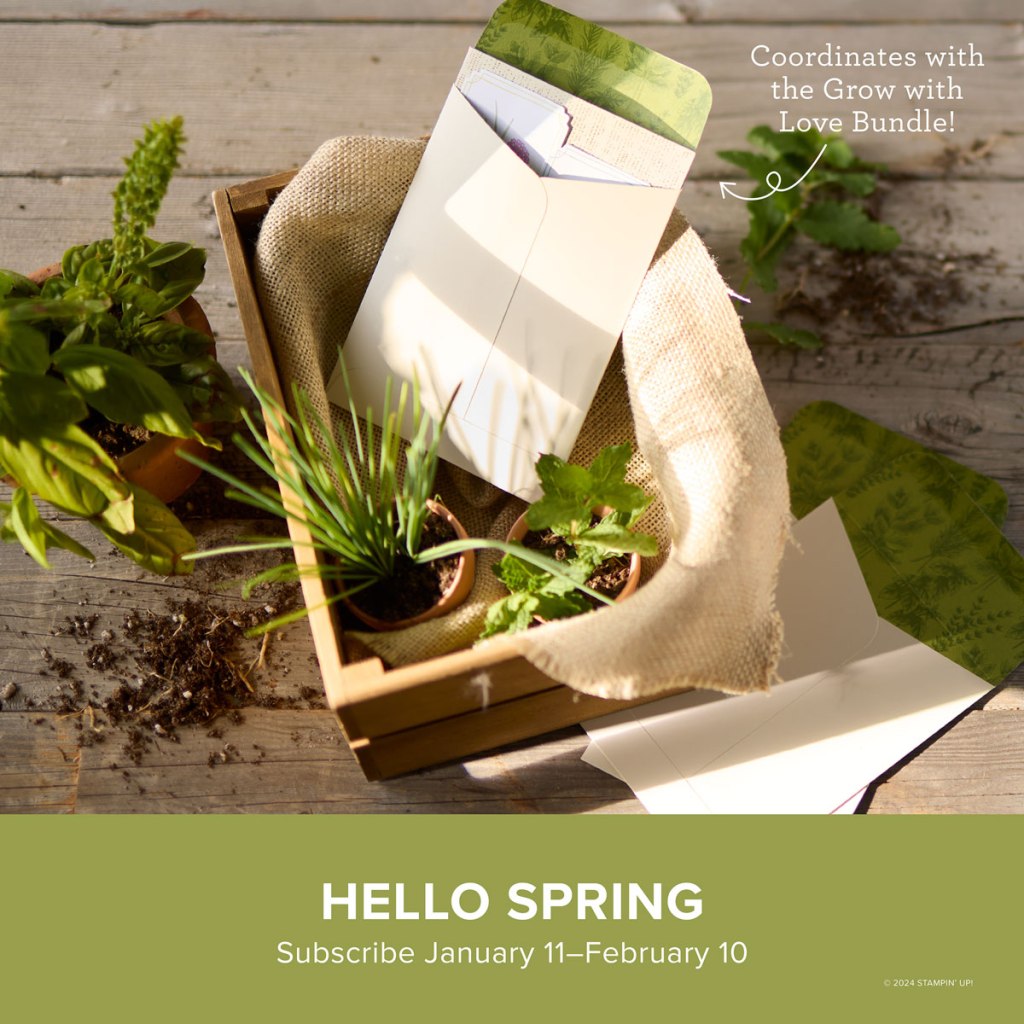
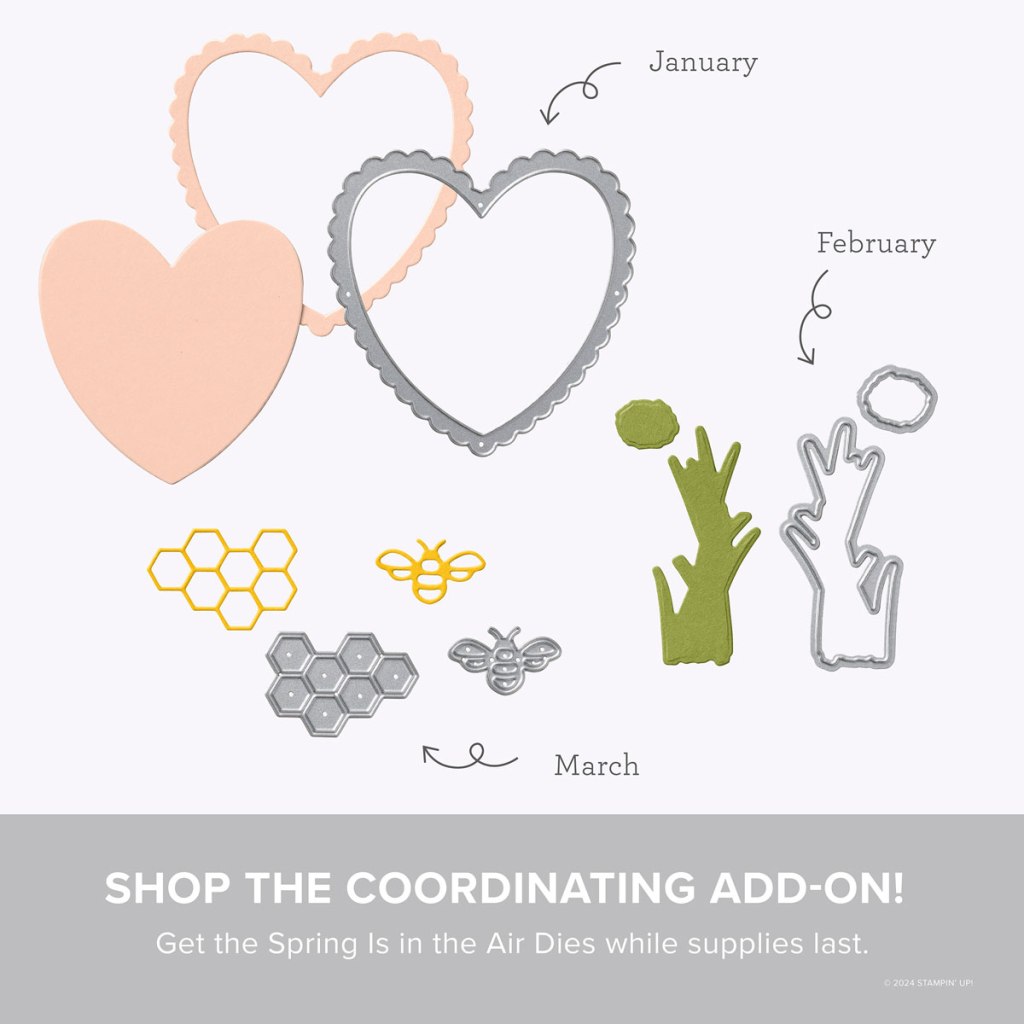


 Bordered Ribbon")


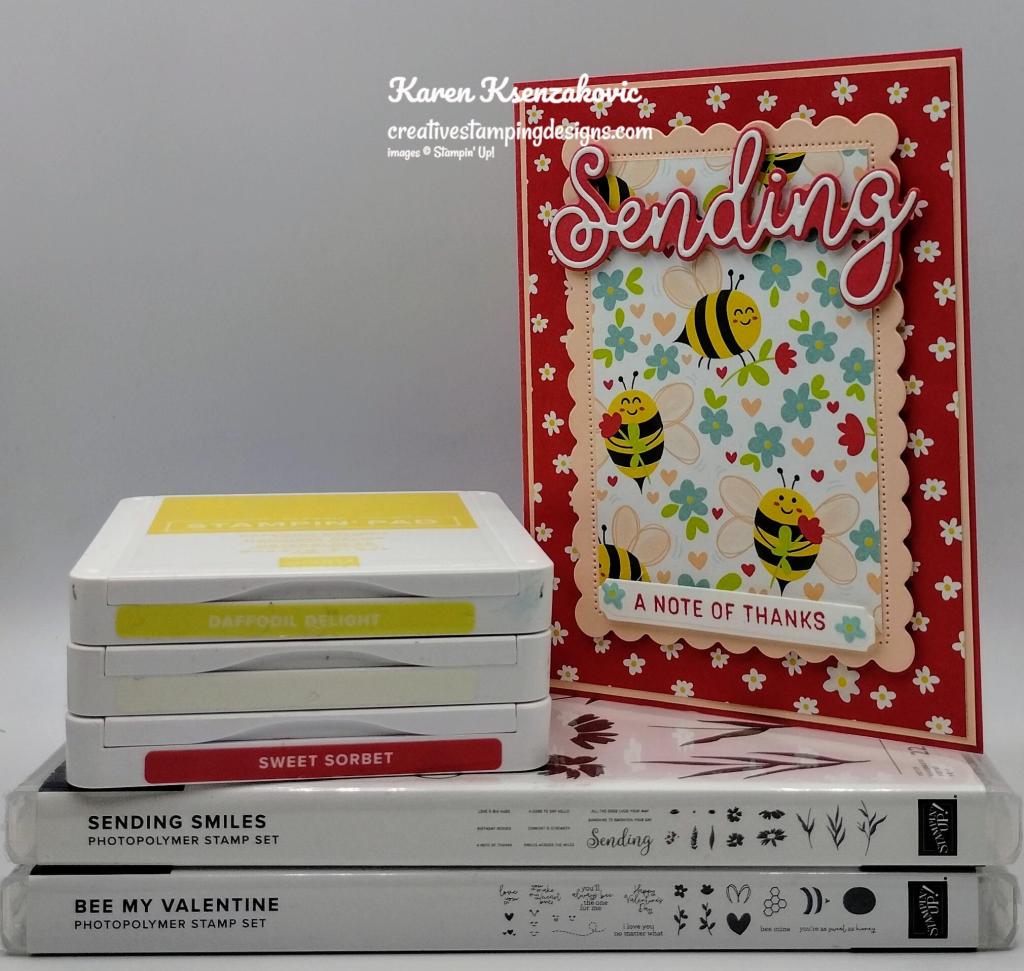
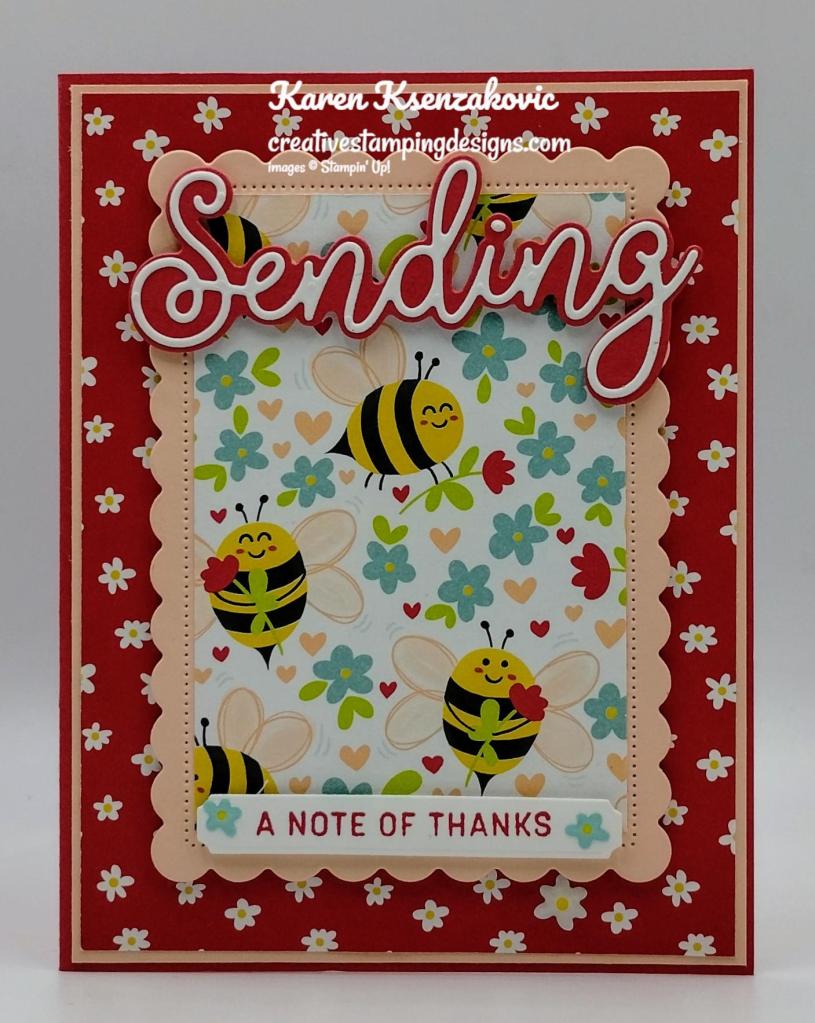
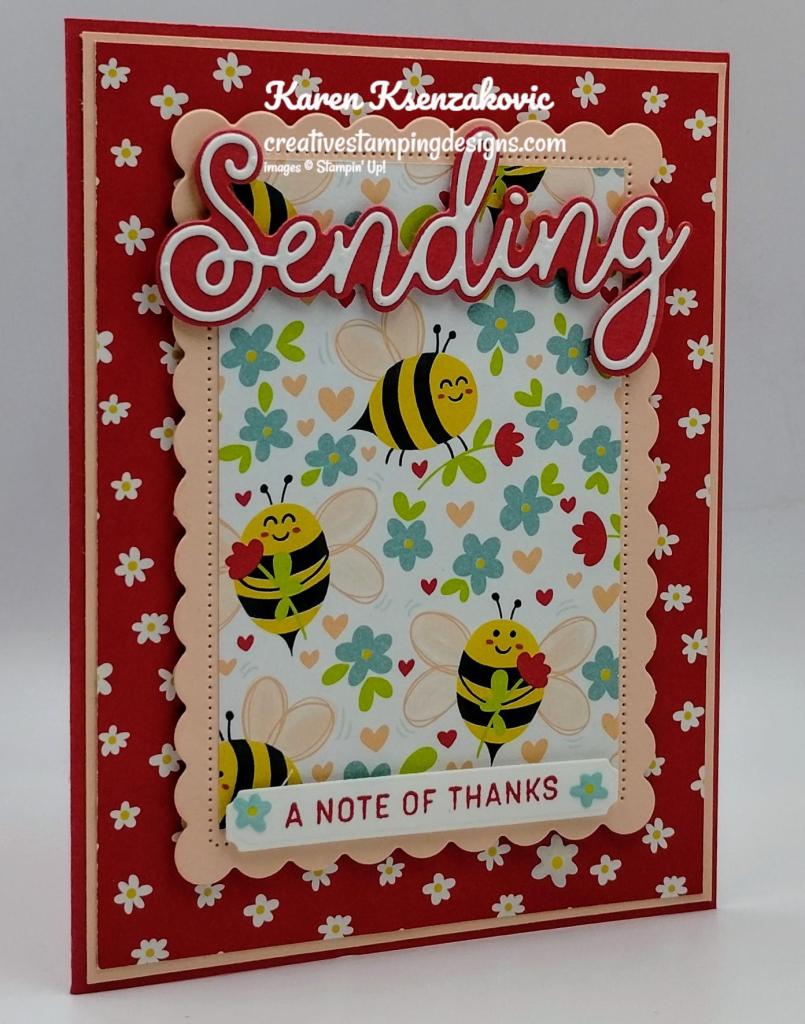
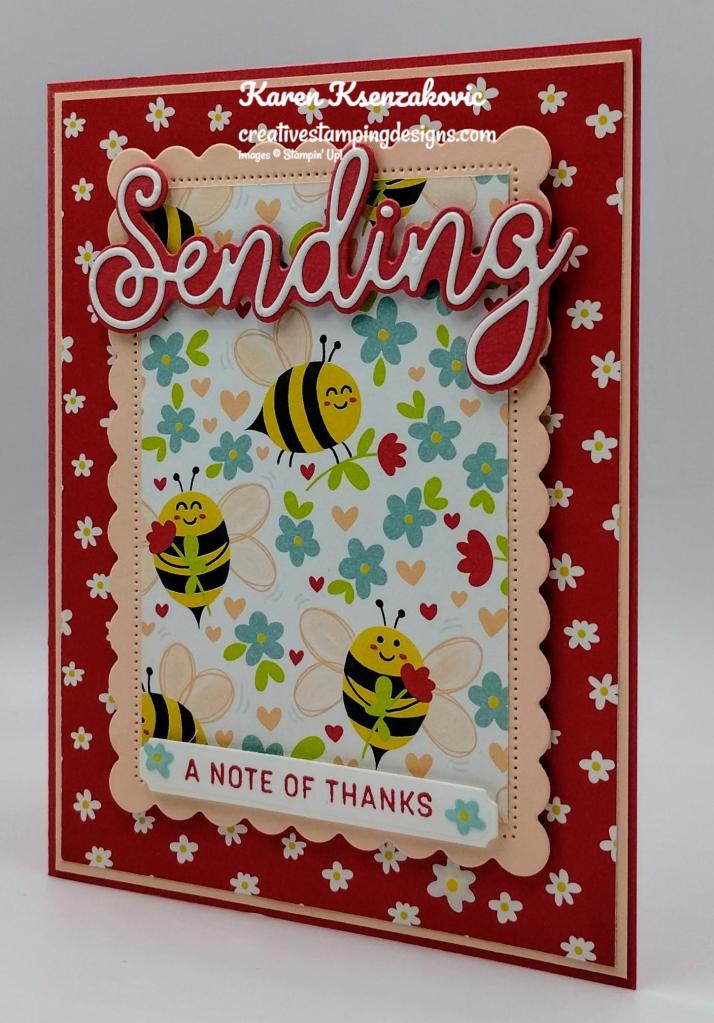


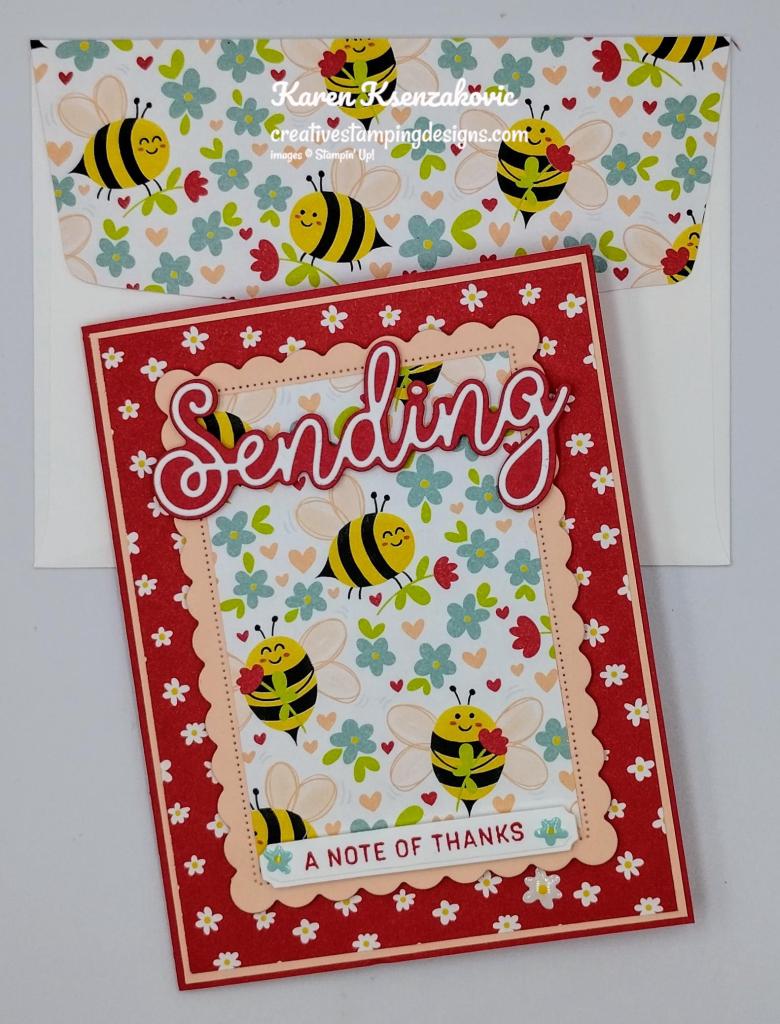
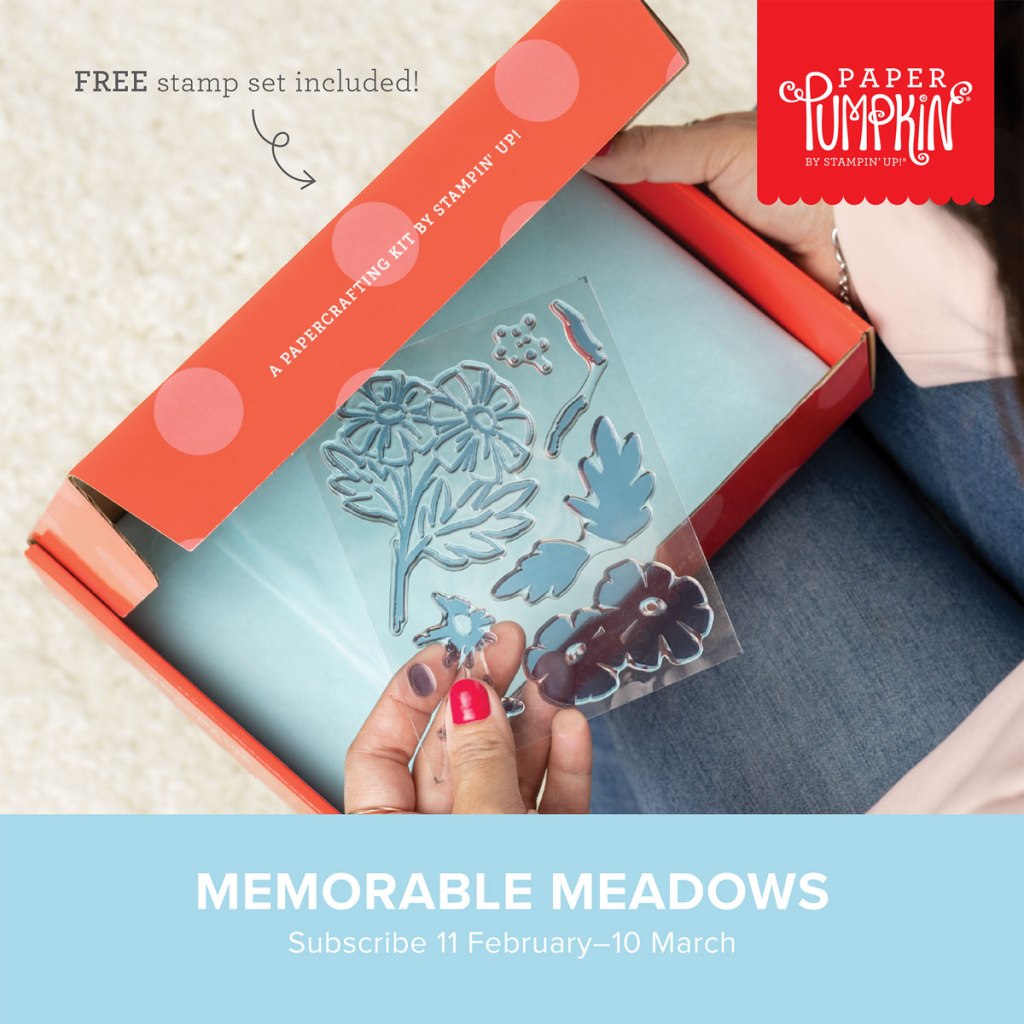

")
")


 Designer Series Paper")


")


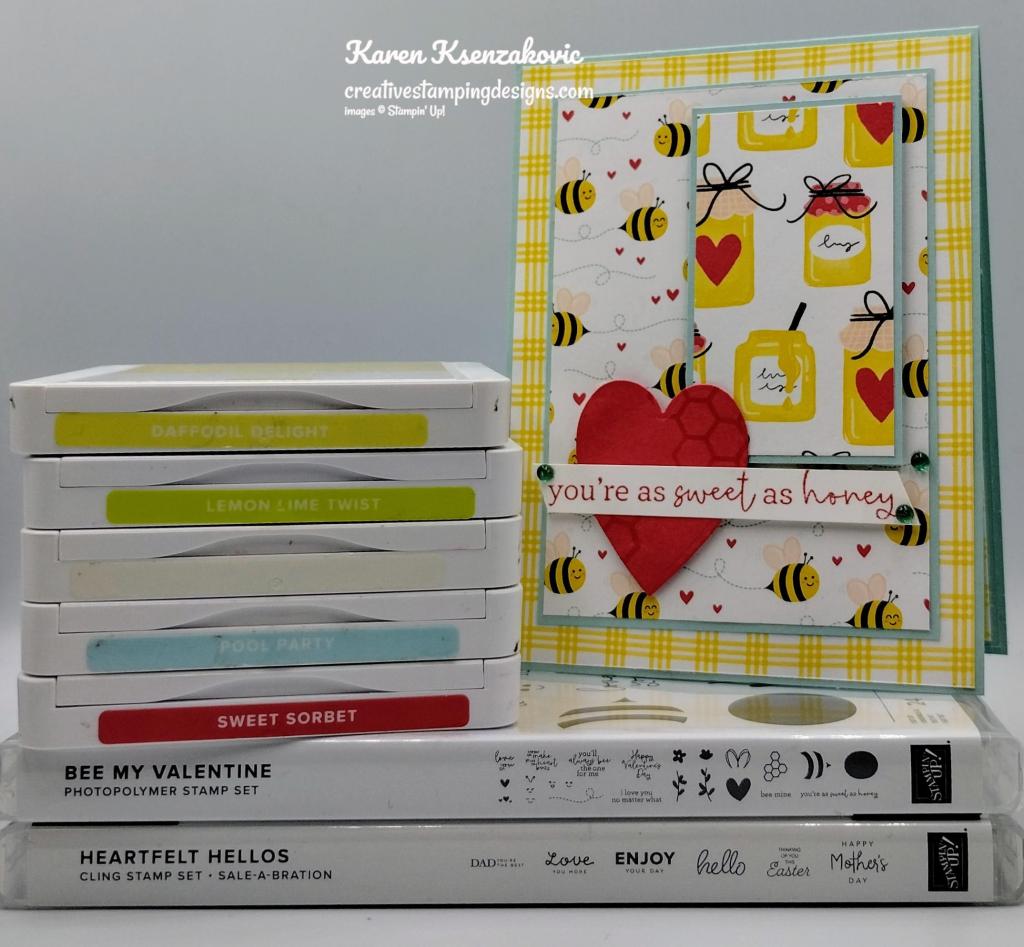
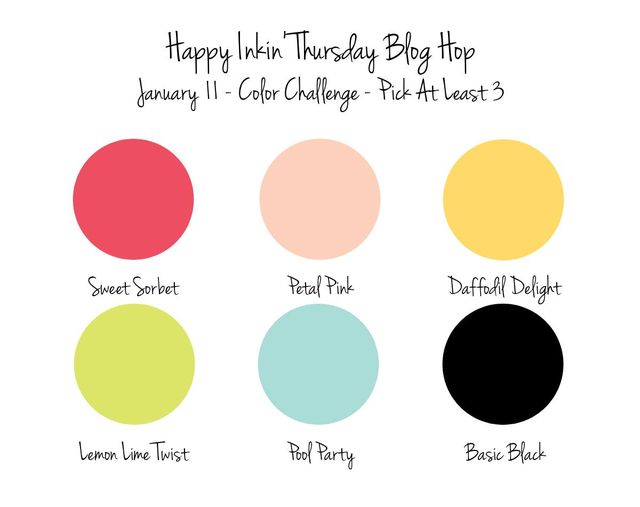

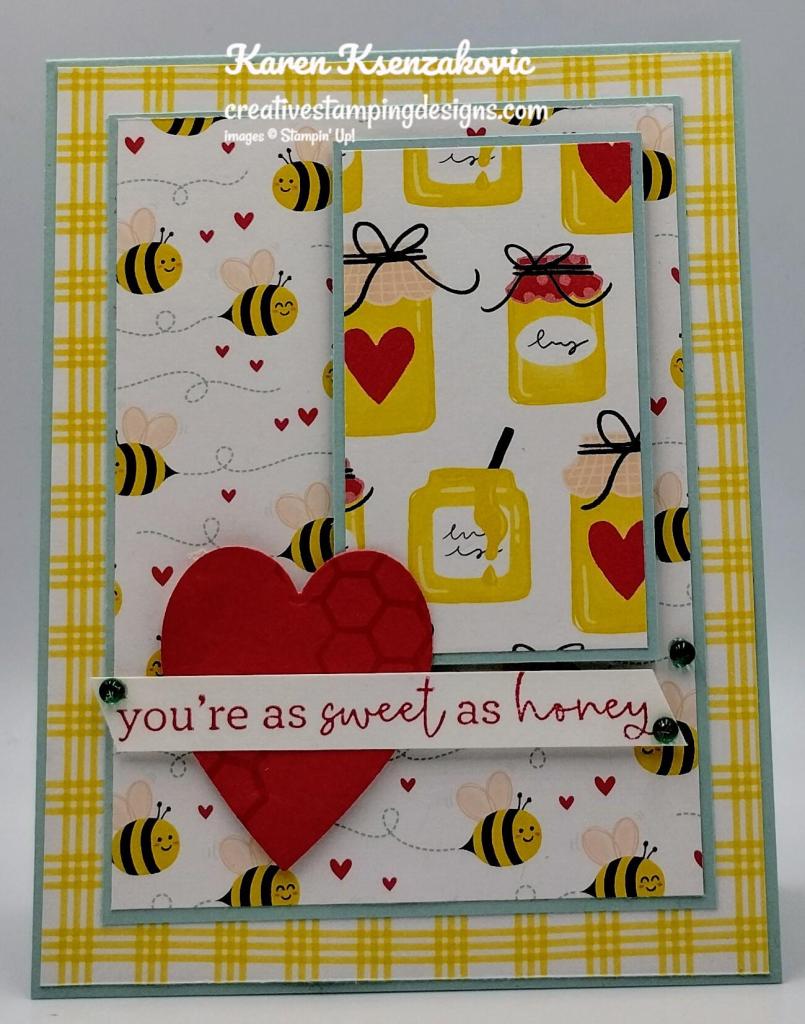
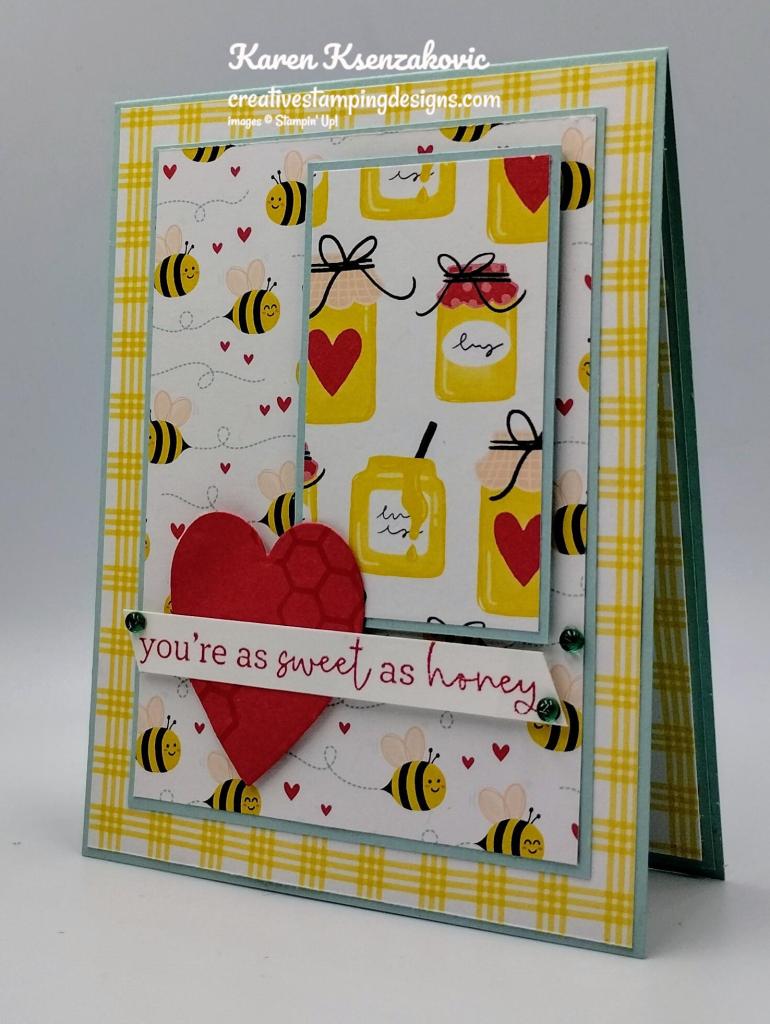
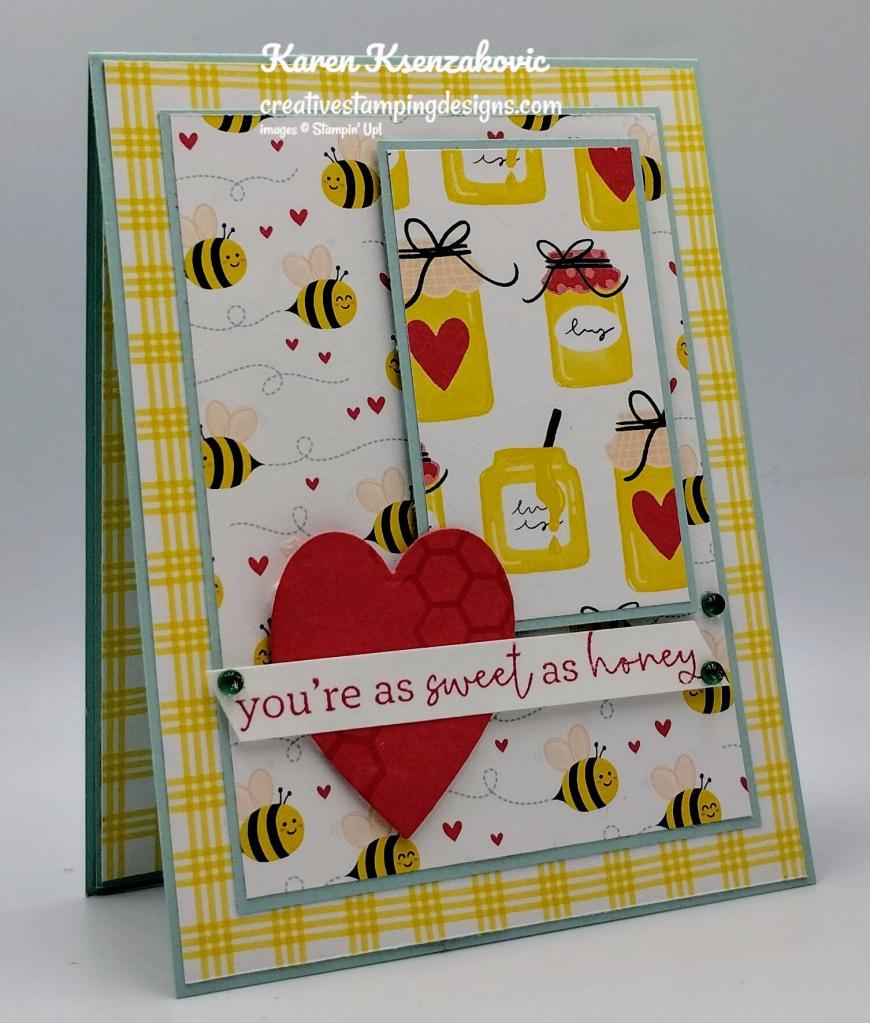
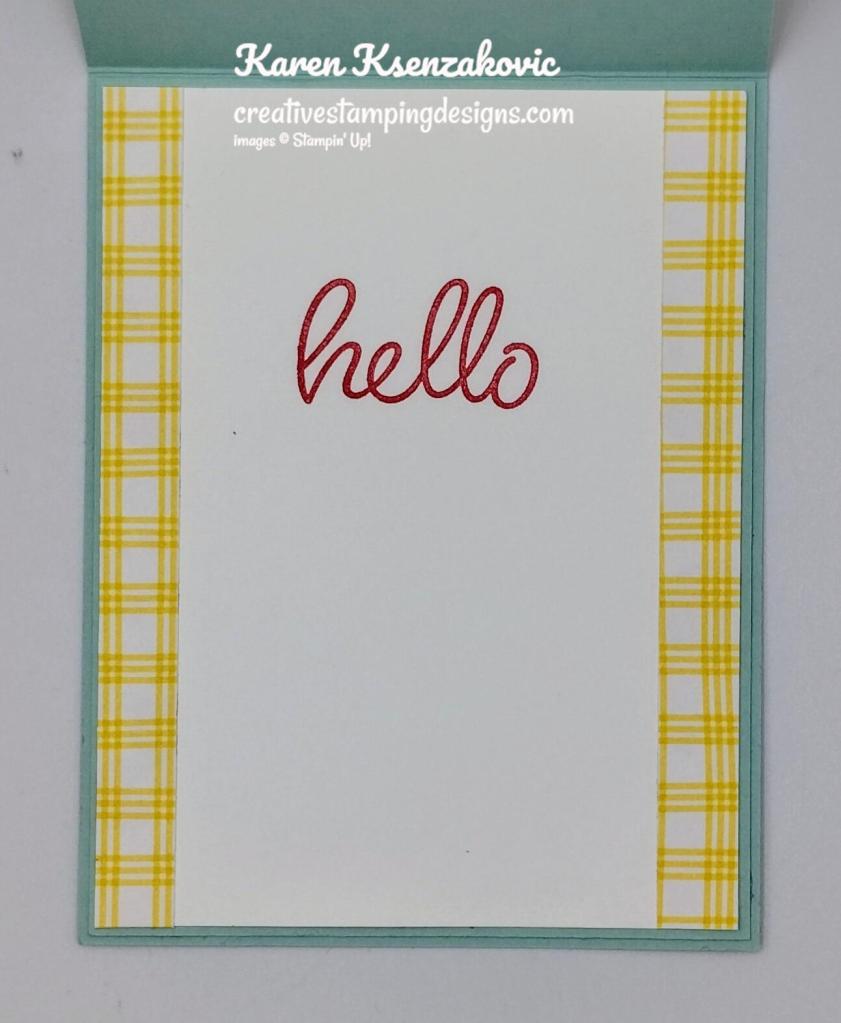
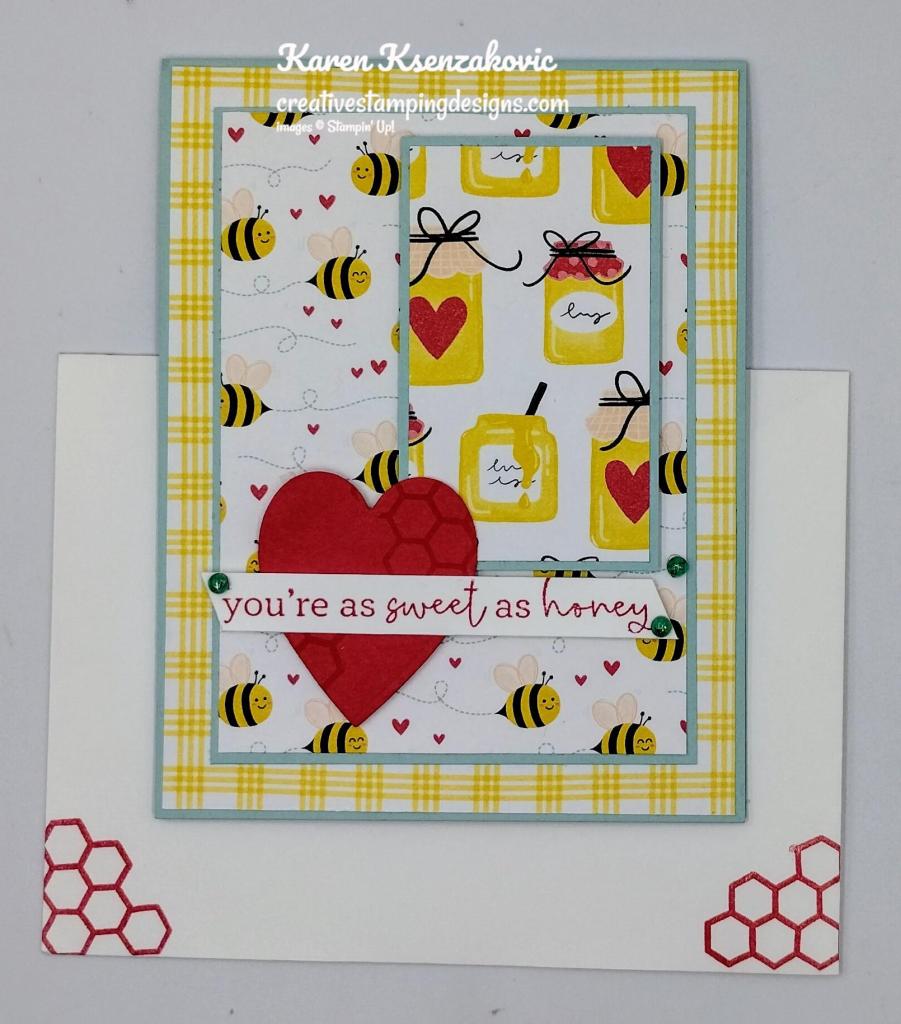
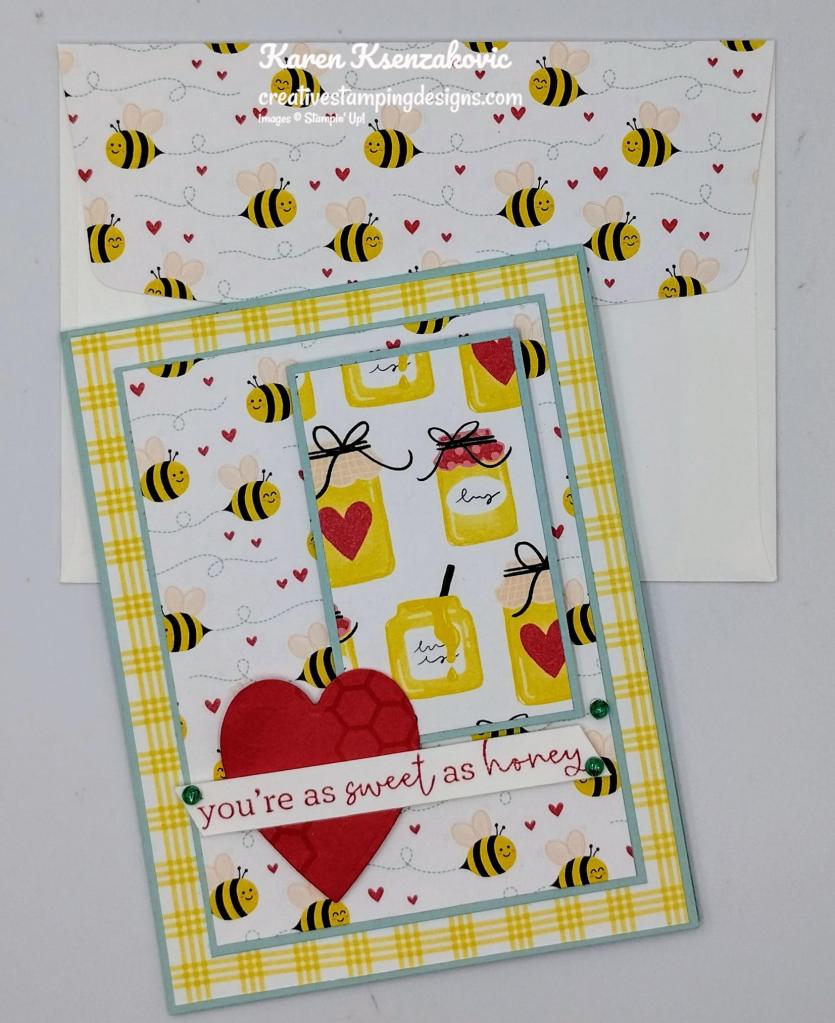


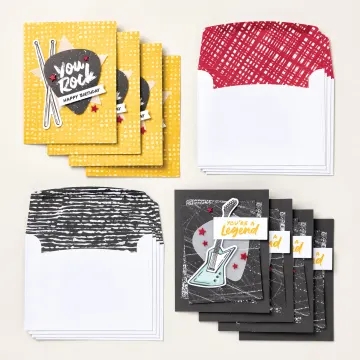

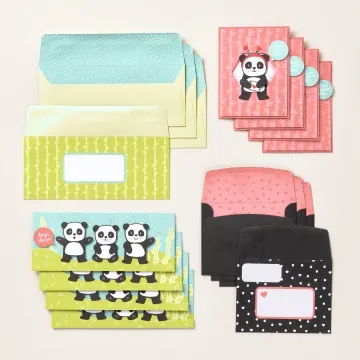
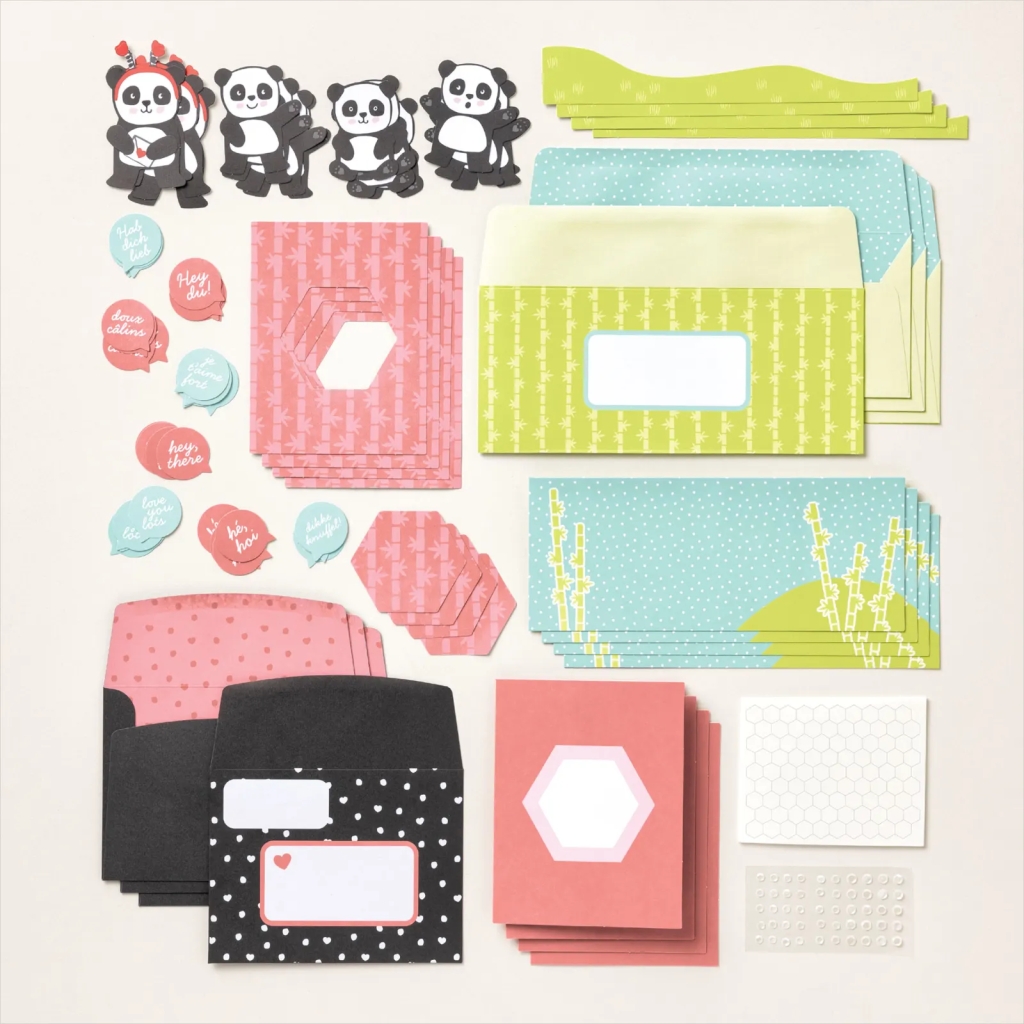
")


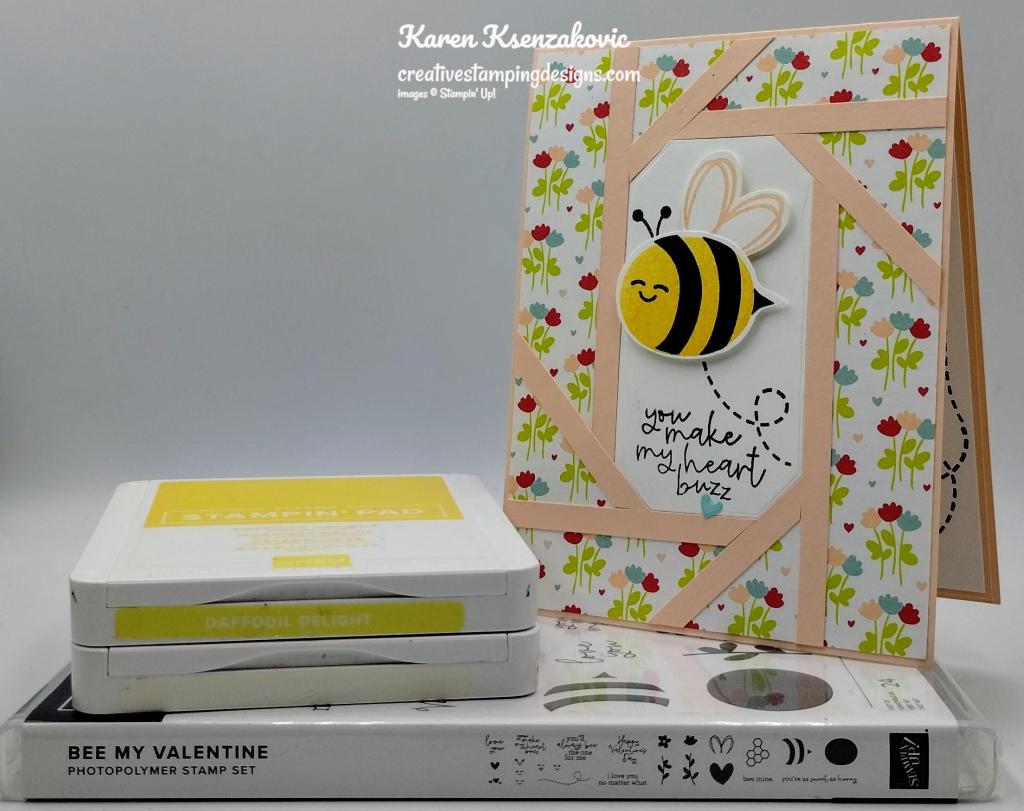


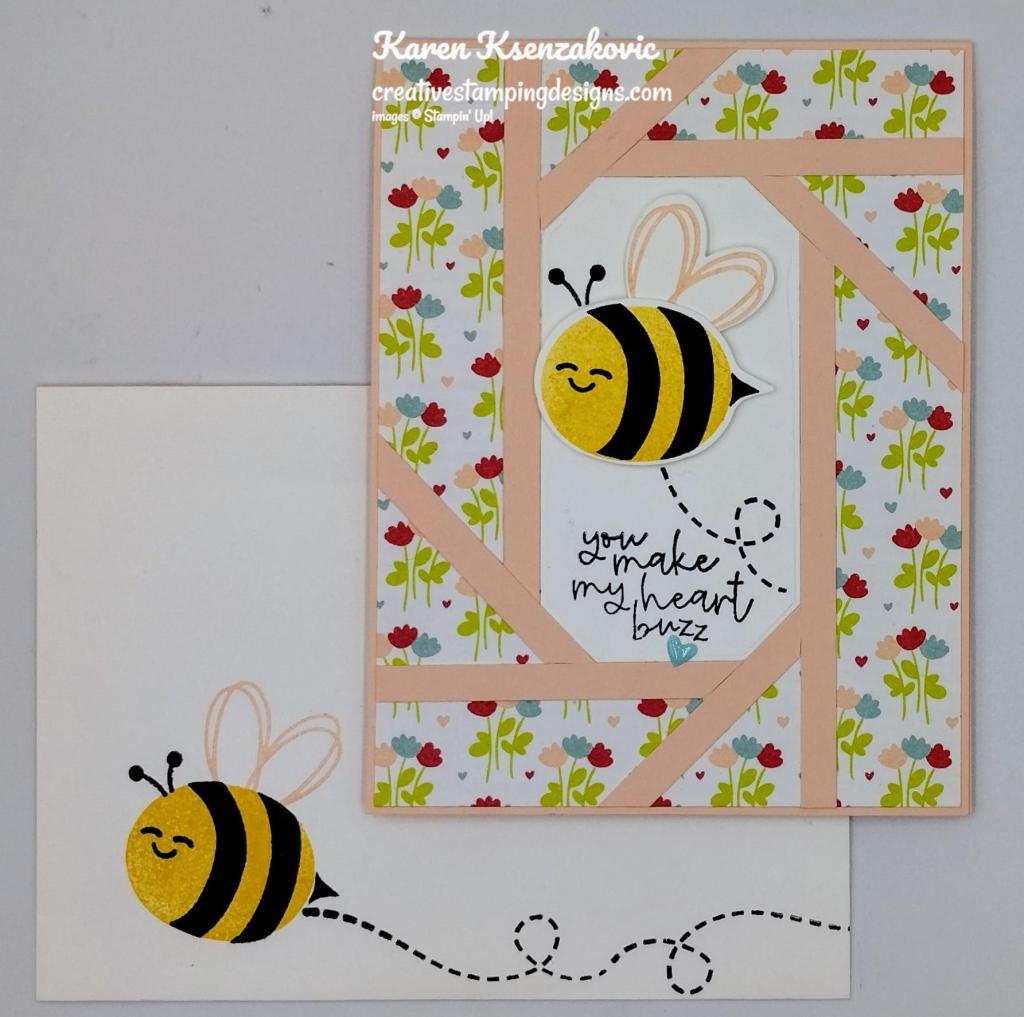


")


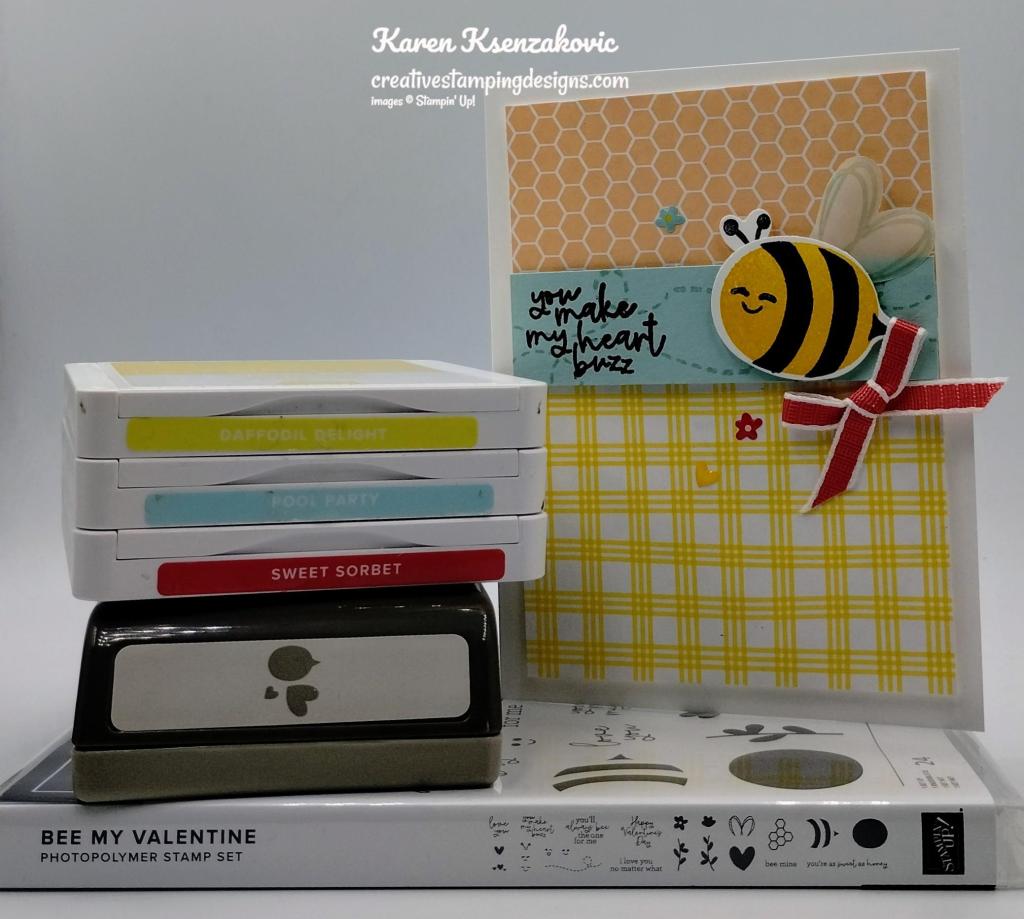
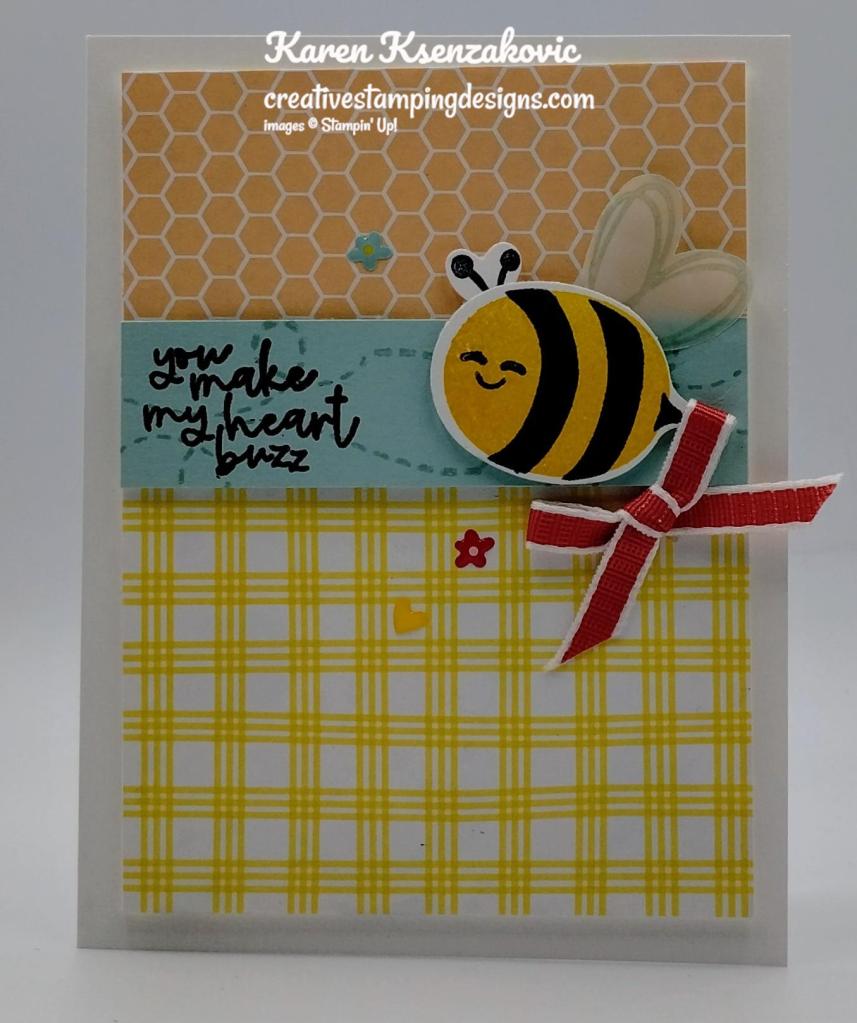
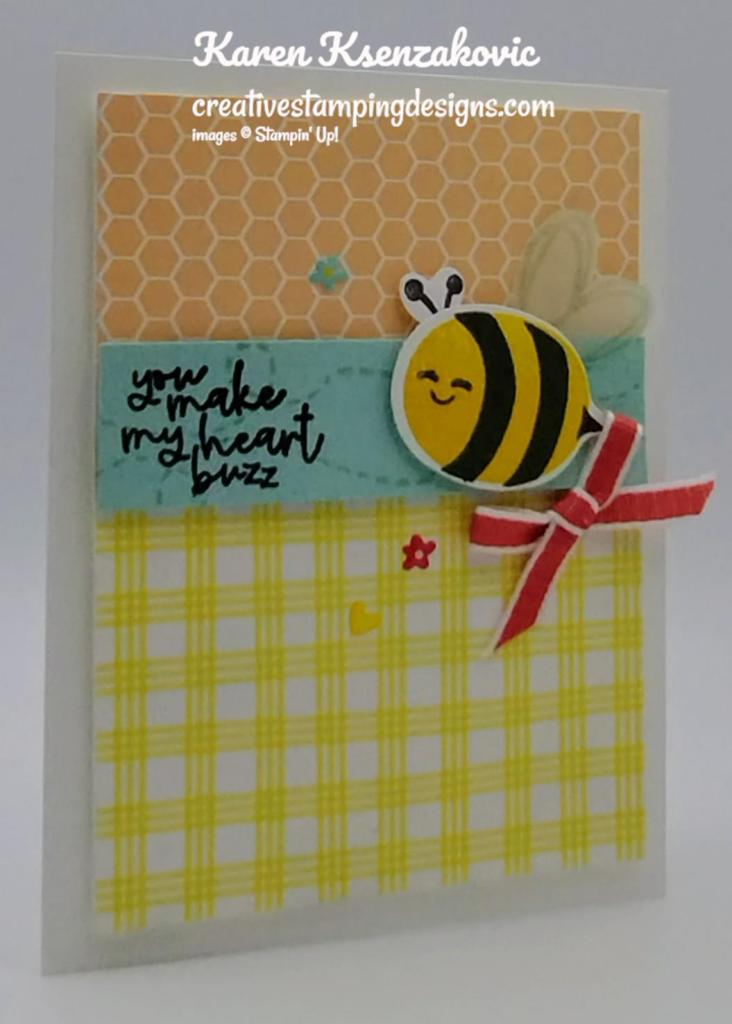
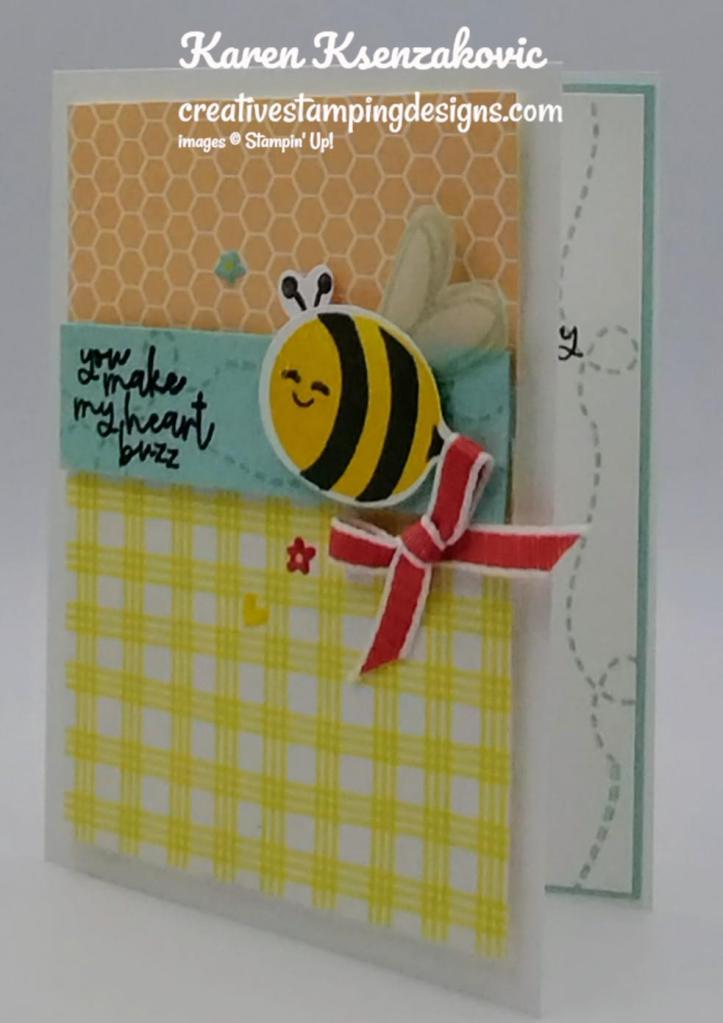
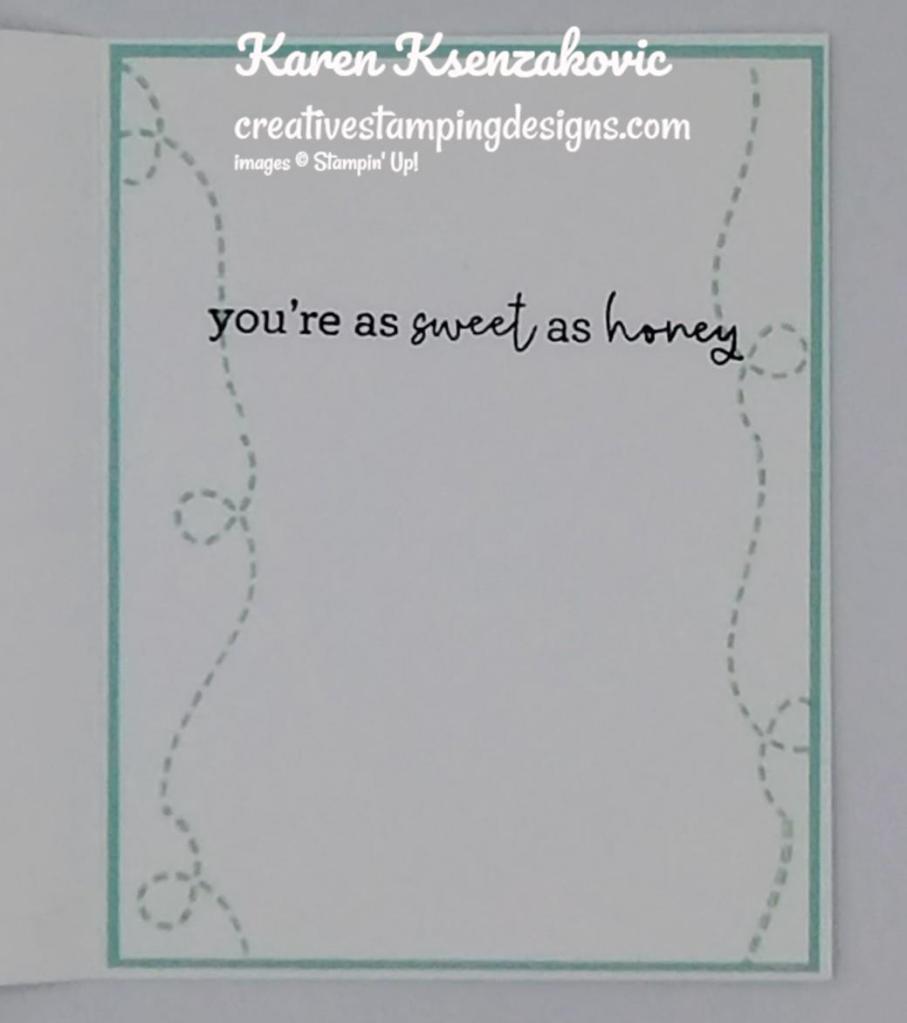
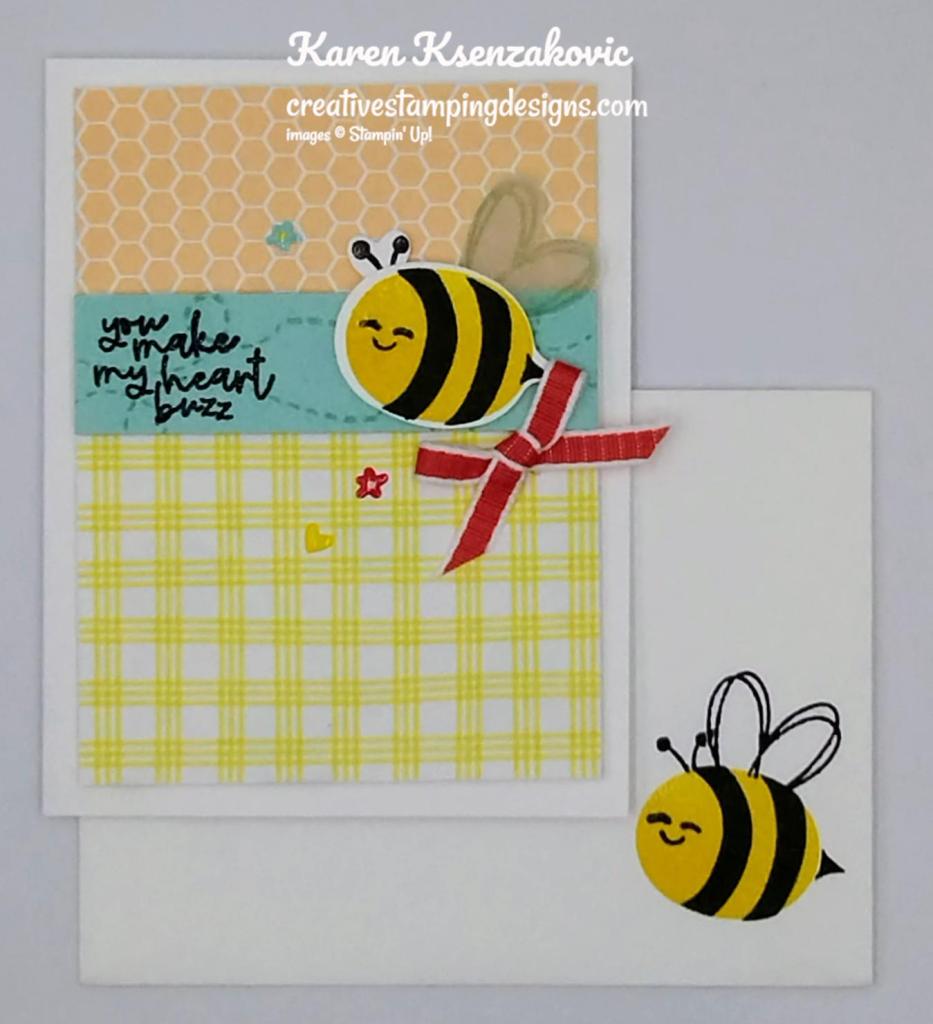

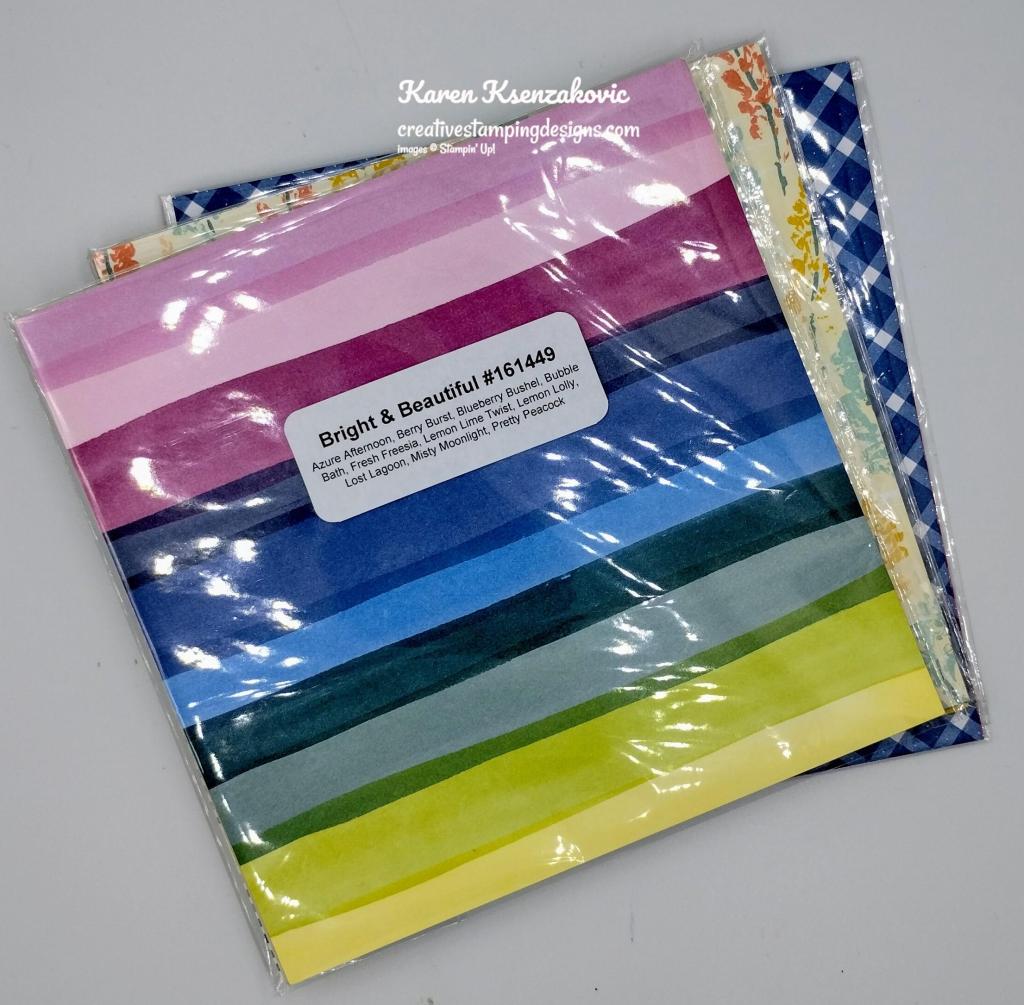


")

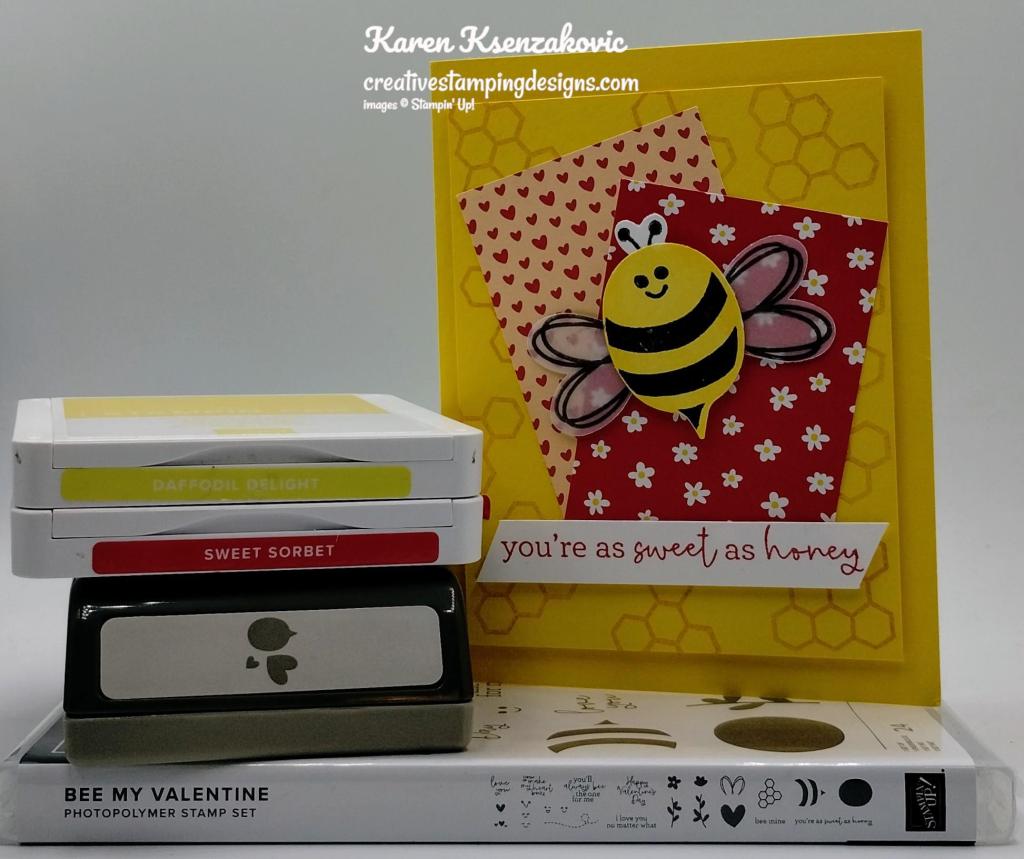
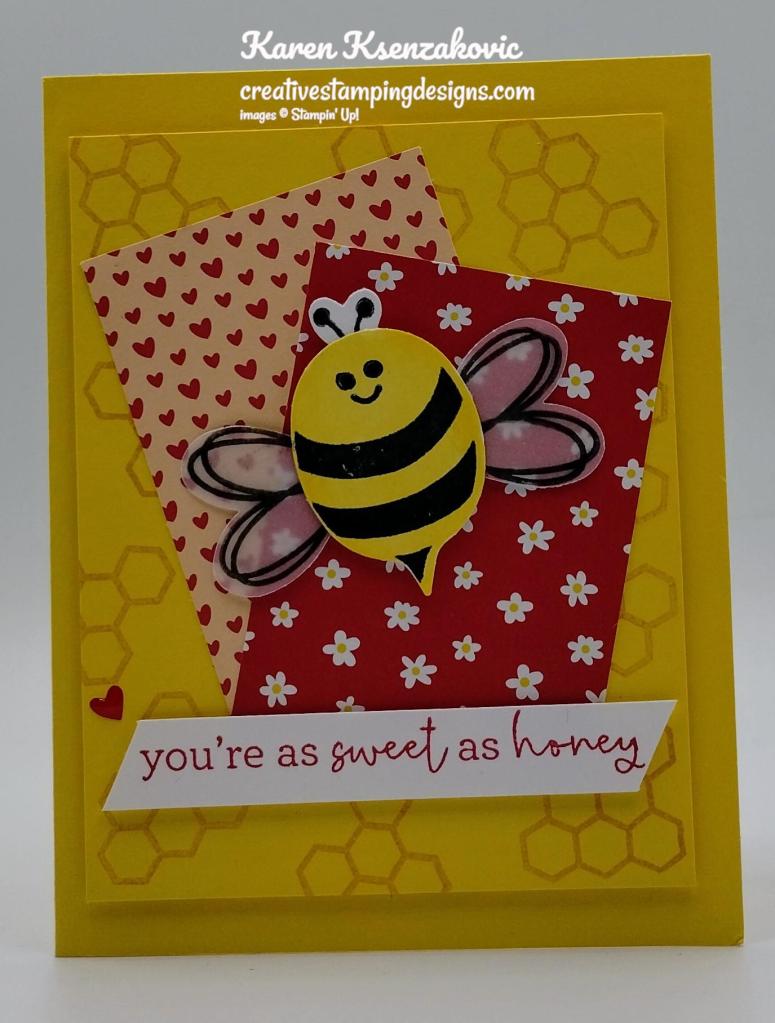


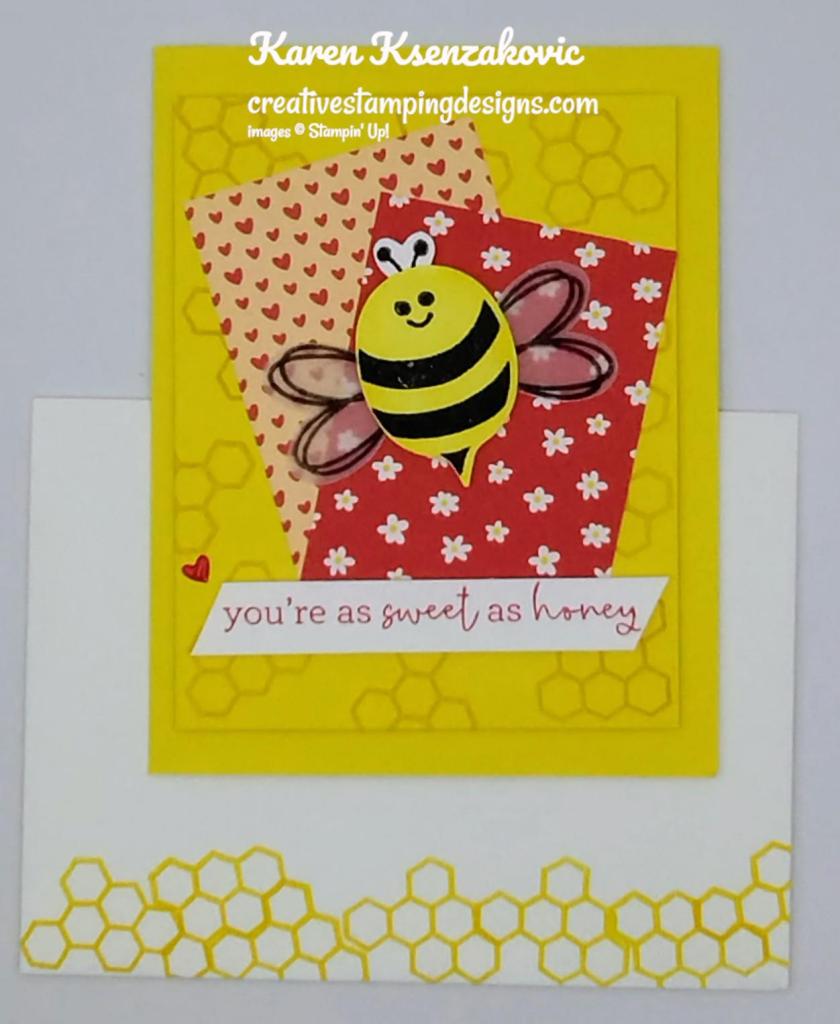


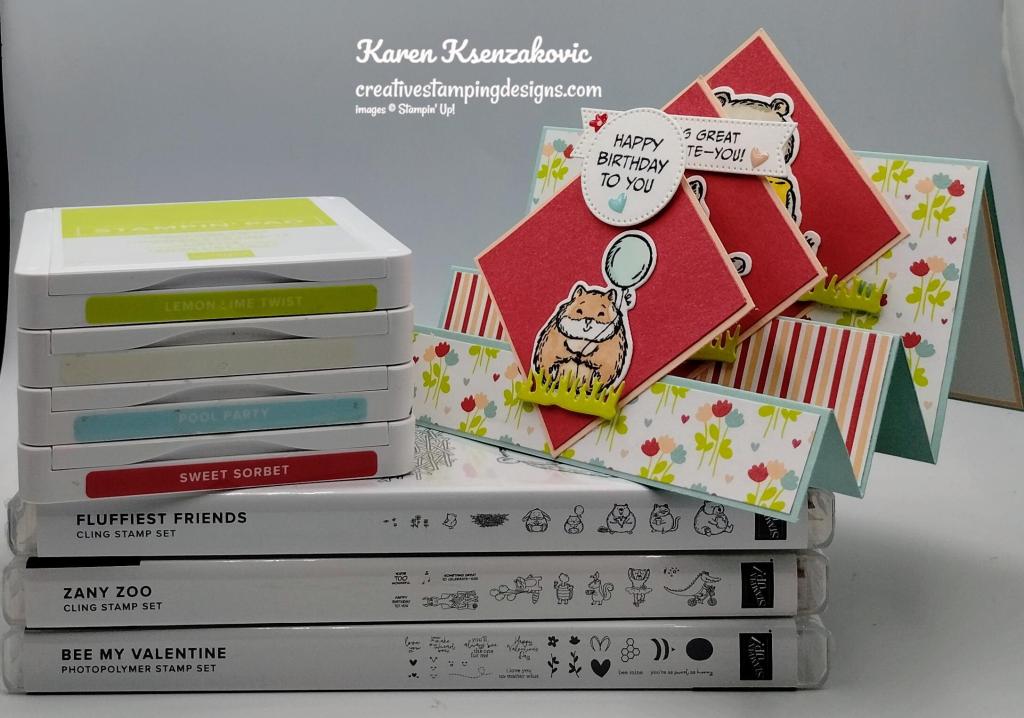
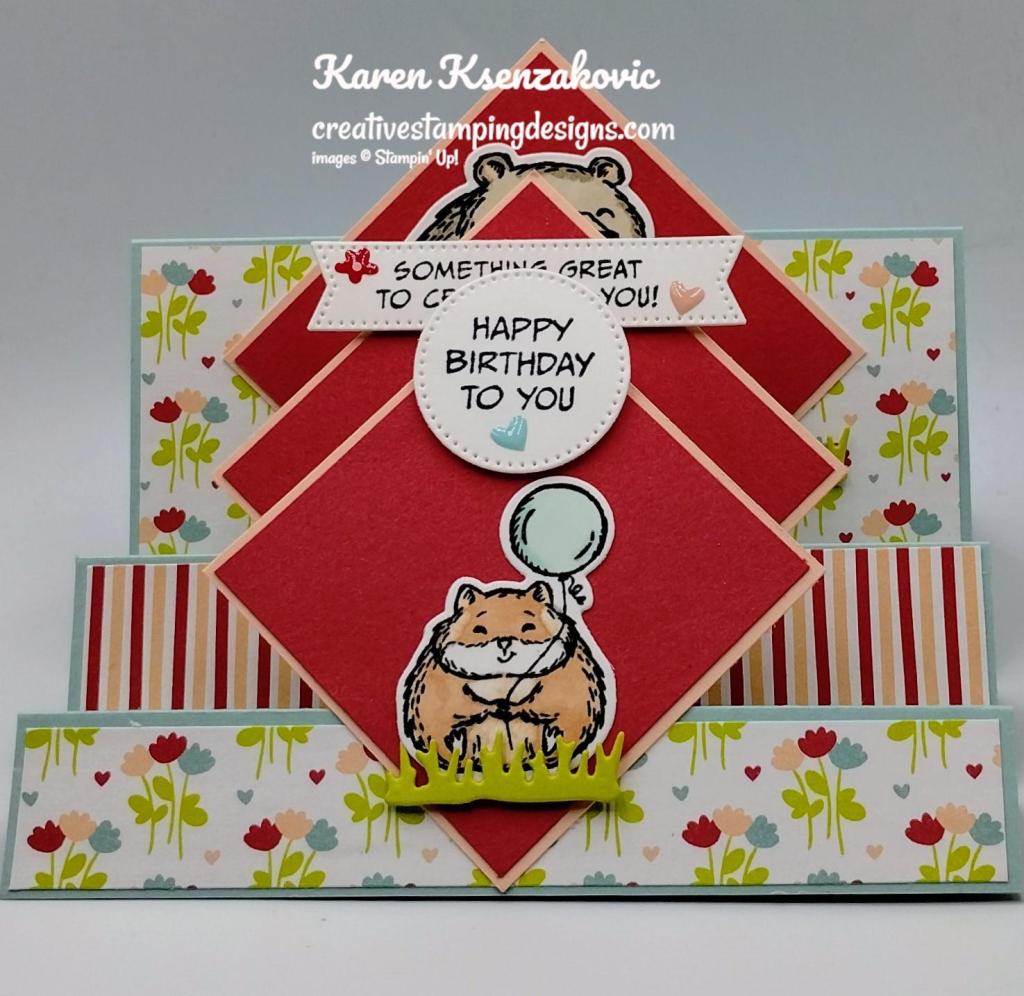
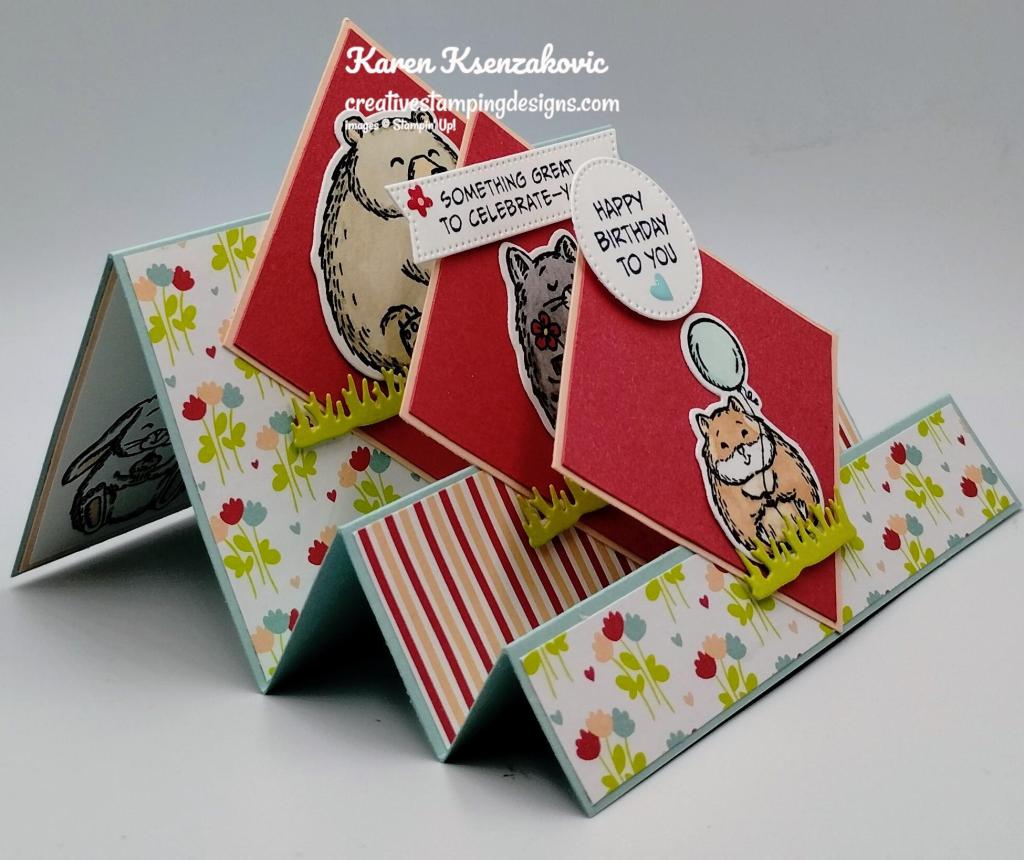

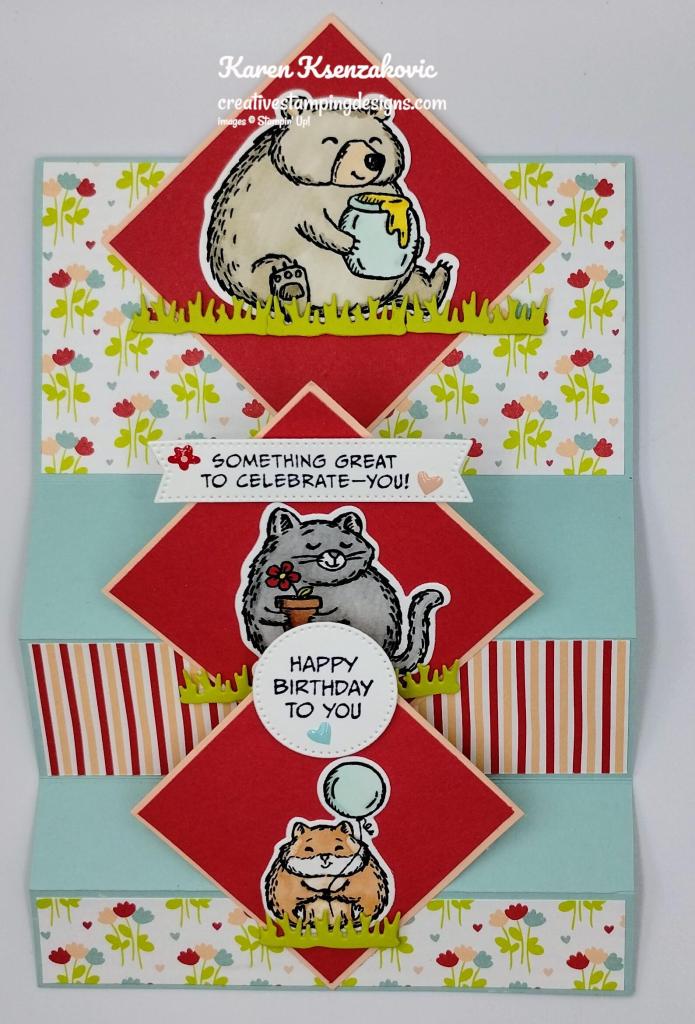
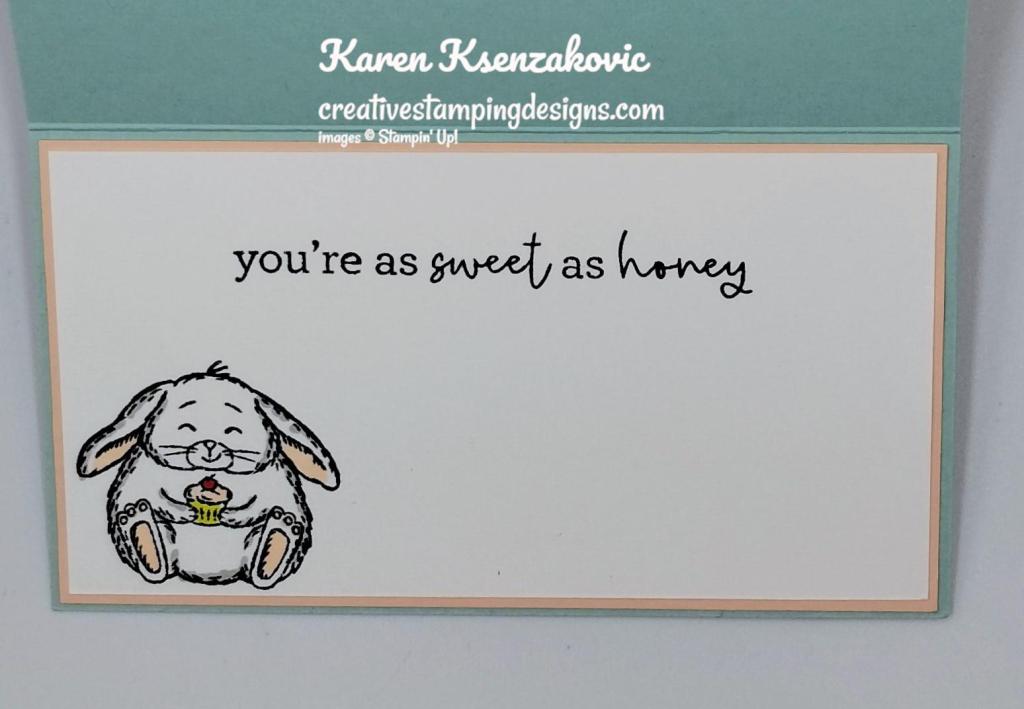

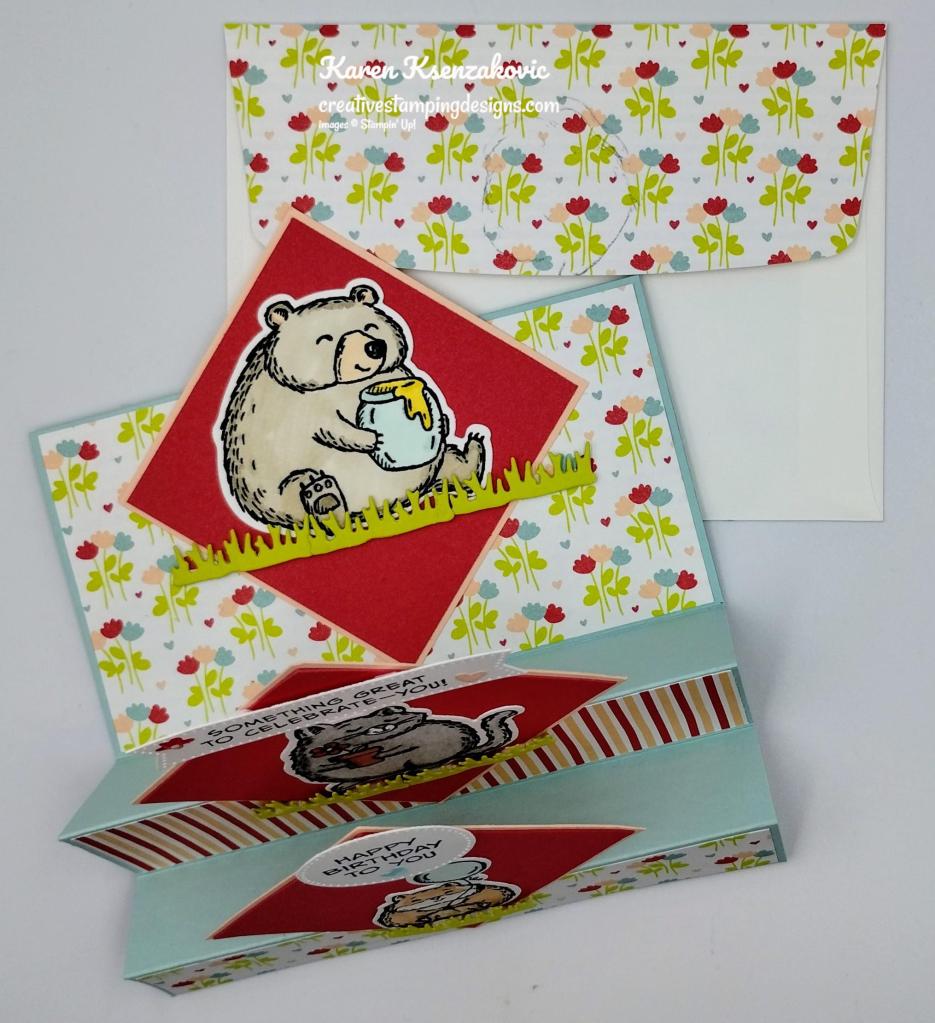


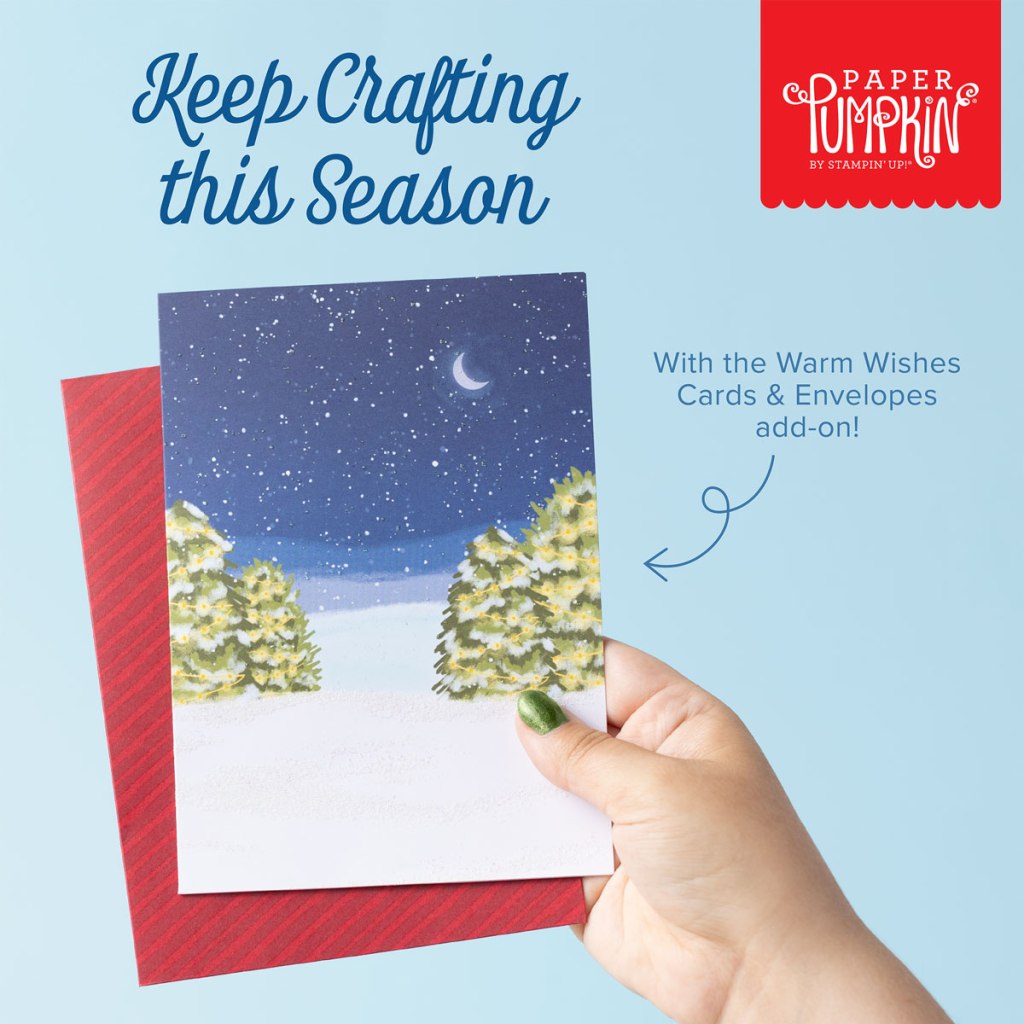
")


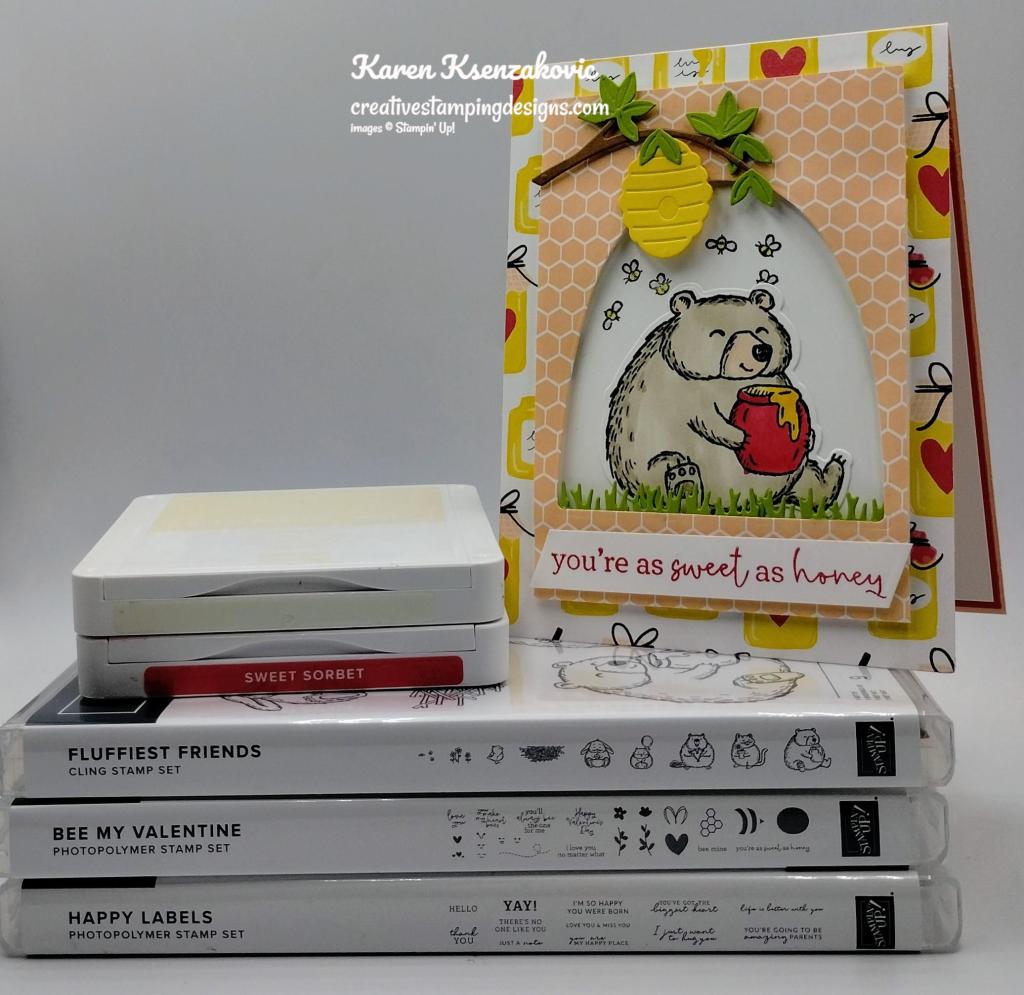


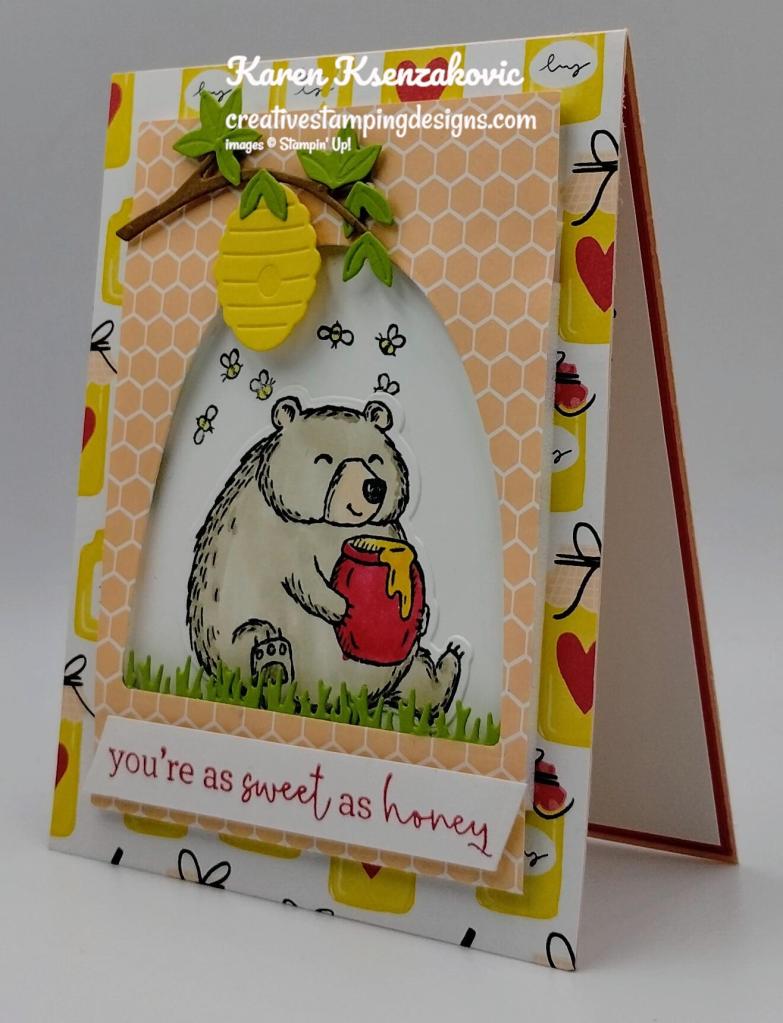


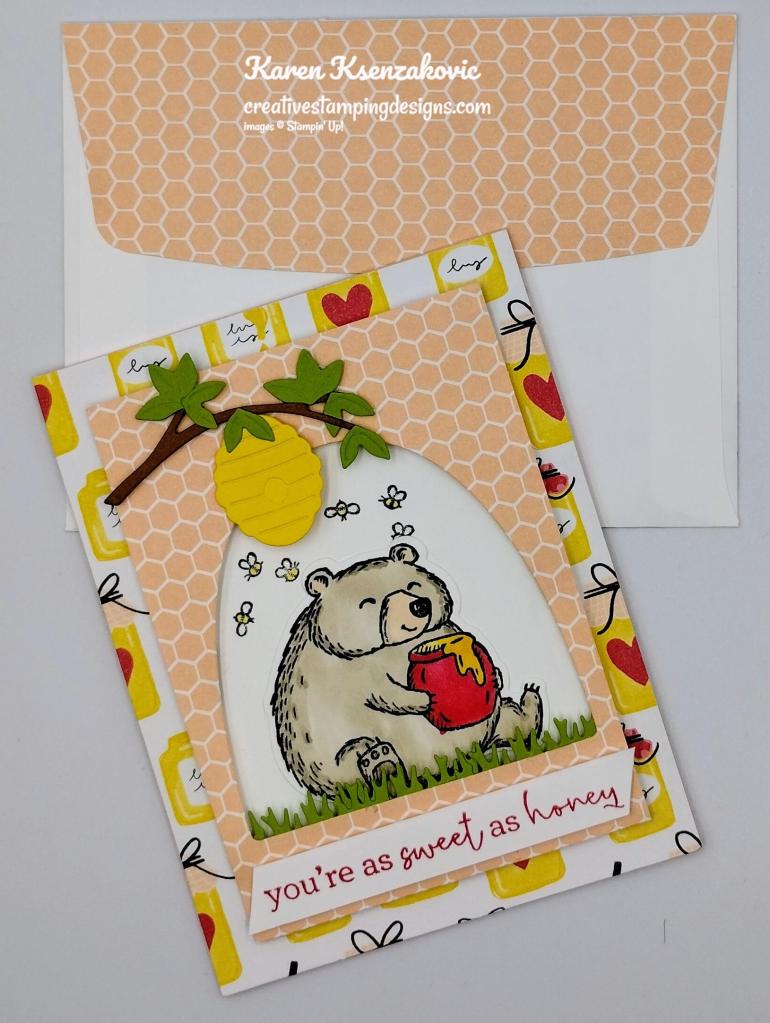


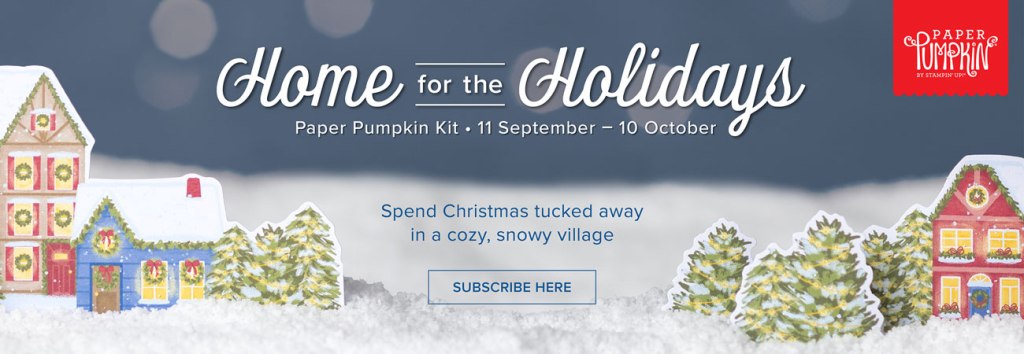
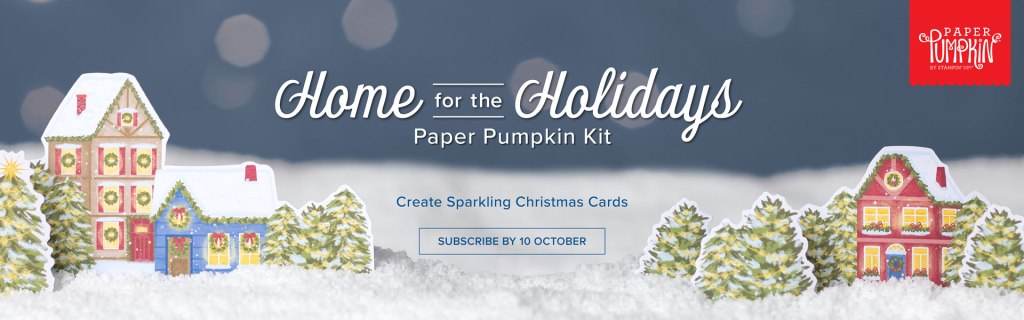

")


