Good Sunday morning stamping friends. I hope you weekend is going well. Yesterday was a long day, but a very enjoyable one celebrating my son’s engagement. By the time I got home, I just wanted to crash.
Before I get started with my card, I want to thank all that participated in my fundraiser. Unfortunately, we did not make the goal of $500, but we did donate $235. Thank you so very much for being a part of raising money for the Texas flooding.
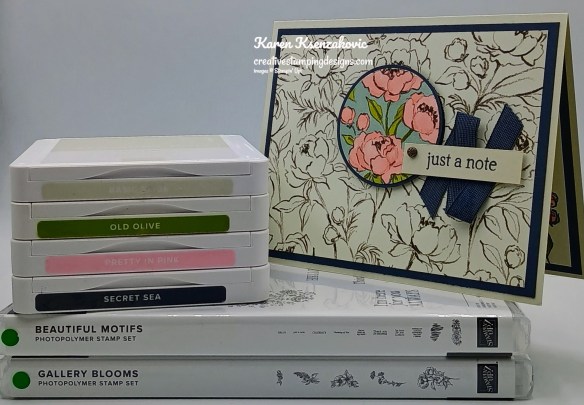
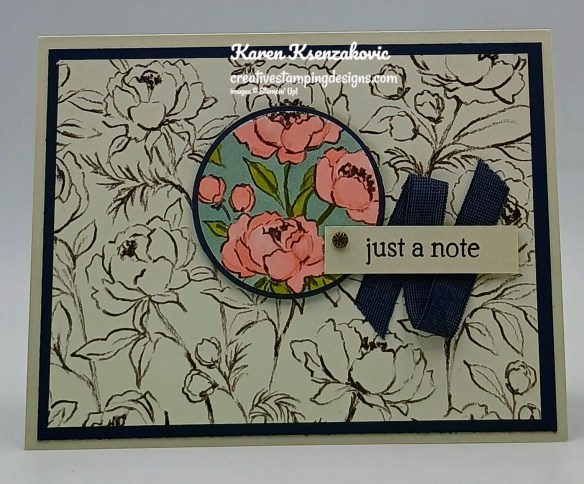
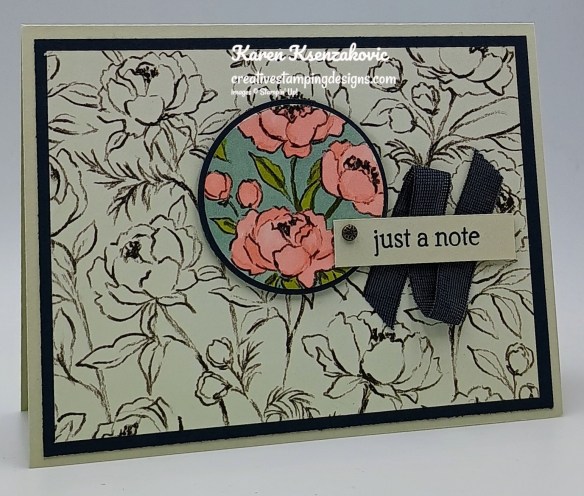
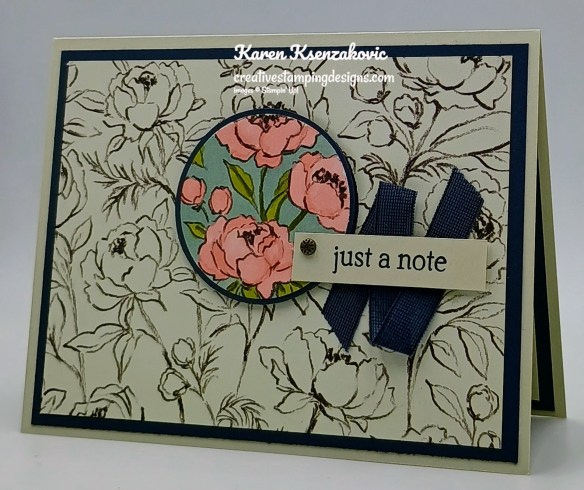
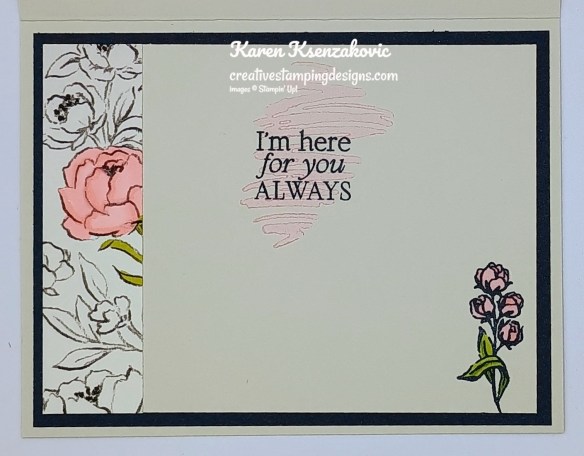
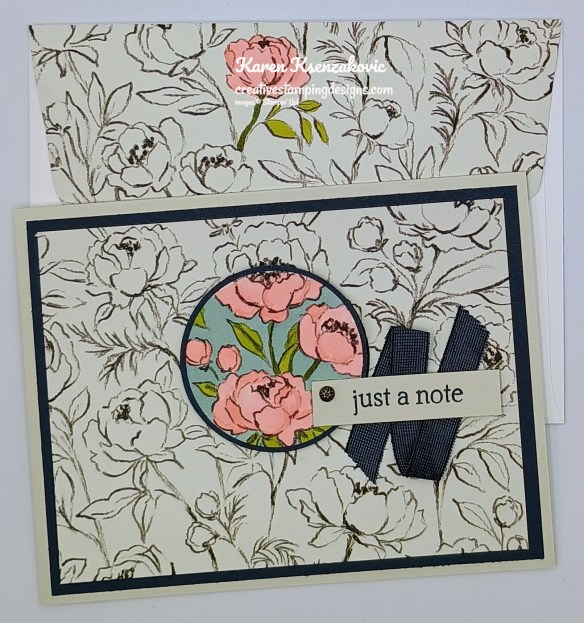
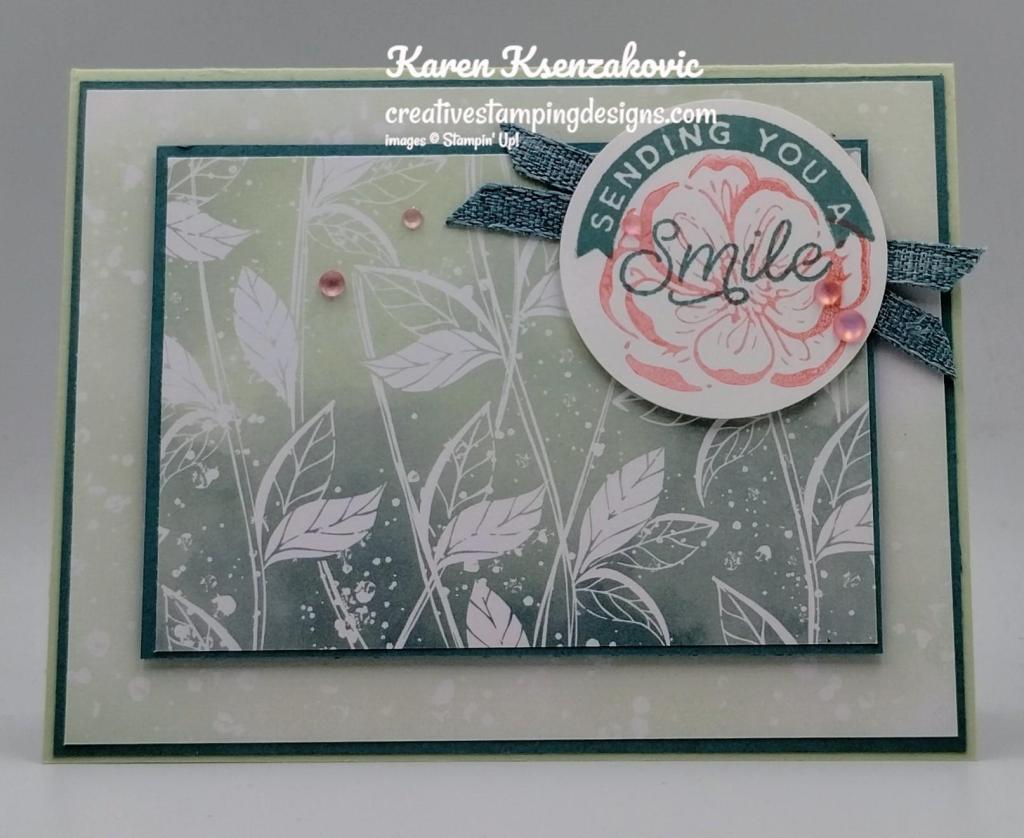
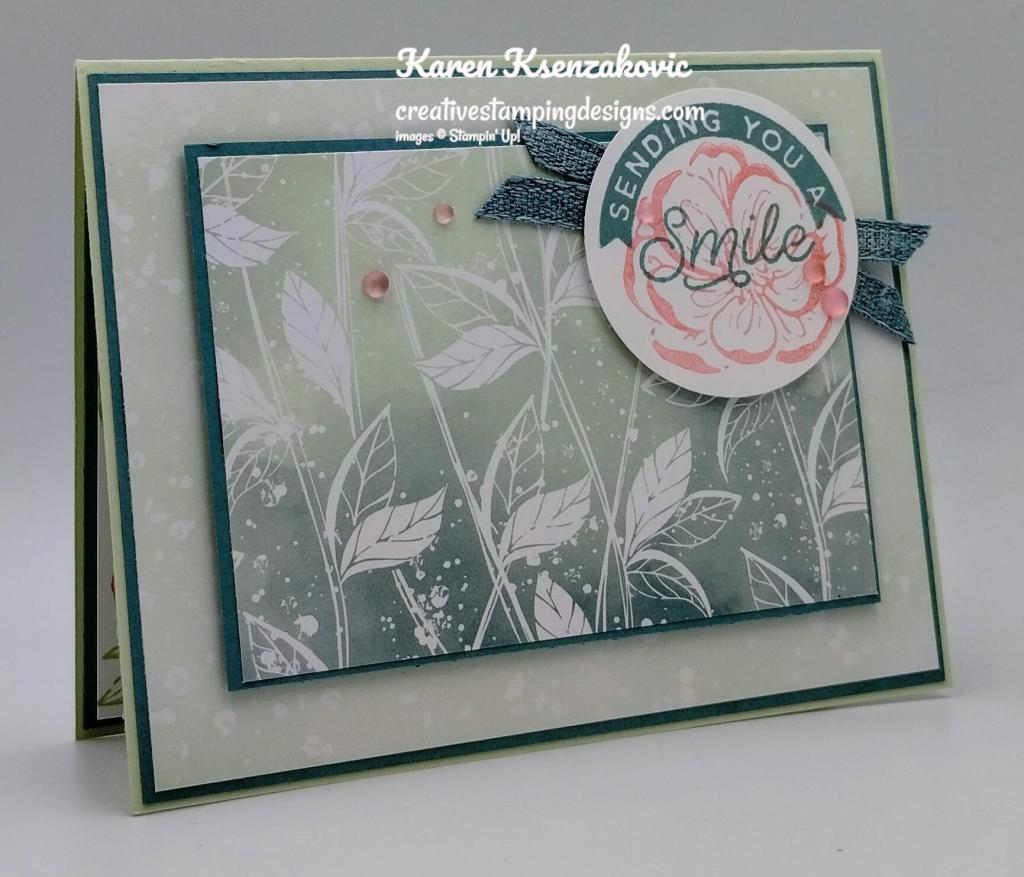
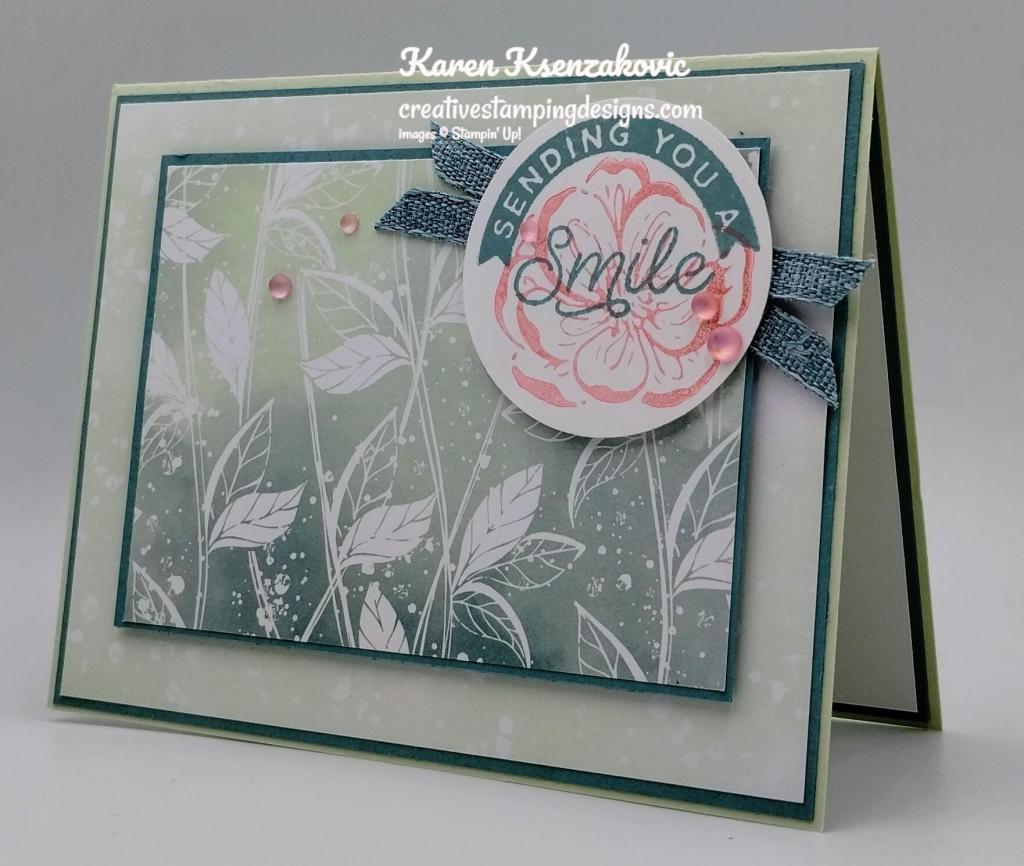
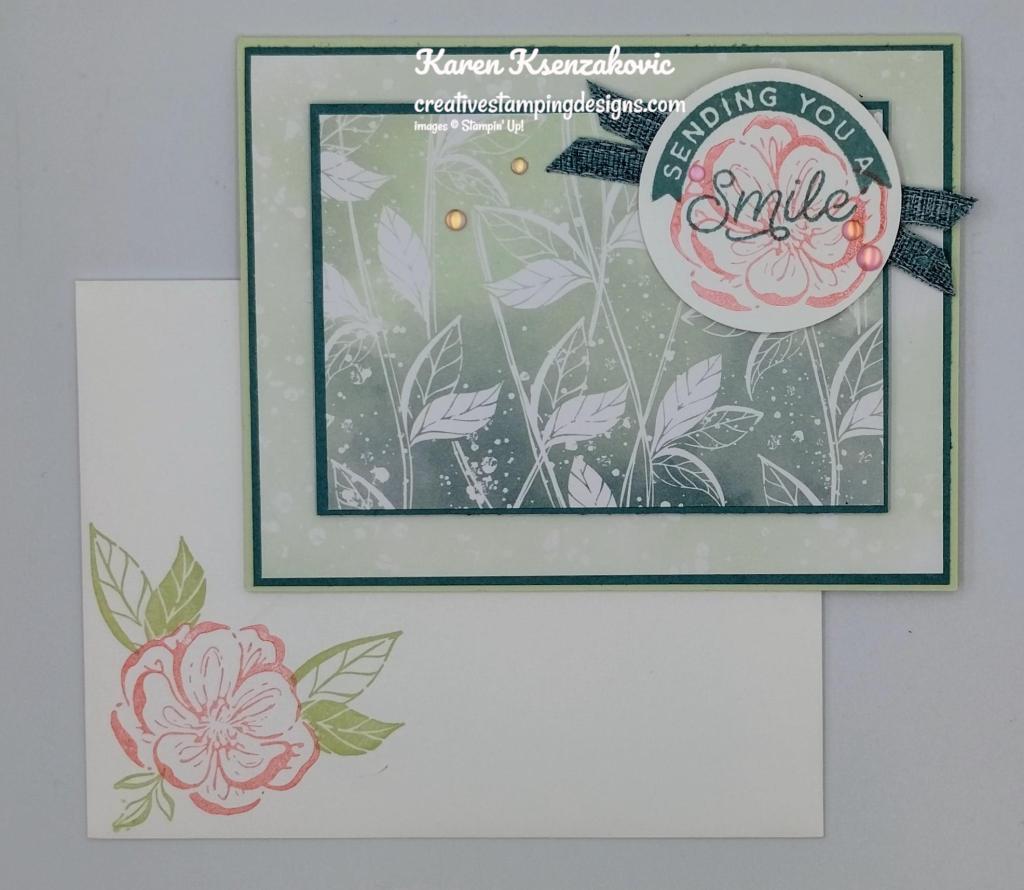
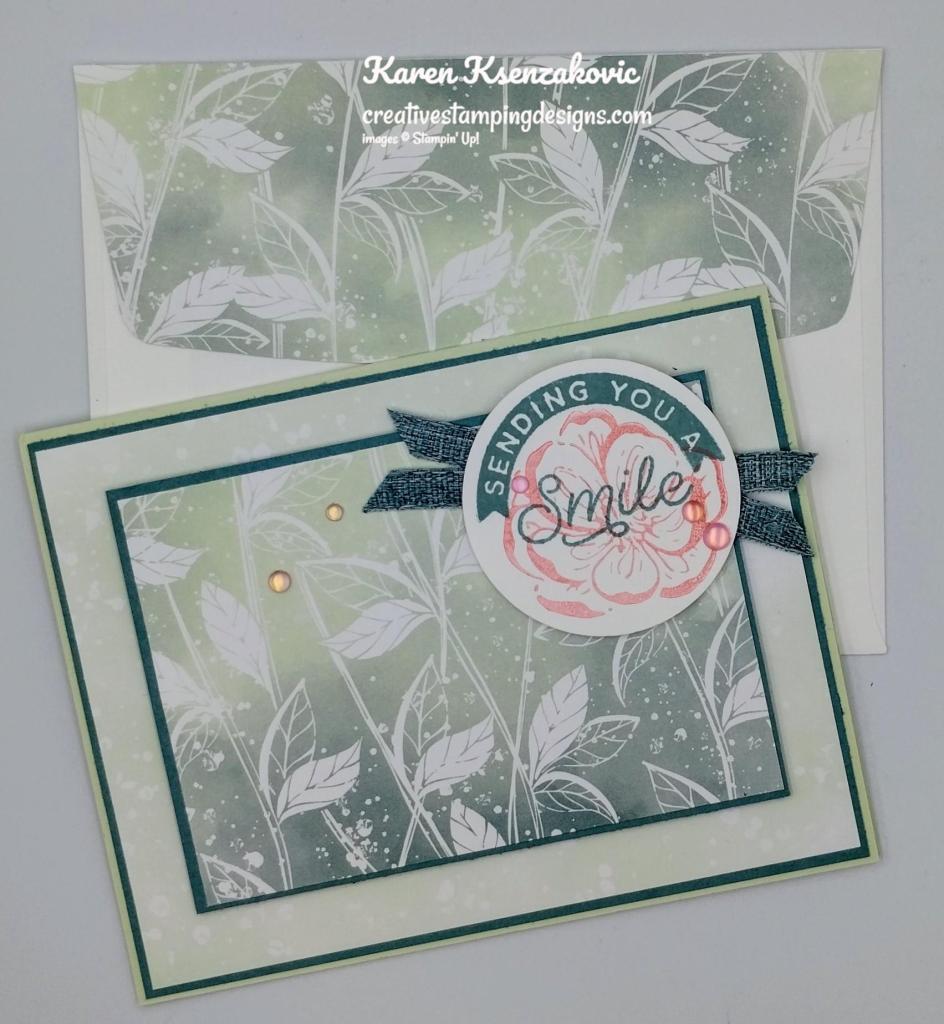
I did a fun technique for today’s card called the Spotlight Technique. I love doing this technique, it’s so easy and it brings your eye to one focal point. If you’d like to see a quick video of how I made this card, Click Here to go to my Instagram Reels. Here is my card for today.
I used the Stampin’ Up! Beautiful Motifs Photopolymer Stamp Set along with the Stampin’ Up! Gallery Blooms Photopolymer Stamp Set, Beautiful Gallery 6 x 6 Designer Series Paper and the 1 7/8″ & 2″ Circle Punches for my card today.
Using the 1 7/8″ Circle Punch, punch out a section of the Beautiful Gallery DSP card front. Using the 2″ Circle Punch, punch out a section of the Secret Sea mat. Adhere the Beautiful Gallery DSP card front to the Secret Sea mat. Adhere the layered panel to the Basic Beige card base with Liquid glue.
Color the punched-out section of the Beautiful Gallery DSP with Cloud Cover, Old Olive and Pretty in Pink Stampin’ Blends Markers. Adhere the colored panel to the 2″ Secret Sea mat. Adhere the layered panel to the card front where you punched out the panel, lining up the flowers and stems, with Stampin’ Dimensionals.
On the pane of Basic Beige, stamp the sentiment from the Beautiful Motifs stamp set in Secret Sea Ink. Adhere a piece of Secret Sea 3/8″ Faux Linen Ribbon to the card front. Adhere the sentiment over the ribbon with Stampin’ Dimensionals. Add a Pressed Flower Motifs to the sentiment.
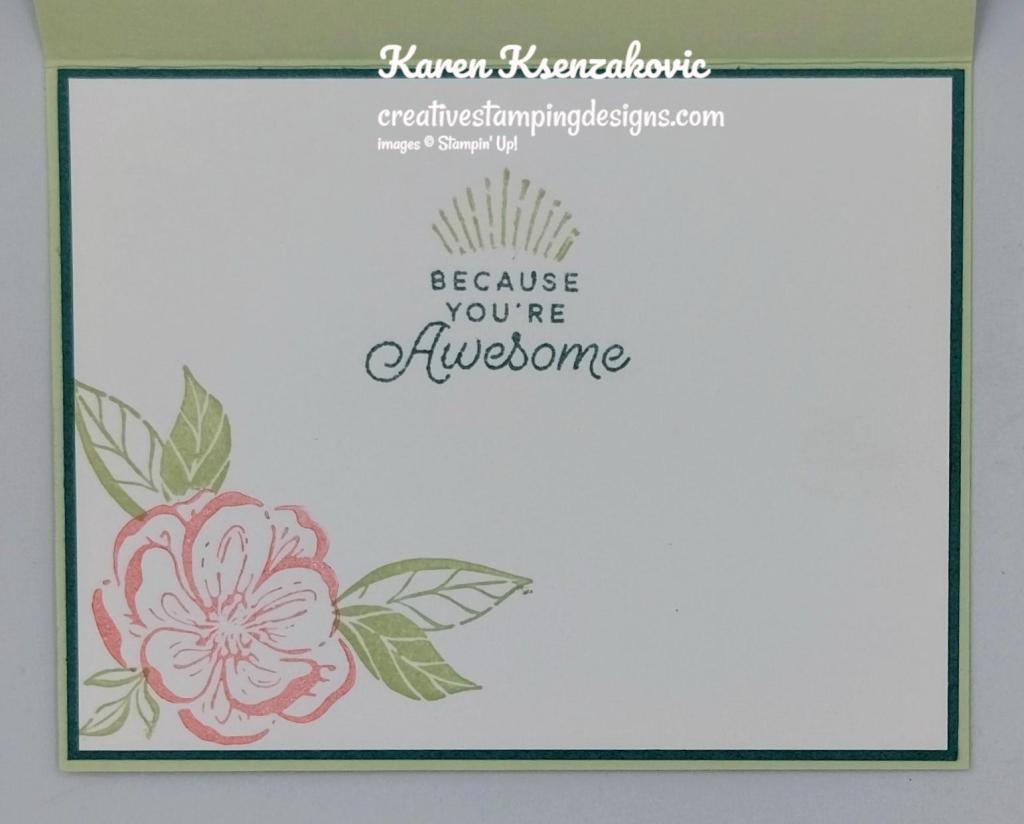
On a panel of Basic Beige, stamp the sentiment from Beautiful Motifs stamp set in Secret Sea Ink. Stamp the swish image from Beautiful Motifs stamp set in Pretty in Pink Ink, stamping off once on scrap paper, over the sentiment. Stamp the small flower image from Gallery Blooms stamp set in Secret Sea In on the bottom of the panel. Color the image with Old Olive and Pretty in Pink Stampin’ Blends Markers. Adhere a panel of Beautiful Gallery DSP to the side of the panel, coloring one of the flower images with Pretty in Pink Stampin’ Blends Markers. Adhere the Basic Beige panel to a Secret Sea mat then to the inside of the Basic Beige card base.
Decorate a Basic White Medium Envelope to finish your card. Stamp the large floral image from Gallery Blooms stamp set in Secret Sea Ink on the envelope front. Color one of the flowers with Pretty in Pink Stampin’ Blends Markers and the leaves with Old Olive Stampin’ Blends Markers. Adhere a panel of Beautiful Gallery DSP to the envelope flap coloring 1 image on the DSP with Old Olive and Pretty in Pink Stampin’ Blends Markers.
Thank you for stopping by my blog today. I hope you like the card and will give it a try. Happy Stamping!!
If you need any stamping supplies, I’d love to be your Demonstrator. Just click HERE to go directly to my online store or drop me an email if you have any questions.
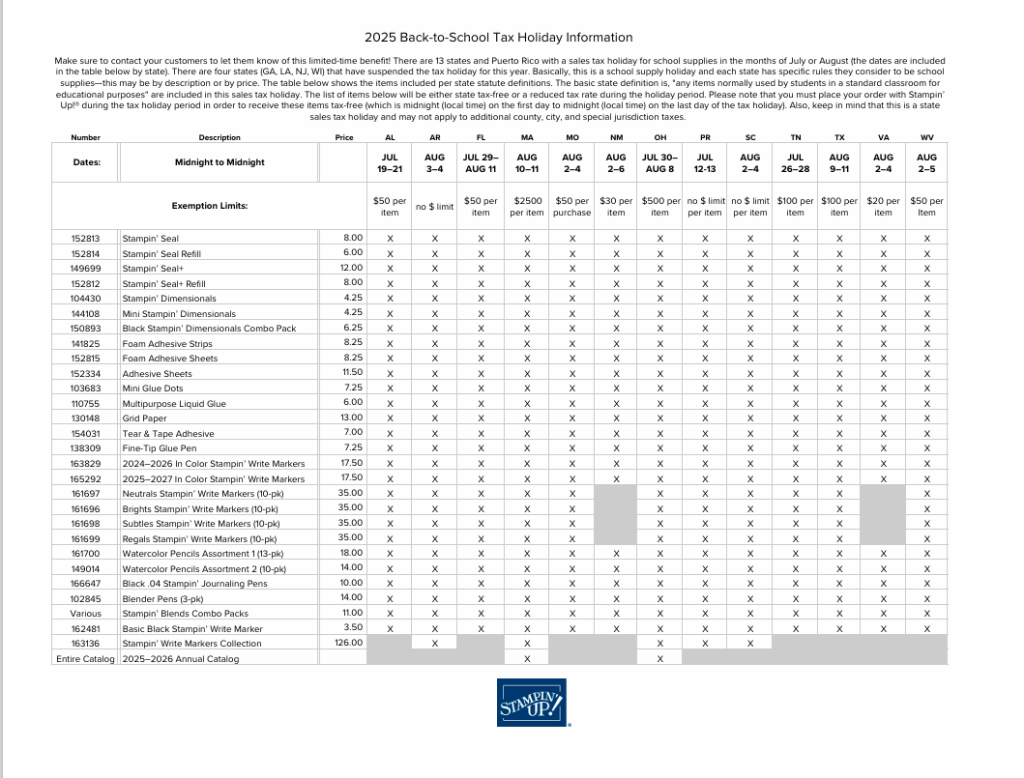
Twelve states and Puerto Rico are having Back-to-School Sales Tax Holidays this year and some Stampin’ Up! items qualify for the tax break in those states!
The states with upcoming tax holidays are: Alabama, Arkansas, Florida, Massachusetts, Missouri, New Mexico, Ohio, South Carolina, Tennessee, Texas, Virginia and West Virginia. So if you live in one of those states or Puerto Rico, take a second to download the spreadsheet below and mark your calendar!
Here is the list of states having sales tax holidays, what the dates are and what supplies will be tax free during the holiday (click on the image to download a full-size printable page):
Please note that you must place your order with Stampin’ Up! during the tax holiday period in your state in order to receive these items tax-free (which is midnight on the first day to midnight on the last day of the tax holiday). Also, keep in mind that this is a state sales tax holiday; the state statute may not apply to county, city, and special jurisdiction taxes.
For those wondering about Georgia, Illinois, Louisiana, New Jersey, and Wisconsin, those states have suspended the sales tax holiday this year.
Don’t miss the coordinating Circle of Seasons Dies Add-On!
Make the most of your Paper Pumpkin kits with the Circle of Seasons Dies add-on! Quickly and cleanly cut out a strawberry with a blossom, a circle, a leaf, or an acorn to elevate your crafting projects. These additional dies are designed to work with THREE Paper Pumpkin Kits: the Sweeter with You Paper Pumpkin Kit, the Farmhouse Florals Paper Pumpkin Kit, and the Fall for Toile Paper Pumpkin Kit. Pair these dies with other Stampin’ Up! products for even more creative options! This exclusive add-on (item 167277) coordinates with the three upcoming kits! Paper Pumpkin subscribers can purchase it beginning June 11. Add-on is available only while supplies last, so it’s best to shop early!
DETAILS – 4 dies – Largest die: 2-1/2″ x 1-1/4″ (6.4 x 3.2 cm) – Use with a Stampin’ Cut & Emboss Machine (sold separately)
You must be a current Paper Pumpkin subscriber to purchase this item. To become a subscriber, visit www.stampinup.com/paperpumpkin.
Note: Supplies may be limited toward the end of the subscription period.
Good Friday morning stamping friends and welcome to my Fun Fold Friday. I hope you are all doing well and had a wonderful week. We stayed until Magic Kingdom closed on Wednesday and had such a great time going on rides, walking around, eating some great food and of course seeing the fabulous firework show. Yesterday we spent the whole day at Epcot. The wine and food festival is going on, so we tried some great food. I was able to get my caramel apple from Germany that’s made with Werther’s Caramels. I’ve waited 4 1/2 years to get another one of these apples. After having one here, I don’t want any others. One of my husband’s co-workers happen to be here in Disney and we met up with him and his wife for a delicious dinner in Canada, at Le Cellier Steakhouse. Today we’re off to Universal Studios. This will be the 1st time we’ve ever gone there, so I can’t wait to see what’s there.
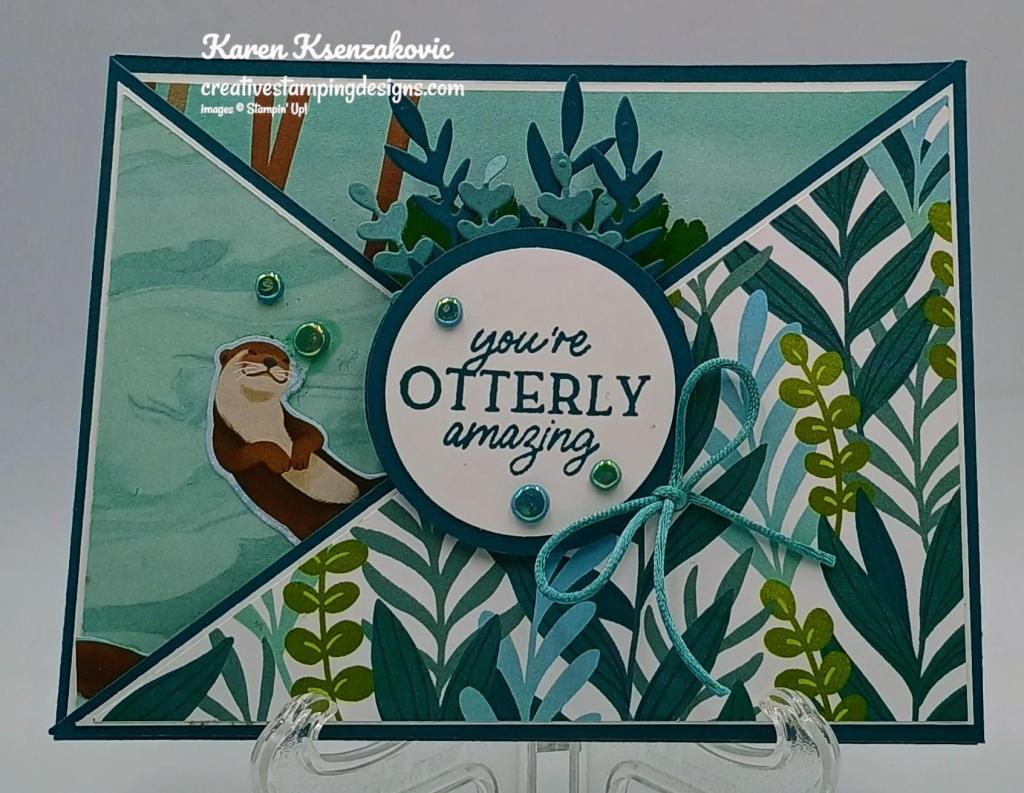
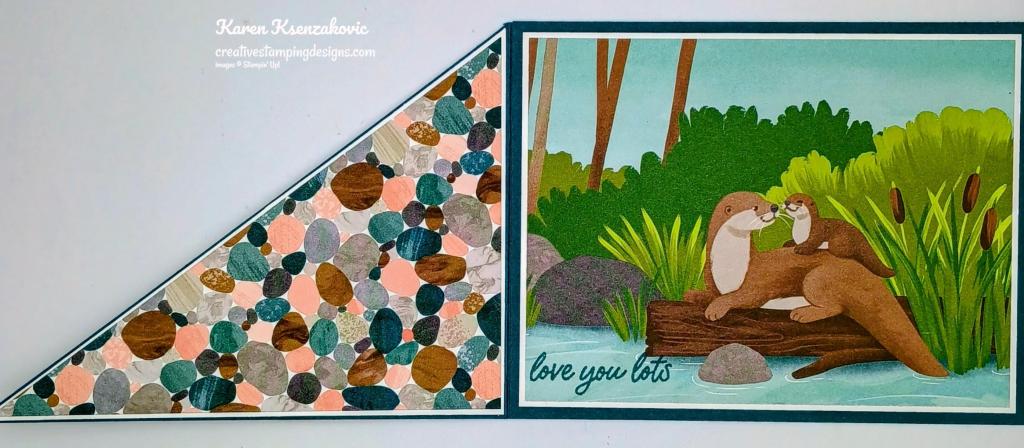
Today’s card is one that we made at our monthly stamping studio last Tuesday for our mystery stamping portion of the meeting. Jaimie sent us all the measurements and talked us through the process of putting the card together. I decided I wanted to use some of the new Online Exclusive products that will be available starting November 5th. If you are interested in getting these products early, let me know, I’d be happy to talk to you about signing up to be a demonstrator and you can add them to your starter kit. Here’s my card for today.
I used the Stampin’ Up! Online Exclusive Otterly Adorable Suite Collection for my card today.
Start with 2 panels of Pretty Peacock card stock cut at 4 1/4″ X 11″ and scored at 5 1/2″. Cut 1 of the panels from the bottom right to the left side of the score line cutting on a diagonal. Cut the other panel from the bottom left to the right side of the score line cutting on a diagonal. Adhere the 2 panels together by adhering the solid card backs together using Liquid Glue.
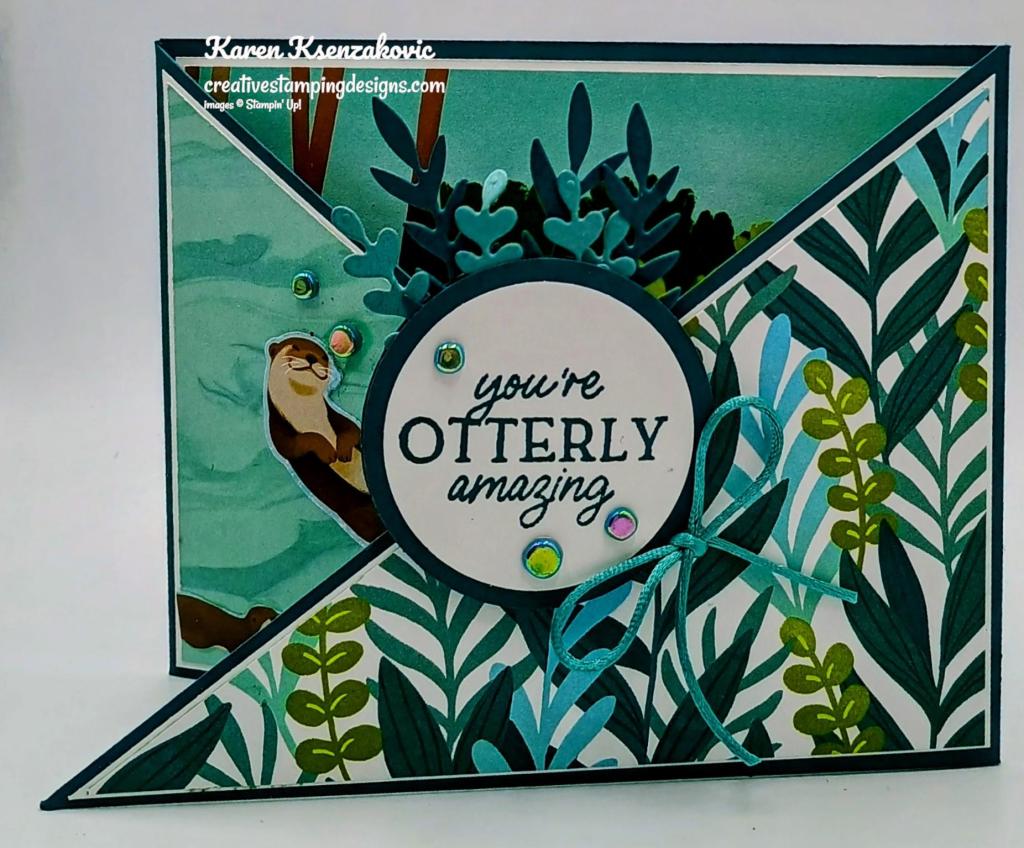
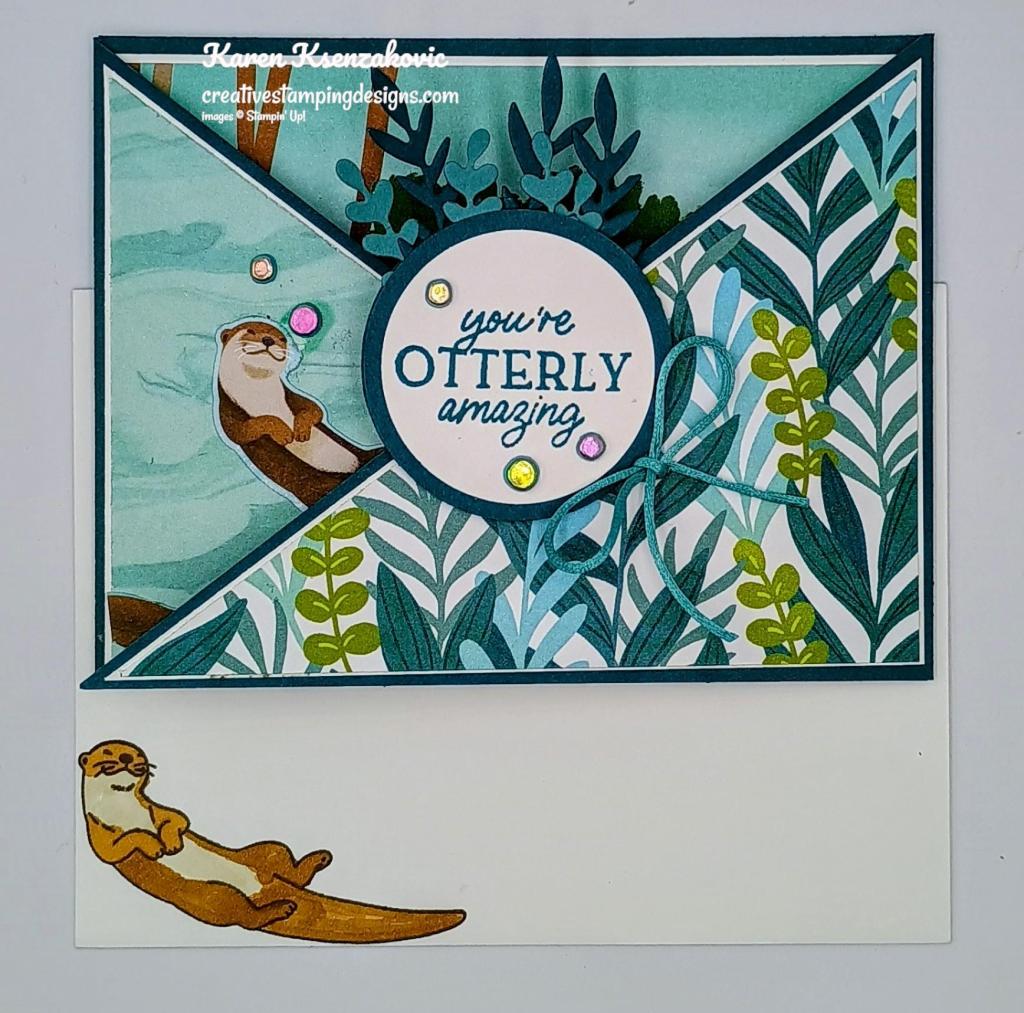
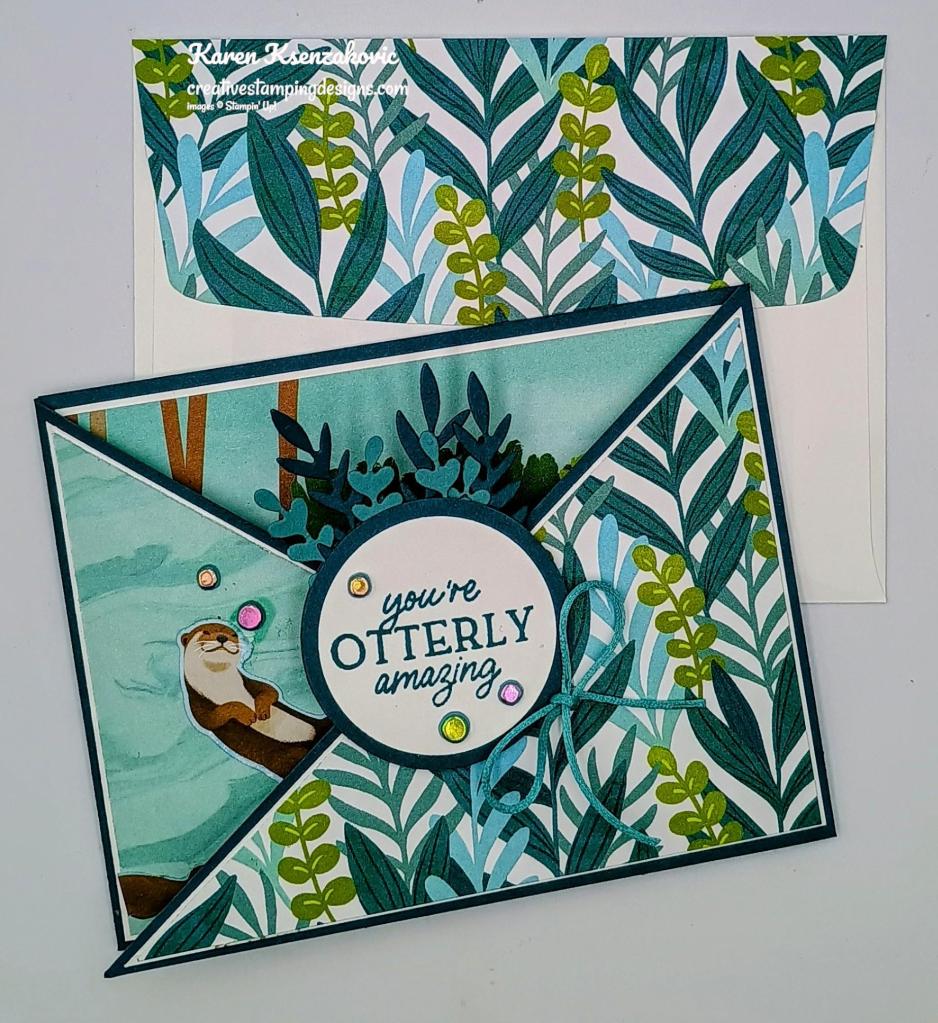
Adhere 1 of the triangle panels of Otterly Adorable Designer Series Paper to a Basic White triangle mat using Liquid Glue. Adhere the layered panel to the right card front using Liquid Glue. On a panel of Basic White, stamp the sentiment from the Stampin’ Up! Otterly Amazing Cling Stamp Set in Pretty Peacock Ink. Cut the sentiment out using the 1 3/4″ Circle Punch. From panels of Lost Lagoon and Pretty Peacock, cut 3 each of the greenery die from the Otterly Amazing Dies. Punch 2 circles using the 2″ Circle Punch from a panel of Pretty Peacock. Adhere the circle sentiment to the Pretty Peacock circle mat using Stampin’ Seal. Adhere the greenery to the back of the Pretty Peacock circle using Glue Dots. Adhere the 2nd circle to the back of the layered sentiment using Liquid Glue. Adhere the layered circle to the right card front using Stampin’ Dimensionals. Tie a small bow using the Lost Lagoon Soft Cording and adhere it next to the sentiment using a Glue Dot. Add a few Riverside Irregular Pearls to the sentiment.
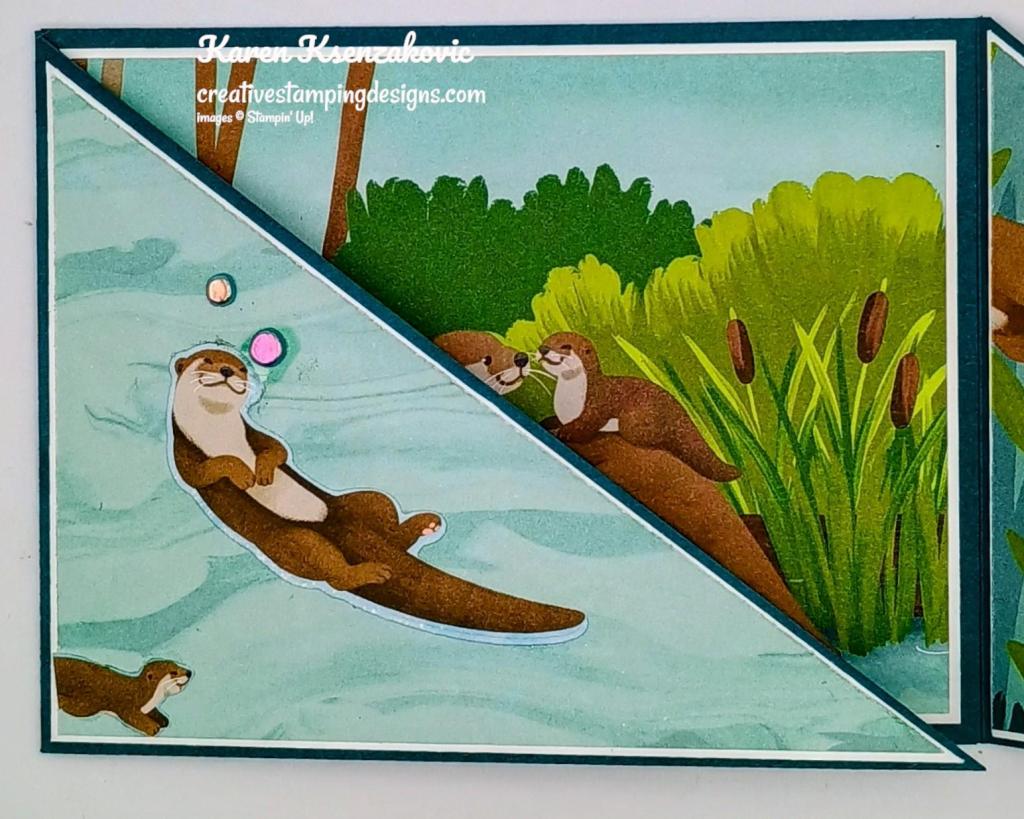
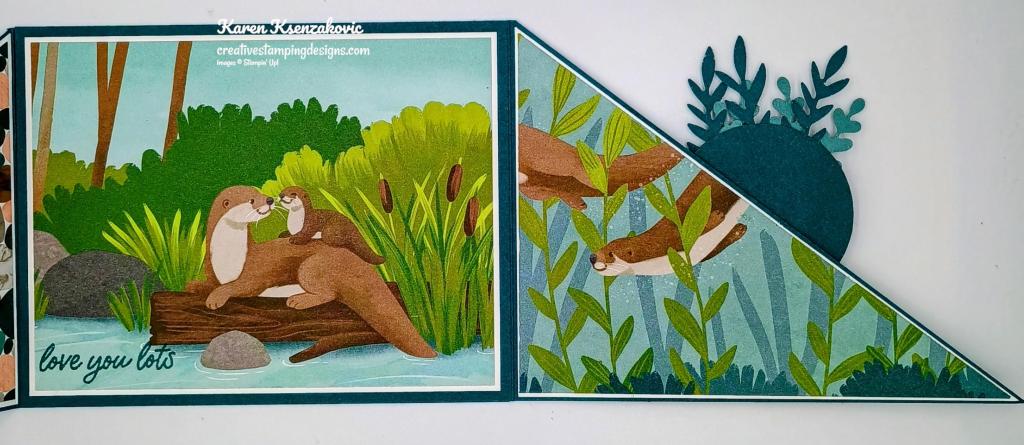
Adhere another triangle panel of the Otterly Adorable DSP to a triangle Basic White mat using Liquid Glue. Adhere the layered panel to the left side of the card front using Liquid Glue. Using the Otterly Amazing Dies, cut the otter images from a panel of Otterly Adorable DSP. Adhere them to the left side panel using Liquid Glue.
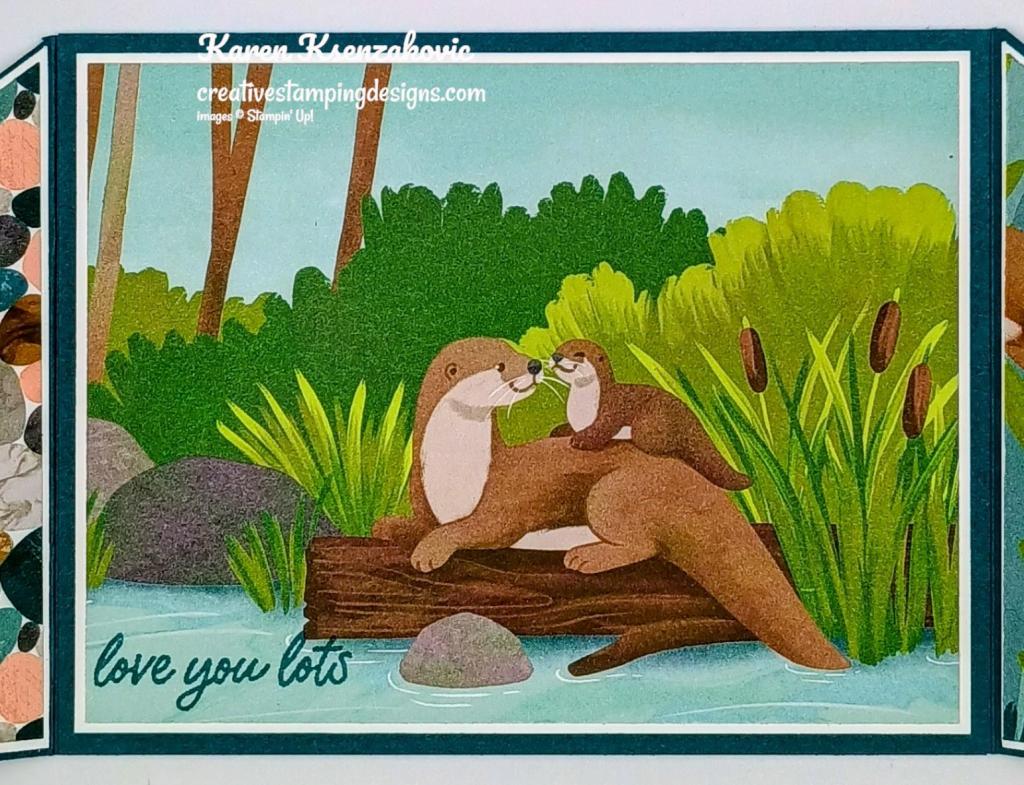
For the inside, stamp the sentiment from the Otterly Amazing stamp set in Pretty Peacock Ink on the bottom of a panel of Otterly Adorable DSP. Adhere the stamped panel of Otterly Adorable DSP to a Basic White mat using Stampin’ Seal. Adhere the layered panel to the inside of the Pretty Peacock card base using Liquid Glue.
For the inside of the right & left sides, adhere 2 triangle panels of Otterly Adorable DSP to Basic White mats using Liquid Glue. Adhere the layered panels to the inside of the right & left sides using Liquid Glue.
Finish the card by decorating a Basic White Medium Envelope. Stamp the otter image from the Otterly Amazing stamp set in Early Espresso Ink on the envelope front. Color the image using Crumb Cake and Pecan Pie Stampin’ Blends Markers. Adhere a panel of Otterly Adorable DSP to the envelope flap.
Thank you for stopping by my blog today. I hope you like the card and will give it a try. Happy Stamping!!
If you need any stamping supplies, I’d love to be your Demonstrator. Just click HERE to go directly to my online store or drop me an email if you have any questions.
MY CURRENT HOST CODE IS: EMDXSBC9
Use this host code when placing an order with me. When you order $50 or greater you will receive a free gift from me! If your order is over $150, please do not use this code, but you’ll still get the free gift. The free gift is your choice of any 1 item valued up to $10.00 from the 2024-2025Annual Catalog, or from the Online Exclusives! Unfortunately, packs of cardstock are no longer an option for a free gift. Shipping has become too expensive to ship and it’s costing me as much to ship as the cardstock costs. For any orders $50 or more I will also send you my monthly class tutorials. Click HERE or go to my Customer Rewards for more details and to see what this month’s tutorials are.
Please remember to use my current Host Code and make sure that you can see my name on the final checkout page listed as your Demonstrator when you order so that you know that you’re ordering with me, and you’ll get my rewards!
It’s time to shop ‘til you drop! Starting October 16 at 12:00 a.m. (MT), you can purchase all* CTMH products for 30% off. That’s right—30%! And don’t wait too long—products are available only while supplies last.
*This sale does not include the September Scrapbooking Brochure and any future scrapbooking brochures. It also excludes any Stampin’ Up! scrapbooking products outside of the CTMH product category in the online store.
Starter Kit Special – Get an extra $30 Your Starter Kit October 1 – 31
Hey, friend! Stampin’ Up! has a fantastic offer for anyone who becomes a demonstrator! Join my team between October 1–31and you can choose $155 worth of product in your Starter Kit for only $99! Starter Kits normally include $125 worth of product for $99, so that’s an extra $30 worth of product at no additional cost. This offering also includes free shipping and free business supplies! That’s MORE product for EVEN MORE fun!Click Here for all the details.
Interested but you are not really sure about wanting to commit? Contact me and we can talk, and you can ask me any questions at creativestampingdesigns@gmail.com.
Read more information about becoming a demonstrator Here.
A new line of products for Online Exclusives are coming! You won’t find these items in any catalog. This is a great opportunity to spark creativity, expand a crafting collection, and discover new opportunities—all from the convenience of the online store. These products will be available starting in November, BUTyou can add these new items to your Starter Kit if you join in October. Here’s a little sneak peek of some of the items that you can add to your Starter kit and get them before customers and start to play. Click Here for a sneak peek of what’s coming.
From October 1-31 All Kits from the Kits Collection will be on sale for up to 30% off
Save up to 30% off on all your favorite kits October 1–31! Our kits come with everything you need to create a unique paper craft. We have crafting options for card kits, treat packaging, home decor, and so much more! Kits are only available while supplies last.
Here are the details for the sale:
Promotion Period: October 1-31!
ALL kits from the kits collection qualify for the discount.
There is no limit on how many kits you can order, as long as product is available.
Orders must be opened and placed during the promotion dates. Orders opened before October 1 will not qualify for the sale.
Kits on sale will NOT qualify for the Stampin’ Rewards 50% off.
Kits can be added to a Starter Kit at their discounted rate.
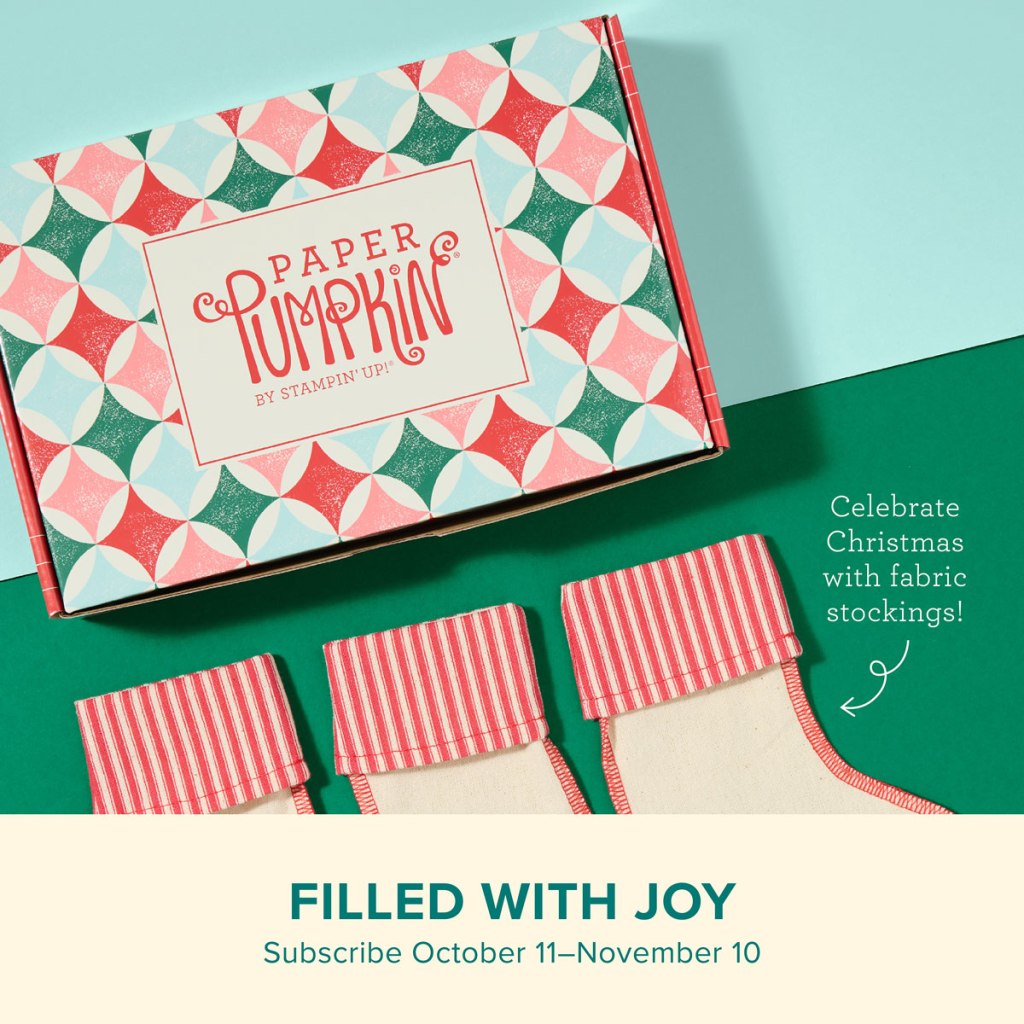
Celebrate Christmas with adorable stockings and gift tags!
Details: • Makes 8 projects: 8 stockings with 8 gift tags • Precut paper pieces • Safety pins and specialty gold foil • Coordinating colors: Flirty Flamingo, Pool Party, Poppy Parade (Classic Stampin’ Spot), Shaded Spruce, Very Vanilla
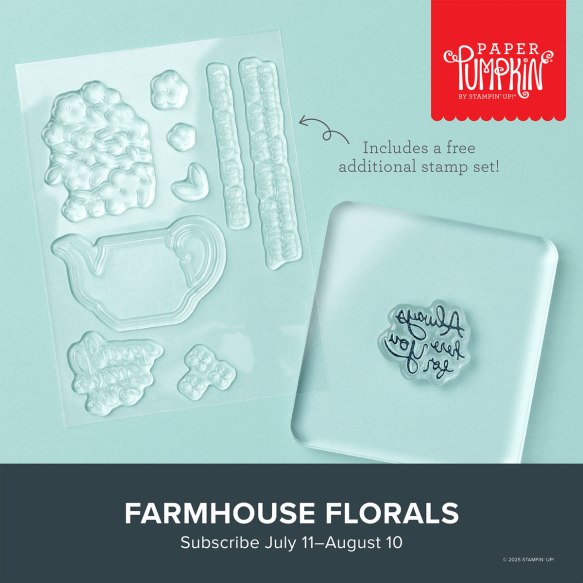
Subscribe to Paper Pumpkin for a monthly, all-inclusive crafting kit that’s a fun surprise! Each kit includes a photopolymer stamp set, Classic Stampin’ Spot, and step by step instructions to complete exclusive paper craft projects, including cards, tags, and gift packaging. And don’t miss the special add-on that coordinates with the next three months!
Subscribe to the November Paper Pumpkin Kit between 11 October and 10 November by clicking here!
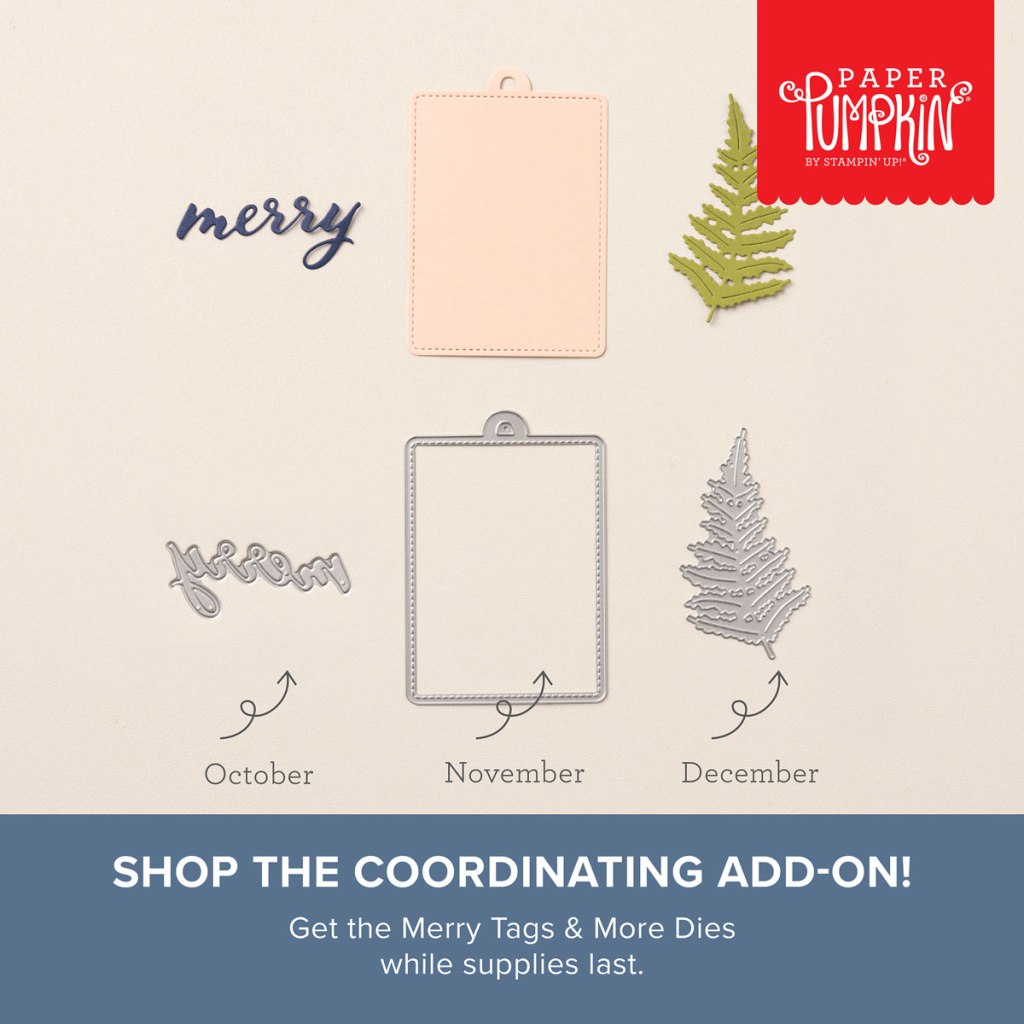
Don’t miss the coordinating Merry Tags & More Dies Add-On!
Add dimension and detail to your cards, scrapbook pages, and gift tags with the Merry Tags & More Dies! With a leaf and tag shape and Merry sentiment, these dies are a great way to expand your crafting experience. They even coordinate with three Paper Pumpkin Kits: Nests of Christmas, Filled with Joy, and Notes from the Heart. Such easy coordination makes these dies a must-have for any paper craft. Paper Pumpkin subscribers can purchase it beginning 11 September. The add-on is available only while supplies last, so it’s best to shop early! Please note that the Stampin’ Cut and Emboss Machine is not included and can be purchased separately.
#165639 $12
Note: Supplies may be limited toward the end of the subscription period.
Basic White Cardstock 2 – 4″ X 5 1/4″ (cut on a diagonal for dsp mats), 4″ X 5 1/4″(inner liner mat), 2 1/4″ X 2 1/4″(sentiment)
Lost Lagoon Cardstock 1 1/4″ X 3″(greenery)
Pretty Peacock Cardstock 2 – 4 1/4″ X 11″(card base scored & folded at 5 1/2″), 4″ X 5 1/4″(2 – circles & greenery)
Otterly Adorable Designer Series Paper 2 – 3 7/8″ X 5 1/8″(card front & inside panels cut on a diagonal), 3 7/8″ X 5 1/8″(inner liner panel), 2 1/4″x 6″(envelope flap)
Good Monday morning stamping friends Happy April and welcome to a new week. How was everyone’s weekend? Did you all have a nice Easter?
Today’s card I played with something different for me. I mixed up some retiring p9roducts with some that’s carrying over and some new. If you’d like to see a quick video on how I made this card, Click Here to go to my Instagram Reels. Here’s my card for today.
I used the Stampin’ Up! Gold Foiled Flowers Cards & Envelope pack along with the Stampin’ Up! Stippled Roses Bundle, 2″ Circle Punch and Stampin’ Up! Flower Cart Photopolymer Stamp Set for my card today. These cards & envelope pack will be retiring at the end of the month. I’ve never used them before and I don’t know why, it made such an elegant card.
I started by coloring the roses on the front of the Gold Foiled Flowers card base using the new 2024-2026 In-Color Pretty Ink Pink Stampin’ Blends Markers.
Using the Stippled Roses Dies, I cut the flowers from a panel of Pretty Ink Pink and the leaves from a panel of Shy Shamrock (both of these colors will be available starting May 1st). I adhered the flowers to the leaves using Liquid Glue.
On a panel of Very Vanilla, I stamped the sentiment from the Stampin’ Up! Stippled Roses Cling Stamp Set in Wild Wheat Ink. I cut the sentiment out using the 2″ Circle Punch. I adhered a piece of Gold & Vanilla 3/8″ Satin Edged Ribbon to the card front using Stampin’ Seal. I adhered the sentiment over the ribbon using Stampin’ Dimensionals. I adhered the leaves with the flowers under the sentiment using Liquid Glue. I added a few Iridescent Foil Gems to the card front.
On the inside, I stamped the sentiment from the Flower Cart stamp set in Wild Wheat Ink on a panel of Very Vanilla. I stamped the small rose image from the Stippled Roses stamp set in Pebbled Path Ink on the bottom of the panel. I colored the image using Pretty In Pink and shy Shamrock Stampin’ Blends Markers. I adhered the Very Vanilla panel to a Pretty In Pink mat then to the inside of the Gold Foiled Flowers card base.
To finish my card, I decorated the Very Vanilla envelope that comes with the Gold Foiled Flowers Cards & Envelopes. I stamped the small rose image from the Stippled Roses stamp set in Pebbled Path Ink on the envelope front. I colored the image using Pretty In Pink and Shy Shamrock Stampin’ Blends Markers. The envelope flap was already die cut.
Thank you for stopping by my blog today. I hope you like this card and will give it a try. Happy Stamping!!
If you need any stamping supplies, I’d love to be your Demonstrator. Just click HERE to go directly to my online store or drop me an email if you have any questions.
MY CURRENT HOST CODE IS: GVPUUBAZ
Use this host code when placing an order with me. When you order $50 or greater you will receive a free gift from me! If your order is over $150, please do not use this code, but you’ll still get the free gift. The free gift is your choice of any 1 item valued up to $10.00 from the 2023-2024 Annual Catalog, the January-April 2024 Mini Catalog or from the Online Exclusives! Unfortunately, packs of cardstock are no longer an option for a free gift. Shipping has become too expensive to ship and it’s costing me as much to ship as the cardstock costs. For any orders $50 or more I will also send you my monthly class tutorials. Click HERE or go to my Customer Rewards for more details and to see what this month’s tutorials are.
Please remember to use my current Host Code and make sure that you can see my name on the final checkout page listed as your Demonstrator when you order so that you know that you’re ordering with me, and you’ll get my rewards!
In response to changing policies at Stampin’ Up – I’m adjusting my Ordering Gift policy as well. I’m having to get a little more tough on the adding of Host codes when you place your order thru my Online Store.
Not to worry – you’re still going to get that $10 ordering gift for orders of $50 (before shipping & tax) or greater. And the gift is still any 1 SU! product up to that $10 value – which includes some of our fun Host Sets!
But – if you DO NOT use the Host code for your orders of less than $150 (this is the RETAIL total before Shipping & Handling), then you’ll have two options:
You’ll need to call Stampin’ Up! (1-800-Stamp-Up) and ask them to add it for you. They’re very helpful and will get it done quickly! OR….
If your order was over the $50 threshold but under $150, then…you’ll forfeit that $10 ordering gift and rewards – this is the Bummer Option – and I REALLY don’t want to do this, SO please remember to add my Current Host Code.
Subscribe to Paper Pumpkin for a monthly, all-inclusive crafting kit that’s a fun surprise! Each kit includes a photopolymer stamp set, Classic Stampin’ Spot, and step by step instructions to complete exclusive paper craft projects, including cards, tags, and gift packaging. And don’t miss the special add-on that coordinates with the next three months!
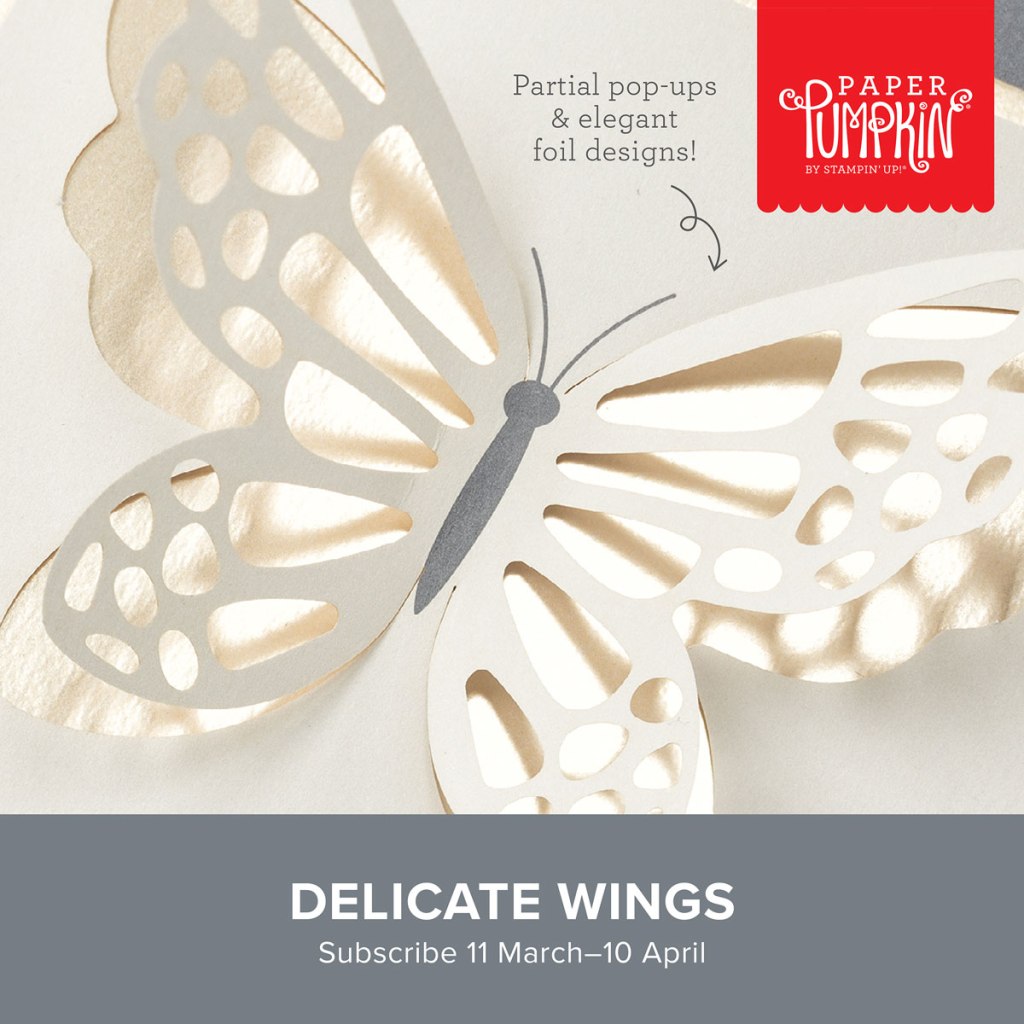
Send elegant words of encouragement and support to those you love.
Makes 9 cards: 3 each of 3 designs with 9 coordinating envelopes
This exclusive add-on coordinates with the three upcoming kits! Paper Pumpkin subscribers can purchase it beginning 11 March. The add-on is available only while supplies last, so it’s best to shop early!
Subscribe to the April Paper Pumpkin Kit between 11 March and 10 April by clicking here!
Note: Supplies may be limited toward the end of the subscription period.
Good Monday morning stamping friends. How was everyone’s weekend? Were you able to enjoy some time outside? I was in all weekend, between working, the storms and the heat & humidity, I wanted nothing to do with outside. I did have to take Coraline for multiple walks though. For some reason when I’m home, she seems to need me to take her out walking every couple hours. When she’s home with my husband and daughter she sleeps all day.
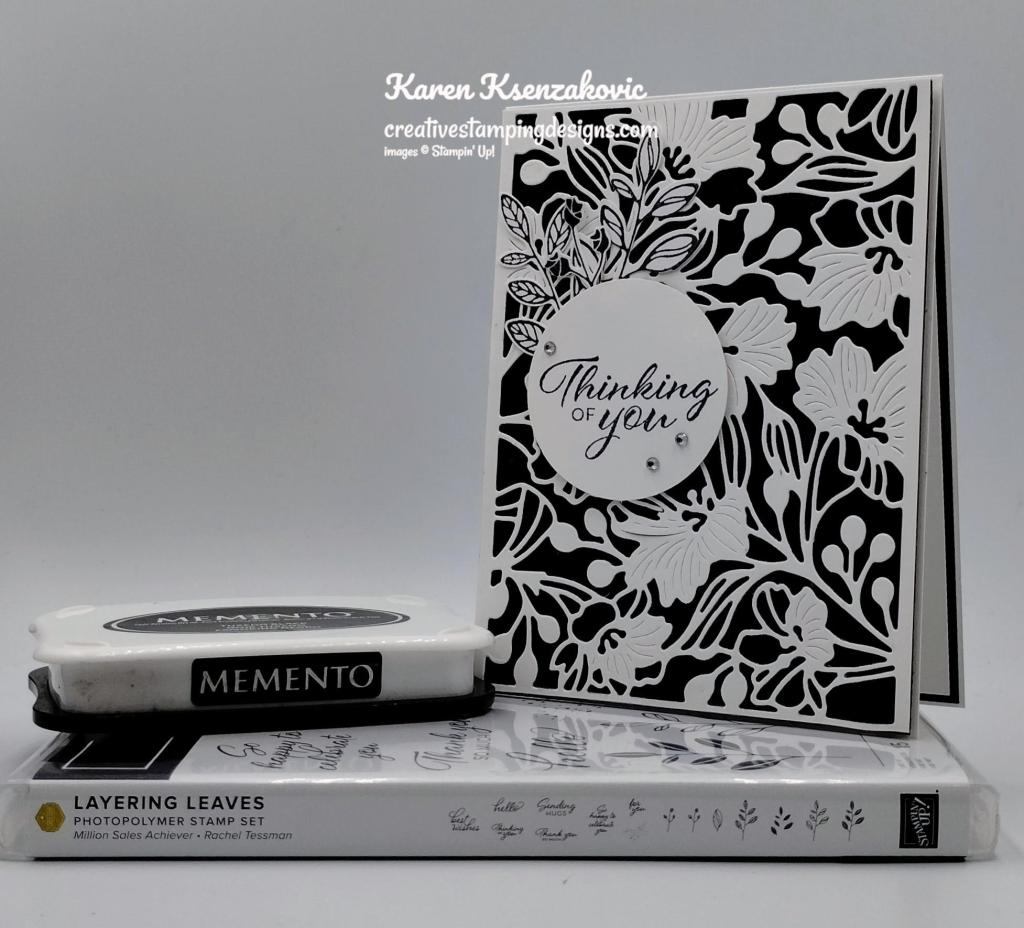
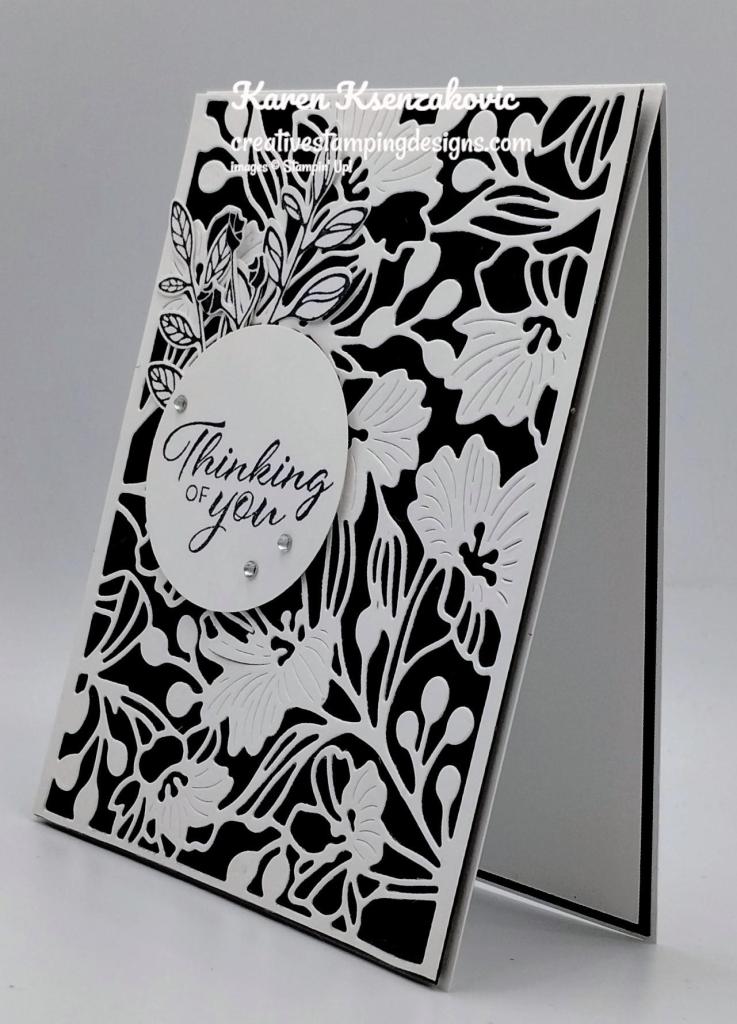
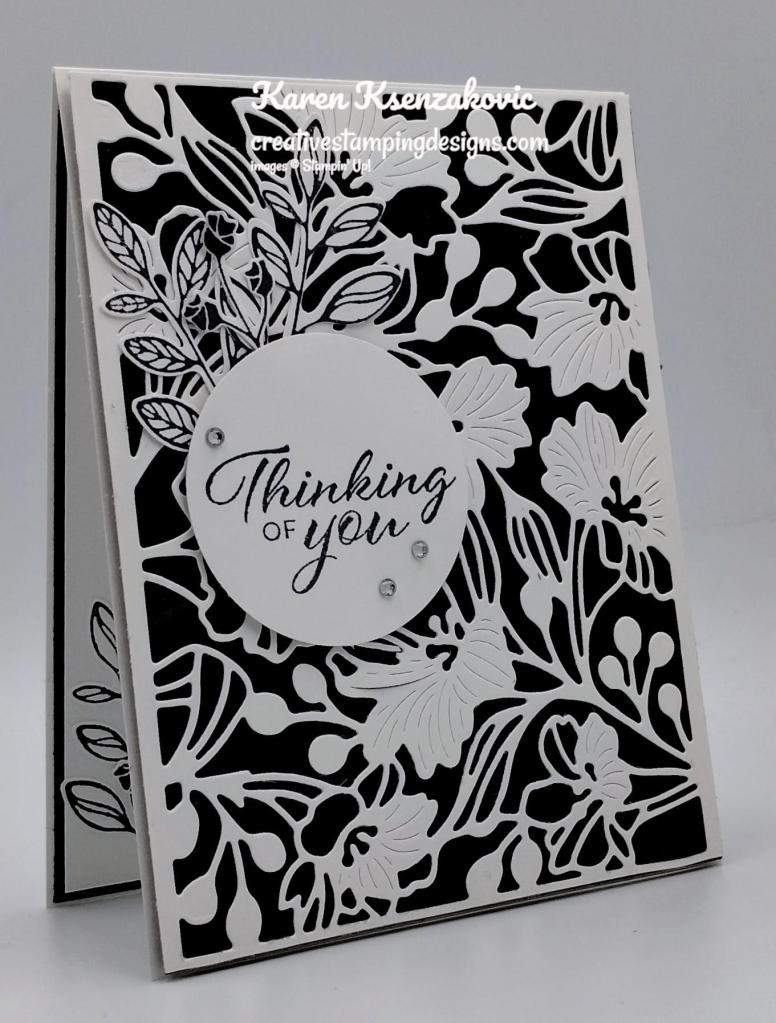
I have a quick card for you today that could be a wedding card, an anniversary card, a birthday card or anything else you want to celebrate with someone. Here’s my card for today.
I used the Stampin’ Up! Layering Leaves Photopolymer Stamp Set along with the Gorgeous Garden Dies, 2″ Circle Punch and Bough Punch for my card today.
I started by cutting a Basic White card front using the Gorgeous Garden Dies.
I adhered the die cut card front to a Basic Black mat using Multipurpose Liquid Glue. I adhered the layered panel to a Basic White Thick card base using Stampin’ Dimensionals.
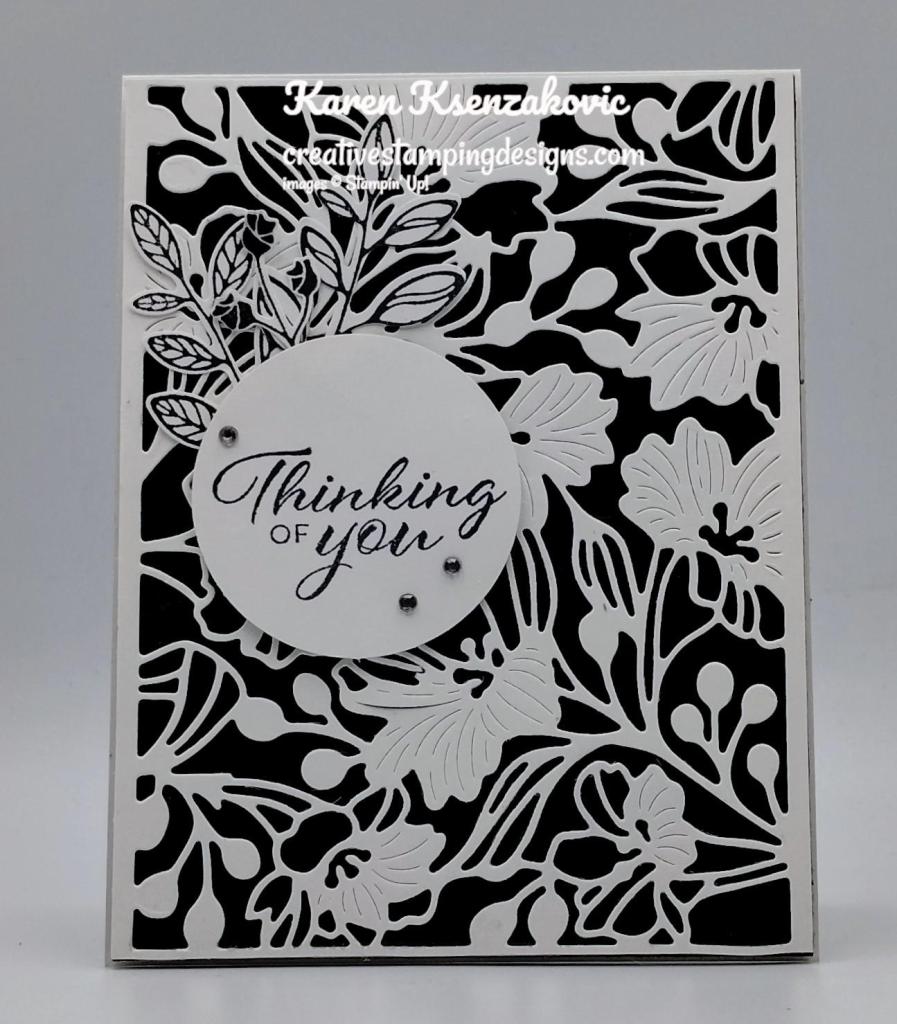
On panels of Basic White, I stamped 2 leaf images and the flower image from the Layering Leaves stamp set 2 times each in Tuxedo Black Ink. I cut the images out using the Bough Punch. I stamped the sentiment from the Layering Leaves stamp set in Tuxedo Black Ink on a panel of Basic White. I cut the sentiment out using the 2″ Circle Punch. I adhered the sentiment to the card front using Stampin’ Dimensionals. I adhered the leaves and flowers under the sentiment using Multipurpose Liquid Gue. I added a few Rhinestone Basic Jewels to the card front.
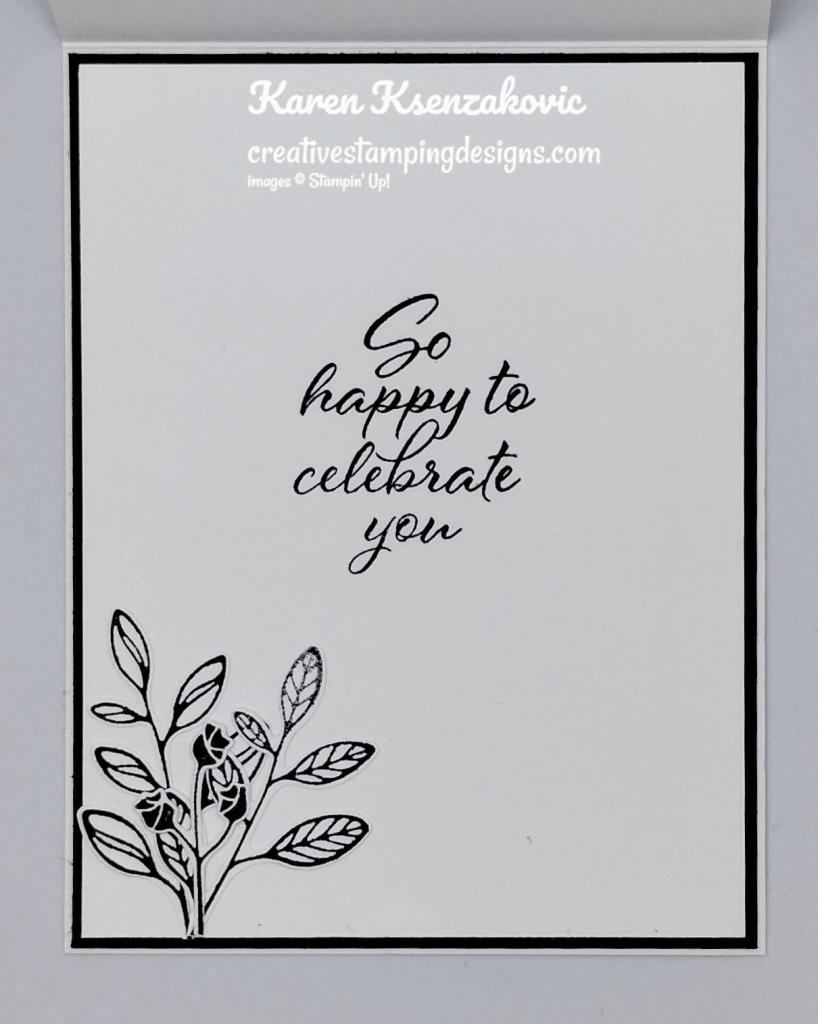
On the inside, I stamped the sentiment from Layereing Leaves stamp set in Tuxedo Black Ink on a panel of Basic White. I adhered the 2nd set of leaves and flowers to the bottom of the panel using Multipurpose Liquid Glue. I adhered the Basic White panel to a Basic Black mat then to the inside of the Basic White Thick card base.
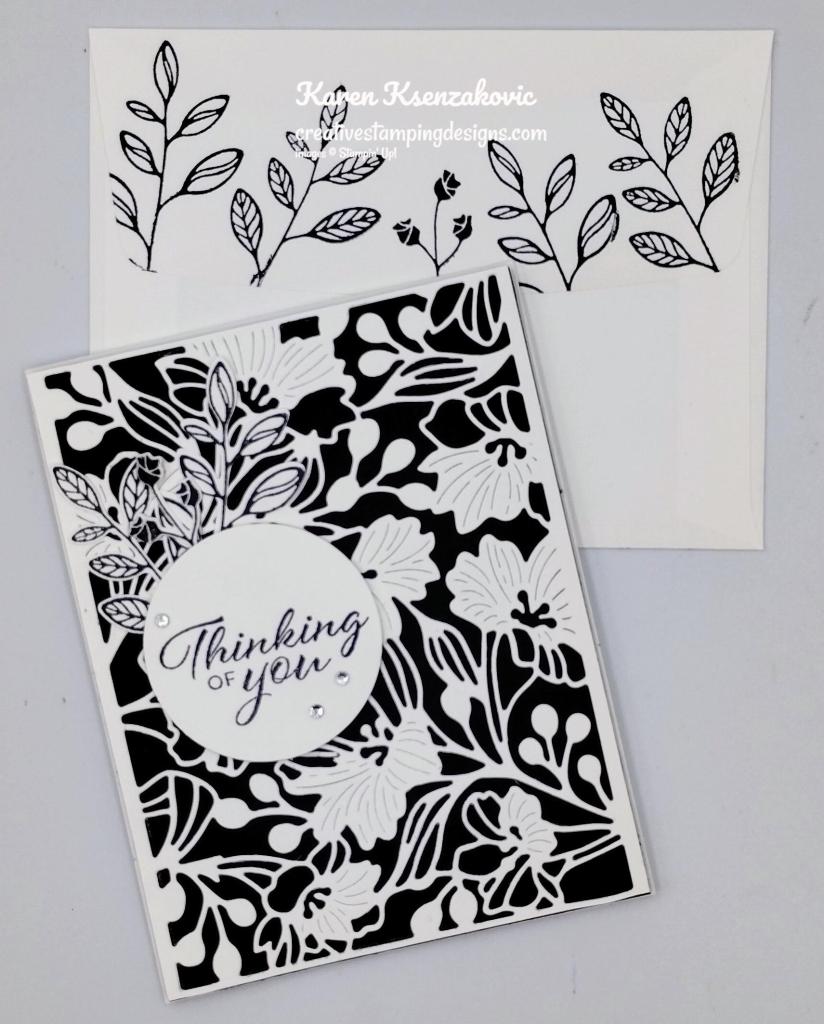
To finish my card, I decorated a Basic White Medium Envelope. I stamped the leaf and flower images from the Layering Leaves stamp set in Tuxedo Black Ink on the envelope front and flap.
Thank you for stopping by my blog today. I hope you like my card and will give it a try. Happy Stamping!!
If you need any stamping supplies, I’d love to be your Demonstrator. Just click HERE to go directly to my online store or drop me an email if you have any questions.
MY CURRENT HOST CODE IS: MHTQEVEX
Use this host code when placing an order with me. When you order $50 or greater you will receive a free gift from me! If your order is over $150, please do not use this code, but you’ll still get the free gift. The free gift is your choice of any 1 item valued up to $10.00 from the 2023-2024 Annual Catalog! Unfortunately, packs of cardstock are no longer an option for a free gift. Shipping has become too expensive to ship and it’s costing me as much to ship as the cardstock costs. For any orders $50 or more I will also send you my monthly class tutorials. Click HERE or go to my Customer Rewards for more details and to see what this month’s tutorials are.
Please remember to use my current Host Code and make sure that you can see my name on the final checkout page listed as your Demonstrator when you order so that you know that you’re ordering with me, and you’ll get my rewards!
In response to changing policies at Stampin’ Up – I’m adjusting my Ordering Gift policy as well. I’m having to get a little more tough on the adding of Host codes when you place your order thru my Online Store.
Not to worry – you’re still going to get that $10 ordering gift for orders of $50 (before shipping & tax) or greater. And the gift is still any 1 SU! product up to that $10 value – which includes some of our fun Host Sets!
But – if you DO NOT use the Host code for your orders of less than $150 (this is the RETAIL total before Shipping & Handling), then you’ll have two options:
You’ll need to call Stampin’ Up! (1-800-Stamp-Up) and ask them to add it for you. They’re very helpful and will get it done quickly! OR….
If your order was over the $50 threshold but under $150, then…you’ll forfeit that $10 ordering gift and rewards – this is the Bummer Option – and I REALLY don’t want to do this, SO please remember to add my Current Host Code.
We’re bringing back one of our favorite promotions—BONUS DAYS! Because do you know what’s a great deal? Getting rewarded for all the crafting supplies you’re already going to buy! When you shop between 6–31 July and spend $50 USD you will earn a $5 USD coupon! Make sure you save all your coupons because you can redeem them (and we mean ALL of them) between 1–31 August. There’s no limit to how many coupons you can earn! So, get your ready to earn and redeem coupons!
Ordering Deadlines
Earning Period: July 6th – July 31, 2023 at 11:59 p.m. (MT)
Earn a $5 USD coupon for every $50 USD spent (before shipping and tax).
All coupon codes will be emailed right after a qualifying purchase has been made.
If a participant earns multiple codes from a single order, they will receive one email with multiple codes. If they earn multiple codes from multiple orders, they will receive separate emails for each code earned.
All order types qualify for this promotion. Phone and email orders still require an email address.
Orders that are started before the promotion begins will not count toward earning coupon codes. For example, if you add items to your cart before 6 July and wait to purchase until that date or later, then those items will not qualify towards earning coupons. You must add items to your cart and complete your purchase during the earning period.
There is no limit to the number of coupon codes participants can earn per order or throughout the duration of the earning period.
Ordering Deadlines
Redemption Period: August1– August 31, 2023 at 11:59 p.m. (MT)
There is no limit to the number of coupon codes participants can redeem on an order during the redemption period. If using multiple codes, they must be separated by a space.
Coupons may be redeemed one time only.
Coupon codes may be redeemed for any product (excluding Starter Kits, demonstrator supply items, and Paper Pumpkin month-to-month subscriptions).
New prepaid Paper Pumpkin codes may be discounted using Bonus Days coupon codes.
Introducing the newest addition to the Stampin’ Up! Kit’s Collection: Blossom Wishes! This kit is special for its trendy, slimline card design, and includes all the precut paper pieces for a fun card for a friend!
This kit includes:
Enough supplies to create 8 cards—4 each of 2 designs
8 coordinating envelopes.
Embossed card bases, printed die cuts, vellum blossoms, adhesive, and embellishments.
Precut sentiments in Dutch, English, French, and German.
Finished card size: 8-1/2″ x 3-1/2″ (21.6 x 8.9 cm), 6-1/4″ x 3-1/4″ (15.9 x 8.3 cm)
Stampin’ Up! has some new Online Exclusive items that are available to order now!! You won’t find these products in any catalog, they’ll only be listed in the online store.
The Online Exclusive product releases will continue throughout the year so there will be new products to shop from, in addition to new catalogs!
We got some new Online Exclusive items on July 6. Click HERE and head over to my Online Store to see the Online Exclusives Now.
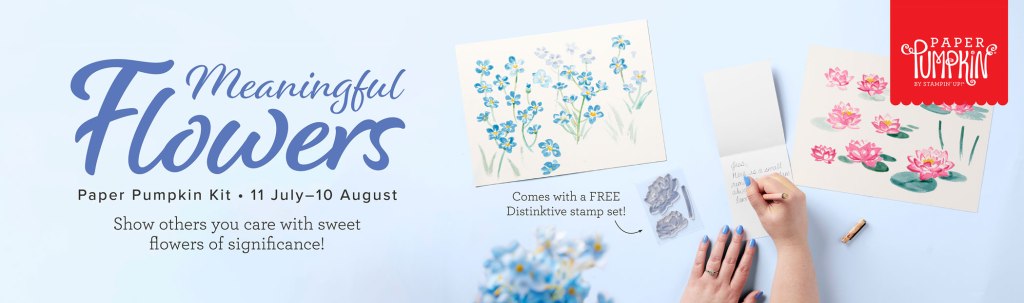
Discover messages of friendship and loyalty in the flowers from the August Paper Pumpkin Kit! This kit includes 8 cards, 4 each of 2 designs, and 8 coordinating envelopes. The kit is special because of the way it uses the meaning of flowers. On each card, you’ll find a small inscription of what the flowers represent. As you craft with the included vellum and watercolor paper pieces, you’ll know you’re sending a message of encouragement and loyalty to your recipients. The Meaningful Flowers Paper Pumpkin Kit is full of florals that are meant to spread hope, encouragement, and remind you of your favorite memories. The kit focuses specifically on forget-me-nots and lotuses. Their meaning is enscripted on the back of each card. Subscribe by 10 August to send beautiful paper crafts with thoughtful messages to those you love.
And don’t wait, because anyone who subscribes to this month’s kit will get a FREE stamp set! This Distinktive stamp set is perfect for a variety of occasions!
Good Saturday morning stamping friends and welcome to the weekend. Does anyone have any plans in the works? I’ll be working today, but we will be closing the store early for a staff event. The owner is taking the entire staff and guest to a Somerset Patriots Game tonight, this is our local team that is associated with the New York Yankees. There’s more socializing going on than watching the game LOL. He gets us the picnic area that comes with food and drinks and the night is finished off with a firework show. We went last year, and it was a lot of fun. It’s one of the managers birthdays, so husband daughter and I worked together and made cupcakes to bring. The last count going was 50 people. It really is a lot of fun to get together with everyone outside of the store.
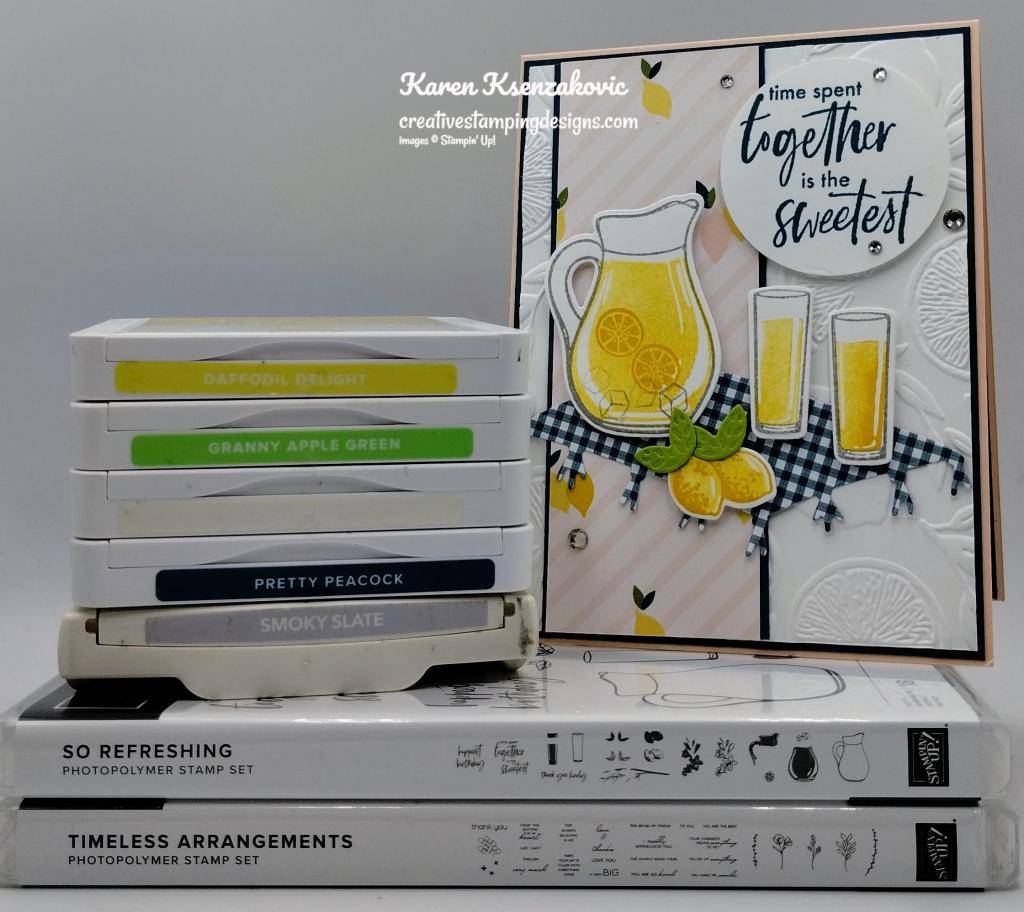
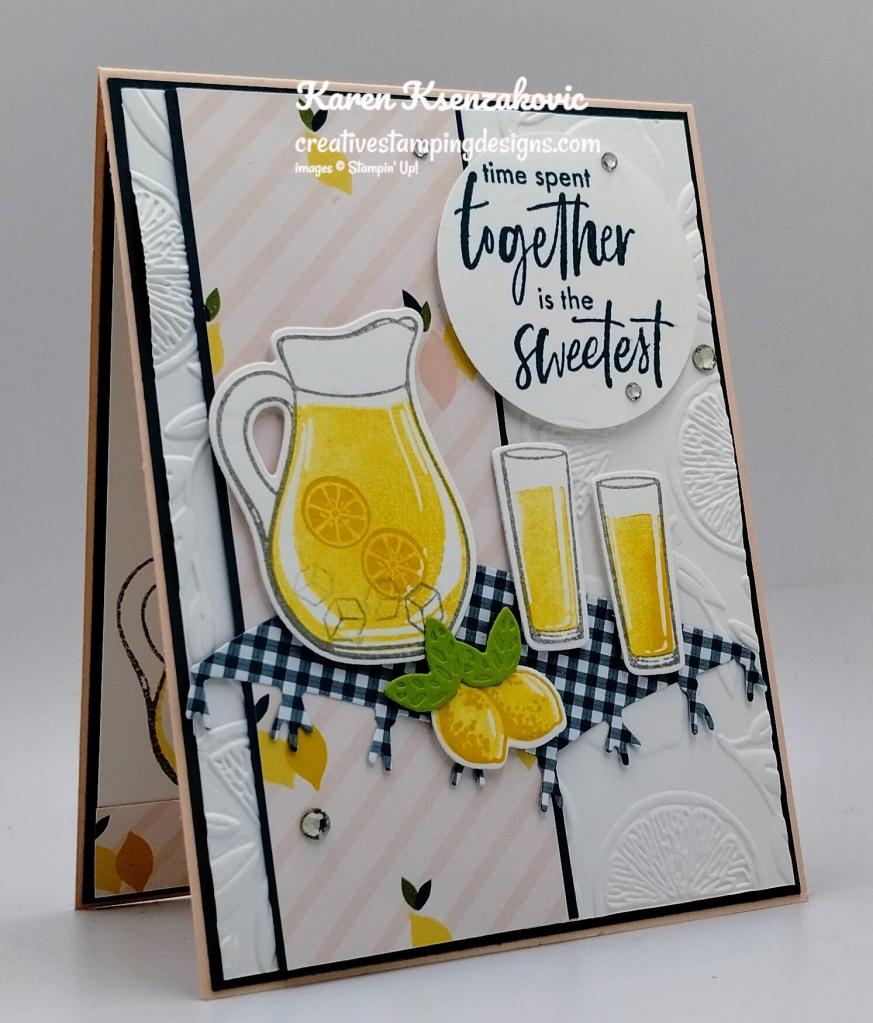
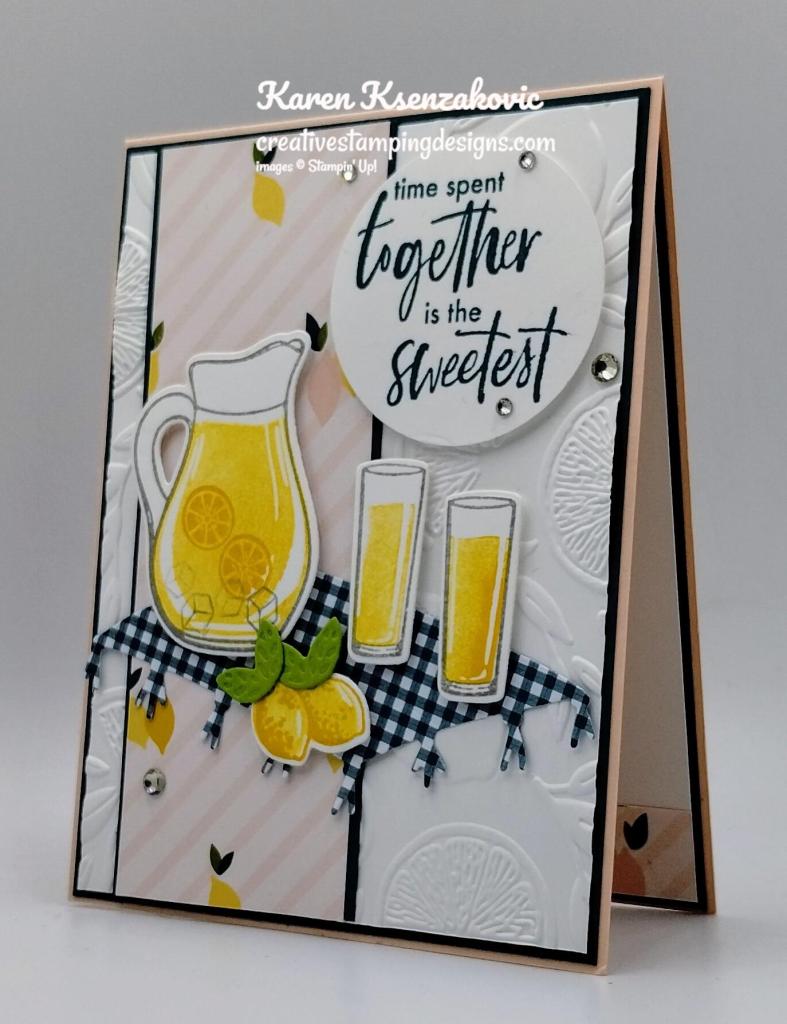
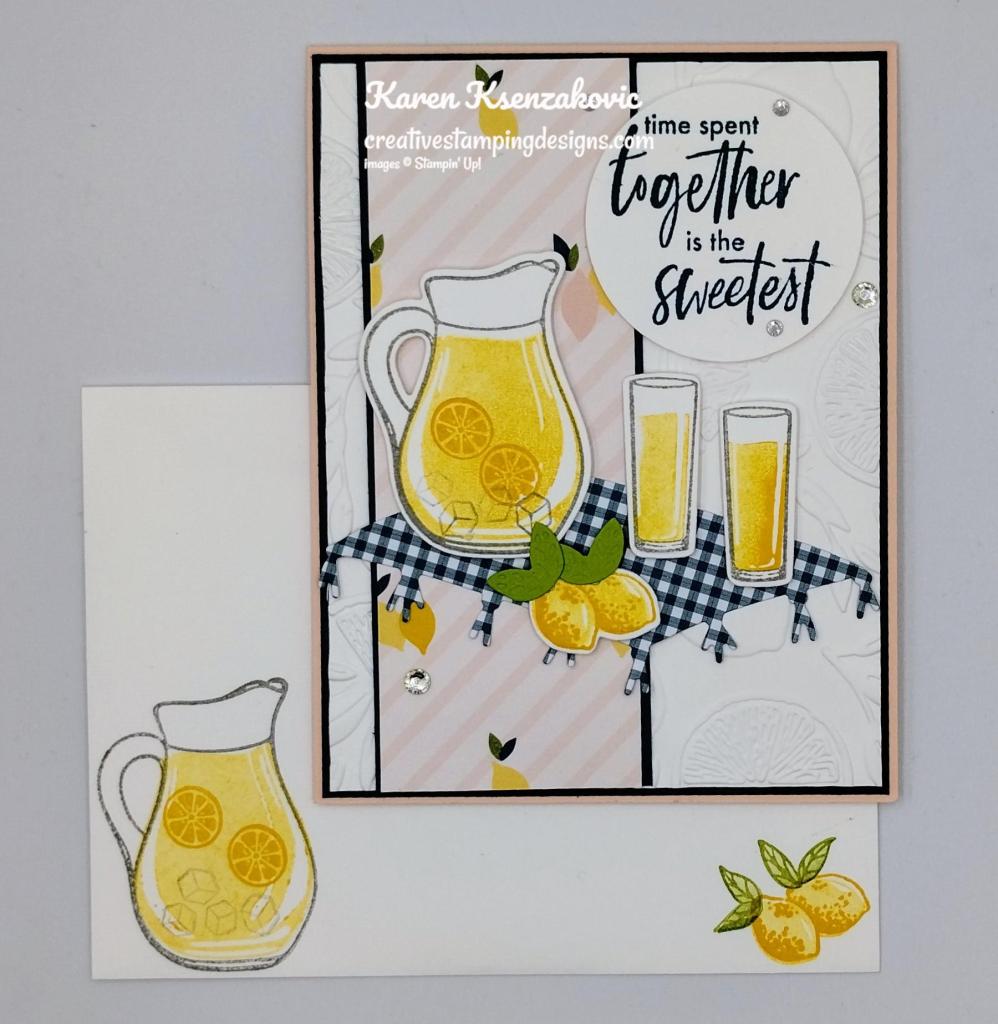
Today’s card is one that we made at our Stamp Camp this past week. I thought I’d have the ladies make a nice refreshing summer card. Here’s my card for today.
I used the Stampin’ Up! So Refreshing Bundle along with the Stampin’ Up! Timeless Arrangements Photopolymer Stamp Set, Delightfully Eclectic Designer Series Paper, Sweet Citrus Hybrid Embossing Folder, Glorious Gingham 6 X 6 Designer Series Paper and 2″ Circle Punch for my card today.
I started by embossing a Basic White card front using the Sweet Citrus Embossing Folder. I adhered the embossed panel to a Pretty Peacock mat using Multipurpose Liquid Glue. I adhered the layered panel to a Petal Pink card base using Multipurpose Liquid Glue. I adhered a panel of Delightfully Eclectic DSP to a Pretty Peacock mat using Stampin’ Seal. I adhered the layered panel to the card front using Multipurpose Liquid Glue.
On a panel of Basic Whtie, I stamped the pitcher and glass outline images from the Stampin’ Up! So Refreshing Photopolymer Stamp Set in Smoky Slate Ink. I stamped the pitcher and glass solid images from the So Refreshing stamp set in Daffodil Delight Ink, stamping off once on scrap paper. I stamped the detail lemon image in Daffodil Delight Ink full strength, and the solid lemon image from the So Refreshing stamp set in Daffodil Delight Ink, stamping off once on scrap paper, on top of the detailed image. I stamped the lemon slice image from the So Refreshing stamp set in the pitcher in Daffodil Delight Ink. I stamped the ice cube image in Smoky Slate Ink, stamping off once on scrap paper, in the pitcher. I cut all the images out using the So refreshing Dies. I cut the detailed leaves from the So Refreshing Dies out of a panel of Granny Apple Green. I cut the tablecloth die from the So Refreshing Dies out of a panel of Glorious Gingham DSP. I adhered the blanket to the card front using Multipurpose Liquid Glue. I adhered the pitcher and glasses using Stampin’ Dimensionals. I adhered the leaves to the lemons using Glue Dots then to the card front using Stampin’ Dimensionals.
On the panel of Basic White, I stamped the sentiment from the So Refreshing stamp set in Pretty Peacock Ink. I cut the sentiment out using the 2″ Circle Punch. I adhered the sentiment to the card front using Stampin’ Dimensionals. I added a few Rhinestone Basic Jewels to the card front.
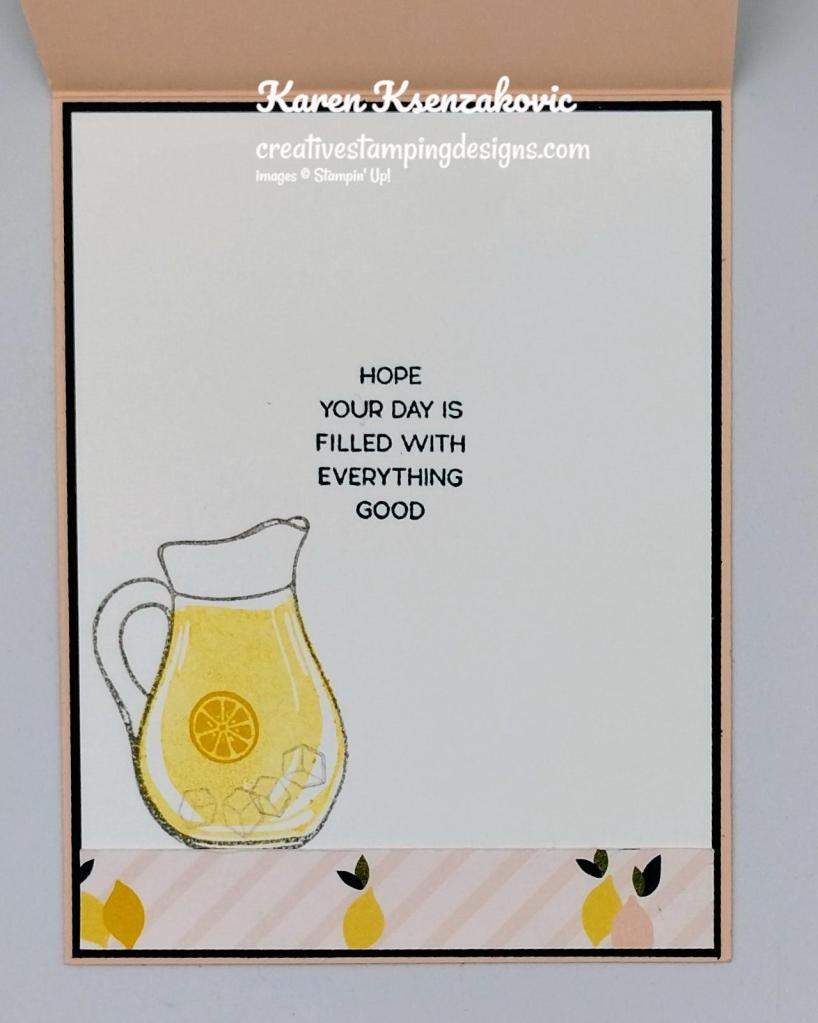
On the inside, I stamped the sentiment from the Timeless Arrangements stamp set in Pretty Peacock Ink on a Basic White panel. I stamped the outline pitcher image from the So Refreshing stamp set in Smoky Slate Ink on the bottom of the panel. I stamped the solid pitcher image from So Refreshing stamp set in Daffodil Delight Ink, stamping off once on scrap paper. I stamped the lemon slice image in Daffodil Delight Ink and the ice cubes in Smoky Slate Ink, stamping off once on scrap paper. I adhered a strip of the Delightfully Eclectic DSP to the bottom of the panel. I adhered the Basic Whtie panel to a Pretty Peacock mat then to the inside of the Petal Pink card base.
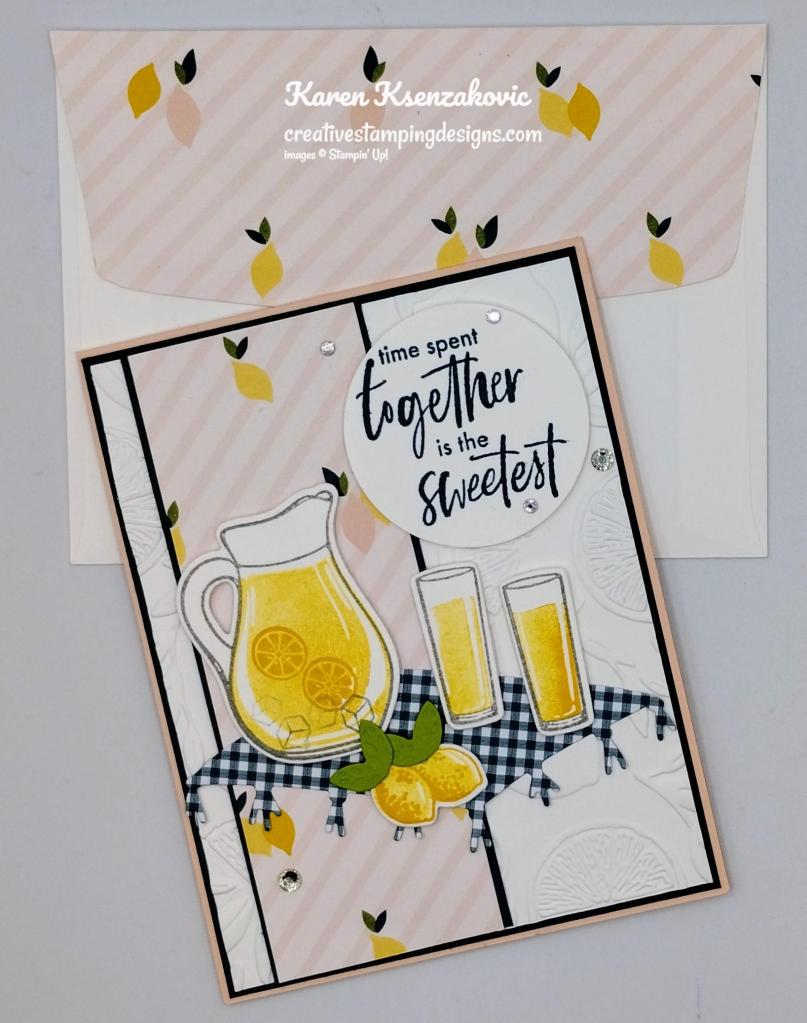
To finish my card, I decorated a Basic White Medium Envelope. I stamped the pitcher and lemons on the envelope front the same as I did for the card. I adhered a panel of Delightfully Eclectic DSP to the envelope flap.
Thank you for stopping by my blog today. I hope you like the card and will give it a try. Happy Stamping!!
If you need any stamping supplies, I’d love to be your Demonstrator. Just click HERE to go directly to my online store or drop me an email if you have any questions.
MY CURRENT HOST CODE IS: MHTQEVEX
Use this host code when placing an order with me. When you order $50 or greater you will receive a free gift from me! If your order is over $150, please do not use this code, but you’ll still get the free gift. The free gift is your choice of any 1 item valued up to $10.00 from the 2022-2023 Annual Catalog or the January-April 2023 Mini Catalog! Unfortunately, packs of cardstock are no longer an option for a free gift. Shipping has become too expensive to ship and it’s costing me as much to ship as the cardstock costs. For any orders $50 or more I will also send you my monthly class tutorials. Click HERE or go to my Customer Rewards for more details and to see what this month’s tutorials are.
Please remember to use my current Host Code and make sure that you can see my name on the final checkout page listed as your Demonstrator when you order so that you know that you’re ordering with me, and you’ll get my rewards!
In response to changing policies at Stampin’ Up – I’m adjusting my Ordering Gift policy as well. I’m having to get a little more tough on the adding of Host codes when you place your order thru my Online Store.
Not to worry – you’re still going to get that $10 ordering gift for orders of $50 (before shipping & tax) or greater. And the gift is still any 1 SU! product up to that $10 value – which includes some of our fun Host Sets!
But – if you DO NOT use the Host code for your orders of less than $150 (this is the RETAIL total before Shipping & Handling), then you’ll have two options:
You’ll need to call Stampin’ Up! (1-800-Stamp-Up) and ask them to add it for you. They’re very helpful and will get it done quickly! OR….
If your order was over the $50 threshold but under $150, then…you’ll forfeit that $10 ordering gift and rewards – this is the Bummer Option – and I REALLY don’t want to do this, SO please remember to add my Current Host Code.
We’re bringing back one of our favorite promotions—BONUS DAYS! Because do you know what’s a great deal? Getting rewarded for all the crafting supplies you’re already going to buy! When you shop between 6–31 July and spend $50 USD you will earn a $5 USD coupon! Make sure you save all your coupons because you can redeem them (and we mean ALL of them) between 1–31 August. There’s no limit to how many coupons you can earn! So, get your ready to earn and redeem coupons!
Ordering Deadlines
Earning Period: July 6th – July 31, 2023 at 11:59 p.m. (MT)
Earn a $5 USD coupon for every $50 USD spent (before shipping and tax).
All coupon codes will be emailed right after a qualifying purchase has been made.
If a participant earns multiple codes from a single order, they will receive one email with multiple codes. If they earn multiple codes from multiple orders, they will receive separate emails for each code earned.
All order types qualify for this promotion. Phone and email orders still require an email address.
Orders that are started before the promotion begins will not count toward earning coupon codes. For example, if you add items to your cart before 6 July and wait to purchase until that date or later, then those items will not qualify towards earning coupons. You must add items to your cart and complete your purchase during the earning period.
There is no limit to the number of coupon codes participants can earn per order or throughout the duration of the earning period.
Ordering Deadlines
Redemption Period: August1– August 31, 2023 at 11:59 p.m. (MT)
There is no limit to the number of coupon codes participants can redeem on an order during the redemption period. If using multiple codes, they must be separated by a space.
Coupons may be redeemed one time only.
Coupon codes may be redeemed for any product (excluding Starter Kits, demonstrator supply items, and Paper Pumpkin month-to-month subscriptions).
New prepaid Paper Pumpkin codes may be discounted using Bonus Days coupon codes.
Stampin’ Up! has some new Online Exclusive items that are available to order now!! You won’t find these products in any catalog, they’ll only be listed in the online store.
The Online Exclusive product releases will continue throughout the year so there will be new products to shop from, in addition to new catalogs!
We’ll be getting some new Online Exclusive items beginning July 6 so keep an eye out in the online store for the new items coming soon!
Click HERE and head over to my Online Store to see the Online Exclusives Now.
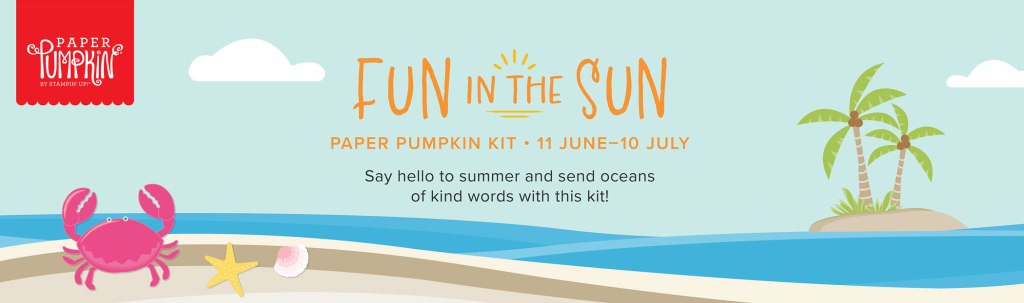
Say hello to summer and get crafting under the sun with this month’s kit! With beach designs, fun accordion-fold cards, along with sentiments to support, encourage, say hello, and more, wave at those you love through uplifting cards and send family and friends oceans of kind words all summer long!
This kit includes:
All the supplies you need to create 9 cards with fun accordion folds: 3 each of 3 designs; and coordinating envelopes.
An all-occasion stamp set to send friends and family words of encouragement, support and kindness.
Iridescent Sequin Embellishments.
1 Classic Stampin’ Spot: Daffodil Delight.
Summertime Ephemera pieces, labels, and paper pieces.
Adhesive Dots and Tear & Tape Adhesive.
Completed card size: 5-1/2″ x 4-1/4″ (14 x 10.8 cm)
Coordinating Stampin’ Up! colors: Azure Afternoon, Basic Gray, Crumb Cake, Daffodil Delight, Flirty Flamingo, Granny Apple Green, Melon Mambo, Pool Party
Subscribe to the July Paper Pumpkin Kit between 11 June and 10 July by clicking here!
Note: Supplies may be limited toward the end of the subscription period.
Good Friday morning stamping friends and welcome to my fun fold Friday. We’ve made it through another week and this was a different one. I’ve spent most of the week inside unfortunately. Tuesday afternoon it got really windy here and very smokey. My daughter came running inside closing windows thinking there was a house on our street or the next block on fire. There was not, it was the smoke from the horrible fires in Canada coming down. I’ve never seen anything like that before. Wednesday afternoon my husband said we were the worst in the area. Because of my asthma I just kept myself inside.
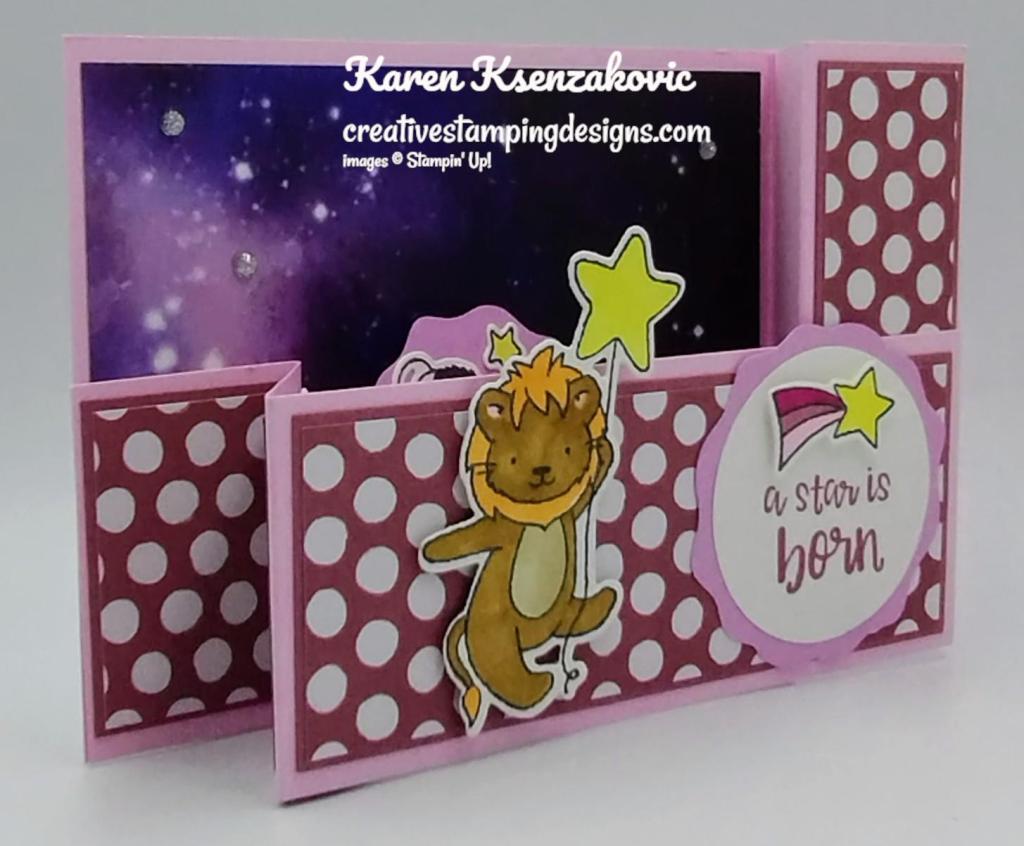
Today’s card is one that we made at last Sunday’s team meeting. This card was designed by my team member Carmelita Gordon, and it is just the cutest card ever. I’m not going to be able to explain the whole card, I was going to make one on my live Wednesday afternoon, but I ended up with a bad migraine and just needed to relax. I will make one live so I can explain and show you how to make it soon. I used the Stampin’ Up! Little Dreamers Bundle along with the Stargazing Designer Series Paper, 2023-2025 In- Color 6 X 6 Designer Series Paper, the Decorative Circle Punch and 2″ Circle Punch for the card.
I started by scoring and folding the large and small card bases. I adhered panels of 2023-2025 In-Color DSP to Moody Mauve mats using Stampin’ Seal. I adhered the layered panel to the Bubble Bath card base using Multipurpose Liquid Glue. I adhered a panel of Stargazing DSP to the back of the large card base. I adhered the small front card base to the larger card base using Multipurpose Liquid Glue only on the right side.
On a panel of Basic White, I stamped the lion, cow, elephant stars and star with rainbow images from the Stampin’ Up! Little Dreamers Cling Stamp Set in Tuxedo Black Ink. I colored all the images using Basic Black, Berry Burst Bubble Bath, Crumb Cake, Gray Granite, Lemon Lolly, Moody Mauve, Pecan Pie and Pumpkin Pie Stampin’ Blends Markers. I cut all the images out using the Little Dreamers Dies. I adhered the lion to the front of the small card base using Stampin’ Dimensionals.
I stamped the sentiment from the Little Dreamers stamp set in Moody Mauve Ink on a panel of Basic White and punched it out using the 2″ Circle Punch. From a panel of Fresh Freesia, I cut 2 of the Decorative Circles Punch. I adhered the sentiment to the Fresh Freesia circle using Stampin’ Seal. I adhered the layered circle to the card front using Multipurpose Liquid Glue just in the center. I added the star with the rainbow using Stampin’ Dimensionals.
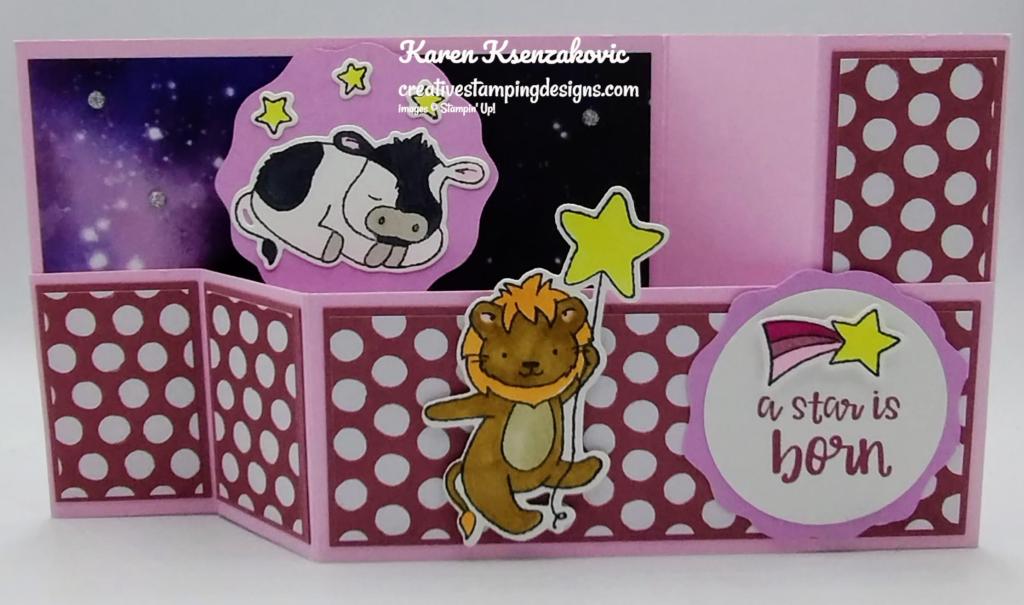
After adhering the pop-up mechanism on the inside, I adhered the cow and stars to the Fresh Freesia circle using Multipurpose Liquid Glue. I adhered the left side of the card front using Multipurpose Liquid Glue. I added a few Adhesive-Backed Sparkel Gems to the back panel.
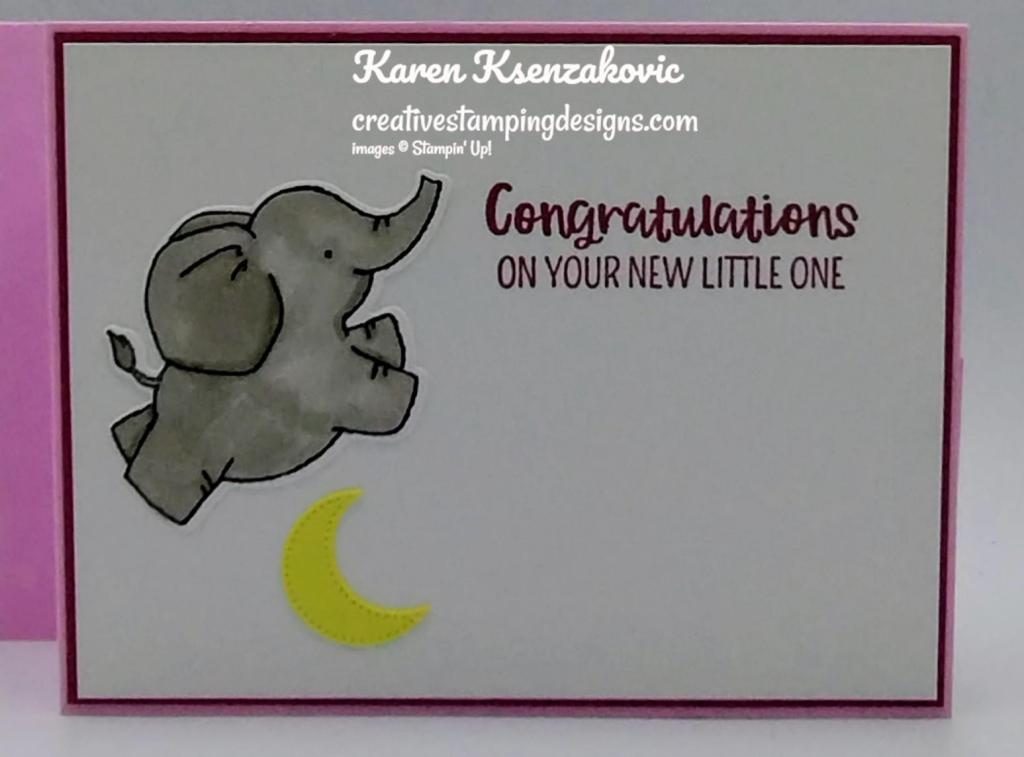
On the back of the card, I stamped the sentiment from the Little Dreamers stamp set in Moody Mauve Ink on a panel of Basic White. I adhered the elephant using Multipurpose Liquid Glue. From a scrap of Lemon Lolly, I cut the moon using the Little Dreamers Dies. I adhered the moon under the elephant using Multipurpose Liquid Glue. I adhered the Basic White panel to a Moody Mauve mat then to the back of the card based using Multipurpose Liquid Glue.
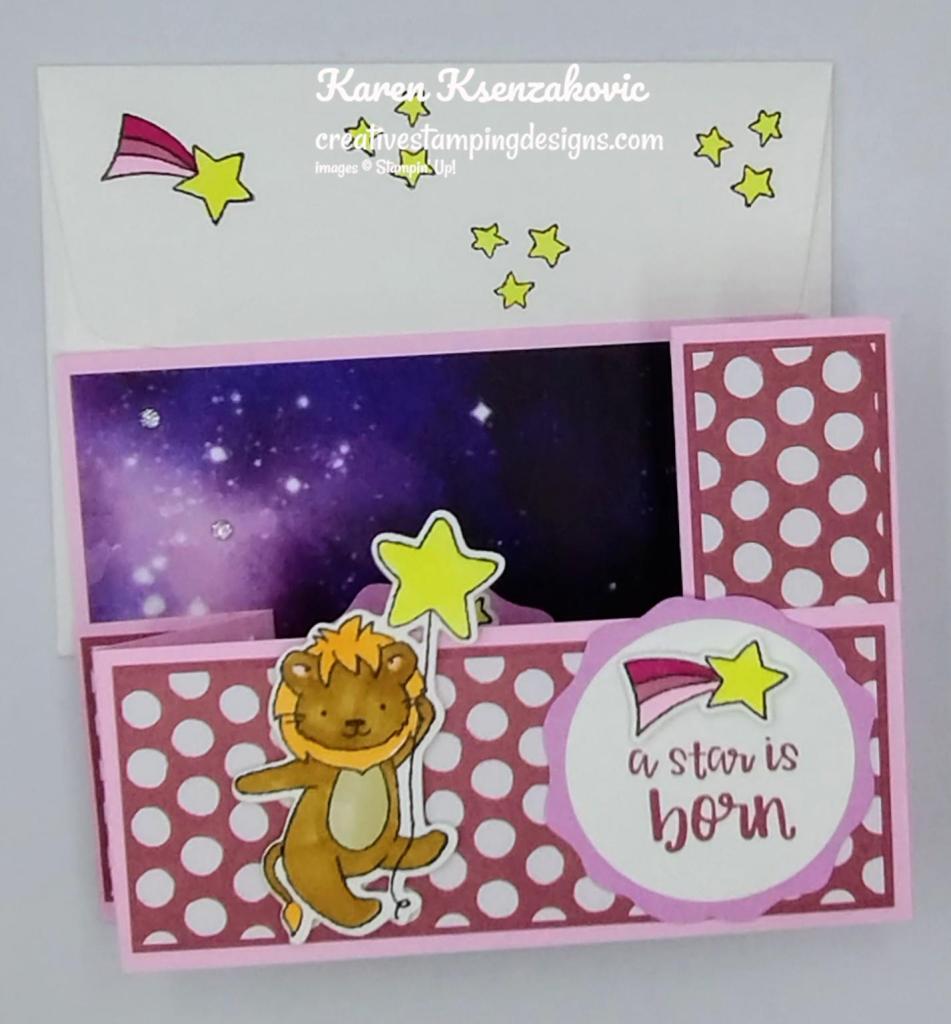
To complete my card, I decorated a Basic White Medium Envelope. I stamped the cow image from the Little Dreamers stamp set on the envelope front in Tuxedo Black Ink. I stamped the cluster of stars and star with the rainbow images from the Little Dreamers stamp set in Tuxedo Black Ink on the envelope flap. I colored all the images the same as I did for the card.
Thank you for stopping by my blog today. I hope you like the card and will give it a try. Happy Stamping!!
If you need any stamping supplies, I’d love to be your Demonstrator. Just click HERE to go directly to my online store or drop me an email if you have any questions.
MY CURRENT HOST CODE IS: GVEBWYZ6
Use this host code when placing an order with me. When you order $50 or greater you will receive a free gift from me! If your order is over $150, please do not use this code, but you’ll still get the free gift. The free gift is your choice of any 1 item valued up to $10.00 from the 2022-2023 Annual Catalog or the January-April 2023 Mini Catalog! Unfortunately, packs of cardstock are no longer an option for a free gift. Shipping has become too expensive to ship and it’s costing me as much to ship as the cardstock costs. For any orders $50 or more I will also send you my monthly class tutorials. Click HERE or go to my Customer Rewards for more details and to see what this month’s tutorials are.
Please remember to use my current Host Code and make sure that you can see my name on the final checkout page listed as your Demonstrator when you order so that you know that you’re ordering with me, and you’ll get my rewards!
In response to changing policies at Stampin’ Up – I’m adjusting my Ordering Gift policy as well. I’m having to get a little more tough on the adding of Host codes when you place your order thru my Online Store.
Not to worry – you’re still going to get that $10 ordering gift for orders of $50 (before shipping & tax) or greater. And the gift is still any 1 SU! product up to that $10 value – which includes some of our fun Host Sets!
But – if you DO NOT use the Host code for your orders of less than $150 (this is the RETAIL total before Shipping & Handling), then you’ll have two options:
You’ll need to call Stampin’ Up! (1-800-Stamp-Up) and ask them to add it for you. They’re very helpful and will get it done quickly! OR….
If your order was over the $50 threshold but under $150, then…you’ll forfeit that $10 ordering gift and rewards – this is the Bummer Option – and I REALLY don’t want to do this, SO please remember to add my Current Host Code.
June 1st through June 30th, we have an amazing joining special going on. June is a fabulous time to join Stampin’ Up! You will get even more FREE products in your customizable Starter Kit! If you sign up between 1–30 June, you can get $125 USD | $165 CAD$155 USD worth of products for only $99 USD + free business supplies + free shipping + all the fun being a part of Stampin’ Up!
STARTER KIT+ PROMOTION DETAILS:
When you purchase you Starter Kit, you will be able to redeem $155 of Starter Kit eligible products for just $99.
New demonstrators who submit their Independent Demonstrator Agreement (IDA) before June 1 or after June 30 will not be eligible for this offer.
This offer begins June 1, 2023 and ends at 11:50 PM MT on June 30, 2023.
There is Never anObligation to sell, you do NOT have to use this as a business, you can join just to enjoy the discount for yourself. I would LOVE to have you on my team. Join as a hobby demonstrator and enjoy all the benefits. All your future orders will be eligible for at least a 20% discount on products ordered. PLUS if you are a demonstrator and there is a special, like the upcoming 15% discount on Designer Series Paper, you will get your 20% discount on top of the 15%. Now that’s an awesome deal. This is a great way to get everything you want on your wish list at a discounted price. Enjoy at least a 20% discount on the future products you purchase. Join now and start enjoying that discount right away!!! Contact me at creativestampingdesigns@gmail.com and we can talk about you joining. We have people on our team from all over the United States. We get together monthly via Zoom; we have team Facebook pages where we share what we make and ask questions. This was one of the best decisions I’ve ever made, I’ve made a lot of new friends from all over.
Joining Stampin’ Up! as a demonstrator offers some fabulous opportunities, including:
Becoming part of our wonderful community
Attending exclusive demonstrator-only events
Having early access to products
Receiving a copy of our catalogs early
Getting a 20% discount on our magnificent coordinating products
Joining our exclusive demonstrator-only Facebook group
Having the opportunity to earn a supplemental income if you choose to make it a business.
We all love beautiful Designer Series Paper, and in June, you can enjoy a 15% discount on select Designer Series Papers from our new 2023–2024 Annual Catalog and Online Exclusives. Whether you’re a scrapbooker, a card maker or simply a paper lover, this is a great time to stock up and save on gorgeous paper, so you have artistic and versatile paper designs on hand for your next projects! Click HERE for a printable PDF flyer.
SALES PERIOD: 1–30 JUNE
All order types qualify for this promotion.
There is no limit to how many packages of Designer Series Paper may be purchased during this promotion.
Only select Designer Series Papers are available at a 15% discount during this promotion.
Orders must be placed—and closed—during the promotion period for the 15% discount to apply.
Designer Series Paper ordered as part of a Starter Kit or with Stampin’ Rewards qualify for the 15% discount.
Designer Series Papers are from the new 2023–2024 Annual Catalog (p. 129–132) and Online Exclusives.
Are you new to stamping and don’t know where to start? Stampin’ Up! has some amazing kits available some with and some without stamping. These are a great way to get your feet wet with card making. Visit my Online store HERE to see what you can choose from. Don’t forget when you are checking out to make sure you are shopping with me and use my Current Host Code GVEBWYZ6.
It’s time to sit back, relax, and take family and friends to the beach from the comfort of your home with our latest kit: Boho Beach Kit! It comes with everything you need to make beach-inspired cards, evoking vacation and relaxation in minutes! Send a friendly note to the people you love and don’t miss the acrylic-poured paint art style used in this kit for a dazzling marbled color effect.
This month’s kit includes:
Enough supplies to create 8 cards—4 each of 2 designs
8 coordinating envelopes
Boho Beach photopolymer stamp set
One Pecan Pie Ink Spot
Printed card bases, printed die cuts, adhesive, embellishments, and a clear block
Finished card size: 5-1/2″ x 4-1/4″ (14 x 10.8 cm)
Coordinating colors: Crumb Cake, Lost Lagoon, Pecan Pie, Pool Party, Wild Wheat
162418$22.00 USD
Available starting 7 June. Also available in French (item 162420).
Spanish Translated Stamp Set Bundle Available In The New Catalog!
Do you speak Spanish? Or know someone who does? Stampin’ Up! is excited to share that they have the new Texturas Naturales (161785), a Spanish stamp set, bundle and suite collection in their 2023–2024 Annual Catalog!
You can find the Spanish translated items in my online store Here
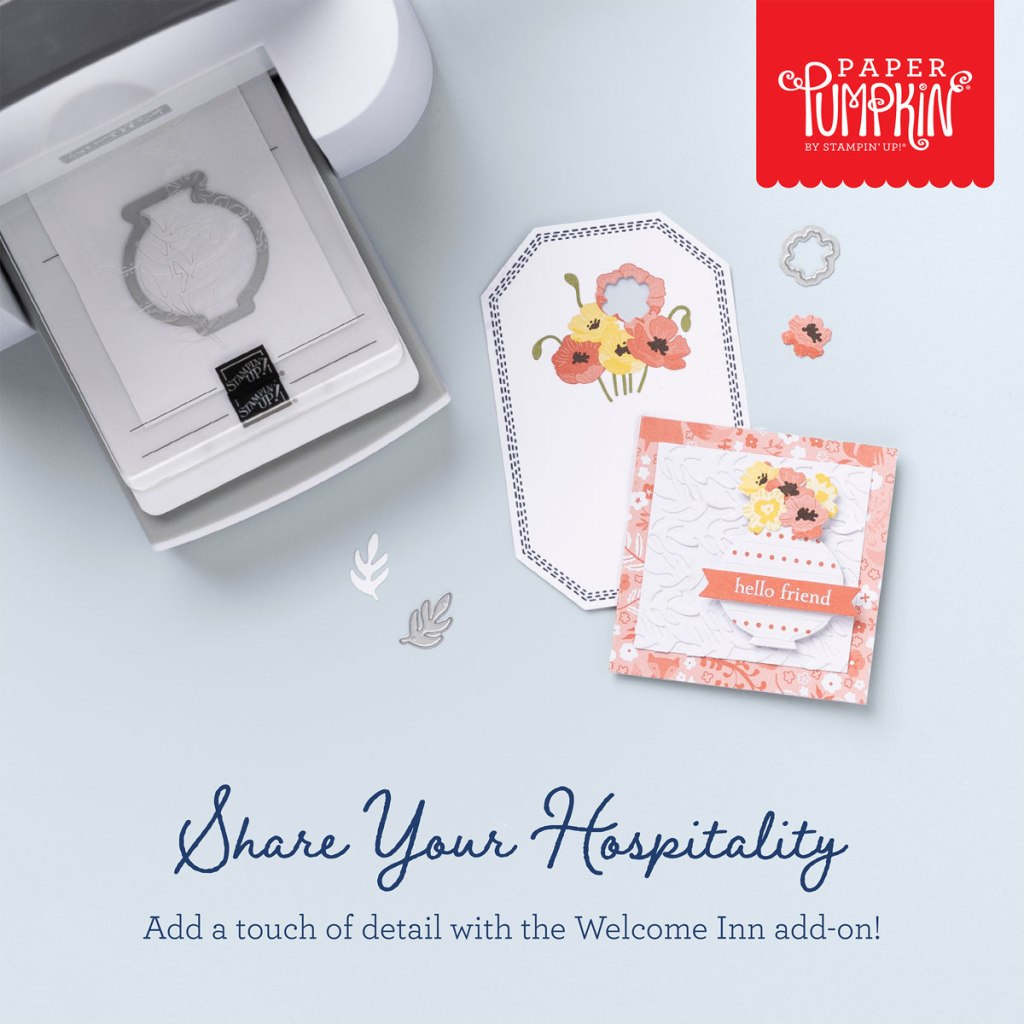
Show hospitality to all your guests with the Welcome Inn Paper Pumpkin Kit! This kit includes nine elegant and detailed cards—three each of three designs. Whether you’re hosting friends and family, or want to invite someone over, this kit has what you need to create sophisticated and elevated cards!
You can also pair this kit with a coordinating die add-on! (Available while supplies last. Stampin’ Cut & Emboss Machine sold separately). Keep reading to learn more!
The Welcome Inn Paper Pumpkin Kit perfectly coordinates with the Countryside Inn Suite Collection (item number 161474) from the 2023–2024 Annual Catalog! You can use the stamps and paper from both the suite and kit to create cards that are stylish and refined. You can create these elegant hospitality cards using the suite’s Countryside Inn 12″ x 12″ (30.5 x 30.5 cm) Designer Series Paper and the kit’s beautiful floral cards. There are endless creative possibilities of this kit and suite coordination!
This kit includes:
All the supplies you’ll need to create 9 elegant and sophisticated cards—3 each of 3 designs—and 9 coordinating envelopes.
A coordinating photopolymer stamp set with floral designs and friendly, hospitality-themed sentiments.
A Night of Navy Stampin’ Spot and beautiful embellishments
Lovely floral details and precut vases
Finished card size: 4-1/4″ x 5-1/2″ (10.8 x 14 cm)
Coordinating Stampin’ Up! colors: Balmy Blue, Boho Blue, Calypso Coral, Daffodil Delight, Early Espresso, Misty Moonlight, Night of Navy, Old Olive
Don’t forget! This kit perfectly coordinates with the Countryside Inn Suite Collection (Item number: 161474).
Subscribe to the May Paper Pumpkin Kit between 11 May 2023 and 10 June 2023 by clicking here!
Note: Supplies may be limited toward the end of the subscription period.
ADD-ON
Welcome Inn Dies (Available for purchase starting 11 May, while supplies last).
Item number: 163192
$6.00 USD / $8.25 CAD
This add-on includes:
One coordinating vase die: 1-1/2″ x 1-1/2″ (3.8 x 3.8 cm)
One coordinating flower die
One beautiful leaf die
Note: Stampin’ Cut & Emboss Machine sold separately.
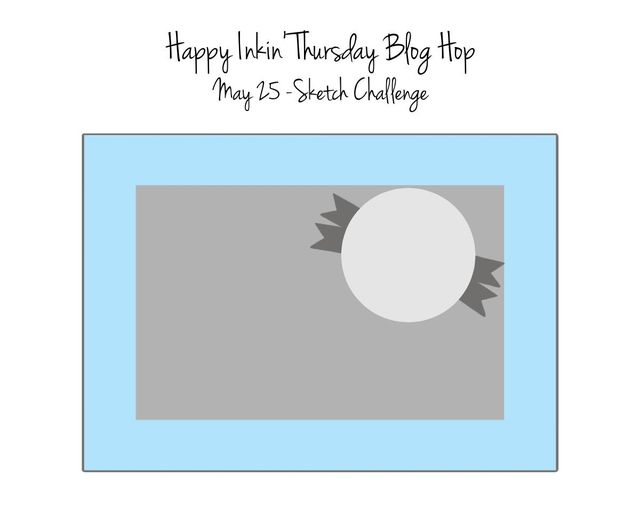
Good Thursday morning my stamping friends welcome to our Happy Inkin’ Thursday Blog Hop. If you are starting with me, thank you. I hope you will stop by everyone’s blog to see what they have created this week. If you are hopping over from Akiko’s blog, thank you for stopping by. This week we have Sketch Challenge. Here is my card using this week’s sketch.
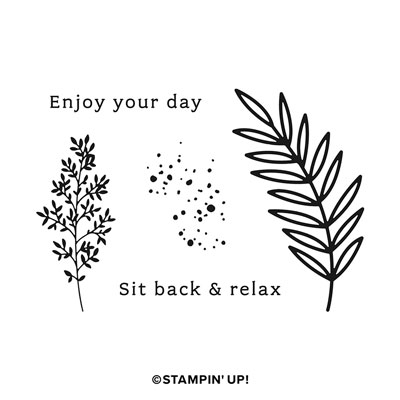
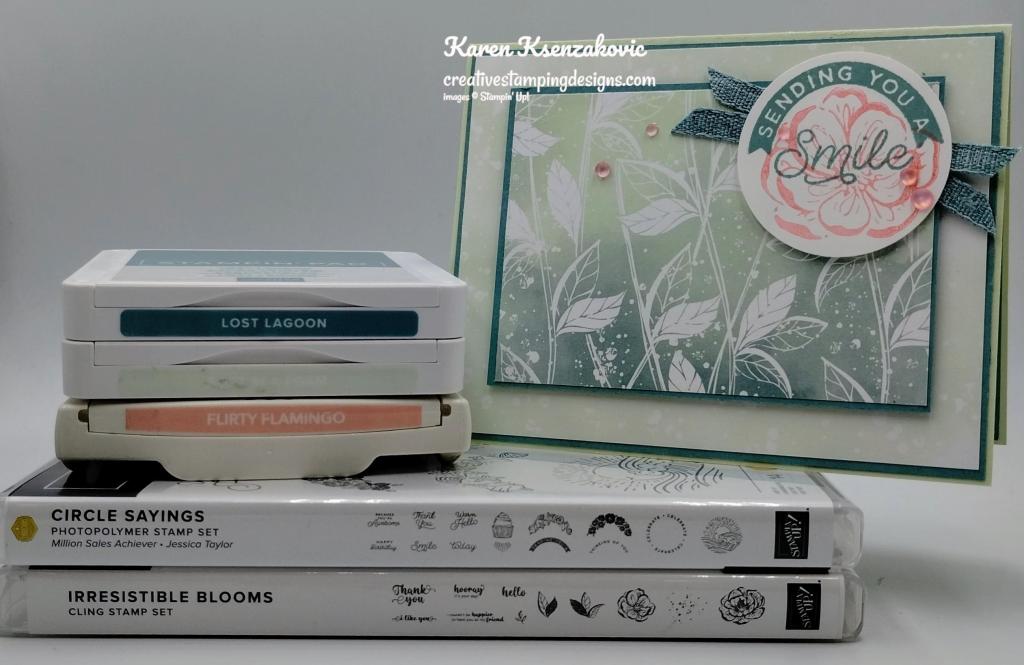
I used the Stampin’ Up! Circle Sayings Photopolymer Stamp Set along with the Stampin’ Up! Irresistible Blooms Cling Stamp Set, Hello Irresistible 6 X 6 Designer Series Paper and the 2″ Circle Punch for my card today.
This is our sketch for this week.
I started by adhering a panel of Hello Irresistible DSP to a Lost Lagoon mat using Stampin’ Seal. I adhered the layered panel to a Soft Sea Foam card base using Multipurpose Liquid Glue.
I adhered a smaller panel of the Hello Irresistible DSP to a Lost Lagoon mat using Stampin’ Seal. I adhered the layered panel to the card front using Stampin’ Dimensionals.
On a panel of Basic White, I stamped the banner sentiment from the Circle Sayings stamp set in Lost Lagoon Ink. I wanted the sentiment to fit the smaller punch, so I bent it a little to fit before stamping. I stamped the flower image from the Irresistible Blooms stamp set in Flirty Flamingo Ink, stamping off on scrap paper, under the sentiment. I stamped the smile sentiment from the Circle Sayings stamp set over the flower in Lost Lagoon Ink. I punched the sentiment out using the 2″ Circle Punch. I adhered 2 pieces of Lost Lagoon 1/4″ Bordered Ribbon to the card front using Stampin’ Seal. I adhered the circle sentiment over the ribbon using Stampin’ Dimensionals. I added a few Loose Frosted Dots using Multipurpose Liquid Glue.
On the inside, I stamped the sentiment from the Circle Sayings stamp set in Lost Lagoon Ink on a panel of Basic White. I stamped the sun burst image from the Circle Sayings stamp set in Soft Sea Foam Ink above the sentiment. I stamped the flower image from the Irresistible Blooms stamp set in Flirty Flamingo Ink on the bottom of the panel. I stamped the leaf images from the Irresistible Blooms stamp set in Soft Sea Foam Ink around the flower. I adhered the Basic White panel to a Lost lagoon mat then to the inside of the Soft Sea Foam card base.
To complete my card, I decorated a Basic White Medium Envelope. I stamped the large flower image from the Irresistible Blooms stamp set in Flirty Flamingo Ink on the envelope front. I stamped the leaf images from the Irresistible Blooms stamp set in Soft Sea Foam Ink around the flower. I adhered a panel of Hello Irresistible DSP to the envelolpe flap.
Thank you for stopping by my blog today. I hope you liked my card and will give it a try. Now that you’ve seen my card, take a minute to hop through and see everyone’s projects today. If you click on the Next Blog button, you’ll go to Tara’s page. Or you can just click on the names below to go directly to all their blogs! Happy Hopping!
If you need any stamping supplies, I’d love to be your Demonstrator. Just click HERE to go directly to my online store or drop me an email if you have any questions.
MY CURRENT HOST CODE IS: BR9XGSTC
Use this host code when placing an order with me. When you order $50 or greater you will receive a free gift from me! If your order is over $150, please do not use this code, but you’ll still get the free gift. The free gift is your choice of any 1 item valued up to $10.00 from the 2022-2023 Annual Catalog or the January-April 2023 Mini Catalog! Unfortunately, packs of cardstock are no longer an option for a free gift. Shipping has become too expensive to ship and it’s costing me as much to ship as the cardstock costs. For any orders $50 or more I will also send you my monthly class tutorials. Click HERE or go to my Customer Rewards for more details and to see what this month’s tutorials are.
Please remember to use my current Host Code and make sure that you can see my name on the final checkout page listed as your Demonstrator when you order so that you know that you’re ordering with me, and you’ll get my rewards!
In response to changing policies at Stampin’ Up – I’m adjusting my Ordering Gift policy as well. I’m having to get a little more tough on the adding of Host codes when you place your order thru my Online Store.
Not to worry – you’re still going to get that $10 ordering gift for orders of $50 (before shipping & tax) or greater. And the gift is still any 1 SU! product up to that $10 value – which includes some of our fun Host Sets!
But – if you DO NOT use the Host code for your orders of less than $150 (this is the RETAIL total before Shipping & Handling), then you’ll have two options:
You’ll need to call Stampin’ Up! (1-800-Stamp-Up) and ask them to add it for you. They’re very helpful and will get it done quickly! OR….
If your order was over the $50 threshold but under $150, then…you’ll forfeit that $10 ordering gift and rewards – this is the Bummer Option – and I REALLY don’t want to do this, SO please remember to add my Current Host Code.
COMING SOON!! SAVE 15% ON SELECT DESIGNER SERIES PAPERS!
We all love beautiful Designer Series Paper, and in June, you can enjoy a 15% discount on select Designer Series Papers from our new 2023–2024 Annual Catalog and Online Exclusives. Whether you’re a scrapbooker, a card maker or simply a paper lover, this is a great time to stock up and save on gorgeous paper, so you have artistic and versatile paper designs on hand for your next projects! Click HERE for a printable PDF flyer.
SALES PERIOD: 1–30 JUNE
All order types qualify for this promotion.
There is no limit to how many packages of Designer Series Paper may be purchased during this promotion.
Only select Designer Series Papers are available at a 15% discount during this promotion.
Orders must be placed—and closed—during the promotion period for the 15% discount to apply.
Designer Series Paper ordered as part of a Starter Kit or with Stampin’ Rewards qualify for the 15% discount.
Designer Series Papers are from the new 2023–2024 Annual Catalog (p. 129–132) and Online Exclusives.
Show hospitality to all your guests with the Welcome Inn Paper Pumpkin Kit! This kit includes nine elegant and detailed cards—three each of three designs. Whether you’re hosting friends and family, or want to invite someone over, this kit has what you need to create sophisticated and elevated cards!
You can also pair this kit with a coordinating die add-on! (Available while supplies last. Stampin’ Cut & Emboss Machine sold separately). Keep reading to learn more!
The Welcome Inn Paper Pumpkin Kit perfectly coordinates with the Countryside Inn Suite Collection (item number 161474) from the 2023–2024 Annual Catalog! You can use the stamps and paper from both the suite and kit to create cards that are stylish and refined. You can create these elegant hospitality cards using the suite’s Countryside Inn 12″ x 12″ (30.5 x 30.5 cm) Designer Series Paper and the kit’s beautiful floral cards. There are endless creative possibilities of this kit and suite coordination!
This kit includes:
All the supplies you’ll need to create 9 elegant and sophisticated cards—3 each of 3 designs—and 9 coordinating envelopes.
A coordinating photopolymer stamp set with floral designs and friendly, hospitality-themed sentiments.
A Night of Navy Stampin’ Spot and beautiful embellishments
Lovely floral details and precut vases
Finished card size: 4-1/4″ x 5-1/2″ (10.8 x 14 cm)
Coordinating Stampin’ Up! colors: Balmy Blue, Boho Blue, Calypso Coral, Daffodil Delight, Early Espresso, Misty Moonlight, Night of Navy, Old Olive
Don’t forget! This kit perfectly coordinates with the Countryside Inn Suite Collection (Item number: 161474).
Subscribe to the May Paper Pumpkin Kit between 11 May 2023 and 10 June 2023 by clicking here!
Note: Supplies may be limited toward the end of the subscription period.
ADD-ON
Welcome Inn Dies (Available for purchase starting 11 May, while supplies last).
Item number: 163192
$6.00 USD / $8.25 CAD
This add-on includes:
One coordinating vase die: 1-1/2″ x 1-1/2″ (3.8 x 3.8 cm)
One coordinating flower die
One beautiful leaf die
Note: Stampin’ Cut & Emboss Machine sold separately.


![Beautiful Motifs Photopolymer Stamp Set (English) [ 165198 ]](https://assets1.tamsnetwork.com/images/EC042017NF/165198s.jpg "Beautiful Motifs Photopolymer Stamp Set (English) [ 165198 ]")
![Gallery Blooms Photopolymer Stamp Set [ 165211 ]](https://assets1.tamsnetwork.com/images/EC042017NF/165211s.jpg "Gallery Blooms Photopolymer Stamp Set [ 165211 ]")
![Basic Beige 8 1/2" X 11" Cardstock [ 164511 ]](https://assets1.tamsnetwork.com/images/EC042017NF/164511s.jpg "Basic Beige 8 1/2\" X 11\" Cardstock [ 164511 ]")
![Secret Sea 8 1/2" X 11" Cardstock [ 165624 ]](https://assets1.tamsnetwork.com/images/EC042017NF/165624s.jpg "Secret Sea 8 1/2\" X 11\" Cardstock [ 165624 ]")
![Beautiful Gallery 6" X 6" (15.2 X 15.2 Cm) Designer Series Paper [ 165196 ]](https://assets1.tamsnetwork.com/images/EC042017NF/165196s.jpg "Beautiful Gallery 6\" X 6\" (15.2 X 15.2 Cm) Designer Series Paper [ 165196 ]")
![Secret Sea Classic Stampin' Pad [ 165285 ]](https://assets1.tamsnetwork.com/images/EC042017NF/165285s.jpg "Secret Sea Classic Stampin' Pad [ 165285 ]")
![Cloud Cover Stampin’ Blends Combo Pack [ 165287 ]](https://assets1.tamsnetwork.com/images/EC042017NF/165287s.jpg "Cloud Cover Stampin’ Blends Combo Pack [ 165287 ]")
![Old Olive Stampin' Blends Combo Pack [ 154892 ]](https://assets1.tamsnetwork.com/images/EC042017NF/154892s.jpg "Old Olive Stampin' Blends Combo Pack [ 154892 ]")
![Pretty In Pink Stampin’ Blends Combo Pack [ 163824 ]](https://assets1.tamsnetwork.com/images/EC042017NF/163824s.jpg "Pretty In Pink Stampin’ Blends Combo Pack [ 163824 ]")
![1 7/8" (4.8 Cm) Circle Punch [ 165259 ]](https://assets1.tamsnetwork.com/images/EC042017NF/165259s.jpg "1 7/8\" (4.8 Cm) Circle Punch [ 165259 ]")
![2" (5.1 Cm) Circle Punch [ 133782 ]](https://assets1.tamsnetwork.com/images/EC042017NF/133782s.jpg "2\" (5.1 Cm) Circle Punch [ 133782 ]")
![Pressed Flower Motifs [ 165215 ]](https://assets1.tamsnetwork.com/images/EC042017NF/165215s.jpg "Pressed Flower Motifs [ 165215 ]")
![Secret Sea 3/8" (1 Cm) Faux Linen Ribbon [ 165273 ]](https://assets1.tamsnetwork.com/images/EC042017NF/165273s.jpg "Secret Sea 3/8\" (1 Cm) Faux Linen Ribbon [ 165273 ]")
![Basic White Medium Envelopes [ 159236 ]](https://assets1.tamsnetwork.com/images/EC042017NF/159236s.jpg "Basic White Medium Envelopes [ 159236 ]")


![Take Your Pick [ 144107 ]](https://assets1.tamsnetwork.com/images/EC042017NF/144107s.jpg "Take Your Pick [ 144107 ]")


 Circle Punch")


")
")

")


 Circle Punch")
 Satin Edged Ribbon")


")


")

")


 Designer Series Paper")
 Designer Series Paper")


")
")


 Designer Series Paper")
 Designer Series Paper")


")
")


 Designer Series Paper")


 Bordered Ribbon")

