
Good Monday morning stamping friends. Welcome to a new week. How was your weekend? Did you do anything fun? This week is going to seem so long after the past 2.
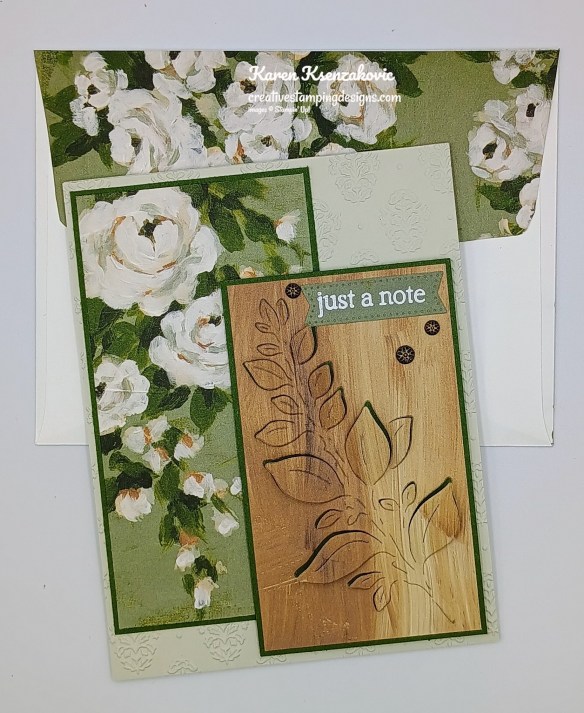
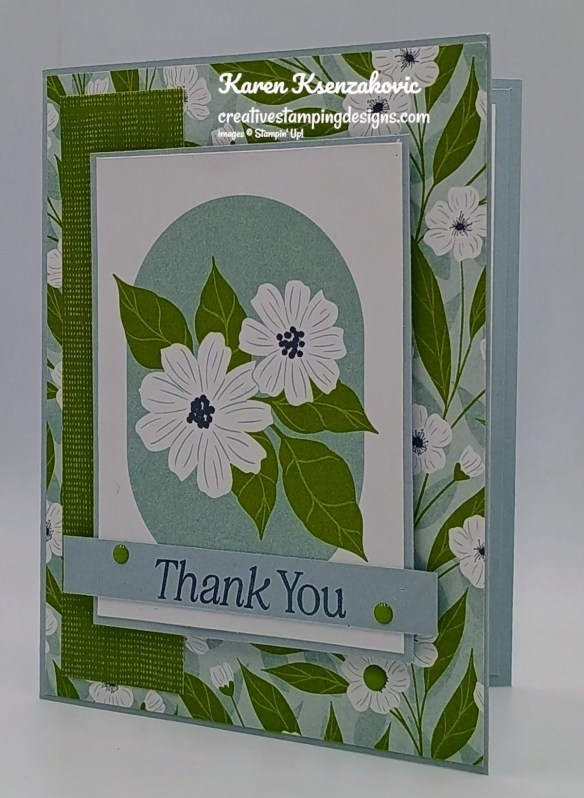
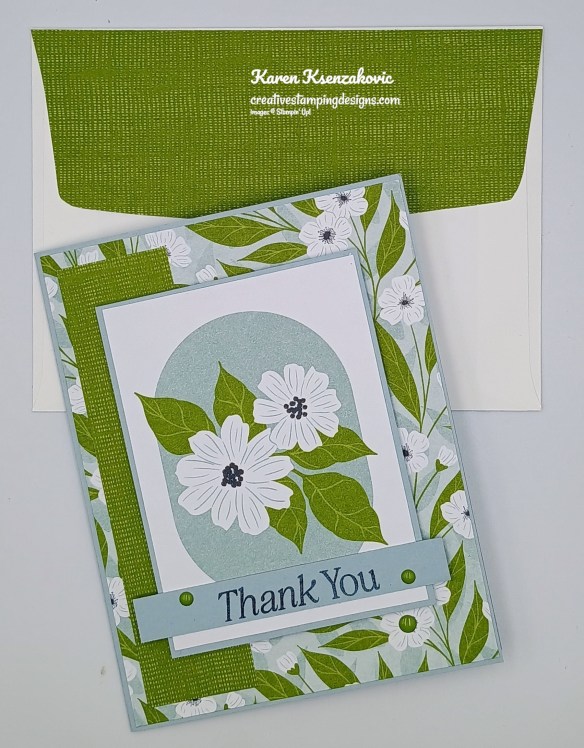
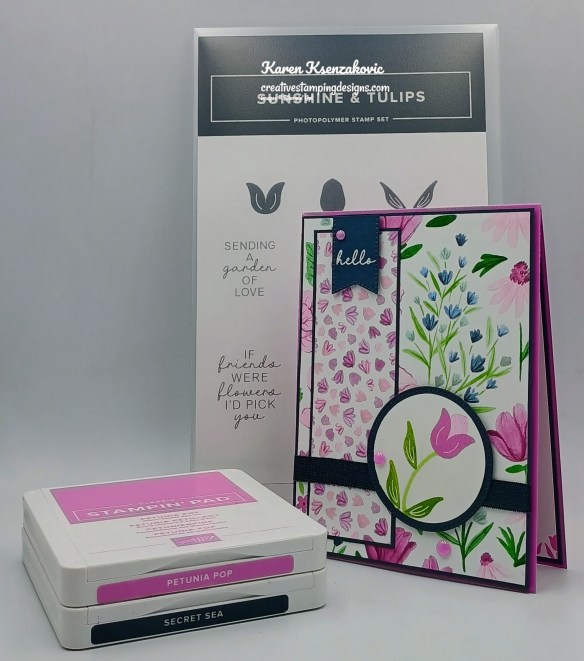
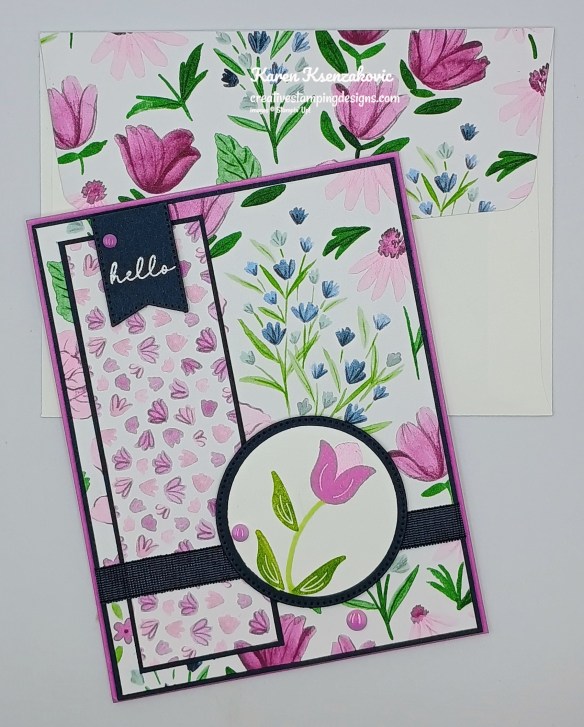
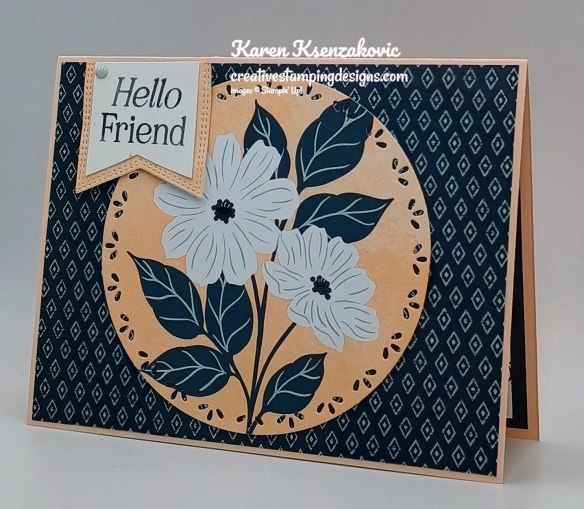
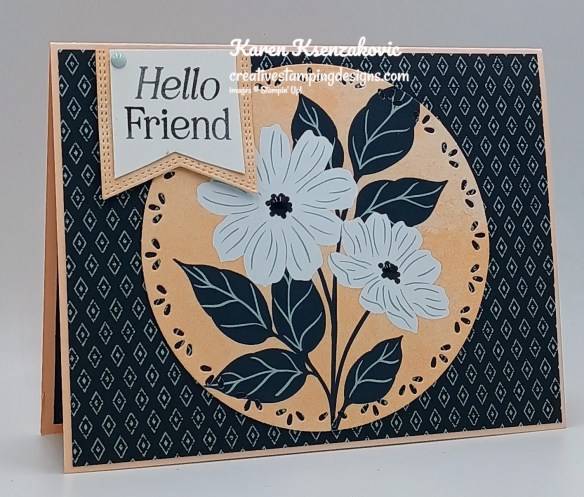
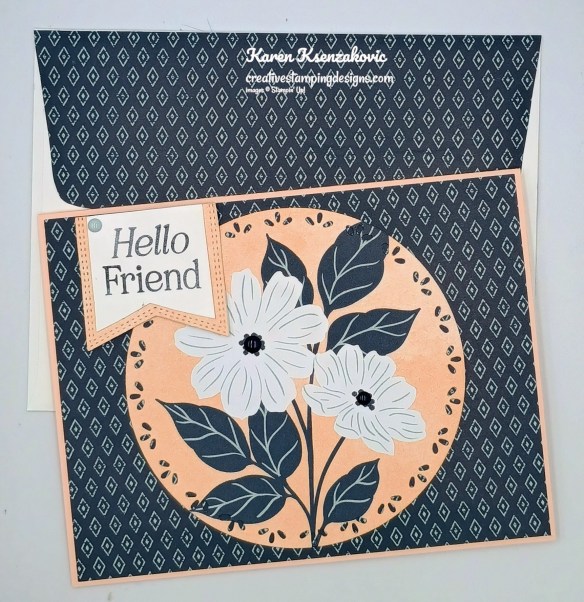
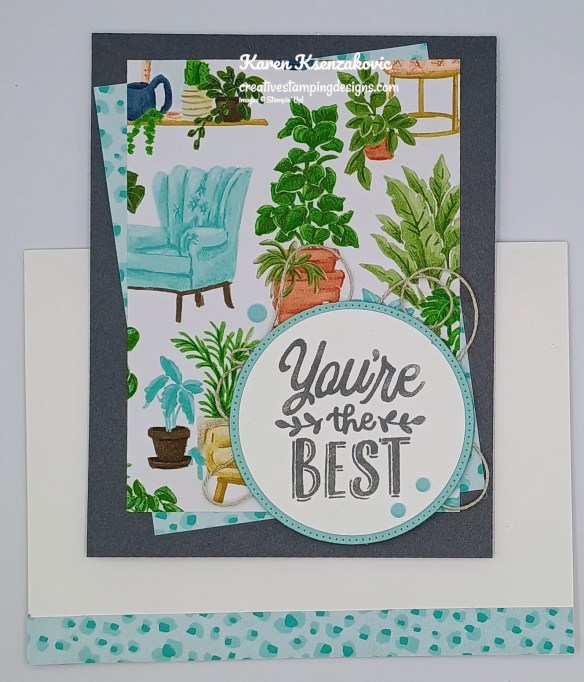
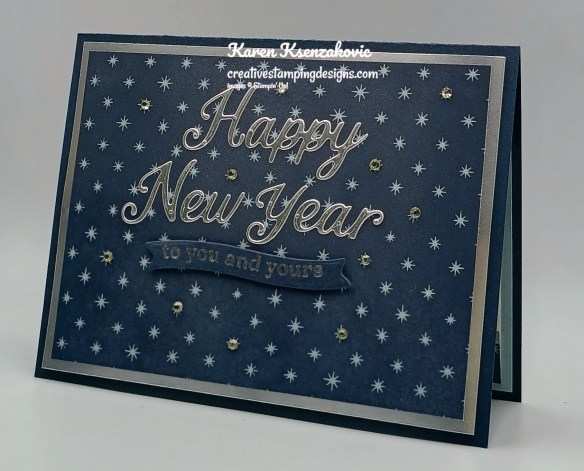
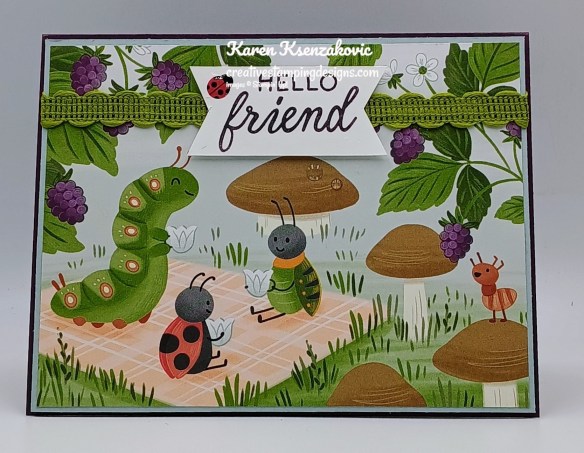
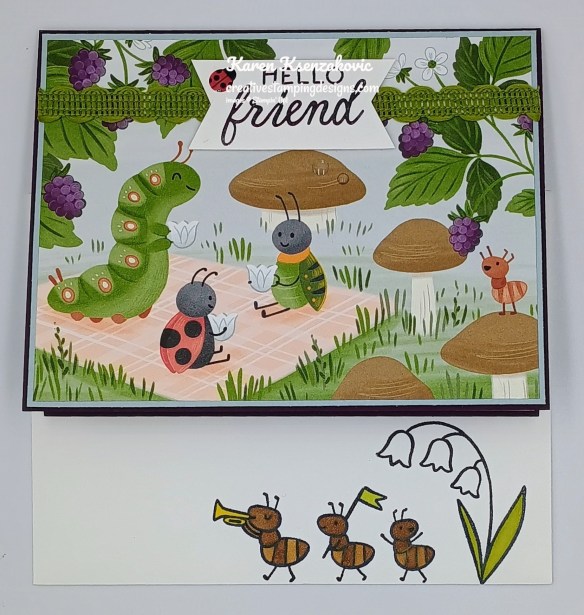
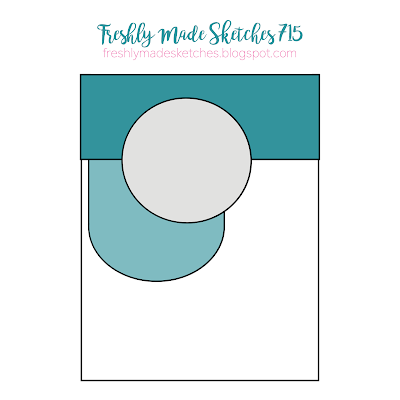
I brought out products from the annual catalog for today’s card. Can you believe I hadn’t played with this die yet? If you’d like to see a quick video on how I made this card, Click Here to go to my Instagram Reels. Here is my card for today.
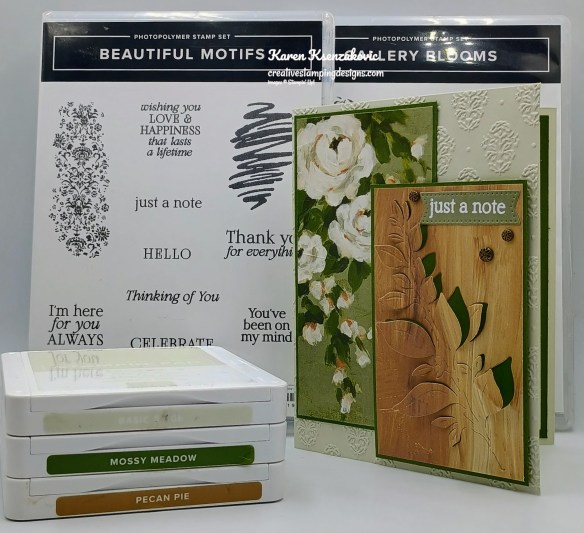
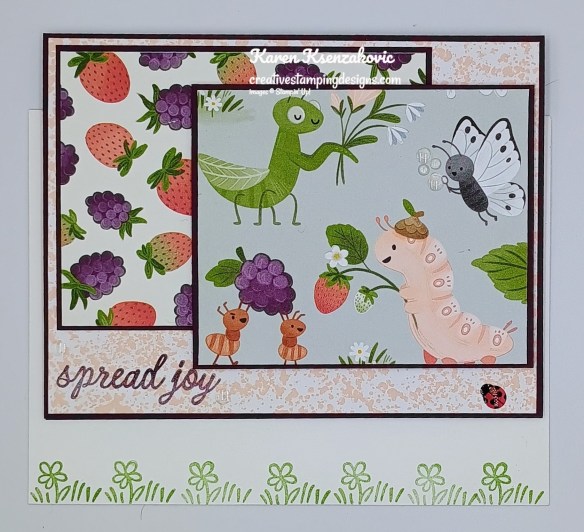
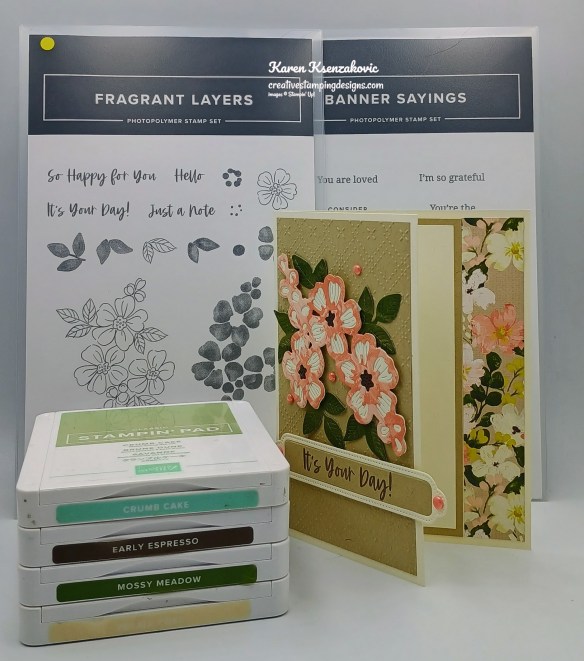
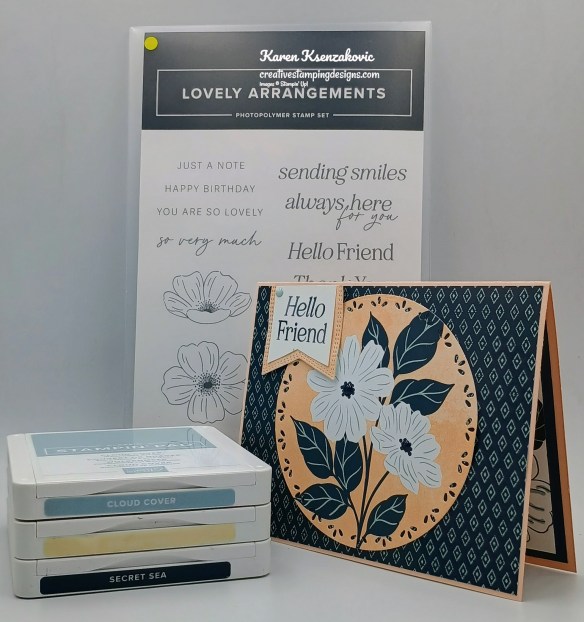
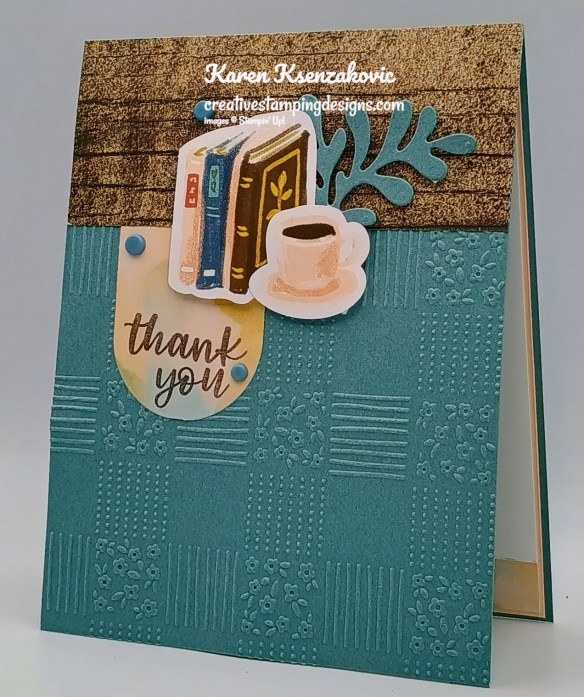
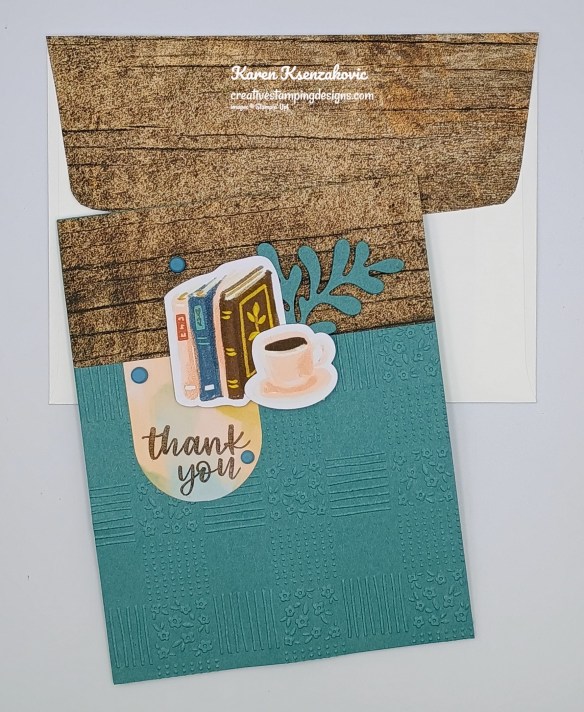
I used the Stampin’ Up! Beautiful Motifs Bundle along with the Beautiful Gallery 6 x 6 Designer Series Paper, Damask Designs Embossing Folder, Stylish Shapes Dies and Stampin’ Up! Gallery Blooms Stamp Set for my card today.

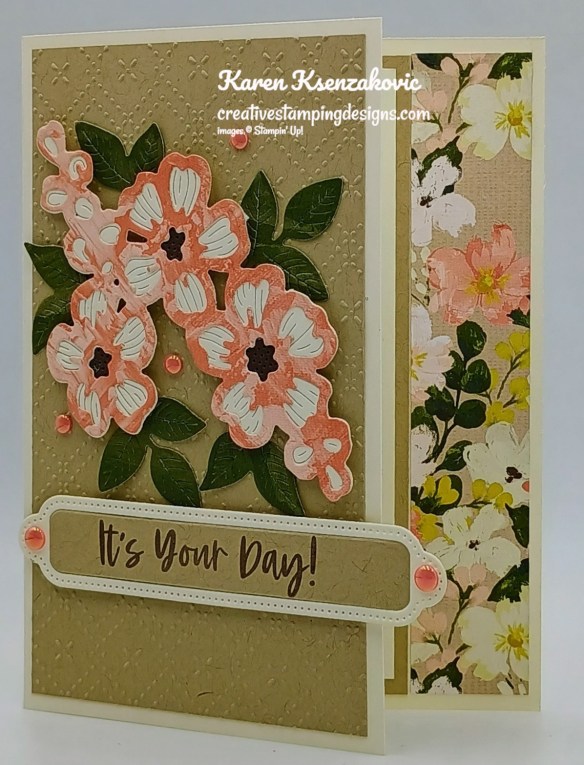
Emboss the panel of Basic Beige using the Damask Designs EF. Adhere the embossed panel to the Basic Beige card base.

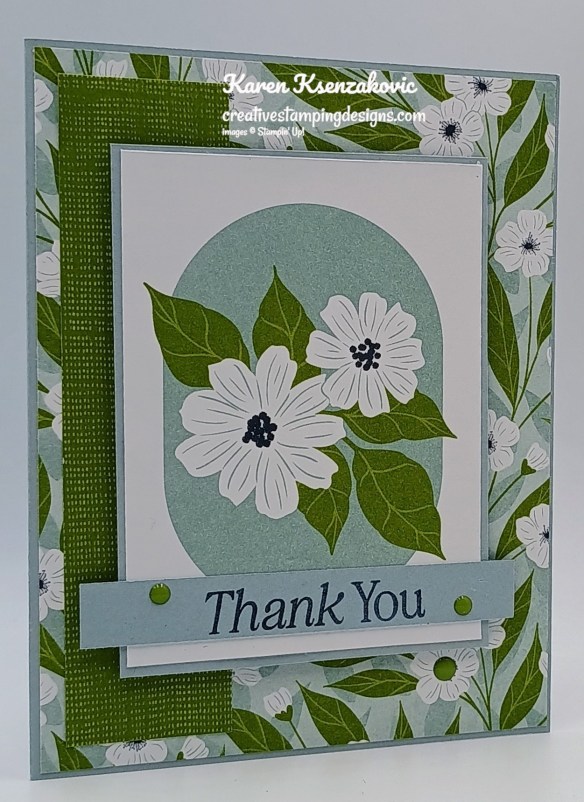
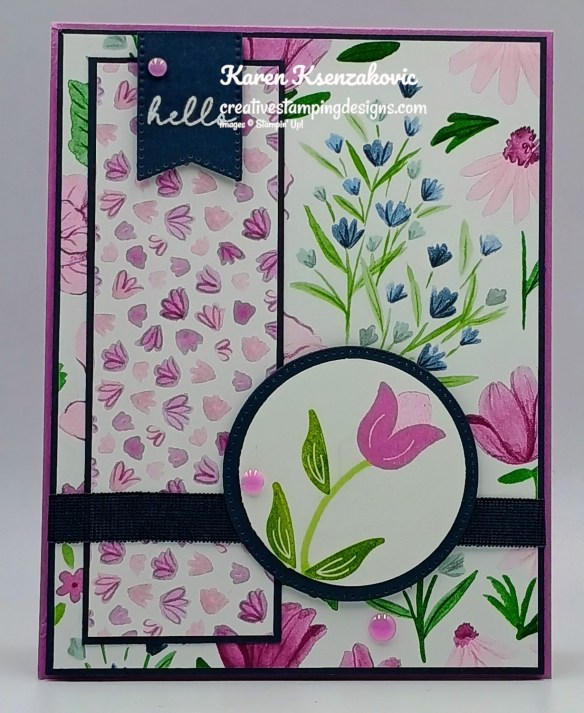
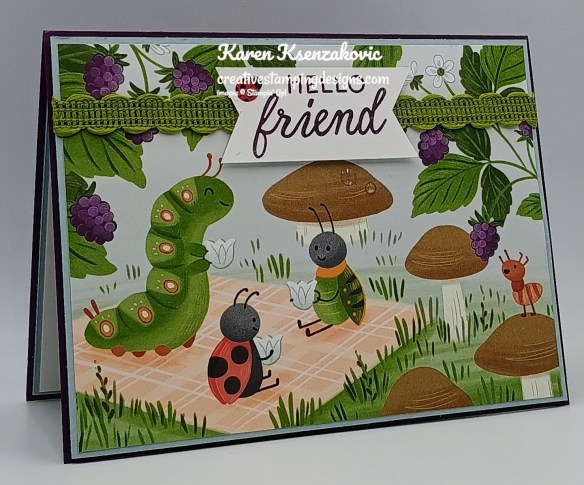
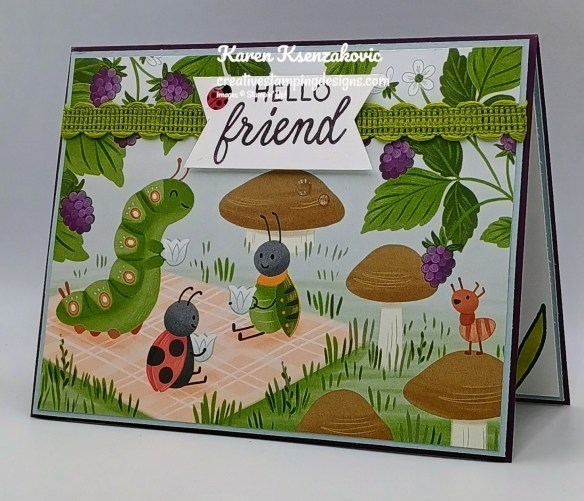
Adhere the larger panel of Beautiful Gallery DSP to the Mossy Meadow mat. Adhere the layered panel to the left side of the card front.
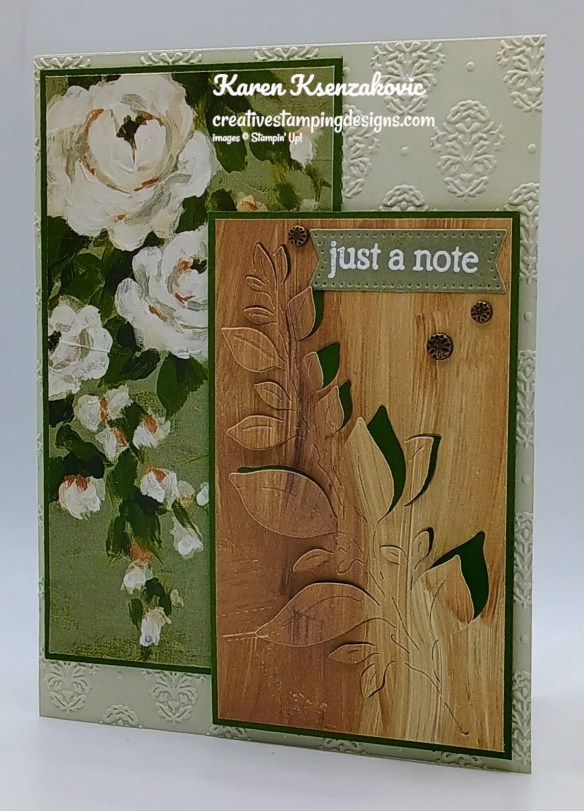
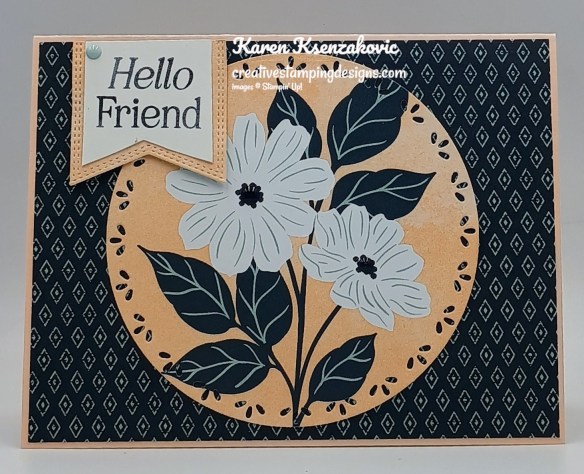
Cut the smaller panel of Beautiful Gallery DSP using the Beautiful Motifs Dies. Adhere the die cut panel to the coordinating Mossy Meadow mat. Adhere the layered panel to the card front with Stampin’ Dimensionals. On the small panel of Beautiful Gallery DSP, stamp the sentiment from the Beautiful Motifs stamp set in Versamark Ink. Sprinkle the sentiment with White Embossing Powder and set it with the Heat Tool. Cut the sentiment out using the smallest banner die from the Stylish Shapes Dies. Adhere the sentiment to the card front. Add a few Pressed Flower Motifs to the card front.
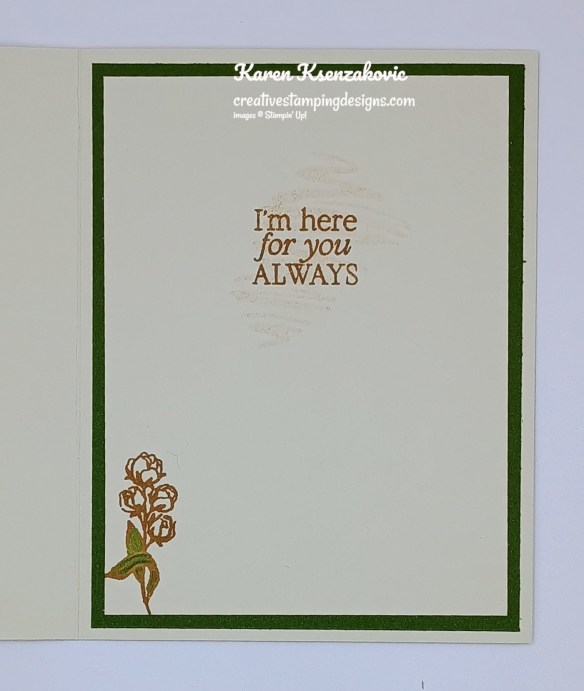
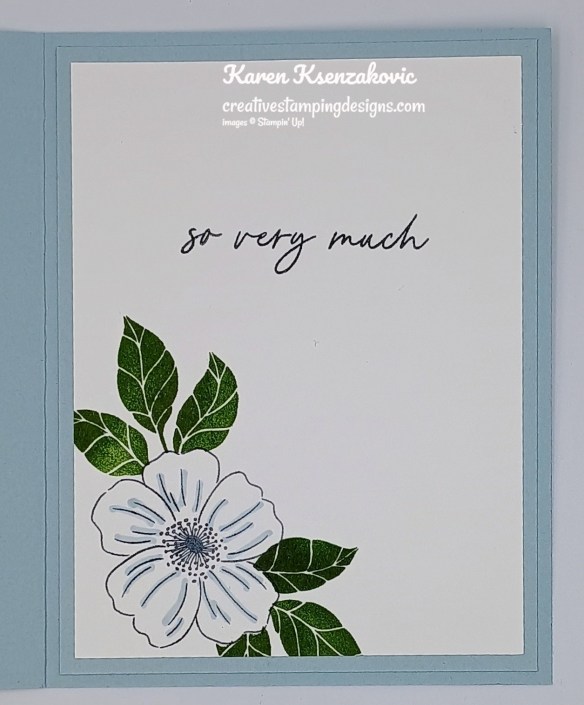
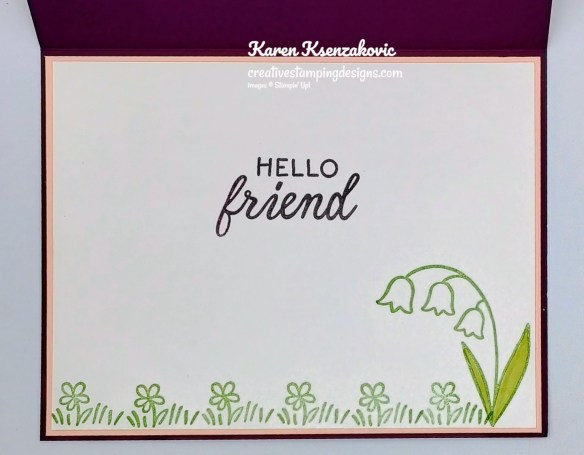
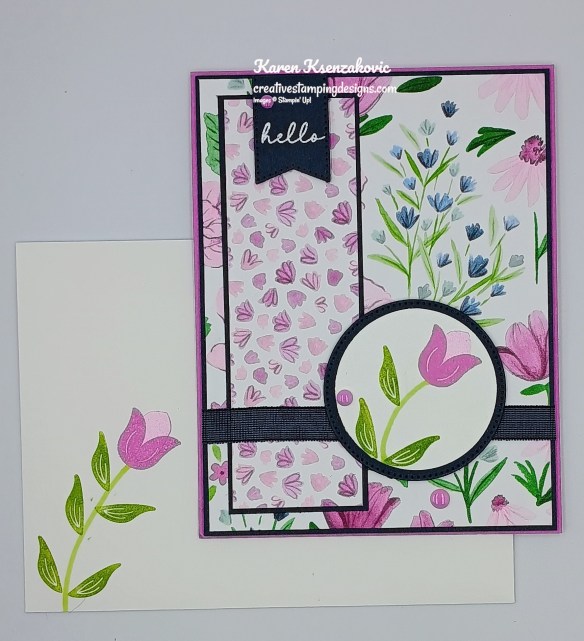
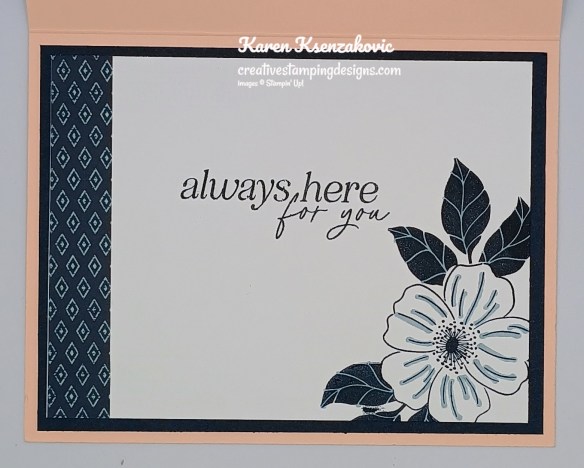
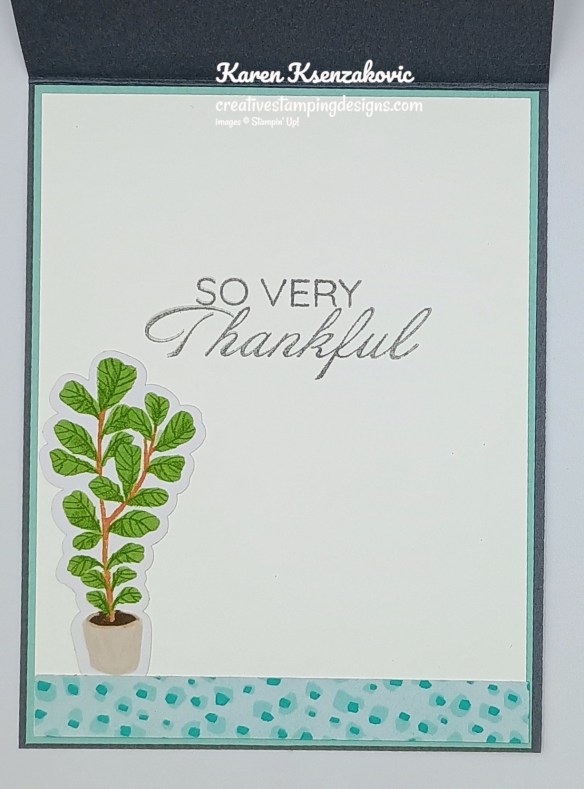
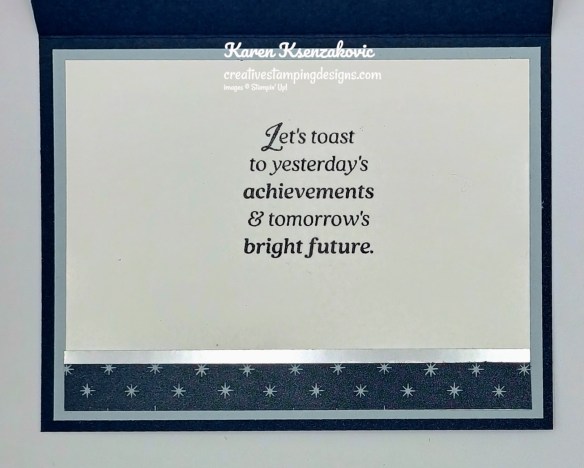
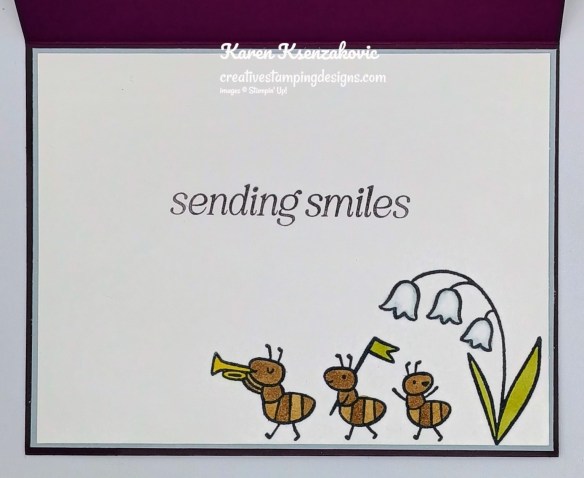
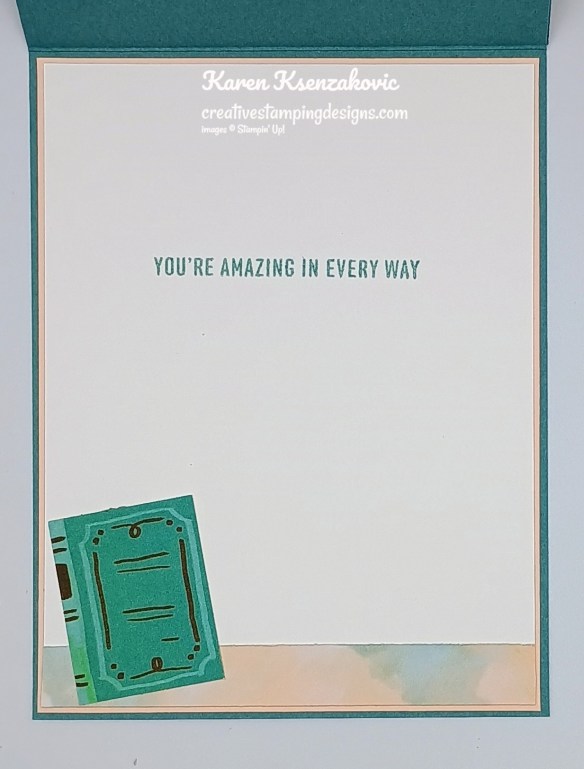
Stamp the sentiment from the Beautiful Motifs stamp set in Pecan Pie Ink on the panel of Basic Beige. Stamp the small flower image from the Gallery Blooms stamp set in Pecan Pie Ink on the bottom of the panel. Stamp the swish image from the Beautiful Motifs stamp set in Pecan Pie Ink, stamping off 2 times on scrap paper, over the sentiment. Adhere the Basic Beige panel to a Mossy Meadow mat then to the inside of the Basic Beige card base.
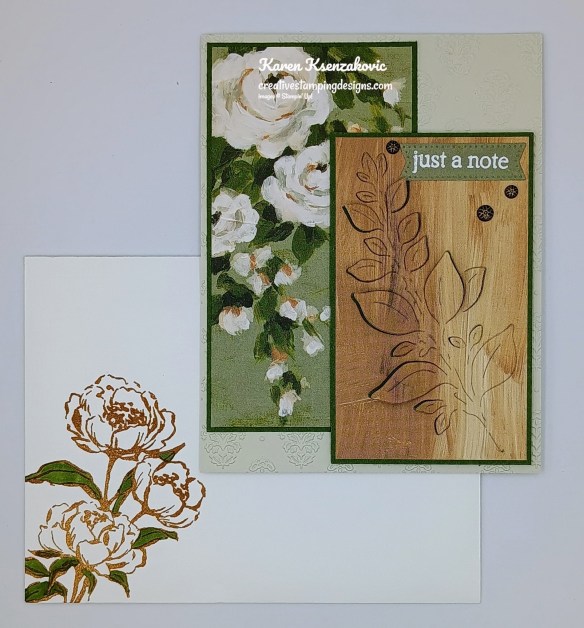
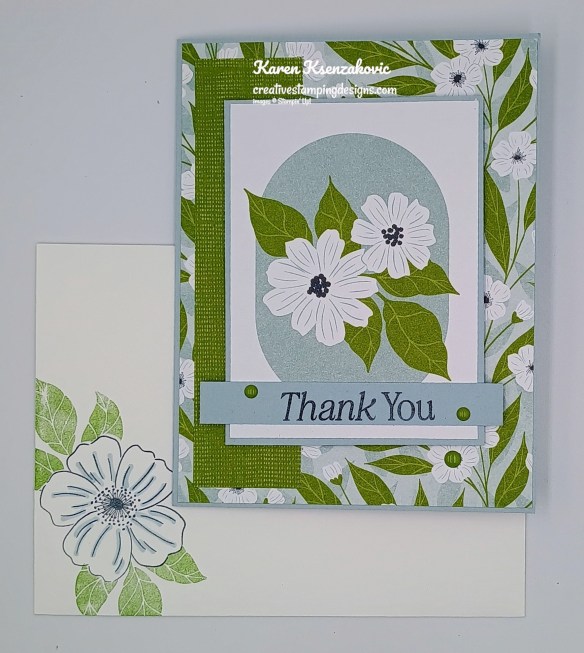
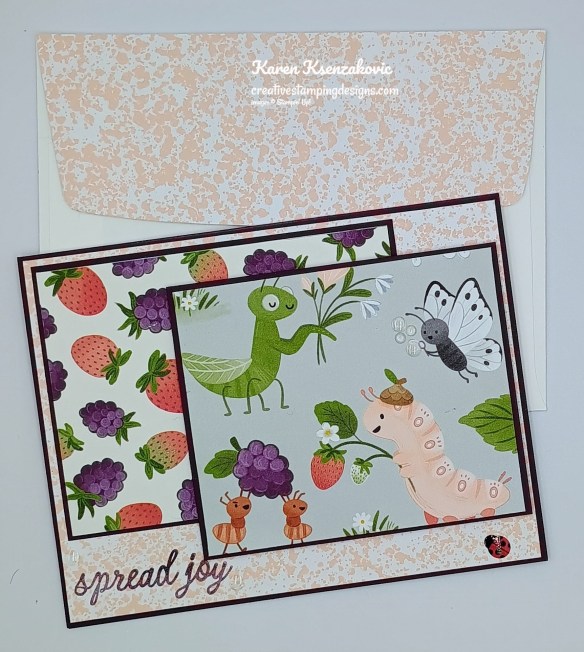
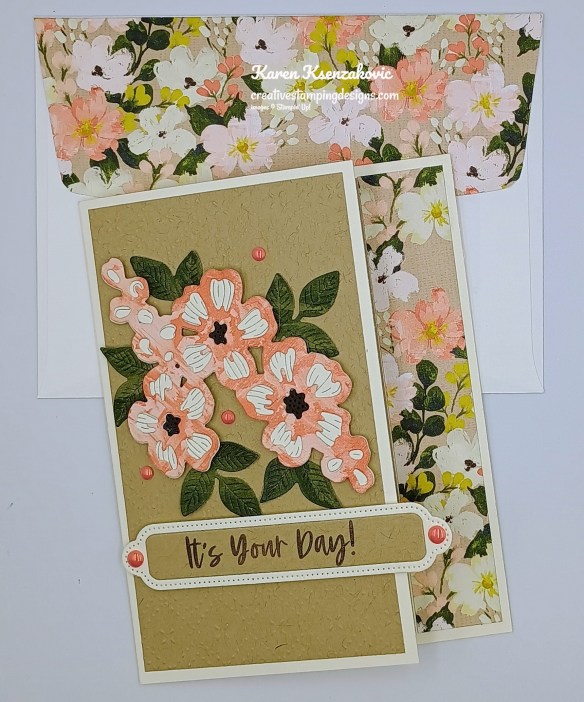
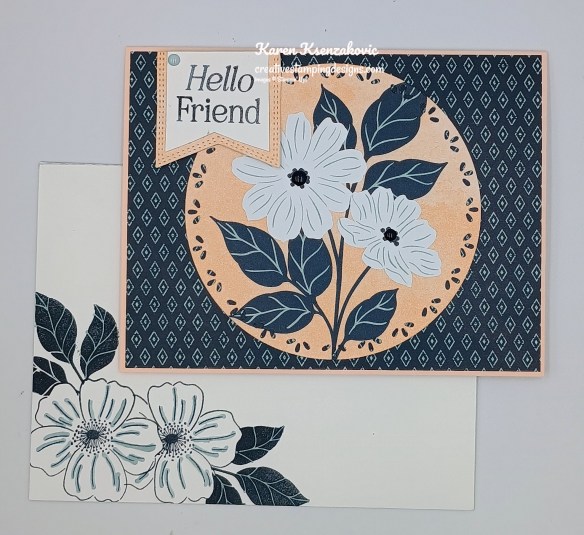
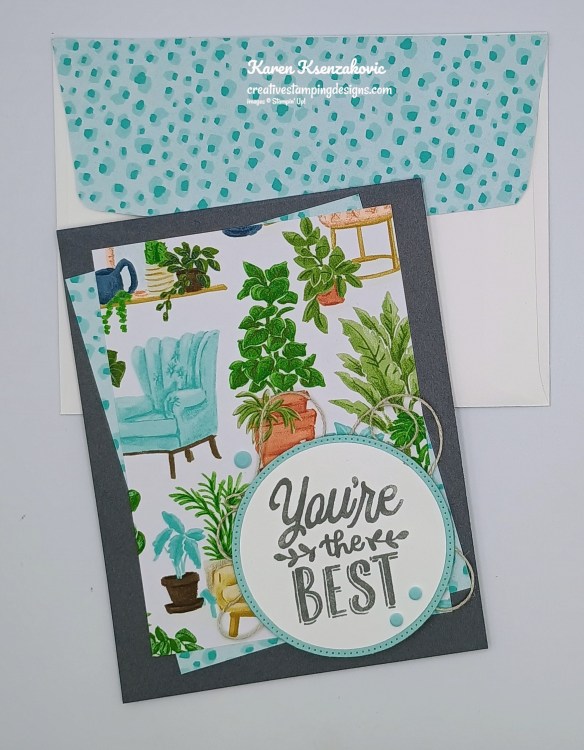
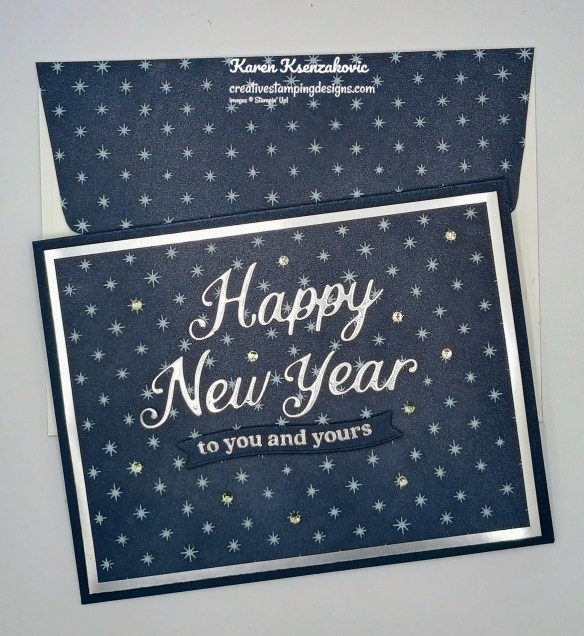
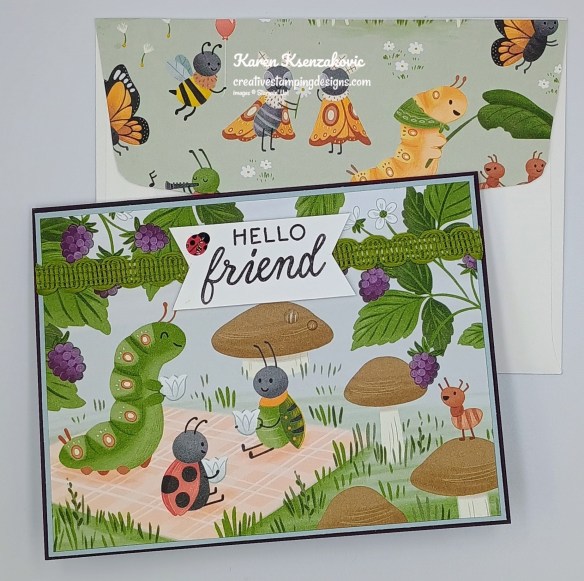
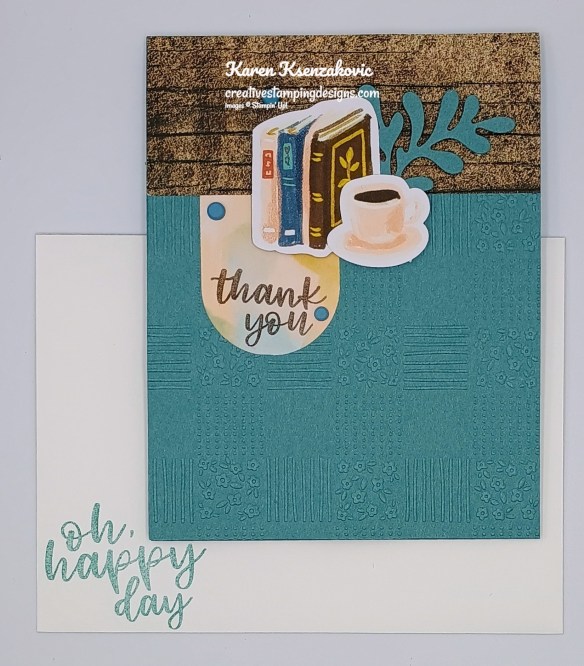
Decorate a Basic White Medium Envelope to finish the card. Stamp the large flower image from the Gallery Blooms stamp set in Pecan Pie Ink on the envelope front. Adhere a panel of Beautiful Gallery DSP to the envelope flap.
Thank you for stopping by my blog today. I hope you like the card and you’ll give it a try. Happy Stamping!!
*********************************************************************************************************
If you need any stamping supplies, I’d love to be your Demonstrator. Just click HERE to go directly to my online store or drop me an email if you have any questions.
*********************************************************************************************************
Registration Open for January Nature’s Symphony Online Class
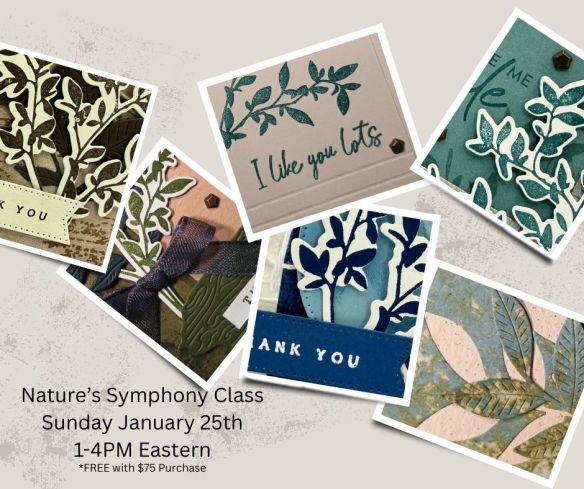
Tara Carpenter and I are teaming up to offer a fun Online Zoom Class featuring the new Stampin’ Up! Nature Walk Suite Collection. We will be creating 6 different cards 2 of which will be fun folds. This class is free with a $75 purchase from my Online Store. As an extra bonus if you make your purchase starting on Tuesday January 6, you will earn Bonus Coupons, and you’ll be eligible for the new Product of the Month.
The class requirements and what you will receive:
- Visit my Online Store and place a $75 or more order before tax and shipping.
- Once you have made the purchase, fill out this form and submit Click Here For Google Form
- Zoom class with complete step by step instructions to complete each card as we go.
- PDF with detailed directions and photos
- A Link to the recorded class after we are done so you can watch it again and make more cards.
A week before the class I will send you the complete PDF of the cards so you can cut all your cardstock gather your supplies, so you are ready to go. We will NOT be cutting cardstock live. Everyone’s cards will be unique since you will pick which color cardstock and ink you want to use for each card.
The class will be held on Sunday January 25th from 1pm – 4pm Eastern Time via Zoom. This will allow everyone all over the United States to participate live!
I will email you the Zoom link to the class a few days before the event.
Deadline to sign up is Sunday January 18th at 5pm ET
*********************************************************************************************************
Bonus Days Start Tomorrow January 6th!!!

It’s almost time for BONUS DAYS! Because do you know what’s a great deal? Getting rewarded for all the crafting supplies you’re already going to buy! When you shop between January 6 and February 2 and spend $50 USD, you will earn a $5 USD coupon! Make sure you save all your coupons because you can redeem them (and we mean ALL of them) between February 3 and 28. And don’t forget—each purchase earns you Stampin’ Rewards, so that’s even more bang for your buck! There’s no limit to how many coupons you can earn!
Details:
- Earn a $5 USD coupon for every $50 USD spent (before shipping and tax).
- All coupon codes will be emailed right after a qualifying purchase has been made. You must have a customer account with a valid email address to earn coupons when you shop.
- If you earn multiple codes from a single order, you will receive one email with multiple codes. If you earn multiple codes from multiple orders, you will receive separate emails for each code earned.
- All order types qualify for this promotion.
- Orders started before the promotion begins will not count toward earning coupon codes. You must add items to your cart and complete your purchase during the earning period.
- There is no limit to the number of coupon codes participants can earn per order or throughout the duration of the earning period.
*********************************************************************************************************
Card stock cuts for this project:
- Basic Beige Cardstock 5 1/2″ x 8 1/2″(card base scored & folded at 4 1/4″), 4 1/4″ x 5 1/2″(card front), 3 3/4″ x 5″(inner liner)
- Mossy Meadow Cardstock 2 5/8″ x 4 7/8″ panel 2 1/2″ x 4″ panel, 4″ x 5 1/4″ panel
- Beautiful Gallery 6 x 6 Designer Series Paper 2 1/2″ x 4 3/4″ panel, 2 3/8″ x 3 7/8″ panel, 1″ x 2″ panel, 2 1/4″ x 6″ panel
*********************************************************************************************************
Product List
![Beautiful Motifs Bundle (English) [ 165206 ]](https://assets1.tamsnetwork.com/images/EC042017NF/165206s.jpg "Beautiful Motifs Bundle (English) [ 165206 ]")
![Beautiful Motifs Photopolymer Stamp Set (English) [ 165198 ]](https://assets1.tamsnetwork.com/images/EC042017NF/165198s.jpg "Beautiful Motifs Photopolymer Stamp Set (English) [ 165198 ]")
![Beautiful Motifs Dies [ 165205 ]](https://assets1.tamsnetwork.com/images/EC042017NF/165205s.jpg "Beautiful Motifs Dies [ 165205 ]")
![Gallery Blooms Photopolymer Stamp Set [ 165211 ]](https://assets1.tamsnetwork.com/images/EC042017NF/165211s.jpg "Gallery Blooms Photopolymer Stamp Set [ 165211 ]")
![Basic Beige 8 1/2" X 11" Cardstock [ 164511 ]](https://assets1.tamsnetwork.com/images/EC042017NF/164511s.jpg "Basic Beige 8 1/2\" X 11\" Cardstock [ 164511 ]")
![Mossy Meadow 8-1/2" X 11" Cardstock [ 133676 ]](https://assets1.tamsnetwork.com/images/EC042017NF/133676s.jpg "Mossy Meadow 8-1/2\" X 11\" Cardstock [ 133676 ]")
![Beautiful Gallery 6" X 6" (15.2 X 15.2 Cm) Designer Series Paper [ 165196 ]](https://assets1.tamsnetwork.com/images/EC042017NF/165196s.jpg "Beautiful Gallery 6\" X 6\" (15.2 X 15.2 Cm) Designer Series Paper [ 165196 ]")
![Pecan Pie Classic Stampin' Pad [ 161665 ]](https://assets1.tamsnetwork.com/images/EC042017NF/161665s.jpg "Pecan Pie Classic Stampin' Pad [ 161665 ]")
![Versamark Pad [ 102283 ]](https://assets1.tamsnetwork.com/images/EC042017NF/102283s.jpg "Versamark Pad [ 102283 ]")
![Basics Wow! Embossing Powder [ 165679 ]](https://assets1.tamsnetwork.com/images/EC042017NF/165679s.jpg "Basics Wow! Embossing Powder [ 165679 ]")
![Heat Tool (Us And Canada) [ 129053 ]](https://assets1.tamsnetwork.com/images/EC042017NF/129053s.jpg "Heat Tool (Us And Canada) [ 129053 ]")
![Damask Designs Embossing Folder [ 165214 ]](https://assets1.tamsnetwork.com/images/EC042017NF/165214s.jpg "Damask Designs Embossing Folder [ 165214 ]")
![Stylish Shapes Dies [ 159183 ]](https://assets1.tamsnetwork.com/images/EC042017NF/159183s.jpg "Stylish Shapes Dies [ 159183 ]")
![Pressed Flower Motifs [ 165215 ]](https://assets1.tamsnetwork.com/images/EC042017NF/165215s.jpg "Pressed Flower Motifs [ 165215 ]")
![Basic White Medium Envelopes [ 159236 ]](https://assets1.tamsnetwork.com/images/EC042017NF/159236s.jpg "Basic White Medium Envelopes [ 159236 ]")


![Tear & Tape Adhesive [ 154031 ]](https://assets1.tamsnetwork.com/images/EC042017NF/154031s.jpg "Tear & Tape Adhesive [ 154031 ]")

![Take Your Pick [ 144107 ]](https://assets1.tamsnetwork.com/images/EC042017NF/144107s.jpg "Take Your Pick [ 144107 ]")


![Basic White 8 1/2" X 11" Cardstock [ 166780 ]](https://assets1.tamsnetwork.com/images/EC042017NF/166780s.jpg "Basic White 8 1/2\" X 11\" Cardstock [ 166780 ]")
![Cloud Cover 8 1/2" X 11" Cardstock [ 165621 ]](https://assets1.tamsnetwork.com/images/EC042017NF/165621s.jpg "Cloud Cover 8 1/2\" X 11\" Cardstock [ 165621 ]")
![Old Olive Classic Stampin' Pad [ 147090 ]](https://assets1.tamsnetwork.com/images/EC042017NF/147090s.jpg "Old Olive Classic Stampin' Pad [ 147090 ]")
![Secret Sea Classic Stampin' Pad [ 165285 ]](https://assets1.tamsnetwork.com/images/EC042017NF/165285s.jpg "Secret Sea Classic Stampin' Pad [ 165285 ]")
![Cloud Cover Stampin’ Blends Combo Pack [ 165287 ]](https://assets1.tamsnetwork.com/images/EC042017NF/165287s.jpg "Cloud Cover Stampin’ Blends Combo Pack [ 165287 ]")


![Blackberry Bliss 8-1/2" X 11" Cardstock [ 133675 ]](https://assets1.tamsnetwork.com/images/EC042017NF/133675s.jpg "Blackberry Bliss 8-1/2\" X 11\" Cardstock [ 133675 ]")
![Petal Pink 8-1/2" X 11" Cardstock [ 146985 ]](https://assets1.tamsnetwork.com/images/EC042017NF/146985s.jpg "Petal Pink 8-1/2\" X 11\" Cardstock [ 146985 ]")
![Blackberry Bliss Classic Stampin' Pad [ 147092 ]](https://assets1.tamsnetwork.com/images/EC042017NF/147092s.jpg "Blackberry Bliss Classic Stampin' Pad [ 147092 ]")
![Old Olive Stampin' Blends Combo Pack [ 154892 ]](https://assets1.tamsnetwork.com/images/EC042017NF/154892s.jpg "Old Olive Stampin' Blends Combo Pack [ 154892 ]")
![Adhesive Sheets [ 152334 ]](https://assets1.tamsnetwork.com/images/EC042017NF/152334s.jpg "Adhesive Sheets [ 152334 ]")


![Banner Sayings Photopolymer Stamp Set (English) [ 167044 ]](https://assets1.tamsnetwork.com/images/EC042017NF/167044s.jpg "Banner Sayings Photopolymer Stamp Set (English) [ 167044 ]")
![Crumb Cake 8-1/2" X 11" Cardstock [ 120953 ]](https://assets1.tamsnetwork.com/images/EC042017NF/120953s.jpg "Crumb Cake 8-1/2\" X 11\" Cardstock [ 120953 ]")
![Early Espresso 8-1/2" X 11" Cardstock [ 119686 ]](https://assets1.tamsnetwork.com/images/EC042017NF/119686s.jpg "Early Espresso 8-1/2\" X 11\" Cardstock [ 119686 ]")
![Very Vanilla 8 1/2" X 11" Cardstock [ 166784 ]](https://assets1.tamsnetwork.com/images/EC042017NF/166784s.jpg "Very Vanilla 8 1/2\" X 11\" Cardstock [ 166784 ]")
![Brushed With Beauty 12" X 12" (30.5 X 30.5 Cm) Designer Series Paper [ 167082 ]](https://assets1.tamsnetwork.com/images/EC042017NF/167082s.jpg "Brushed With Beauty 12\" X 12\" (30.5 X 30.5 Cm) Designer Series Paper [ 167082 ]")
![Crumb Cake Classic Stampin' Pad [ 147116 ]](https://assets1.tamsnetwork.com/images/EC042017NF/147116s.jpg "Crumb Cake Classic Stampin' Pad [ 147116 ]")
![Early Espresso Classic Stampin' Pad [ 147114 ]](https://assets1.tamsnetwork.com/images/EC042017NF/147114s.jpg "Early Espresso Classic Stampin' Pad [ 147114 ]")
![Mossy Meadow Classic Stampin' Pad [ 147111 ]](https://assets1.tamsnetwork.com/images/EC042017NF/147111s.jpg "Mossy Meadow Classic Stampin' Pad [ 147111 ]")
![Petal Pink Classic Stampin' Pad [ 147108 ]](https://assets1.tamsnetwork.com/images/EC042017NF/147108s.jpg "Petal Pink Classic Stampin' Pad [ 147108 ]")
![Beautiful Pattern 3 D Embossing Folder [ 167097 ]](https://assets1.tamsnetwork.com/images/EC042017NF/167097s.jpg "Beautiful Pattern 3 D Embossing Folder [ 167097 ]")
![Pearls Of Beauty [ 167098 ]](https://assets1.tamsnetwork.com/images/EC042017NF/167098s.jpg "Pearls Of Beauty [ 167098 ]")


![Petunia Pop 8 1/2" X 11" Cardstock [ 163801 ]](https://assets1.tamsnetwork.com/images/EC042017NF/163801s.jpg "Petunia Pop 8 1/2\" X 11\" Cardstock [ 163801 ]")
![Secret Sea 8 1/2" X 11" Cardstock [ 165624 ]](https://assets1.tamsnetwork.com/images/EC042017NF/165624s.jpg "Secret Sea 8 1/2\" X 11\" Cardstock [ 165624 ]")
![Florals In Bloom 12" X 12" (30.5 X 30.5 Cm) Designer Series Paper [ 165175 ]](https://assets1.tamsnetwork.com/images/EC042017NF/165175s.jpg "Florals In Bloom 12\" X 12\" (30.5 X 30.5 Cm) Designer Series Paper [ 165175 ]")
![Granny Apple Green Stampin' Pad [ 147095 ]](https://assets1.tamsnetwork.com/images/EC042017NF/147095s.jpg "Granny Apple Green Stampin' Pad [ 147095 ]")
![Granny Apple Green Stampin' Blends Combo Pack [ 154885 ]](https://assets1.tamsnetwork.com/images/EC042017NF/154885s.jpg "Granny Apple Green Stampin' Blends Combo Pack [ 154885 ]")
![Petunia Pop Classic Stampin Pad [ 163811 ]](https://assets1.tamsnetwork.com/images/EC042017NF/163811s.jpg "Petunia Pop Classic Stampin Pad [ 163811 ]")
![1 7/8" (4.8 Cm) Circle Punch [ 165259 ]](https://assets1.tamsnetwork.com/images/EC042017NF/165259s.jpg "1 7/8\" (4.8 Cm) Circle Punch [ 165259 ]")
![Secret Sea 3/8" (1 Cm) Faux Linen Ribbon [ 165273 ]](https://assets1.tamsnetwork.com/images/EC042017NF/165273s.jpg "Secret Sea 3/8\" (1 Cm) Faux Linen Ribbon [ 165273 ]")
![2024 2026 In Color™ Flat Pearls [ 165266 ]](https://assets1.tamsnetwork.com/images/EC042017NF/165266s.jpg "2024 2026 In Color™ Flat Pearls [ 165266 ]")

![Nested Essentials Dies [ 161597 ]](https://assets1.tamsnetwork.com/images/EC042017NF/161597s.jpg "Nested Essentials Dies [ 161597 ]")
![Spotlight On Nature Dies [ 163580 ]](https://assets1.tamsnetwork.com/images/EC042017NF/163580s.jpg "Spotlight On Nature Dies [ 163580 ]")


![Creative Haven Photopolymer Stamp Set (English) [ 167202 ]](https://assets1.tamsnetwork.com/images/EC042017NF/167202s.jpg "Creative Haven Photopolymer Stamp Set (English) [ 167202 ]")
![Delicate Framing Photopolymer Stamp Set (English) [ 167024 ]](https://assets1.tamsnetwork.com/images/EC042017NF/167024s.jpg "Delicate Framing Photopolymer Stamp Set (English) [ 167024 ]")
![Basic Gray 8-1/2" X 11" Cardstock [ 121044 ]](https://assets1.tamsnetwork.com/images/EC042017NF/121044s.jpg "Basic Gray 8-1/2\" X 11\" Cardstock [ 121044 ]")
![Pool Party 8-1/2" X 11" Cardstock [ 122924 ]](https://assets1.tamsnetwork.com/images/EC042017NF/122924s.jpg "Pool Party 8-1/2\" X 11\" Cardstock [ 122924 ]")
![Hobby Haven 12" X 12" (30.5 X 30.5 Cm) Specialty Designer Series Paper [ 167201 ]](https://assets1.tamsnetwork.com/images/EC042017NF/167201s.jpg "Hobby Haven 12\" X 12\" (30.5 X 30.5 Cm) Specialty Designer Series Paper [ 167201 ]")
![Basic Gray Classic Stampin' Pad [ 149165 ]](https://assets1.tamsnetwork.com/images/EC042017NF/149165s.jpg "Basic Gray Classic Stampin' Pad [ 149165 ]")
![2 3/8" (6 Cm) Circle Punch [ 161354 ]](https://assets1.tamsnetwork.com/images/EC042017NF/161354s.jpg "2 3/8\" (6 Cm) Circle Punch [ 161354 ]")
![Dear Dots [ 165848 ]](https://assets1.tamsnetwork.com/images/EC042017NF/165848s.jpg "Dear Dots [ 165848 ]")
![Linen Thread [ 104199 ]](https://assets1.tamsnetwork.com/images/EC042017NF/104199s.jpg "Linen Thread [ 104199 ]")


![Words For The Season Bundle (English) [ 165798 ]](https://assets1.tamsnetwork.com/images/EC042017NF/165798s.jpg "Words For The Season Bundle (English) [ 165798 ]")
![Words For The Season Cling Stamp Set (English) [ 165716 ]](https://assets1.tamsnetwork.com/images/EC042017NF/165716s.jpg "Words For The Season Cling Stamp Set (English) [ 165716 ]")
![Words For The Season Dies (English) [ 165797 ]](https://assets1.tamsnetwork.com/images/EC042017NF/165797s.jpg "Words For The Season Dies (English) [ 165797 ]")
![Peaceful Garden 12" X 12" (30.5 X 30.5 Cm) Designer Series Paper [ 165917 ]](https://assets1.tamsnetwork.com/images/EC042017NF/165917s.jpg "Peaceful Garden 12\" X 12\" (30.5 X 30.5 Cm) Designer Series Paper [ 165917 ]")
![Silver 12" X 12" (30.5 X 30.5 Cm) Foil Sheets [ 163387 ]](https://assets1.tamsnetwork.com/images/EC042017NF/163387s.jpg "Silver 12\" X 12\" (30.5 X 30.5 Cm) Foil Sheets [ 163387 ]")
![Metallics Wow! Embossing Powder [ 165678 ]](https://assets1.tamsnetwork.com/images/EC042017NF/165678s.jpg "Metallics Wow! Embossing Powder [ 165678 ]")
![Rhinestone Basic Jewels [ 144220 ]](https://assets1.tamsnetwork.com/images/EC042017NF/144220s.jpg "Rhinestone Basic Jewels [ 144220 ]")

![Tuxedo Black Memento Ink Pad [ 132708 ]](https://assets1.tamsnetwork.com/images/EC042017NF/132708s.jpg "Tuxedo Black Memento Ink Pad [ 132708 ]")
![Darling Duckling Stampin’ Blends Combo Pack [ 165288 ]](https://assets1.tamsnetwork.com/images/EC042017NF/165288s.jpg "Darling Duckling Stampin’ Blends Combo Pack [ 165288 ]")
![Pecan Pie Stampin’ Blends Combo Pack [ 161674 ]](https://assets1.tamsnetwork.com/images/EC042017NF/161674s.jpg "Pecan Pie Stampin’ Blends Combo Pack [ 161674 ]")


![Lost Lagoon 8-1/2" X 11" Cardstock [ 133679 ]](https://assets1.tamsnetwork.com/images/EC042017NF/133679s.jpg "Lost Lagoon 8-1/2\" X 11\" Cardstock [ 133679 ]")
![Country Woods 12" X 12" (30.5 X 30.5 Cm) Designer Series Paper [ 163393 ]](https://assets1.tamsnetwork.com/images/EC042017NF/163393s.jpg "Country Woods 12\" X 12\" (30.5 X 30.5 Cm) Designer Series Paper [ 163393 ]")
![Lost Lagoon Classic Stampin' Pad [ 161678 ]](https://assets1.tamsnetwork.com/images/EC042017NF/161678s.jpg "Lost Lagoon Classic Stampin' Pad [ 161678 ]")
![Earthy Matte Dots [ 167213 ]](https://assets1.tamsnetwork.com/images/EC042017NF/167213s.jpg "Earthy Matte Dots [ 167213 ]")

