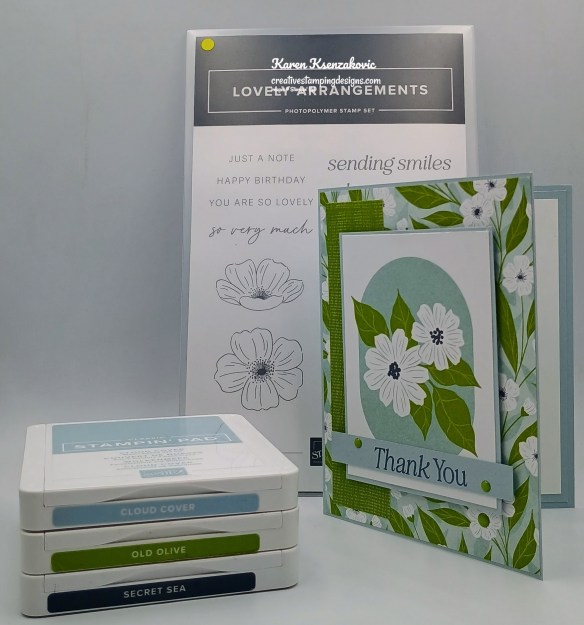
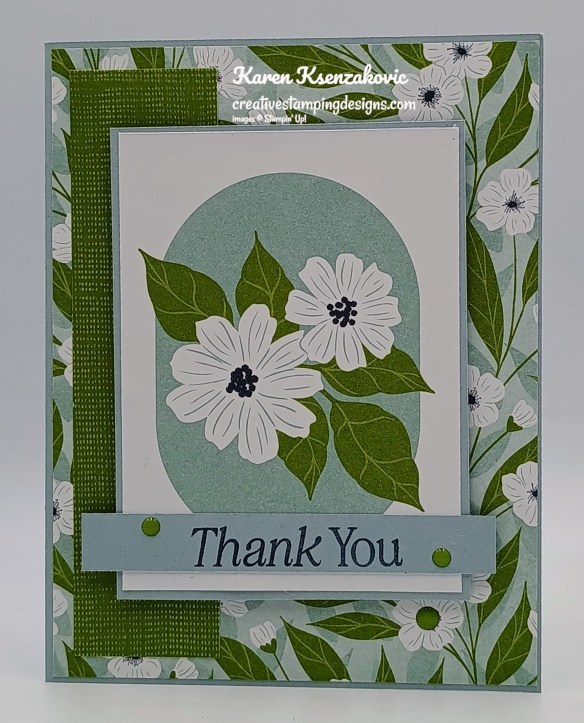
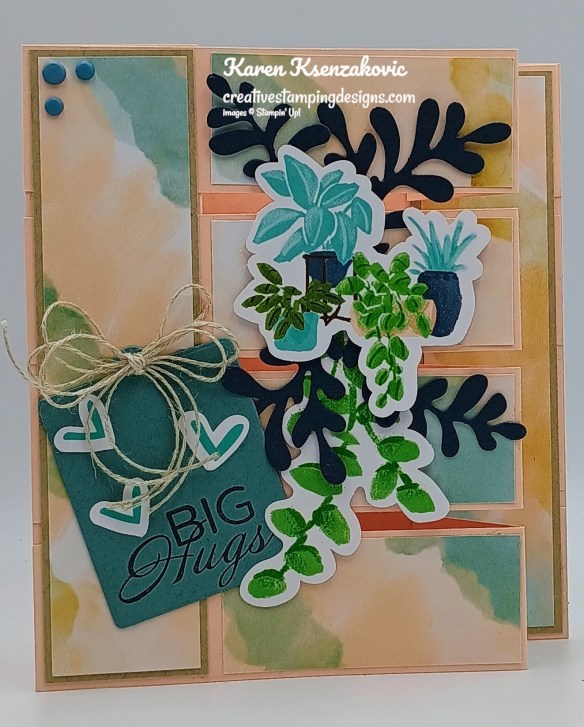
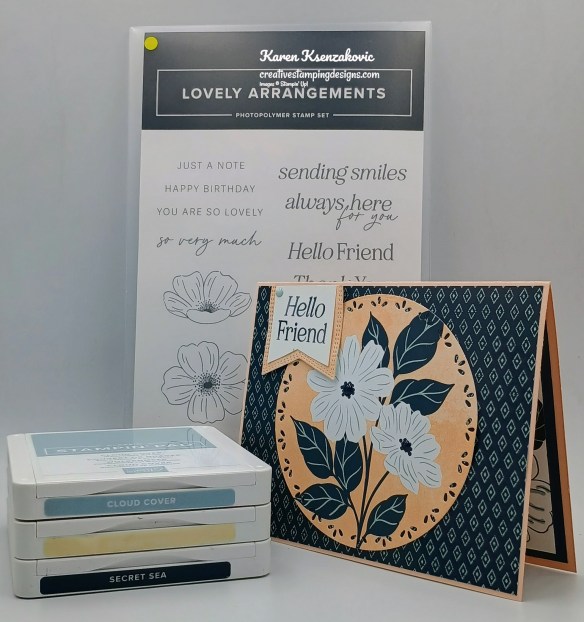
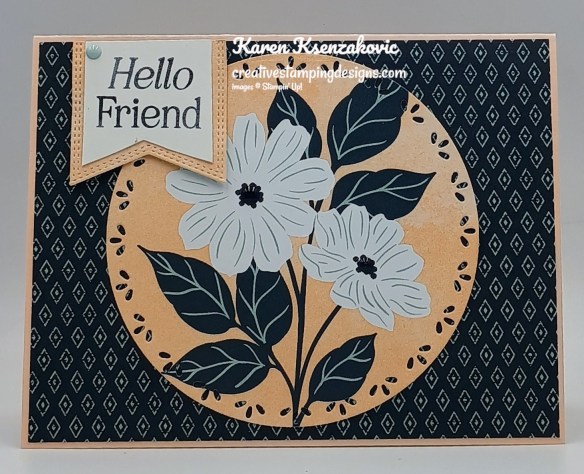
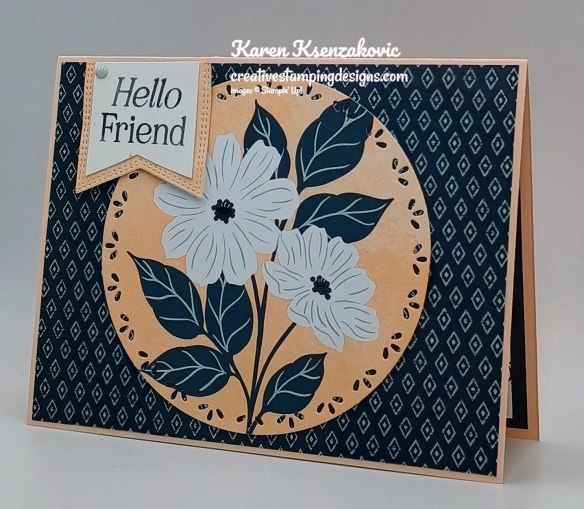
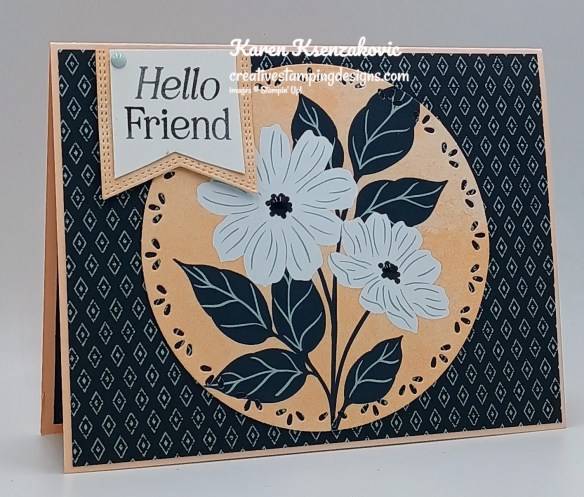
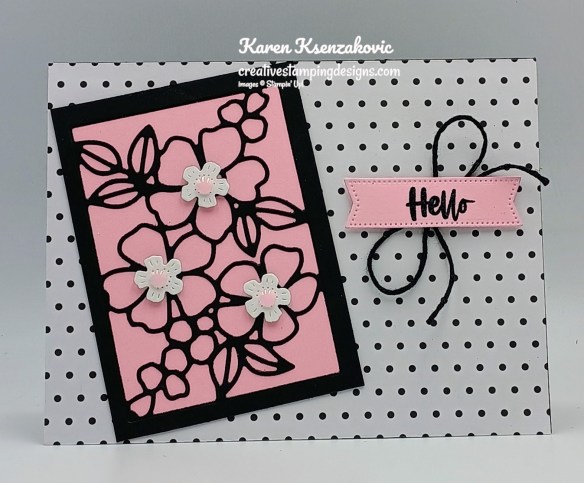
Good Thursday morning stamping friends HAPPY NEW YEAR!!! Welcome to our Happy Inkin’ Thursday Blog Hop. If you are starting with me, thank you, I hope you will stop by everyone’s blog to see what they have created this week. If you are hopping over from Mary’s blog, thank you for stopping by. This week we have Sketch Challenge. If you’d like to see a quick video on how I made this card, Click Here to go to my Instagram Reels. Here is my card using this week’s sketch.
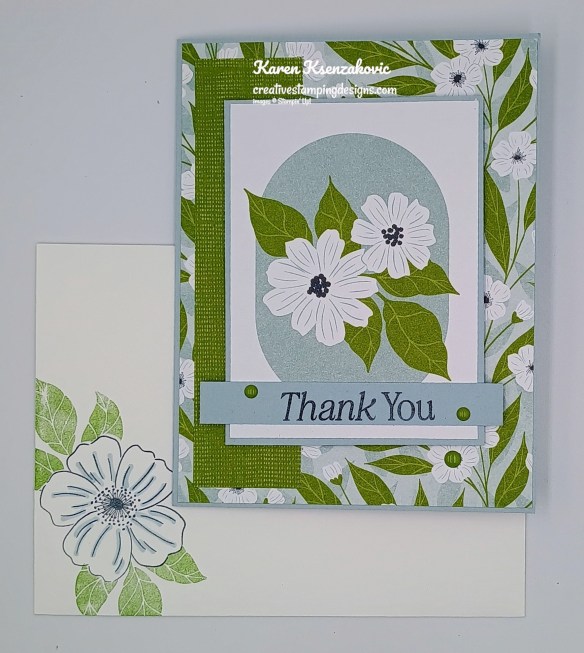
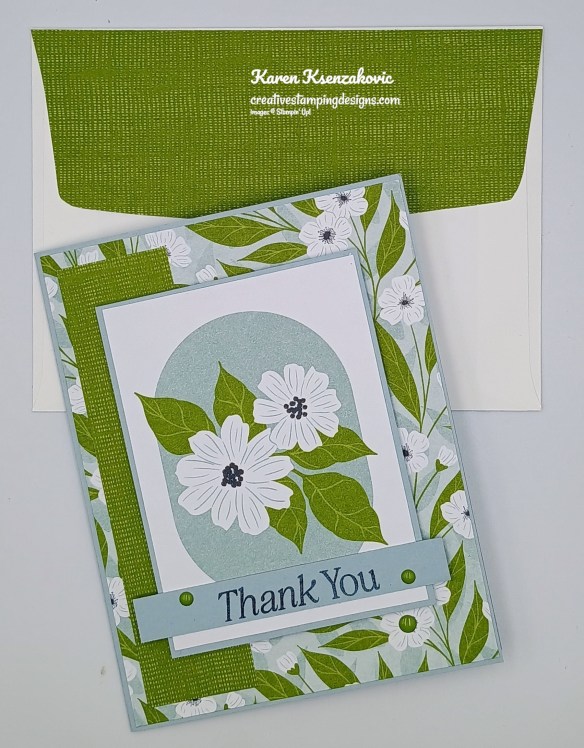
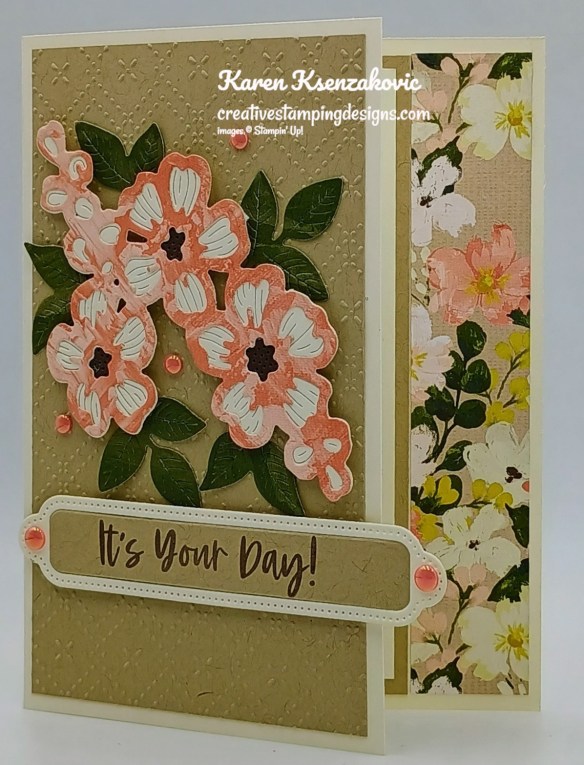
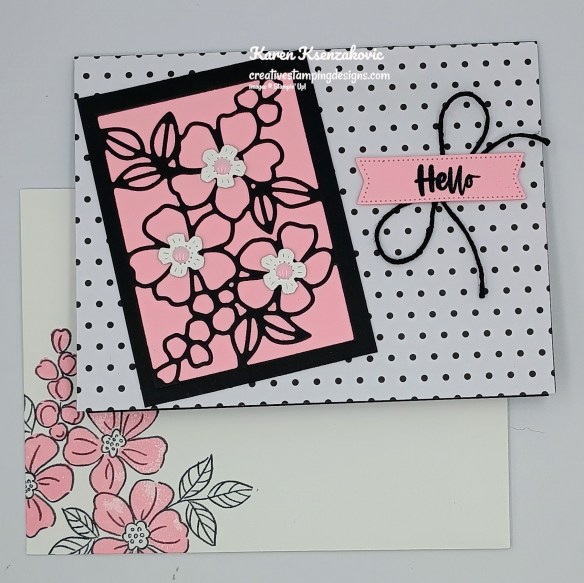
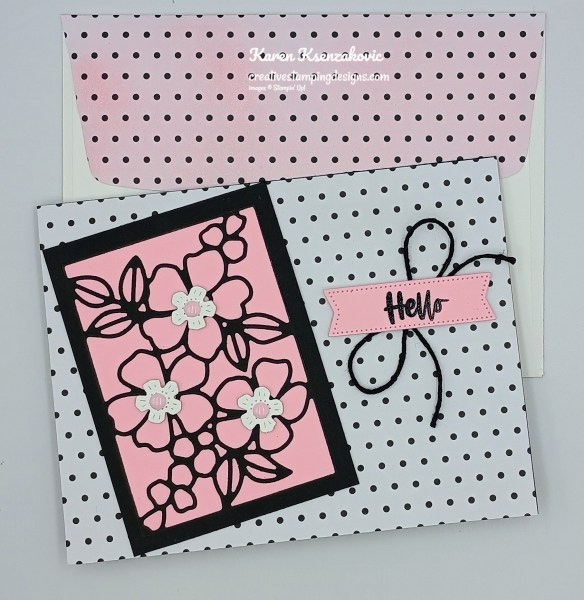
I used the new Stampin Up! Lovely Arrangements Stamp Set along with the Lovely Blossoms Designer Series Paper (both available January 6) for my card today.
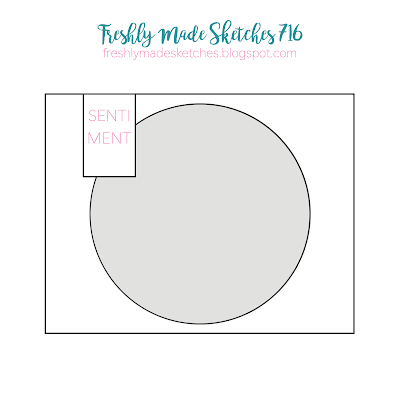
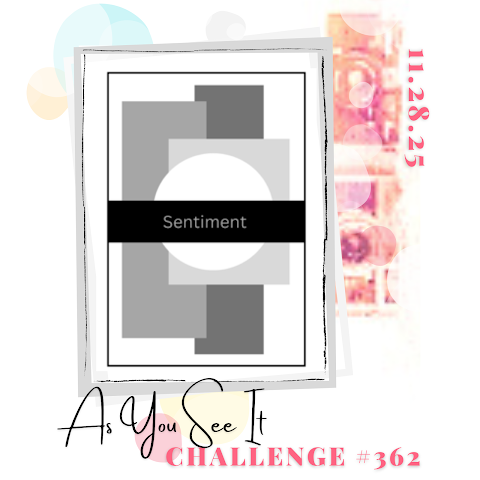
This is our sketch for this week
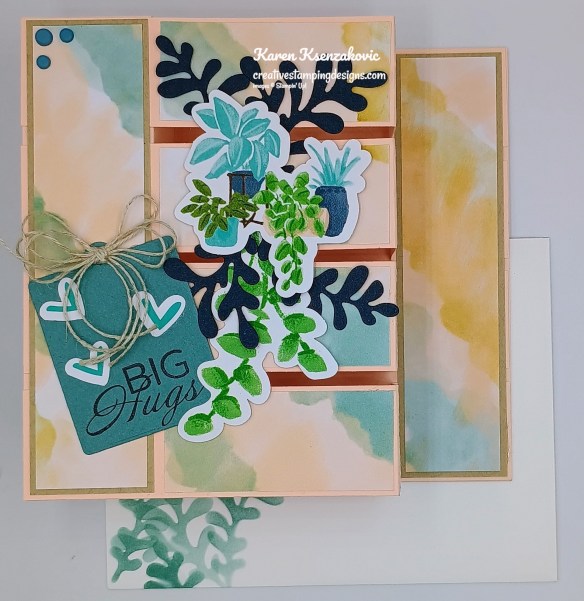
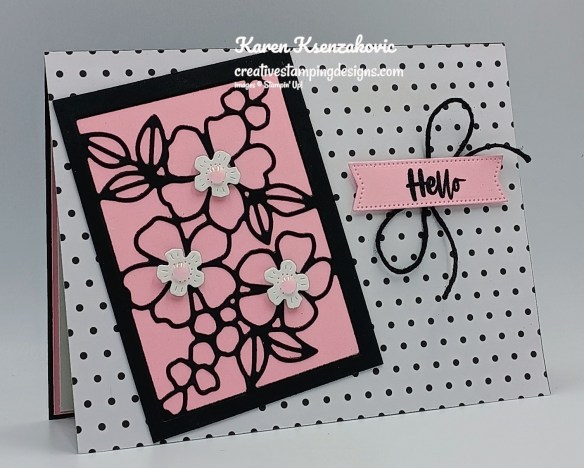
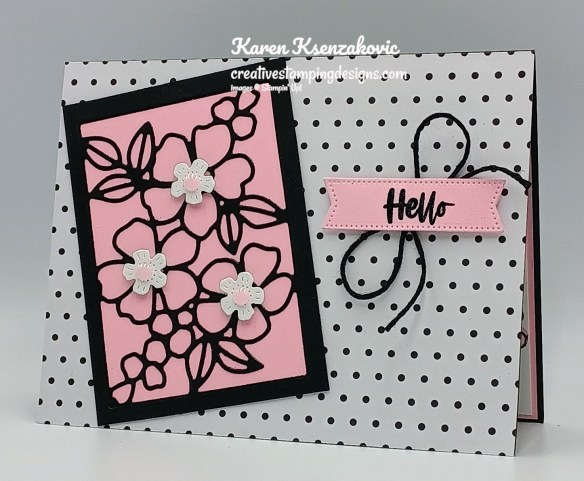
Adhere a panel of Lovely Blossoms DSP to a Cloud Cover card base. Adhere a smaller panel of Lovely Blossoms DSP to the left side of the card front.
Adhere 1 of the preprinted panels of Lovely Blossoms DSP to a Cloud Cover mat. Adhere the layered panel to the card front with Stampin’ Dimensionals.
Stamp the sentiment from the Lovely Arrangements stamp set in Secret Sea Ink on a panel of Cloud Cover. Adhere the sentiment to the card front. Add a few Moody Palette Glossy Dots (available Jan 6) to the card front.
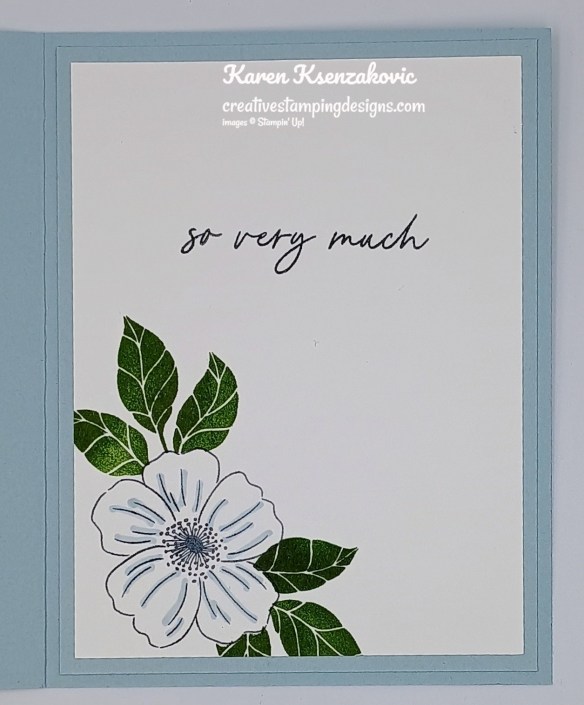
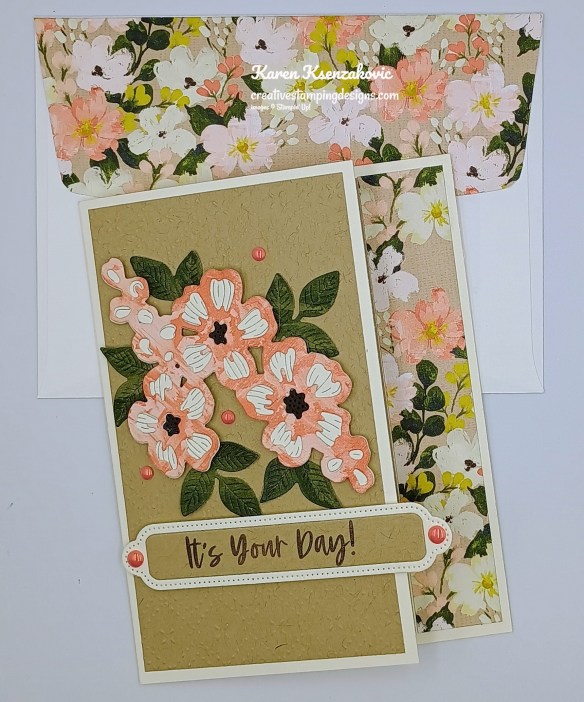
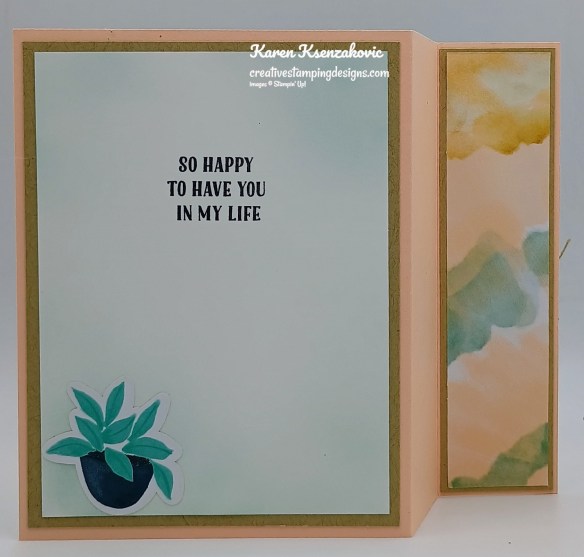
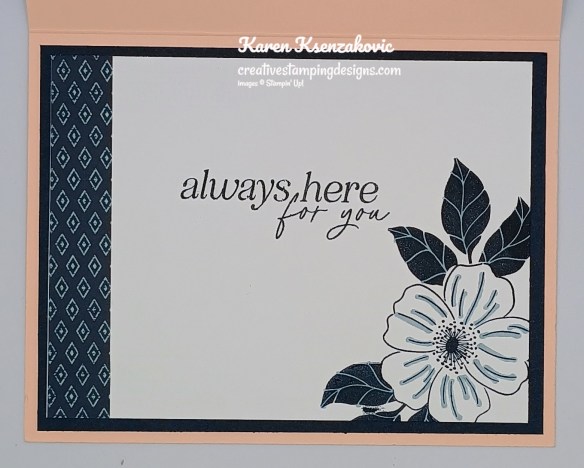
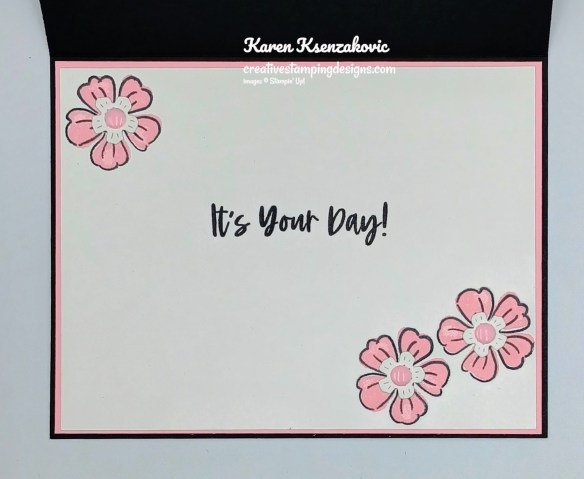
Stamp the sentiment from the Lovely Arrangements stamp set in Secret Sea Ink on a panel of Basic White. Stamp the flower image from the Lovely Arrangements stamp set on the bottom of the panel in Secret Sea. Stamp the leaf image from the Lovely Arrangements stamp set in Old Olive Ink by the flower. go over the lines of the flower with Cloud Cover Stampin’ Blends Marker. Adhere the Basic White panel to a Cloud Cover mat then to the inside of the Cloud Cover card base.
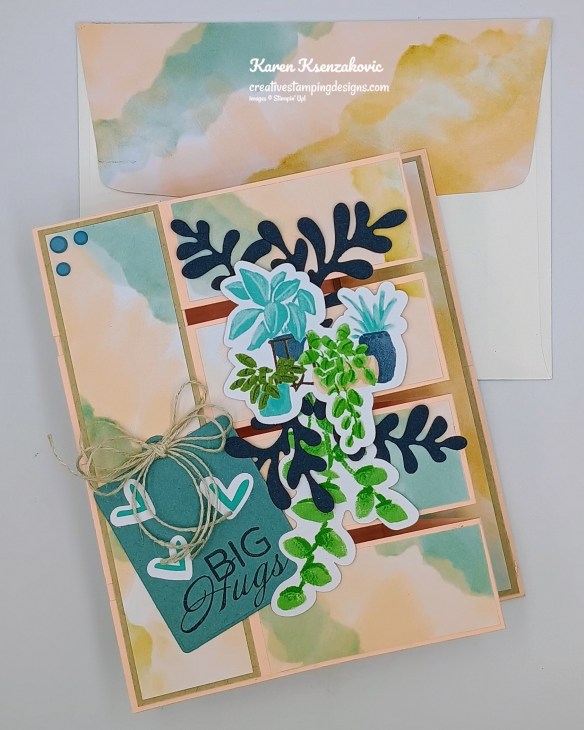
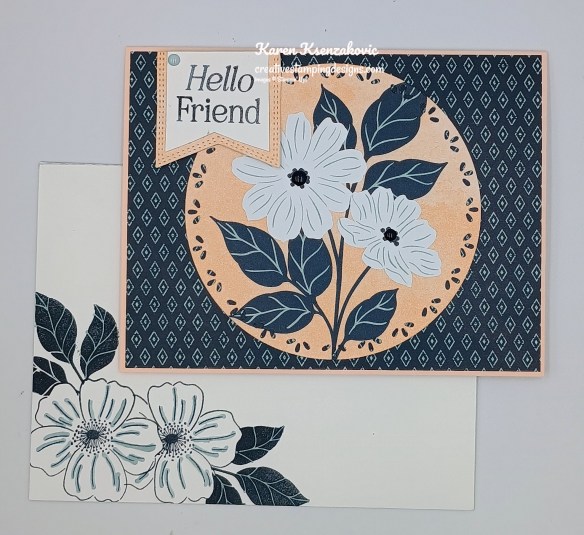
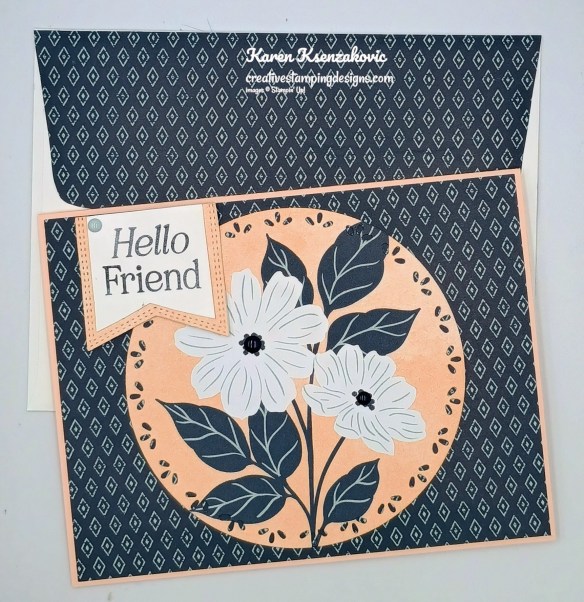
Decorate a Basic White Medium Envelope to complete the card. Stamp the flower image from the Lovely Arrangements stamp set in Secret Sea Ink on the envelope front. Go over the lines of the flower in Cloud Cover Stampin’ Blends Marker. Stamp the leaf image from the Lovely Arrangements stamp set in Old Olive Ink by the flower. Adhere a panel of Lovely Blossoms DSP to the envelope flap.
Thank you for stopping by my blog today. Now that you’ve seen my card, let’s get on with the hop! Click the next button below to hop over to see what Tara has created. Happy Hopping!!
Just in case you get lost along the way, here is a list of the team members involved in the hop today.
If you need any stamping supplies, I’d love to be your Demonstrator. Just click HERE to go directly to my online store or drop me an email if you have any questions.
Cloud Cover Cardstock 5 1/2″ x 8 1/2″(card base scored & folded at 4 1/4″), 1/2″ x 3″(sentiment), 4″ x 5 1/4″(inner liner mat)
Lovely Blossoms Designer Series Paper 4 1/8″ x 5 3/8″(card front), 1 1/4″ x 5″(card front panel), 2 7/8″ x 3 7/8″ (card front panel), 2 1/4″ x 6″(envelope)
Good Monday morning stamping friends and welcome to a new week. This will be a short week for many since Christmas falls on Thursday. Are you ready yet?? I’m definitely NOT. I got all my cookie trays put together yesterday. I’m going to run some of them around this morning before I head into work. I’ve got a few that I’ll be shipping out, but I know they won’t get to their destination before Christmas, but that’s ok. After work I need to run to Costco to pick up a couple Christmas gifts that I just decided to get, nothing like waiting until the last minute. Tomorrow is Rice pudding making day and maybe get the gifts wrapped up. Somehow, I always seem to get everything done no matter how behind I’m running.
I played with a new bundle that will be available January 6 with the Online Exclusives, for today’s card. If you’d like to see a quick video on how I made this card, Click Here to go to my Instagram Reels. Here is my card for today.
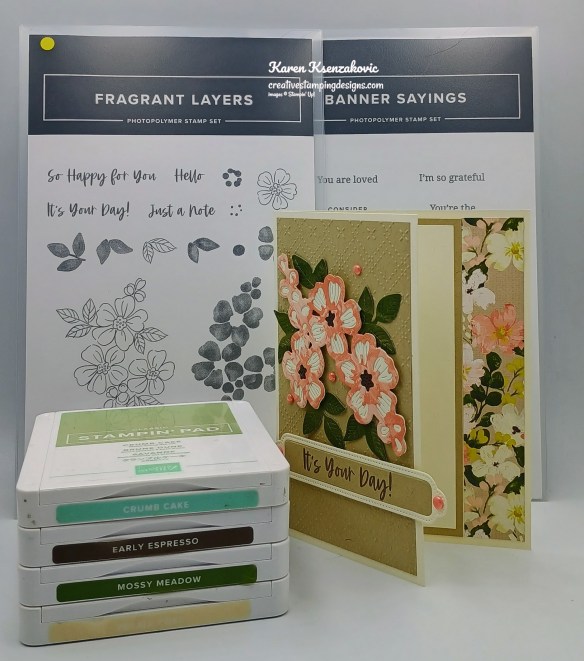
I used the new Stampin’ Up! Online Exclusive Fragrant Layers Bundle (available January 6) along with the Brushed With Beauty Designer Series Paper, Beautiful Patterns Embossing Folder and Stampin’ Up! Banner Sayings Stamp Set for my card today.
Emboss a panel of Crumb Cake using the Beautiful Patterns EF. Adhere the embossed panel to the front of the Very Vanilla card base.
Using the Fragrant Layers Dies, cut the large-detailed flower die from the panel of Brushed with Beauty DSP, the leaves from the smaller panel of Brushed with Beauty DSP, the large solid flower die from the panel of Very Vanilla and the tiny flowers from a panel of Early Espresso. Adhere the detailed flower die to the solid flower die. Adhere 3 of the tiny flowers to the back of the solid die cut flower then adhere the assembled die cut flower to the embossed card front with Stampin’ Dimensionals. Adhere the leaves under the flower die on the card front.
On a panel of Crumb Cake, stamp the sentiment from the Fragrant Layers stamp set in Early Espresso Ink. Cut the sentiment and a panel of Very Vanilla using the Fragrant Layers Dies. Insert the Crumb Cake sentiment into the Very Vanilla die cut frame and adhere the 2 panels to the card front with Stampin’ Dimensionals. Add a few Pearls of Beauty to the card front.
On a panel of Very Vanilla, stamp the sentiments from the Banner Sayings stamp set in Early Espresso Ink. Stamp the large, outlined flower image from the Fragrant Layers stamp set in Crumb Cake Ink on the bottom of the panel. Stamp the large solid flower image from the Fragrant Layers stamp set in Petal Pink Ink over the outlined image. Stamp the leaf images from the Fragrant Layers stamp set in Mossy Meadow Ink, stamping off once on scrap paper. Adhere the Very Vanilla panel to a Crumb Cake mat then to the inside of the Very Vanilla card base. Adhere the panel of Brushed with Beauty DSP to the right side of the inside card base.
Decorate a Basic White Medium Envelope to finish your card. Stamp the large, outlined flower image from the Fragrant Layers stamp set in Crumb Cake Ink on the envelope front. Stamp the large, solid flower image from the Fragrant Layers stamp set in Petal Pink Ink over the outlined image. Stamp the leaf images from the Fragrant Layers stamp set in Mossy Meadow Ink over the outlined image. Adhere a panel of Brushed with Beauty DSP to the envelope flap
Thank you for stopping by my blog today. I hope you like the card and you’ll give it a try. Happy Stamping!!
If you need any stamping supplies, I’d love to be your Demonstrator. Just click HERE to go directly to my online store or drop me an email if you have any questions.
My January – April 2026 Mini Catalog and January Online Exclusive Designer Series Paper, Ribbon and Embellishment Shares are open for ordering. You can order just the DSP share, just the Two-Tone cardstock share, just the Ribbon share or just the Embellishment share, or you can it all!! For all the information, Click Here.
I’m offering a Designer Series PaperShare, Two-Tone Cardstock Share, Ribbon Share & Embellishment Share from the January – April 2026 Mini Catalog, along with the upcoming January 2026 Online Exclusives and I’d love to have you join!! I’m placing my share order early on January 6th and I’m going to use the expedited shipping option so I should be able to have the shares cut, bundled and back out to you during the week of January 12th. Wouldn’t you love to have all of the gorgeous new Designer Series Papers in the Stampin’ Up! January – April 2026 Mini Catalog and the upcoming January 2026 Online Exclusives? What is a Paper Share you ask? It’s a sample of each of the new Designer Series Papers from the Catalog and Online Exclusives. Shares give you a good working sample of all of the papers so that you can decide which ones to order in full packs! If you were to purchase all of the DSP in the new Catalog and Online Exclusives, it would cost you over $175.00 plus shipping and if you were to purchase all the ribbon it would cost you over $50.00.
New Designer Series Paper Share – $22.00 plus $10.00 for Priority Mail Shipping
How my shares work: I order full packs of all of the Designer Series Papers listed below, I cut them into 6″ X 6″ pieces (or 6″ X 12″ pieces for double shares) and give you one panel of each design from each pack on the list. I pack up the paper in a cellophane bag with labels listing the Name, Item # and Colors in the pack and mail it back out to you just as quickly as I can!
New Designer Series Paper Share – $22.00 plus $10.00 for Priority Mail shipping
You will receive one 6×6 sheet of each design from the following DSP packs (the number after the name indicates how many 6×6 sheets of that paper pack you will receive):
Beach Boardwalk (6)
Cute As A Bug (6)
Easter Joy (6)
Love Notes Mix & Match 6 x 6 (6)
Lovely & Beautiful Specialty (6)
Lovely Blossoms (4)
Made With Love (6)
Mixed Up Patterns Mix-Ins (6)
Natural Hues Textured (3)
Nature Walk (6)
Pastels Shimmer (3)
Pleasant Patterns Specialty (3)
Splash of Sparkles Specialty (6)
Square Snippets (3)
In all, you’ll receive 70 – 6” x 6” sheets of designer or specialty paper!
Double Designer Series Paper Share – $44.00 Plus $10.00 Priority Mail Shipping
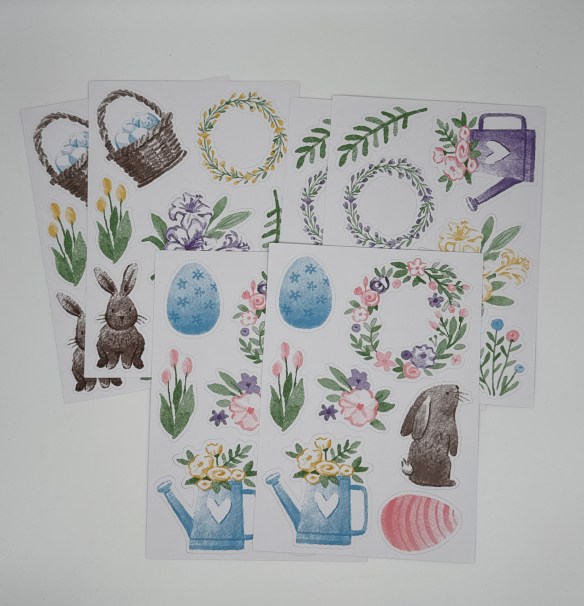
As a gift from me for ordering a Double Share of Designer Series Paper, I will include an Easter Time Mix & Match Ephemera Pack. This gift is only for ordering a Double DSP Share.
Two-Tone Cardstock Share
Have you been wanting to try the Two-Tone Cardstock but didn’t want to buy a whole pack? You can add a share of the 4 different Two-Tone Cardstock packs for an additional $6 or purchase them separately for $6 + $10 Priority Shipping
You will receive one 6×6 sheet of each color from each of the packs (the number after the name indicates how many 6×6 sheets of that paper pack you will receive):
Beach Time (6)
Currently Loving (6)
Exploring Nature (6)
Love Story (6)
In all, you’ll receive 24 – 6” x 6” sheets of cardstock!
Double Share of the Two-Tone Cardstock – $12.00 plus $10.00 Priority Mail Shipping
If you’d like double shares of the designer paper or cardstock, I’m offering those too! I’ll cut the 12″ x 12″ sheets into 6″ × 12″ so that you’ll be able to get 3 full A2 size card fronts from each sheet and you’ll get double sheets of the 6″ x 6″ since they’re already precut.
Ribbon Share – $13.00 plus $10.00 Priority Mail Shipping
All ribbons will come individually wrapped and labeled with the name and number of the product.
One-Fourth of a Roll of each:
Balmy Blue 1/4″ Gingham Ribbon
Bubble Bath 1/8″ Faux Linen Ribbon
Cloud Cover 5/8″ Textured Ribbon
Old Olive 3/8″ Specialty Rickrack
Secret Sea 3/8″ Bordered Open Weave Ribbon
White With Gold 3/8″ Ribbon
Double Ribbon Share – $26.00 Plus $10.00 Priority Mail Shipping and you will be getting 1/2 of the roll or each ribbon.
Embellishment Share – $12.00 plus $10.00 Priority Mail Shipping
I’m also offering an Embellishment Share. I will divide the embellishments up and package them in a cello bag with the name and number for easy ordering, just like I do with the paper and ribbon.
You will receive (approximate # listed:
Easter Assortment (20)
Faux Bronze Pentagons (20)
Heart Gusseted Treat Bags (2)
Ladybug Garden Epoxy Shapes (18)
Moody Palette Glossy Dots (32)
Pearlized Faceted Circles (24)
Sparkle Dot Essentials (24)
Double Share of the Embellishments – $24.00 plus $10.00 Priority Mail Shipping
Anyone is welcome to join in my shares (please note, I can only ship to addresses within the US). To make ordering the shares a little easier, I have created a form for you to submit, that way you can order any combination of shares you want. Click Here for the form. I will send out PayPal Invoices by January 2nd.
Deadline to sign up for my share is Saturday January 3rd at 5:00 PM ET.
Good Friday morning stamping friends and welcome to my Fun Fold Friday. I hope you all had a great week. I’m finishing up the last of my decorating of cookies today and I’m hoping to start putting together my cookie trays. Tonight, I’ll be going to see Trans-Siberian Orchestra, my husband got me tickets for my birthday last month. I’m very excited, I’ve heard they put on amazing show.
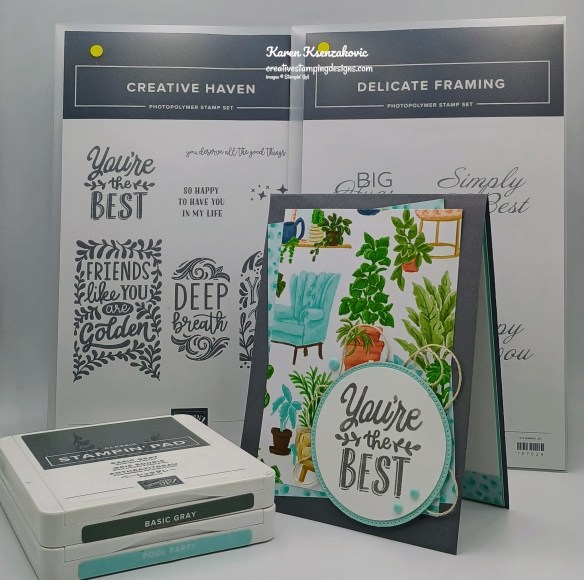
Today’s card is the last card that we made at our quarterly meeting. This card was designed by Ann Louise Fodgaard. I’ve done this one with 3 panels before, but this is the 1st time I made it with 4 panels. Here’s my card for today.
I used the Stampin’ Up! Online Exclusives Delicate Framing Stamp Set along with the Stampin’ Up! Creative Haven Bundle and Hobby Haven Designer Series Paper for my card today.
Adhere the 3 larger panels of Hobby Haven DSP to the 3 Crumb Cake mats. Adhere the 4 panels of Petal Pink with the larger fold in the front to the small, folded section of the Petal Pink card base. Adhere one of the layered panels of DSP to the left side of the card base. Adhere the 4 medium panels of Hobby Haven DSP to the 4 sections of the Petal Pink card base.
Adhere the shorter folded panels to the back larger folded section of the Petal Pink card base. Adhere a layered DSP panel to the right side of the card base. Adhere the 4 smallest panels of Hobby Haven DSP to the small section of the folded strips.
Cut 2 of each of the sprigs from a panel of Secret Sea using the Creative Haven Dies. Adhere the sprigs to the card front. Adhere a couple of the die cut panels of Hobby Haven DSP to the card front. Using the Creative Haven Dies, cut a panel of Lost Lagoon. Stamp the sentiment from the Delicate Framing stamp set in Secret Sea Ink on the die cut panel. Adhere the sentiment to the card front. Tie a multi loop bow with Linen Thread and adhere it to the top of the sentiment. Add a few Dear Dots to the card front.
On a panel of Basic White, stamp the sentiment from the Creative Haven stamp set in Secret Sea Ink. Adhere one of the die cut pieces from the Hobby Haven DSP to the bottom of the panel. Adhere the Basic White panel to a Crumb Cake mat then to the back of the Petal Pink card base.
Decorate a Basic White Medium Envelope to finish your card. From the panel that the sprigs were cut as a stencil, use a Blending Brush to stencil the sprigs to the envelope front with Lost Lagoon Ink. Adhere a panel of Hobby Haven DSP to the envelope flap.
Thank you for stopping by my blog today. I hope you like the card and you’ll give it a try. Happy Stamping!!
If you need any stamping supplies, I’d love to be your Demonstrator. Just click HERE to go directly to my online store or drop me an email if you have any questions.
My January – April 2026 Mini Catalog and January Online Exclusive Designer Series Paper, Ribbon and Embellishment Shares are open for ordering. You can order just the DSP share, just the Two-Tone cardstock share, just the Ribbon share or just the Embellishment share, or you can it all!! For all the information, Click Here.
I’m offering a Designer Series PaperShare, Two-Tone Cardstock Share, Ribbon Share & Embellishment Share from the January – April 2026 Mini Catalog, along with the upcoming January 2026 Online Exclusives and I’d love to have you join!! I’m placing my share order early on January 6th and I’m going to use the expedited shipping option so I should be able to have the shares cut, bundled and back out to you during the week of January 12th. Wouldn’t you love to have all of the gorgeous new Designer Series Papers in the Stampin’ Up! January – April 2026 Mini Catalog and the upcoming January 2026 Online Exclusives? What is a Paper Share you ask? It’s a sample of each of the new Designer Series Papers from the Catalog and Online Exclusives. Shares give you a good working sample of all of the papers so that you can decide which ones to order in full packs! If you were to purchase all of the DSP in the new Catalog and Online Exclusives, it would cost you over $175.00 plus shipping and if you were to purchase all the ribbon it would cost you over $50.00.
New Designer Series Paper Share – $22.00 plus $10.00 for Priority Mail Shipping
How my shares work: I order full packs of all of the Designer Series Papers listed below, I cut them into 6″ X 6″ pieces (or 6″ X 12″ pieces for double shares) and give you one panel of each design from each pack on the list. I pack up the paper in a cellophane bag with labels listing the Name, Item # and Colors in the pack and mail it back out to you just as quickly as I can!
New Designer Series Paper Share – $22.00 plus $10.00 for Priority Mail shipping
You will receive one 6×6 sheet of each design from the following DSP packs (the number after the name indicates how many 6×6 sheets of that paper pack you will receive):
Beach Boardwalk (6)
Cute As A Bug (6)
Easter Joy (6)
Love Notes Mix & Match 6 x 6 (6)
Lovely & Beautiful Specialty (6)
Lovely Blossoms (4)
Made With Love (6)
Mixed Up Patterns Mix-Ins (6)
Natural Hues Textured (3)
Nature Walk (6)
Pastels Shimmer (3)
Pleasant Patterns Specialty (3)
Splash of Sparkles Specialty (6)
Square Snippets (3)
In all, you’ll receive 70 – 6” x 6” sheets of designer or specialty paper!
Double Designer Series Paper Share – $44.00 Plus $10.00 Priority Mail Shipping
As a gift from me for ordering a Double Share of Designer Series Paper, I will include an Easter Time Mix & Match Ephemera Pack. This gift is only for ordering a Double DSP Share.
Two-Tone Cardstock Share
Have you been wanting to try the Two-Tone Cardstock but didn’t want to buy a whole pack? You can add a share of the 4 different Two-Tone Cardstock packs for an additional $6 or purchase them separately for $6 + $10 Priority Shipping
You will receive one 6×6 sheet of each color from each of the packs (the number after the name indicates how many 6×6 sheets of that paper pack you will receive):
Beach Time (6)
Currently Loving (6)
Exploring Nature (6)
Love Story (6)
In all, you’ll receive 24 – 6” x 6” sheets of cardstock!
Double Share of the Two-Tone Cardstock – $12.00 plus $10.00 Priority Mail Shipping
If you’d like double shares of the designer paper or cardstock, I’m offering those too! I’ll cut the 12″ x 12″ sheets into 6″ × 12″ so that you’ll be able to get 3 full A2 size card fronts from each sheet and you’ll get double sheets of the 6″ x 6″ since they’re already precut.
Ribbon Share – $13.00 plus $10.00 Priority Mail Shipping
All ribbons will come individually wrapped and labeled with the name and number of the product.
One-Fourth of a Roll of each:
Balmy Blue 1/4″ Gingham Ribbon
Bubble Bath 1/8″ Faux Linen Ribbon
Cloud Cover 5/8″ Textured Ribbon
Old Olive 3/8″ Specialty Rickrack
Secret Sea 3/8″ Bordered Open Weave Ribbon
White With Gold 3/8″ Ribbon
Double Ribbon Share – $26.00 Plus $10.00 Priority Mail Shipping and you will be getting 1/2 of the roll or each ribbon.
Embellishment Share – $12.00 plus $10.00 Priority Mail Shipping
I’m also offering an Embellishment Share. I will divide the embellishments up and package them in a cello bag with the name and number for easy ordering, just like I do with the paper and ribbon.
You will receive (approximate # listed:
Easter Assortment (20)
Faux Bronze Pentagons (20)
Heart Gusseted Treat Bags (2)
Ladybug Garden Epoxy Shapes (18)
Moody Palette Glossy Dots (32)
Pearlized Faceted Circles (24)
Sparkle Dot Essentials (24)
Double Share of the Embellishments – $24.00 plus $10.00 Priority Mail Shipping
Anyone is welcome to join in my shares (please note, I can only ship to addresses within the US). To make ordering the shares a little easier, I have created a form for you to submit, that way you can order any combination of shares you want. Click Here for the form. I will send out PayPal Invoices by January 2nd.
Deadline to sign up for my share is Saturday January 3rd at 5:00 PM ET.
Good Monday morning stamping friends and welcome to a new week. It’s the middle of the month already and only 10 days until Christmas. I got my cards written out and mailed; I pulled my recipes for my cookie baking and I got my card studio decorated. We still haven’t gotten a tree, maybe today I’ll come home to one.
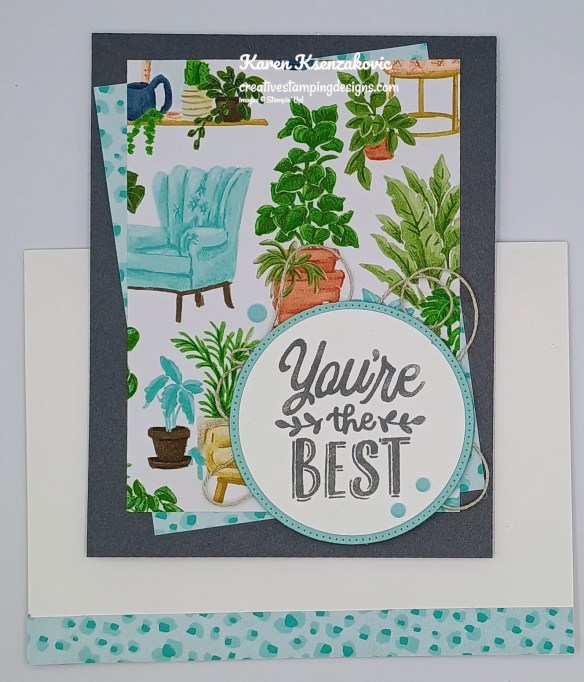
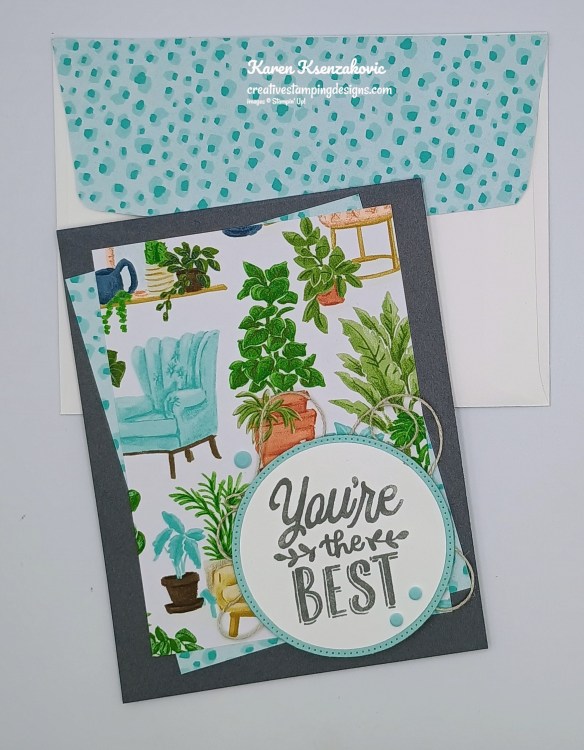
I have a very quick CAS card for you today playing with some new Online Exclusives coming in January. If you’d like to see a quick video on how I made this card, Click Here to go to my Instagram Reels. Here is my card for today.
I used the new Stampin’ Up! Online Exclusive Lovely Arrangements Stamp Set and Lovely Blossoms Designer Series Paper (both available Jan 6) along with Spotlight on Nature Dies and Nested Essentials Dies for my card today.
Adhere a panel of Lovely Blossoms DSP to a Petal Pink card base.
Cut a panel of Lovely Blossoms DSP using the largest Spotlight on Nature Dies. Adhere the die cut panel to the center of the card front.
On a panel of Basic White, stamp the sentiment from the Lovely Arrangements stamp set in Secret Sea Ink. cut the sentiment out using the Nested Essentials Dies. Cut a panel of Lovely Blossoms DSP using the same Nested Essentials Dies. Trim the sentiment die cut along the dotted line with snips. Adhere the sentiment to the die cut DSP. Adhere the layered sentiment to the card front. Add Moody Palette Glossy Dots.
Stamp the sentiment from the Lovely Arrangements stamp set on a panel of Basic White. Adhere a panel of Lovely Blossoms DSP to the side of the panel. Stamp the flower and leaf images from the Lovely Arrangements stamp set in Secret Sea Ink on the bottom of the panel. Using Cloud Cover Stampin’ Blends Marker, add a little color to the flower and leaves. Adhere the Basic White panel to a Secret Sea mat then to the inside of the Petal Pink card base.
Decorate a Basic White Medium Envelope to finish your card. Stamp the flower and leaf image front the Lovely Arrangements stamp set in Secret Sea Ink on the envelope front Adhere a panel of Lovely Blossoms DSP to the envelope flap.
Thank you for stopping by my blog today. I hope you like the card and you have this set on your wish list for January. Happy Stamping!!
If you need any stamping supplies, I’d love to be your Demonstrator. Just click HERE to go directly to my online store or drop me an email if you have any questions.
My January – April 2026 Mini Catalog and January Online Exclusive Designer Series Paper, Ribbon and Embellishment Shares are open for ordering. You can order just the DSP share, just the Two-Tone cardstock share, just the Ribbon share or just the Embellishment share, or you can it all!! For all the information, Click Here.
I’m offering a Designer Series PaperShare, Two-Tone Cardstock Share, Ribbon Share & Embellishment Share from the January – April 2026 Mini Catalog, along with the upcoming January 2026 Online Exclusives and I’d love to have you join!! I’m placing my share order early on January 6th and I’m going to use the expedited shipping option so I should be able to have the shares cut, bundled and back out to you during the week of January 12th. Wouldn’t you love to have all of the gorgeous new Designer Series Papers in the Stampin’ Up! January – April 2026 Mini Catalog and the upcoming January 2026 Online Exclusives? What is a Paper Share you ask? It’s a sample of each of the new Designer Series Papers from the Catalog and Online Exclusives. Shares give you a good working sample of all of the papers so that you can decide which ones to order in full packs! If you were to purchase all of the DSP in the new Catalog and Online Exclusives, it would cost you over $175.00 plus shipping and if you were to purchase all the ribbon it would cost you over $50.00.
New Designer Series Paper Share – $22.00 plus $10.00 for Priority Mail Shipping
How my shares work: I order full packs of all of the Designer Series Papers listed below, I cut them into 6″ X 6″ pieces (or 6″ X 12″ pieces for double shares) and give you one panel of each design from each pack on the list. I pack up the paper in a cellophane bag with labels listing the Name, Item # and Colors in the pack and mail it back out to you just as quickly as I can!
New Designer Series Paper Share – $22.00 plus $10.00 for Priority Mail shipping
You will receive one 6×6 sheet of each design from the following DSP packs (the number after the name indicates how many 6×6 sheets of that paper pack you will receive):
Beach Boardwalk (6)
Cute As A Bug (6)
Easter Joy (6)
Love Notes Mix & Match 6 x 6 (6)
Lovely & Beautiful Specialty (6)
Lovely Blossoms (4)
Made With Love (6)
Mixed Up Patterns Mix-Ins (6)
Natural Hues Textured (3)
Nature Walk (6)
Pastels Shimmer (3)
Pleasant Patterns Specialty (3)
Splash of Sparkles Specialty (6)
Square Snippets (3)
In all, you’ll receive 70 – 6” x 6” sheets of designer or specialty paper!
Double Designer Series Paper Share – $44.00 Plus $10.00 Priority Mail Shipping
As a gift from me for ordering a Double Share of Designer Series Paper, I will include an Easter Time Mix & Match Ephemera Pack. This gift is only for ordering a Double DSP Share.
Two-Tone Cardstock Share
Have you been wanting to try the Two-Tone Cardstock but didn’t want to buy a whole pack? You can add a share of the 4 different Two-Tone Cardstock packs for an additional $6 or purchase them separately for $6 + $10 Priority Shipping
You will receive one 6×6 sheet of each color from each of the packs (the number after the name indicates how many 6×6 sheets of that paper pack you will receive):
Beach Time (6)
Currently Loving (6)
Exploring Nature (6)
Love Story (6)
In all, you’ll receive 24 – 6” x 6” sheets of cardstock!
Double Share of the Two-Tone Cardstock – $12.00 plus $10.00 Priority Mail Shipping
If you’d like double shares of the designer paper or cardstock, I’m offering those too! I’ll cut the 12″ x 12″ sheets into 6″ × 12″ so that you’ll be able to get 3 full A2 size card fronts from each sheet and you’ll get double sheets of the 6″ x 6″ since they’re already precut.
Ribbon Share – $13.00 plus $10.00 Priority Mail Shipping
All ribbons will come individually wrapped and labeled with the name and number of the product.
One-Fourth of a Roll of each:
Balmy Blue 1/4″ Gingham Ribbon
Bubble Bath 1/8″ Faux Linen Ribbon
Cloud Cover 5/8″ Textured Ribbon
Old Olive 3/8″ Specialty Rickrack
Secret Sea 3/8″ Bordered Open Weave Ribbon
White With Gold 3/8″ Ribbon
Double Ribbon Share – $26.00 Plus $10.00 Priority Mail Shipping and you will be getting 1/2 of the roll or each ribbon.
Embellishment Share – $12.00 plus $10.00 Priority Mail Shipping
I’m also offering an Embellishment Share. I will divide the embellishments up and package them in a cello bag with the name and number for easy ordering, just like I do with the paper and ribbon.
You will receive (approximate # listed:
Easter Assortment (20)
Faux Bronze Pentagons (20)
Heart Gusseted Treat Bags (2)
Ladybug Garden Epoxy Shapes (18)
Moody Palette Glossy Dots (32)
Pearlized Faceted Circles (24)
Sparkle Dot Essentials (24)
Double Share of the Embellishments – $24.00 plus $10.00 Priority Mail Shipping
Anyone is welcome to join in my shares (please note, I can only ship to addresses within the US). To make ordering the shares a little easier, I have created a form for you to submit, that way you can order any combination of shares you want. Click Here for the form. I will send out PayPal Invoices by January 2nd.
Deadline to sign up for my share is Saturday January 3rd at 5:00 PM ET.
Good Saturday morning stamping friends and welcome to the weekend. What kind of plans do you all have for the weekend? I’ll be working today, and I believe by the time I get home from work; my husband will have gone to cut our tree and have it set up and ready to decorate. I feel like we’re a little late this year with getting the tree. All I’ll have to do is jump up into the attic to get everything out. I finally decorated my card studio and put up my small 4 1/2′ tree. We set up multiple trees in our house, the smaller trees are in the bedrooms or my studio, and the main tree is in the living room.
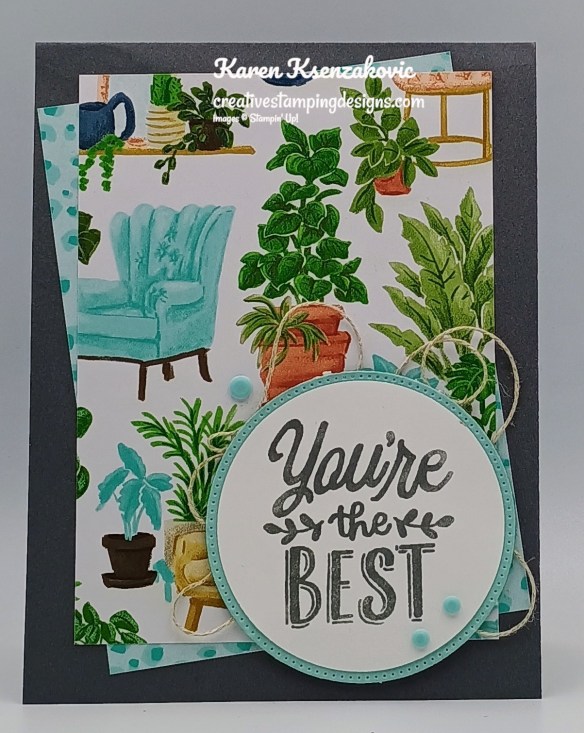
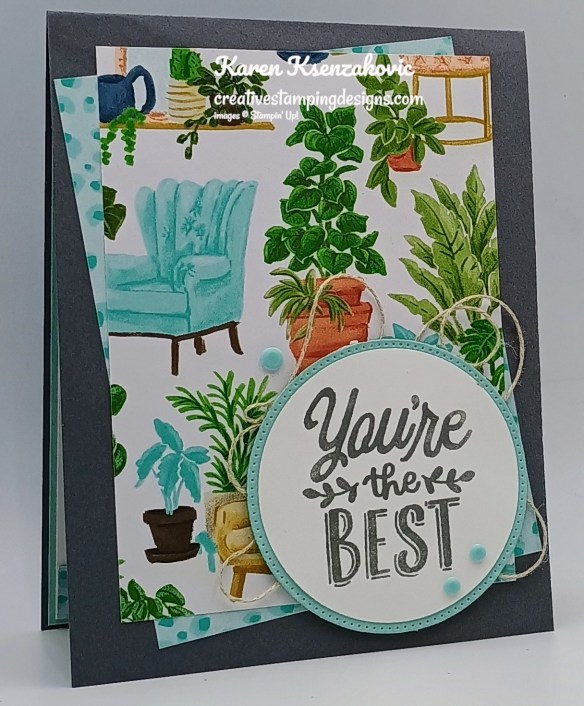
Today’s card is one that we made last Sunday at our quarterly meeting. this card was designed by my wonderful team member Tara Carpenter. Here’s my card for today.
I used the Stampin’ Up! Creative Haven Stamp Set along with the Hobby Haven Designer Series Paper,Stylish Shapes Dies, 2 3/8″ Circle Punch and Stampin’ Up! Delicate Framing Stamp Set for my card today.
Adhere 2 panels of Hobby Haven DSP to the Basic Gray card base.
On a panel of Basic White, stamp the sentiment from the Creative Haven stamp set in Basic Gray Ink. Using the 2 3/8″ Circle Punch, cut the sentiment out. Using the 2nd largest circle from the Stylish Shapes Dies, cut a panel of Pool Party. Adhere the sentiment to the die cut circle.
Adhere a piece of Linen Thread to the card front. Adhere the layered sentiment over the Linen Thread with Stampin’ Dimensionals. Add a few Dear Dots to the card front.
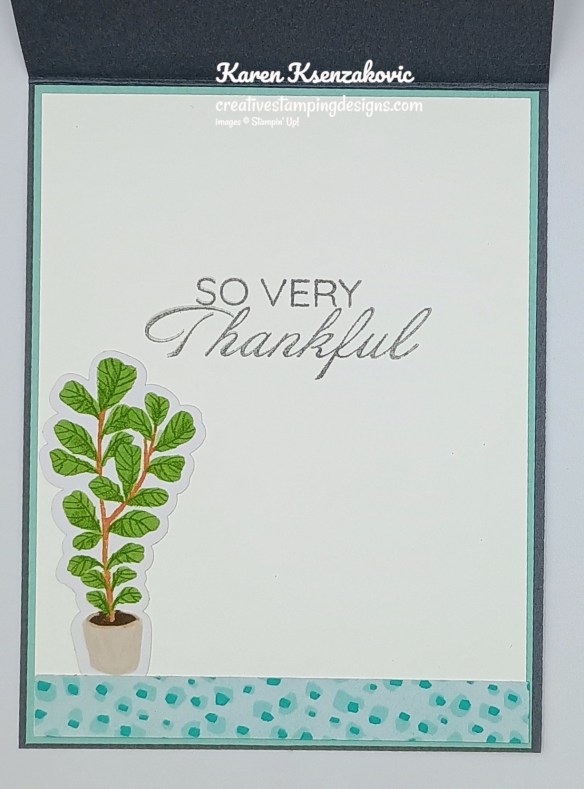
On a panel of Basic White, stamp the sentiment from the Delicate Framing stamp set in Basic Gray Ink. Adhere a panel of Hobby Haven DSP to the bottom of the panel. Adhere one of the die cut images from the Hobby Haven DSP to the bottom of the panel. Adhere the Basic White panel to a Pool Party mat then to the inside of the Basic Gray card base.
Decorate a Basic White Medium Envelope to finish your card. Adhere a strip of the Hobby Haven DSP to the envelope front and panel to the envelope flap.
Thank you for stopping by my blog today. I hope you like the card and you’ll give it a try. Happy Stamping!!
If you need any stamping supplies, I’d love to be your Demonstrator. Just click HERE to go directly to my online store or drop me an email if you have any questions.
My January – April 2026 Mini Catalog and January Online Exclusive Designer Series Paper, Ribbon and Embellishment Shares are open for ordering. You can order just the DSP share, just the Two-Tone cardstock share, just the Ribbon share or just the Embellishment share, or you can it all!! For all the information, Click Here.
I’m offering a Designer Series PaperShare, Two-Tone Cardstock Share, Ribbon Share & Embellishment Share from the January – April 2026 Mini Catalog, along with the upcoming January 2026 Online Exclusives and I’d love to have you join!! I’m placing my share order early on January 6th and I’m going to use the expedited shipping option so I should be able to have the shares cut, bundled and back out to you during the week of January 12th. Wouldn’t you love to have all of the gorgeous new Designer Series Papers in the Stampin’ Up! January – April 2026 Mini Catalog and the upcoming January 2026 Online Exclusives? What is a Paper Share you ask? It’s a sample of each of the new Designer Series Papers from the Catalog and Online Exclusives. Shares give you a good working sample of all of the papers so that you can decide which ones to order in full packs! If you were to purchase all of the DSP in the new Catalog and Online Exclusives, it would cost you over $175.00 plus shipping and if you were to purchase all the ribbon it would cost you over $50.00.
New Designer Series Paper Share – $22.00 plus $10.00 for Priority Mail Shipping
How my shares work: I order full packs of all of the Designer Series Papers listed below, I cut them into 6″ X 6″ pieces (or 6″ X 12″ pieces for double shares) and give you one panel of each design from each pack on the list. I pack up the paper in a cellophane bag with labels listing the Name, Item # and Colors in the pack and mail it back out to you just as quickly as I can!
New Designer Series Paper Share – $22.00 plus $10.00 for Priority Mail shipping
You will receive one 6×6 sheet of each design from the following DSP packs (the number after the name indicates how many 6×6 sheets of that paper pack you will receive):
Beach Boardwalk (6)
Cute As A Bug (6)
Easter Joy (6)
Love Notes Mix & Match 6 x 6 (6)
Lovely & Beautiful Specialty (6)
Lovely Blossoms (4)
Made With Love (6)
Mixed Up Patterns Mix-Ins (6)
Natural Hues Textured (3)
Nature Walk (6)
Pastels Shimmer (3)
Pleasant Patterns Specialty (3)
Splash of Sparkles Specialty (6)
Square Snippets (3)
In all, you’ll receive 70 – 6” x 6” sheets of designer or specialty paper!
Double Designer Series Paper Share – $44.00 Plus $10.00 Priority Mail Shipping
As a gift from me for ordering a Double Share of Designer Series Paper, I will include an Easter Time Mix & Match Ephemera Pack. This gift is only for ordering a Double DSP Share.
Two-Tone Cardstock Share
Have you been wanting to try the Two-Tone Cardstock but didn’t want to buy a whole pack? You can add a share of the 4 different Two-Tone Cardstock packs for an additional $6 or purchase them separately for $6 + $10 Priority Shipping
You will receive one 6×6 sheet of each color from each of the packs (the number after the name indicates how many 6×6 sheets of that paper pack you will receive):
Beach Time (6)
Currently Loving (6)
Exploring Nature (6)
Love Story (6)
In all, you’ll receive 24 – 6” x 6” sheets of cardstock!
Double Share of the Two-Tone Cardstock – $12.00 plus $10.00 Priority Mail Shipping
If you’d like double shares of the designer paper or cardstock, I’m offering those too! I’ll cut the 12″ x 12″ sheets into 6″ × 12″ so that you’ll be able to get 3 full A2 size card fronts from each sheet and you’ll get double sheets of the 6″ x 6″ since they’re already precut.
Ribbon Share – $13.00 plus $10.00 Priority Mail Shipping
All ribbons will come individually wrapped and labeled with the name and number of the product.
One-Fourth of a Roll of each:
Balmy Blue 1/4″ Gingham Ribbon
Bubble Bath 1/8″ Faux Linen Ribbon
Cloud Cover 5/8″ Textured Ribbon
Old Olive 3/8″ Specialty Rickrack
Secret Sea 3/8″ Bordered Open Weave Ribbon
White With Gold 3/8″ Ribbon
Double Ribbon Share – $26.00 Plus $10.00 Priority Mail Shipping and you will be getting 1/2 of the roll or each ribbon.
Embellishment Share – $12.00 plus $10.00 Priority Mail Shipping
I’m also offering an Embellishment Share. I will divide the embellishments up and package them in a cello bag with the name and number for easy ordering, just like I do with the paper and ribbon.
You will receive (approximate # listed:
Easter Assortment (20)
Faux Bronze Pentagons (20)
Heart Gusseted Treat Bags (2)
Ladybug Garden Epoxy Shapes (18)
Moody Palette Glossy Dots (32)
Pearlized Faceted Circles (24)
Sparkle Dot Essentials (24)
Double Share of the Embellishments – $24.00 plus $10.00 Priority Mail Shipping
Anyone is welcome to join in my shares (please note, I can only ship to addresses within the US). To make ordering the shares a little easier, I have created a form for you to submit, that way you can order any combination of shares you want. Click Here for the form. I will send out PayPal Invoices by January 2nd.
Deadline to sign up for my share is Saturday January 3rd at 5:00 PM ET.
Special Delivery January Paper Pumpkin Subscribe December 11 – January 10
PAPER PUMPKIN – Is our monthly One-Stop Box that offers a unique variety of paper projects for crafters of any skill level to enjoy! – Thoughtfully themed and all-inclusive craft kits encourage you to explore your creativity, try new techniques, and discover your potential in paper crafting.
Send heartfelt valentines featuring sweet postage stamp designs and sentiments for love and friendship.
• Makes 9 cards: 3 each of 3 designs • 3 different coordinating envelope designs • Precut paper pieces with gold foil accents • Coordinating colors: Blueberry Bushel, Bubble Bath, Darling Duckling, Garden Green, Mossy Meadow, Poppy Parade (Classic Stampin’ Spot)
Kit arrives in a lovely coordinating box!
Subscribe to the January Paper Pumpkin Kit between 11 December and 10 January by clicking here!
Don’t miss the coordinating Beautiful Blooms Dies Add-On!
Make the most of your Paper Pumpkin kits with the Beautiful Blooms Dies add-on! Quickly and cleanly cut out a tulip, a postage stamp shape, or the word Beautiful to elevate your crafting projects. These additional dies are designed to work with THREE Paper Pumpkin Kits: the Special Delivery Paper Pumpkin Kit, the Celebrate Spring Paper Pumpkin Kit, and the Fluttering Garden Paper Pumpkin Kit. Pair these dies with other Stampin’ Up! products for even more creative options!
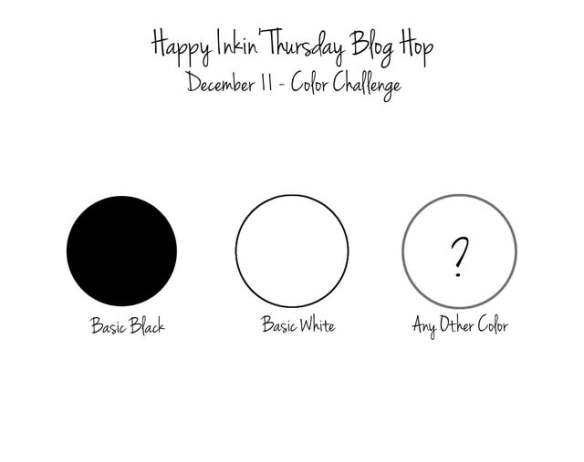
Good Thursday morning stamping friends and welcome to our Happy Inkin’ Thursday Blog Hop. If you are starting with me, thank you, I hope you will stop by everyone’s blog to see what they have created this week. If you are hopping over from Mary’s blog, thank you for stopping by. This week we have Color Challenge. If you’d like to see a quick video on how I made this card, Click Here to go to my Instagram Reels. Here is my card using this week’s colors.
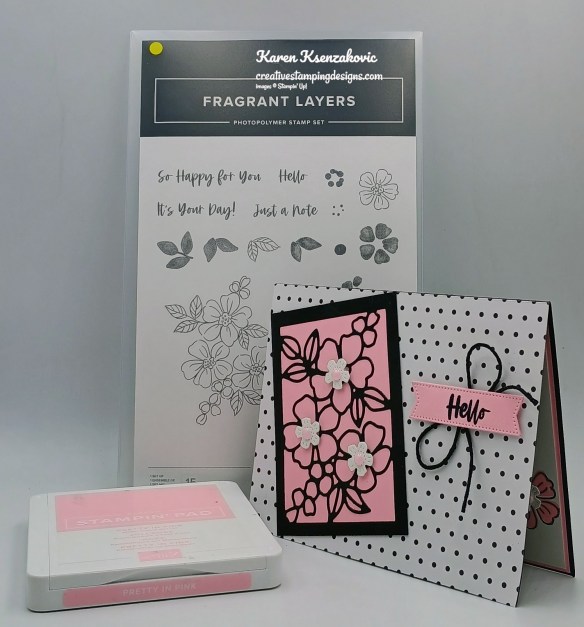
I used the new Stampin’ Up! Online Exclusive Fragrant Layers Bundle along with the Modern Christmas Specialty Designer Series Paper for my card today.
These are our colors for today. I chose to use Pretty in Pink for my other color.
Adhere a panel of Modern Christmas DSP to a Basic Black card base.
Cut a panel of Basic Black using the Fragrant Layers Dies. Adhere the die cut panel to a Pretty in Pink panel. Adhere the layered panel to the card front. Cut the small flower die cut using the Fragrant Layers Dies from a panel of Basic White. Adhere the flowers to the die cut panel with Stampin’ Dimensionals.
On a panel of Pretty in Pink, stamp the sentiment from Fragrant Layers stamp set in Versamark Ink. Sprinkle the sentiment with Black Embossing Powder and set it using the Heat Tool. Cut the sentiment out using the Fragrant Layers Dies. Tie a bow with Black Baker’s Twine and adhere it to the card front. Adhere the sentiment over the bow with Stampin’ Dimensionals. Add a few 2024-2026 In-Color Flat Pearls to the card front.
Stamp the sentiment from Fragrant Layers stamp set in tuxedo Black Ink on a panel of Basic White. Stamp the single outlined flower image from the Fragrant Layers stamp set in Tuxedo Black Ink on the Basic White panel. Stamp the solid single flower image from the Fragrant Layers stamp set in Pretty in Pink Ink over the outlined images. Adhere the die cut flowers to the flower centers. Add a few 2024-2026 In-Color Flat Pearls to the flowers. Adhere the Basic White panel to a Pretty in Pink mat then to the inside of the Basic Black card base.
Decorate a Basic White Medium Envelope to complete the card. Stamp the large, outlined flower image from the Fragrant Layers stamp set in Tuxedo Black Ink on the envelope front. Stamp the large solid flower image from the Fragrant Layers stamp set in Pretty in Pink Ink over the outlined image. Add Pretty in Pink Ink using the Blending Brush to a panel of Modern Christmas DSP and adhere it to the envelope flap.
Thank you for stopping by my blog today. Now that you’ve seen my card, let’s get on with the hop! Click the next button below to hop over to see what Tara has created. Happy Hopping!!
Just in case you get lost along the way, here is a list of the team members involved in the hop today.
If you need any stamping supplies, I’d love to be your Demonstrator. Just click HERE to go directly to my online store or drop me an email if you have any questions.
Good Wednesday morning my stamping friends. How is everyone doing today? We’re halfway through the week and on our way to the weekend already.
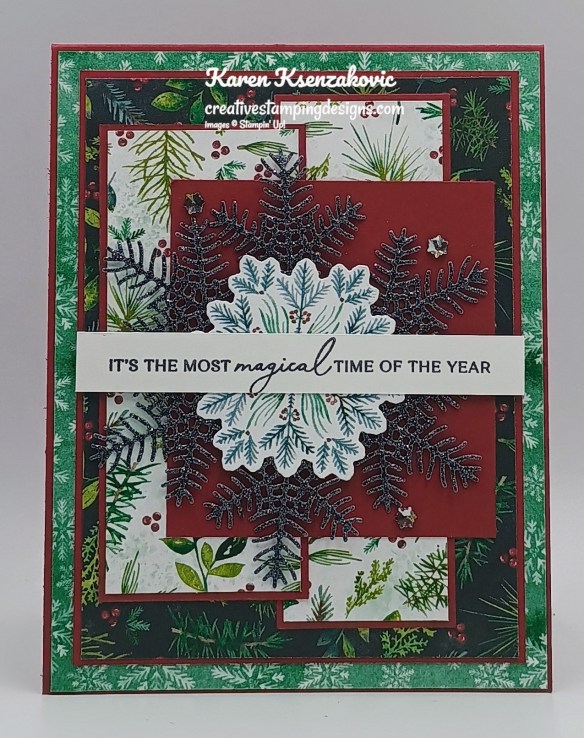
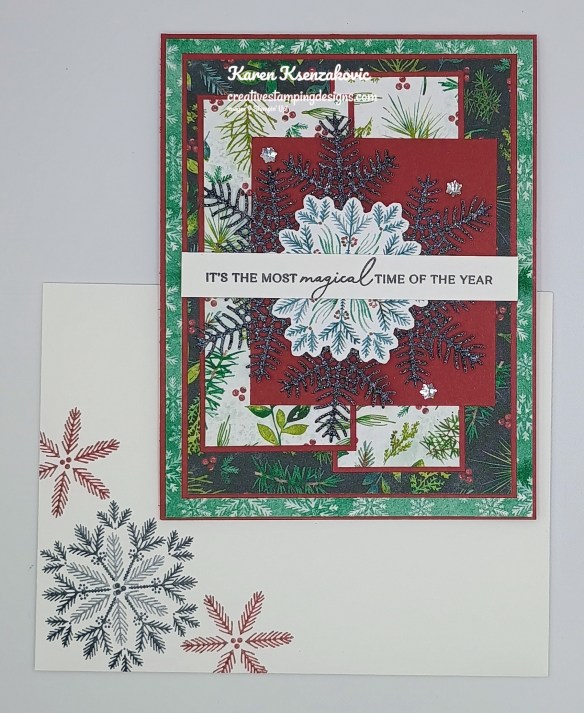
Today’s card is for the inspiration challenge from The Card Concepts. The inspiration photo #222 is Christmas Gathering. I used lots of layered on my card, since that is one of my favorite kinds of cards to make. If you’d like to see a quick video of how I made this card, Click Here to go to my Instagram Reels. Here’s my card for today.
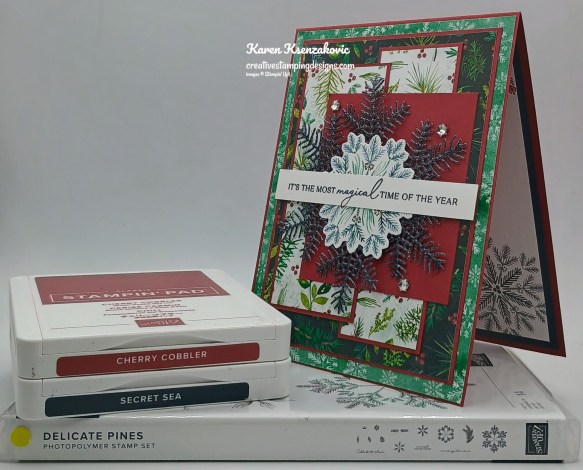
I used the Stampin’ Up! Delicate Pines Bundle along with the Elegant Pine Snowflakes Designer Series Paper for my card today. I was inspired by the colors along with the snowflake in the photo for my clean and layered card today.
I hope you will take a moment to visit The Card Concepts and join us for our challenge 222. How are you inspired by the photos?
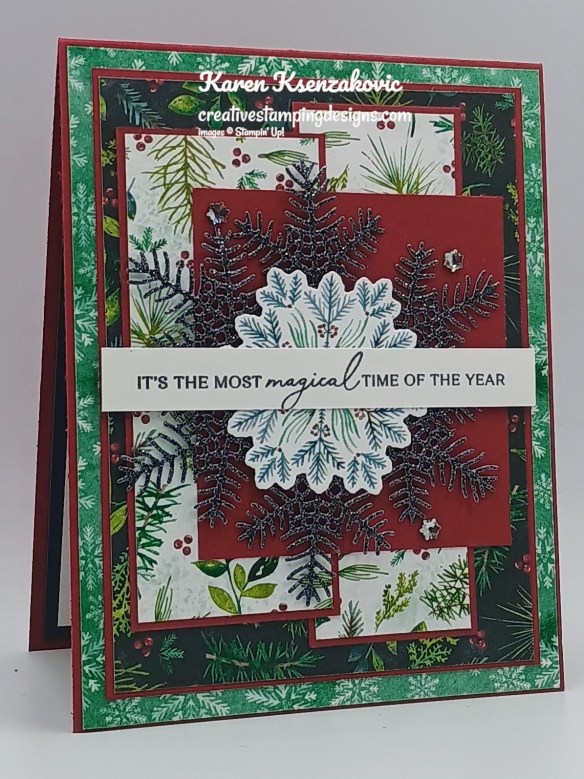
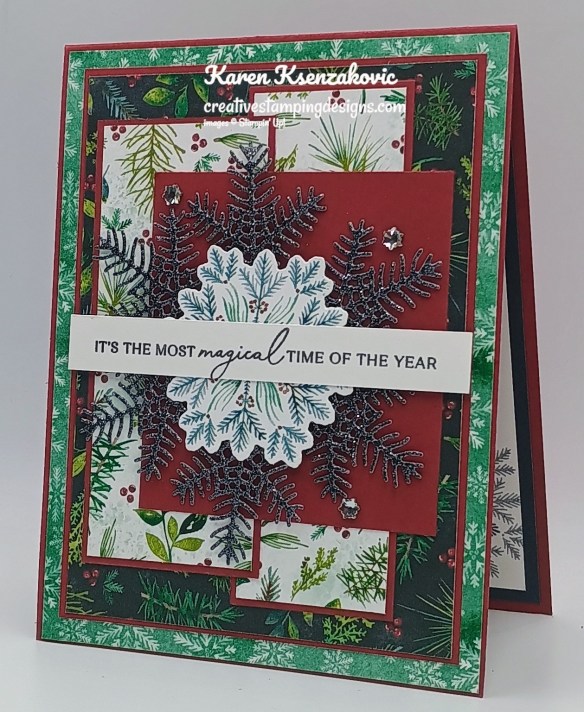
Adhere a panel of Elegant Pine Snowflakes DSP to a Cherry Cobbler card base. Adhere a smaller panel of Elegant Pine Snowflakes DSP to a Cherry Cobbler mat. Adhere the layered panel to the card front.
Adhere the 2 panels of Elegant Pine Snowflakes DSP to coordinating Cherry Cobbler mats. Adhere the 2 layered panels to the card front. Using the Delicate Pines Dies, cut 3 of the large pine boughs from a panel of Peaceful Garden Glimmer Paper and cut the medium snowflake from a panel of Elegant Pine Snowflakes DSP. Adhere the 3 large pine boughs together. Adhere the die cut snowflake on top of the pine boughs. Adhere the die cut panel to the panel of Cherry Cobbler, off centering it. Adhere the layered panel to the card front.
On a strip of Basic White, stamp the sentiment from the Delicate Pines stamp set in Secret Sea Ink. Adhere the sentiment across the center of the snowflake. Add a few Faceted Snowflakes to the card front.
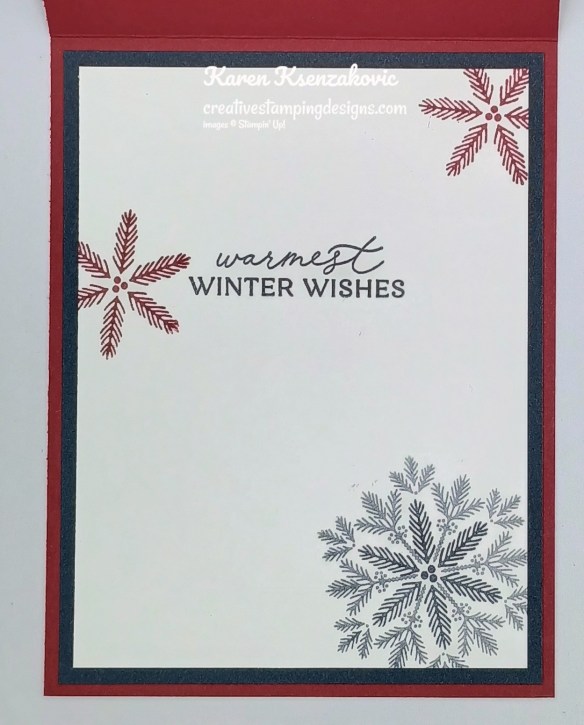
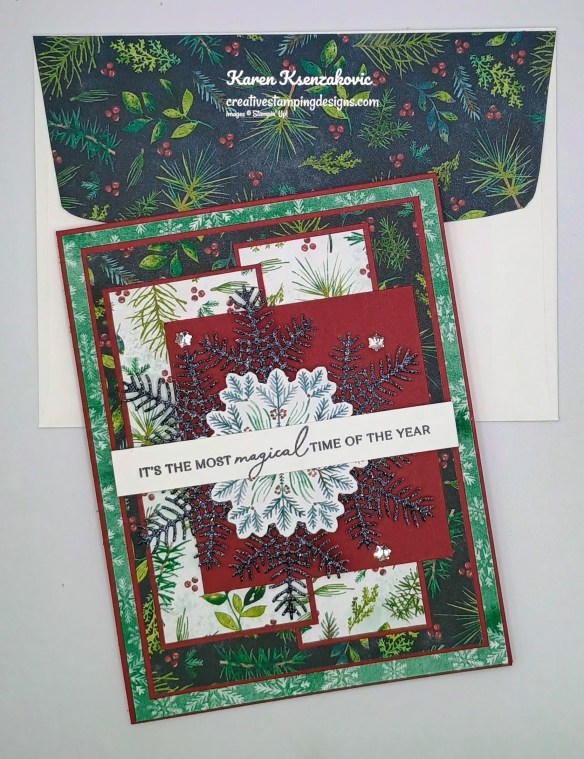
Stamp the sentiment from the Delicate Pines stamp set in Secret Sea Ink on a panel of Basic White. Stamp the medium and small snowflake images from the Delicate Pines stamp set in Cherry Cobbler and Secret Sea Inks on the panel. Adhere the Basic White panel to a Secret Sea mat then to the inside of the Cherry Cobbler card base.
Decorate a Basic White Medium Envelope to finish the card. Stamp the snowflake images from the Delicate Pines stamp set in Cherry Cobbler and Secret Sea Inks on the envelope front. Adhere a panel of Elegant Pine Snowflakes DSP to the envelope flap.
Thank you for stopping by my blog today. I hope you like the card and will give it a try. Happy Stamping!!
If you need any stamping supplies, I’d love to be your Demonstrator. Just click HERE to go directly to my online store or drop me an email if you have any questions.
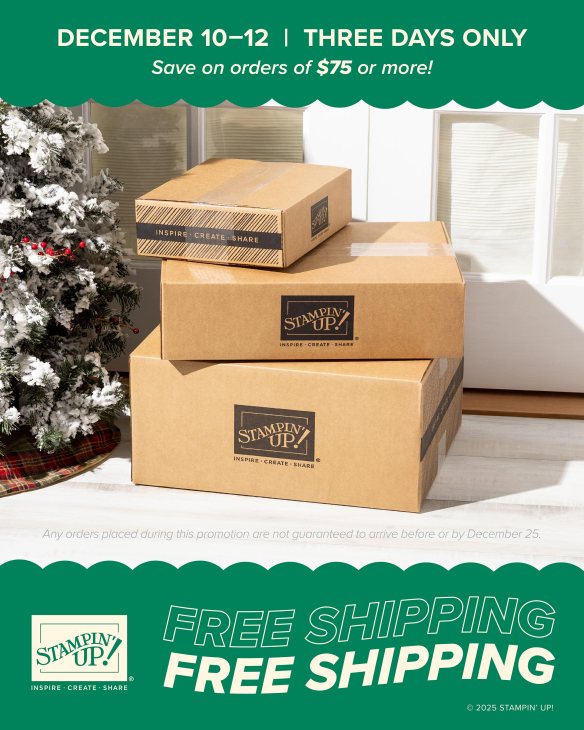
Free Shipping for Orders of $75+ before tax – 3 Days Only – Starting Today
Stampin’ Up! announced that they are offering FREE shipping on orders of $75+ from December 10-12!!
Here are the details:
Free shipping begins at 12:01 AM MT on December 10.
Free shipping ends at 11:59 PM MT on December 12.
Free shipping is for three days only. Orders must be opened and closed from December 10–12.
Free shipping automatically applies to your cart after the qualifying amount has been met, which is $75 (before tax).
Coupon codes and Stampin’ Rewards will lower your order’s retail amount. Orders must meet the qualifying amount to be eligible for free shipping.
The additional cost for expedited shipping is not covered by this promotion.
Prepaid 3-, 6-, and 12-month Paper Pumpkin subscriptions and month-to-month subscriptions do not qualify for free shipping. Refills, past kits, and add-ons do qualify toward free shipping, but you must be a subscriber to purchase. Subscriptions billed and shipped this month will be charged for the normal amount ($27.00 shipping included) + tax.
Please keep in mind that due to the high volume of orders and the Christmas season, the distribution center may fall behind their typical shipping time frames. They will do all we can to return to our regular service levels as quickly as possible. Any orders placed during this promotion are not guaranteed to arrive before or by December 25.
Get your orders ready and get them placed in the online store between December 10-12! And as an added bonus, if you haven’t already earned the December Product Of The Month, your $75 order with free shipping will qualify you to earn that item for $5!!
Let me know if you have any questions. Have fun shopping!
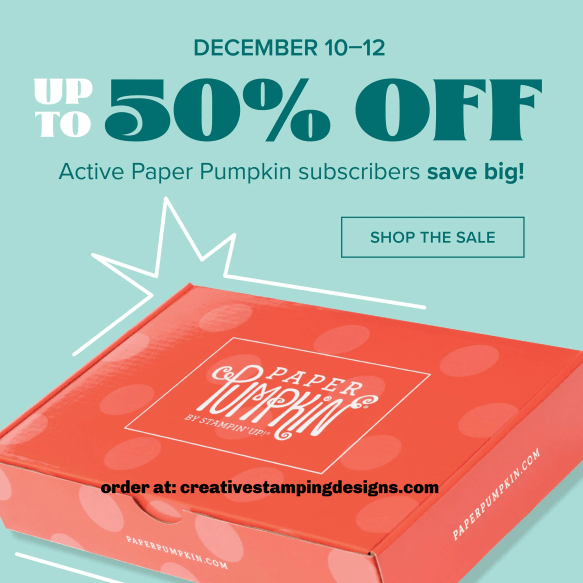
Save Up To 50% off on Past Paper Pumpkin Refills December 10-12
Big savings start today! From December 10–12, Paper Pumpkin subscribers can get up to 50% off on refills, past kits, and add-ons! Bonus: the sale items also qualify for FREE SHIPPING during the sale!
This sale is only open to active subscribers! Today, December 9, is the last day to save on prepaid Paper Pumpkin subscriptions with the Cyber Monday Sale! So if you’re interested in subscribing but haven’t done it yet, subscribe now and get that great deal on the prepaid kits then shop the refills, past kits and add-ons sale starting tomorrow!
Hurry—this sale is only while supplies last! Click here to see the great products that will be on sale December 10-12!
My January – April 2026 Mini Catalog and January Online Exclusive Designer Series Paper, Ribbon and Embellishment Shares are open for ordering. You can order just the DSP share, just the Two-Tone cardstock share, just the Ribbon share or just the Embellishment share, or you can it all!! For all the information, Click Here.
Anyone is welcome to join in my shares (please note, I can only ship to addresses within the US). To make ordering the shares a little easier, I have created a form for you to submit, that way you can order any combination of shares you want. Click Here for the form. I will send out PayPal Invoices by January 2nd.
Deadline to sign up for my share is Saturday January 3rd at 5:00 PM ET.
Basic White Cardstock 1/2″ x 3 3/4″(sentiment), 3 3/4″ x 5″(inner liner)
Cherry Cobbler Cardstock 4 1/4″ x 11″(card base scored & folded at 5 1/2″), 3 3/5″ x 5″ panel, 1 1/2″ x 4 1/2″ panel, 1 3/4″ x 4″ panel, 2 3/4″ x 3″ panel
Secret Sea Cardstock 4″ x 5 1/4″ panel
Elegant Pine Snowflakes Designer Series Paper 4 1/8″ x 5 3/8″ panel, 3 5/8″ x 4 7/8″ panel, 1 3/8″ x 4 3/8″ panel, 1 5/8″ x 3 7/8″ panel, 2 1/4″ x 6″ panel
Good Saturday morning stamping friends and welcome to the weekend. What kind of plans do you all have? Shopping, decorating? I’m going to a play this afternoon, my husband’s financial adviser gave us tickets to go see Scrooge.
Today’s card uses some new products coming in January along with some new Online Exclusive products that became available in November. If you’d like to see a quick video on how I made this card, Click Here to go to my Instagram Reels. Here’s my card for today.
I used the new Stampin’ Up! Online Exclusive A Round of Hellos Stamp Set and All in A Row Embossing Folder (both available Jan 6), along with Country Woods Designer Series Paper, Creative Haven Dies and Hobby Haven Designer Series Paper for my card today.
Emboss a Lost Lagoon card front with the All in a Row EF. Adhere the embossed panel to a Lost Lagoon card base.
Cut a panel of Hobby Haven DSP using the Creative Haven Dies. Stamp the sentiment from the A Round of Hellos stamp set in Early Espresso Ink on the die cut panel. Adhere a panel of Country Woods DSP to the top of the card front. Adhere the sentiment just under the Country Woods DSP panel.
Using the Creative Haven Dies, cut the sprig from a panel of Lost Lagoon. Adhere the die cut books, teacup (from the Hobby Haven DSP) and sprig to the card front with Stampin’ Dimensionals. Add a few Earthy Matte Dots to the card f
Stamp the sentiment from the A Round of Hellos stamp set in Lost Lagoon Ink on a panel of Basic White. Adhere a panel of Hobby Haven DSP to the bottom of the panel. Adhere a book from the Hobby Haven DSP to the bottom of the panel. Adhere the Basic White panel to a Petal Pink mat then to the inside of the Lost Lagoon card base.
Decorate a Basic White Medium Envelope to finish your card. Stamp the sentiment from the A Round of Hellos stamp set in Lost Lagoon Ink on the envelope front. Adhere a panel of Country Wood DSP to the envelope flap.
Thank you for stopping by my blog today. I hope you like the card and maybe you’ll have this set on your wish list for January. Happy Stamping!!
If you need any stamping supplies, I’d love to be your Demonstrator. Just click HERE to go directly to my online store or drop me an email if you have any questions.
My January – April 2026 Mini Catalog and January Online Exclusive Designer Series Paper, Ribbon and Embellishment Shares are open for ordering. You can order just the DSP share, just the Two-Tone cardstock share, just the Ribbon share or just the Embellishment share, or you can it all!! For all the information, Click Here.
Anyone is welcome to join in my shares (please note, I can only ship to addresses within the US). To make ordering the shares a little easier, I have created a form for you to submit, that way you can order any combination of shares you want. Click Here for the form. I will send out PayPal Invoices by January 2nd.
Deadline to sign up for my share is Saturday January 3rd at 5:00 PM ET.
Cyber Monday – Paper Pumpkin Sale – December 1 – 9
This is such an awesome deal!! Whether you are new to Paper Pumpkin or you already have a subscription, you can take advantage of the awesome offer. You can save $80 on a 1-year subscription. If you are already subscribed, you’ll want to suspend your current subscription, so you don’t get duplicate kits (unless you want to get 2 of each).
Starting December 1 at 8 a.m. (MT), Stampin’ Up! is offering big savings on prepaid Paper Pumpkin subscriptions! There’s never been a better time to subscribe to get a new all-inclusive crafting kit delivered to your door each month. Take advantage of this Cyber Monday offer for fantastic deals on 3-, 6-, and 12-month prepaid subscriptions.
Whether you’re looking for a last-minute Christmas present that sparks creativity or resolving to make time to craft in the new year, a Paper Pumpkin subscription is the gift that keeps on giving!
From December 1–9, prepaid Paper Pumpkin subscriptions will be discounted as follows:
3-month prepaid: $61.00 (regular price $81.00)
6-month prepaid: $122.00 (regular price $162.00)
12-month prepaid: $244.00 (regular price $324.00)
Here are the details:
Subscriptions purchased during this promotion start immediately with the December Watercolor in Bloom Kit. This kit cannot be skipped.
Do not purchase multiple subscriptions for the same recipient. The subscriptions will all start with the Watercolor in Bloom Kit, so the recipient will end up receiving duplicates of the same kit each month.
Subscriptions purchased during the promotion will earn reduced rewards compared to full-priced subscriptions due to the discounted price, but they will still qualify for rewards once the threshold is met.
Don’t miss your chance to enjoy months of exciting kits at an incredible value! Stop by the Paper Pumpkin page here for more details about how Paper Pumpkin works and get ready to order your prepaid subscriptions on December 1!
Good Wednesday morning stamping friends. I’ve been MIA for a bit with cards; I’ve been trying to get my house completely decorated and juggling a car situation here. We’ve got 3 people sharing 1 car going in 3 different directions. Fingers crossed that we could get this all worked out sooner than later. In the meantime, with 3 of us sharing the car, it needs to go in for servicing and new tires. Why do things always happen around the holidays? I’m starting to realize that I need to get shopping done and get my cookie list together, so I know what ingredients I need. I need more than 4 weeks between Thanksgiving and Christmas, or I need to start getting lists together in October, so it doesn’t sneak up so quickly. Is anyone else feeling that way?
Today’s card uses new and older Online Exclusives along with a new set coming in the January-April 2026 Mini Catalog. Here’s my card for today.
I used the new Stampin’ Up! Addressed To You Stamp Set (available January 6), along with the Exposed Brick 3D Embossing Folder, Online Exclusives Everyday Happiness Designer Series Paper and Stampin’ Up! Pop-Up Petals Stamp Set for my card today.
Emboss a panel of Everyday Happiness DSP using the Exposed Brick EF. Adhere the embossed pane to a Gray Granite card base.
Adhere 3 panels of Everyday Happiness DSP to a Gray Granite mat. Adhere the layered panel to the card front
On a panel of Basic White, stamp the outline and flower images from the Addressed To You stamp set in Gray Granite Ink. Stamp the sentiments from the Addressed To You stamp set in Pretty Peacock Ink inside the outlined image. Color the leaves and dots using Lost Lagoon and Pretty Peacock Stampin’ Blends Markers. Use the Clear Wink of Stella to fill in the flowers. Adhere the sentiment to the card front with Stampin’ Dimensionals. Add a few Iridescent Pearls Basic Jewels to the flowers.
On a panel of Basic White, stamp the sentiment from the Pop-Up Petals stamp set in Pretty Peacock Ink. Stamp the small flower image from the Addressed To You stamp set in Gray Granite Ink on the top of the panel. Color the image with Lost Lagoon and Pretty Peacock Stampin’ Blends Markers. Adhere a panel of Everyday Happiness DSP to the bottom of the panel. Adhere the Basic White panel to a Lost Lagoon mat then to the inside of the Gray Granite card base.
Decorate a Basic White Medium Envelope to finish your card. Stamp the small flower image from the Addressed To You stamp set in Gray Granite Ink on the envelope front. Color the image with Lost Lagoon and Pretty Peacock Stampin’ Blends Markers. Adhere a panel of Everyday Happiness DSP to the envelope flap.
Thank you for stopping by my blog today. I hope you like the card and maybe you’ll have this set on your wish list for January. Happy Stamping!!
If you need any stamping supplies, I’d love to be your Demonstrator. Just click HERE to go directly to my online store or drop me an email if you have any questions.
New Product Of The Month from Stampin’ Up! Available
The December Product of the Month is available and it’s beautiful. The True Blue Florals 12 x 12 Designer Series Paper is available for $5 with a qualifying order of $75 + before shipping & tax, but only while supplies last.
If you love exclusive products, you’re going to love Product of the Month, a promotion centered around a special product release every month! The Product of the Month items are specially designed to be some of the best items Stampin’ Up! has to offer that aren’t available in any of our catalogs or our Online Exclusives.
The first Product of the Month is now available to order and it will be available while supplies last!!
Every month Stampin’ Up! will release a new item that is only available for purchase once per account. These items will be limited quantity and are likely to sell out quickly once they’re sold out, they’re gone for good!
Here are the details:
Qualifying Amounts.
You can purchase the Product of the Month item for only $5 when you spend $75 or more in a single order. Your cart total MUST be $75 or more at checkout to qualify. You cannot add the Product of the Month to your cart until you’ve reached the qualifying amount. If you use Stampin’ Rewards, coupons, or discount codes on your order and your cart amount falls below $75, you’ll need to add items in your cart to get the total at or above the qualifying amount again. If you reach the qualifying amount, add the Product of the Month to your cart, and the Product of the Month sells out before you’re able to check out, you won’t be able to complete your checkout until you remove the product from your cart.
Product of the Month Price. Currently the Product of the Month is only $5.
Stampin’ Up! Account. To participate in Product of the Month, you MUST have a Stampin’ Up! account.
A New Product Every Month. Stampin’ Up! will release a new Product of the Month item every month. The Product of the Month items will be available at midnight sometime near the beginning of every month. Keep an eye out for the Product Of The Month to be announced and when the new Product of the Month item will be available. You will be able to view the newly released products on the Product of the Month page in the Online Store.
Product of the Month Purchasing Limit. The Product of the Month is limited to one month’s product per Stampin’ Up! account. Additionally, the Product of the Month items are only available while supplies last, so once they’re all sold out, they’re gone for good.
Order Restrictions. All types of orders (as long as the person ordering has a Stampin’ Up! account), and phone orders all apply toward the qualifying amount for a single order. Starter Kit orders and gift orders do NOT apply toward the qualifying amount. You cannot qualify for the Product of the Month by making separate purchases that eventually amounts to $75 or more. The only way you can qualify for Product of the Month is with a single order that reaches the qualifying amount.
Canceled Orders. If you have an order with a Product of the Month included in it, and you decide to cancel the order, you WILL be able to re-qualify and re-purchase the Product of the Month as long as it’s still available.
Starter Kits. When someone orders a Starter Kit, the price of the kit will NOT count toward the qualifying amount to earn the Product of the Month. After purchasing a Starter Kit, your next order will begin to qualify for the Product of the Month.
Available Until Sold Out. Product of the Month products will be available until they’re sold out. Once they’re sold out, they won’t be available for purchase again. If you didn’t qualify to purchase the Product of the Month during the month it was first offered and it’s still available in the following months, you can purchase that product once you reach the qualifying amount. So, if you didn’t qualify in January but you qualify in February, you can choose to buy the January Product of the Month, provided it’s still available for purchase and you meet the qualifying amount. If you buy the January Product of the Month but still want the February Product of the Month, you’ll need to qualify again.
Here is a short video from Stampin’ Up! with a few of the details:
Cyber Monday – Paper Pumpkin Sale – December 1 – 9
This is such an awesome deal!! Whether you are new to Paper Pumpkin or you already have a subscription, you can take advantage of the awesome offer. You can save $80 on a 1-year subscription. If you are already subscribed, you’ll want to suspend your current subscription, so you don’t get duplicate kits (unless you want to get 2 of each).
Starting December 1 at 8 a.m. (MT), Stampin’ Up! is offering big savings on prepaid Paper Pumpkin subscriptions! There’s never been a better time to subscribe to get a new all-inclusive crafting kit delivered to your door each month. Take advantage of this Cyber Monday offer for fantastic deals on 3-, 6-, and 12-month prepaid subscriptions.
Whether you’re looking for a last-minute Christmas present that sparks creativity or resolving to make time to craft in the new year, a Paper Pumpkin subscription is the gift that keeps on giving!
From December 1–9, prepaid Paper Pumpkin subscriptions will be discounted as follows:
3-month prepaid: $61.00 (regular price $81.00)
6-month prepaid: $122.00 (regular price $162.00)
12-month prepaid: $244.00 (regular price $324.00)
Here are the details:
Subscriptions purchased during this promotion start immediately with the December Watercolor in Bloom Kit. This kit cannot be skipped.
Do not purchase multiple subscriptions for the same recipient. The subscriptions will all start with the Watercolor in Bloom Kit, so the recipient will end up receiving duplicates of the same kit each month.
Subscriptions purchased during the promotion will earn reduced rewards compared to full-priced subscriptions due to the discounted price, but they will still qualify for rewards once the threshold is met.
Don’t miss your chance to enjoy months of exciting kits at an incredible value! Stop by the Paper Pumpkin page here for more details about how Paper Pumpkin works and get ready to order your prepaid subscriptions on December 1!
My January – April 2026 Mini Catalog and January Online Exclusive Designer Series Paper, Ribbon and Embellishment Shares are open for ordering. You can order just the DSP share, just the Two-Tone cardstock share, just the Ribbon share or just the Embellishment share, or you can it all!! For all the information, Click Here.
Anyone is welcome to join in my shares (please note, I can only ship to addresses within the US). To make ordering the shares a little easier, I have created a form for you to submit, that way you can order any combination of shares you want. Click Here for the form. I will send out PayPal Invoices by January 2nd.
Deadline to sign up for my share is Saturday January 3rd at 5:00 PM ET.
Introducing the Virtual Card Retreat, a crafting extravaganza for people who love card making and community! During this two-day virtual event, you’ll craft along with Stampin’ Up! staff as they go through the step-by-step process of creating 15 beautiful cards using the 2026 Virtual Card Making Retreat kit. There will even have some fun giveaways! Mark your calendars now and join us in January for this event!
Here are the details:
When: January 22–23, 2026, from 2:00 p.m.–9:00 p.m. (MT)
Where: Private Facebook Group
Registration: There is no registration for this event! By purchasing the 2026 Virtual Card Making Retreat kit, you’ll get access to the exclusive Facebook group where the live event will stream.
Price of 2026 Virtual Card Making Retreat kit: $165
2026 Virtual Card Making Retreat kit available for purchase: December 10, 2025
Language of Event: This event will be presented in English only.
After the Event: You can access the recorded event videos on the exclusive Facebook group. Videos with English, French, German, and Dutch captioning will be available through the Facebook group within two weeks after the live stream.
To craft along with the presenters and make 15 beautiful, all-occasion cards, you’ll need to purchase the 2026 Virtual Card Making Retreat kit. Everyone who purchases a kit will receive a link to the exclusive Facebook group where the live event will stream. There are only a limited number of kits, so make sure to order yours ASAP starting on December 10!
Here are the details for the Virtual Card Making Retreat Kit:
Item: 2026 Virtual Card Making Retreat kit (170023)
Includes: Exclusive stamp sets, a set of dies, Designer Series Paper, cardstock, envelopes, embellishments, and more
Price: $165
Ordering Begins: December 10, 2025 (Kits are only available while supplies last, so be sure to order ASAP! And you’ll want to order early to make sure you get your products in time for the event!)
Language: The kit is available in English, French, and German.
Be sure to pick up the kit beginning December 10 in my online store!
Last Chance List Updated with Sept-Dec 2025 Mini Catalog & July Online Exclusives
Stampin’ Up! has added a bunch of items from the retiring September-December 2025 Mini Catalog and July Online Exclusives to the Last Chance Products list! Be sure to scroll through all of the pages so that you don’t miss anything. There are newly added items sprinkled throughout the list.
You can find the Last Chance Products list right here in the online store.
Don’t forget that Last Chance Products are only available while supplies last, so order early for the best selection!
Basic White Cardstock 1 3/4″ x 3 1/4″(sentiment), 3 3/4″ x 5″(inner liner)
Gray Granite Cardstock 5 1/2″ x 8 1/2″(card base scored & folded at 4 1/4″), 3″ x 4 1/4″(mat for panels)
Lost Lagoon Cardstock 4″ x 5 1/4″(inner liner mat)
Everyday Happiness Designer Series Paper 4″ x 5 1/4″(card front), 1/2″ x 4″, 3/4″ x 4″ & 1 1/4″ x 4″(card front panels), 3/4″ x 3 3/4″(inner liner), 2 1/4″ x 6″(envelope)
Good Friday morning stamping friends and welcome to my Fun Fold Friday. Happy Black Friday!!!! Who all heads out to go shopping today? Today’s my day to decorate my house for Christmas. I’m hoping to get most of it done today, but if I don’t, I have off tomorrow so I can finish up then. It all starts with me going up into the attic and passing the hundred boxes down and telling them which room to put them all in. I then work on 1 room at a time unpacking and putting everything up.
I did a video on my YouTube channel for today’s card. If you’d like to stamp along while you watch the video, the list of measurements are below. Here’s my card for today.
I used the Stampin’ Up! Charming Day Bundle along with the Beautiful Pattern 3D Embossing Folder, Floral Charm Designer Series Paper, and Stampin’ Up! Words of Beauty Bundle for my card today.
Adhere 3 panels of Floral Charm DSP to the front of the Basic White panels. Adhere 6 small Floral Charm DSP square panels to the folded sections of the Basic White panels. Using the Words of Beauty Dies, cut the detailed sentiment from a panel of Floral Charm DSP and the mat from a panel of Night of Navy. Adhere the detailed sentiment to the Night of Navy mat. On a panel of Basic White, stamp the sentiment from Words of Beauty stamp set in Night of Navy Ink. Cut the sentiment out using the Words of Beauty Dies.
Adhere the Basic White strips to the card base with the longer side on the front and the shorter side on the right side of the card base.
Emboss a panel of Basic White using the Beautiful Pattern EF. Adhere the embossed panel to a Timid Tiger mat. Adhere the layered panel to the front of the card base. On a panel of Basic White, stamp the large flower image from the Charming Day stamp set in Tuxedo Black Ink. Color the image using Night of Navy, Old Olive, Petal Pink and Timid Tiger Stampin’ Blends Markers. Using the Charming Day Dies, cut the image and 3 of the leaf dies from a panel of Old Olive. Adhere the floral image to the card front with Stampin’ Dimensionals. Adhere the leaf dies under the flower image. Adhere the sentiments using Stampin’ Dimensionals. Add a few Charming Shimmer Faceted Dots to the card front.
Stamp the sentiments from the Words of Beauty and Charming Day stamp sets on a panel of Basic White in Night of Navy Ink. Stamp the floral image from Charming Day stamp set in Tuxedo Black Ink in the bottom of the panel. Color the image using Old Olive, Petal Pink and Timid Tiger Stampin’ Blends Markers. Adhere the Basic White panel to a Timid Tiger mat then to the back of the Night of Navy card base.
Decorate a Basic White Medium Envelope to finish your card. Stamp the smaller flower image from the Charming Day stamp set in Tuxedo Black Ink on the envelope front. Color the image using the Night Old Olive, Petal Pink and Timid Tiger Stampin’ Blends Markers. Adhere a panel of Floral Charm DSP to the envelope flap.
Thank you for stopping by my blog today. I hope you liked my card and will give it a try. I hope you will CASE this card and please feel free to post it in the comments of my Facebook page under my post. I’d love to see your take it. You can watch my video on my YouTube Channel Here
If you watch this on my YouTube channel, please remember to subscribe so that you will get notified when a new video goes live. Thank you to those that have subscribed already. Happy Stamping!!
If you need any stamping supplies, I’d love to be your Demonstrator. Just click HERE to go directly to my online store or drop me an email if you have any questions.
Get ready for Stampin’ Up!’s Black Friday sale with up to 40% off Stampin’ Up! products! Shop this limited-time-only sale between November 25 to December 1!
Here is what will be on sale:
40% off – Stampin’ Blends – Paper Trimmer and Blades – Ink Bundles
25% off – Select adhesive
15% off – Select cardstock
Here are the details:
Shop the full selection of discounted products online.
Products are available while supplies last.
Orders will likely arrive in time for the holidays.
Ordering deadline: December 1, 2025, at 11:59 p.m. (MT)
Get your lists ready and head to the online store beginning November 25 to get those deals!!
Double Creative Stamping Designs Rewards During the Black Friday Sale
I’m offering my Double Creative Stamping Designs Rewards during the Black Friday Sale, starting today through December 1. I’m offering DOUBLE REWARDS for all orders over $50 (before tax & shipping)!! How does this work? For a $50 you’ll earn 2 rewards, $100 you’ll earn 4 rewards, $150 you’ll earn 6 rewards, etc. Head over to my Online Store and get those orders in early and earn those Double Rewards!!
My January – April 2026 Mini Catalog and January Online Exclusive Designer Series Paper, Ribbon and Embellishment Shares are open for ordering. You can order just the DSP share, just the Two-Tone cardstock share, just the Ribbon share or just the Embellishment share, or you can it all!! Click Here to order.
For all the information about what’s included Click Here.
New Product Of The Month from Stampin’ Up! Coming In December!
If you love exclusive products, you’re going to love Product of the Month, a promotion centered around a special product release every month! The Product of the Month items are specially designed to be some of the best items Stampin’ Up! has to offer that aren’t available in any of our catalogs or our Online Exclusives.
The first Product of the Month will be available to order beginning on December 2 and it will be available while supplies last!!
Every month Stampin’ Up! will release a new item that is only available for purchase once per account. These items will be limited quantity and are likely to sell out quickly once they’re sold out, they’re gone for good!
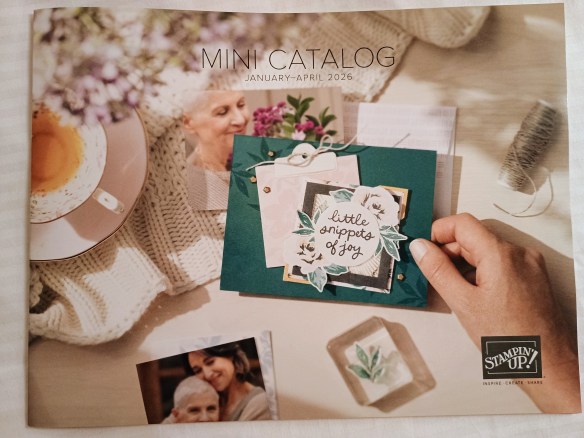
The January – April 2026 Mini Catalog is coming soon. I’ve ordered the new mini catalog and shipped them out to my customers. To be a customer of mine, you need to have placed an order with me within the last year, and you will automatically receive the catalog. If you would like a copy of the catalog from me, just go to my Online Store and place an order and you will be on my list to receive the new catalog.


![Basic White 8 1/2" X 11" Cardstock [ 166780 ]](https://assets1.tamsnetwork.com/images/EC042017NF/166780s.jpg "Basic White 8 1/2\" X 11\" Cardstock [ 166780 ]")
![Cloud Cover 8 1/2" X 11" Cardstock [ 165621 ]](https://assets1.tamsnetwork.com/images/EC042017NF/165621s.jpg "Cloud Cover 8 1/2\" X 11\" Cardstock [ 165621 ]")
![Old Olive Classic Stampin' Pad [ 147090 ]](https://assets1.tamsnetwork.com/images/EC042017NF/147090s.jpg "Old Olive Classic Stampin' Pad [ 147090 ]")
![Secret Sea Classic Stampin' Pad [ 165285 ]](https://assets1.tamsnetwork.com/images/EC042017NF/165285s.jpg "Secret Sea Classic Stampin' Pad [ 165285 ]")
![Cloud Cover Stampin’ Blends Combo Pack [ 165287 ]](https://assets1.tamsnetwork.com/images/EC042017NF/165287s.jpg "Cloud Cover Stampin’ Blends Combo Pack [ 165287 ]")
![Basic White Medium Envelopes [ 159236 ]](https://assets1.tamsnetwork.com/images/EC042017NF/159236s.jpg "Basic White Medium Envelopes [ 159236 ]")


![Tear & Tape Adhesive [ 154031 ]](https://assets1.tamsnetwork.com/images/EC042017NF/154031s.jpg "Tear & Tape Adhesive [ 154031 ]")

![Take Your Pick [ 144107 ]](https://assets1.tamsnetwork.com/images/EC042017NF/144107s.jpg "Take Your Pick [ 144107 ]")


![Banner Sayings Photopolymer Stamp Set (English) [ 167044 ]](https://assets1.tamsnetwork.com/images/EC042017NF/167044s.jpg "Banner Sayings Photopolymer Stamp Set (English) [ 167044 ]")
![Crumb Cake 8-1/2" X 11" Cardstock [ 120953 ]](https://assets1.tamsnetwork.com/images/EC042017NF/120953s.jpg "Crumb Cake 8-1/2\" X 11\" Cardstock [ 120953 ]")
![Early Espresso 8-1/2" X 11" Cardstock [ 119686 ]](https://assets1.tamsnetwork.com/images/EC042017NF/119686s.jpg "Early Espresso 8-1/2\" X 11\" Cardstock [ 119686 ]")
![Very Vanilla 8 1/2" X 11" Cardstock [ 166784 ]](https://assets1.tamsnetwork.com/images/EC042017NF/166784s.jpg "Very Vanilla 8 1/2\" X 11\" Cardstock [ 166784 ]")
![Brushed With Beauty 12" X 12" (30.5 X 30.5 Cm) Designer Series Paper [ 167082 ]](https://assets1.tamsnetwork.com/images/EC042017NF/167082s.jpg "Brushed With Beauty 12\" X 12\" (30.5 X 30.5 Cm) Designer Series Paper [ 167082 ]")
![Crumb Cake Classic Stampin' Pad [ 147116 ]](https://assets1.tamsnetwork.com/images/EC042017NF/147116s.jpg "Crumb Cake Classic Stampin' Pad [ 147116 ]")
![Early Espresso Classic Stampin' Pad [ 147114 ]](https://assets1.tamsnetwork.com/images/EC042017NF/147114s.jpg "Early Espresso Classic Stampin' Pad [ 147114 ]")
![Mossy Meadow Classic Stampin' Pad [ 147111 ]](https://assets1.tamsnetwork.com/images/EC042017NF/147111s.jpg "Mossy Meadow Classic Stampin' Pad [ 147111 ]")
![Petal Pink Classic Stampin' Pad [ 147108 ]](https://assets1.tamsnetwork.com/images/EC042017NF/147108s.jpg "Petal Pink Classic Stampin' Pad [ 147108 ]")
![Beautiful Pattern 3 D Embossing Folder [ 167097 ]](https://assets1.tamsnetwork.com/images/EC042017NF/167097s.jpg "Beautiful Pattern 3 D Embossing Folder [ 167097 ]")
![Pearls Of Beauty [ 167098 ]](https://assets1.tamsnetwork.com/images/EC042017NF/167098s.jpg "Pearls Of Beauty [ 167098 ]")
![Adhesive Sheets [ 152334 ]](https://assets1.tamsnetwork.com/images/EC042017NF/152334s.jpg "Adhesive Sheets [ 152334 ]")


![Delicate Framing Photopolymer Stamp Set (English) [ 167024 ]](https://assets1.tamsnetwork.com/images/EC042017NF/167024s.jpg "Delicate Framing Photopolymer Stamp Set (English) [ 167024 ]")
![Creative Haven Bundle (English) [ 167209 ]](https://assets1.tamsnetwork.com/images/EC042017NF/167209s.jpg "Creative Haven Bundle (English) [ 167209 ]")
![Creative Haven Photopolymer Stamp Set (English) [ 167202 ]](https://assets1.tamsnetwork.com/images/EC042017NF/167202s.jpg "Creative Haven Photopolymer Stamp Set (English) [ 167202 ]")
![Lost Lagoon 8-1/2" X 11" Cardstock [ 133679 ]](https://assets1.tamsnetwork.com/images/EC042017NF/133679s.jpg "Lost Lagoon 8-1/2\" X 11\" Cardstock [ 133679 ]")
![Petal Pink 8-1/2" X 11" Cardstock [ 146985 ]](https://assets1.tamsnetwork.com/images/EC042017NF/146985s.jpg "Petal Pink 8-1/2\" X 11\" Cardstock [ 146985 ]")
![Secret Sea 8 1/2" X 11" Cardstock [ 165624 ]](https://assets1.tamsnetwork.com/images/EC042017NF/165624s.jpg "Secret Sea 8 1/2\" X 11\" Cardstock [ 165624 ]")
![Hobby Haven 12" X 12" (30.5 X 30.5 Cm) Specialty Designer Series Paper [ 167201 ]](https://assets1.tamsnetwork.com/images/EC042017NF/167201s.jpg "Hobby Haven 12\" X 12\" (30.5 X 30.5 Cm) Specialty Designer Series Paper [ 167201 ]")
![Lost Lagoon Classic Stampin' Pad [ 161678 ]](https://assets1.tamsnetwork.com/images/EC042017NF/161678s.jpg "Lost Lagoon Classic Stampin' Pad [ 161678 ]")
![Small Blending Brushes [ 160518 ]](https://assets1.tamsnetwork.com/images/EC042017NF/160518s.jpg "Small Blending Brushes [ 160518 ]")
![Linen Thread [ 104199 ]](https://assets1.tamsnetwork.com/images/EC042017NF/104199s.jpg "Linen Thread [ 104199 ]")
![Dear Dots [ 165848 ]](https://assets1.tamsnetwork.com/images/EC042017NF/165848s.jpg "Dear Dots [ 165848 ]")
![Creative Haven Dies [ 167208 ]](https://assets1.tamsnetwork.com/images/EC042017NF/167208s.jpg "Creative Haven Dies [ 167208 ]")

![Nested Essentials Dies [ 161597 ]](https://assets1.tamsnetwork.com/images/EC042017NF/161597s.jpg "Nested Essentials Dies [ 161597 ]")
![Spotlight On Nature Dies [ 163580 ]](https://assets1.tamsnetwork.com/images/EC042017NF/163580s.jpg "Spotlight On Nature Dies [ 163580 ]")


![Basic Gray 8-1/2" X 11" Cardstock [ 121044 ]](https://assets1.tamsnetwork.com/images/EC042017NF/121044s.jpg "Basic Gray 8-1/2\" X 11\" Cardstock [ 121044 ]")
![Pool Party 8-1/2" X 11" Cardstock [ 122924 ]](https://assets1.tamsnetwork.com/images/EC042017NF/122924s.jpg "Pool Party 8-1/2\" X 11\" Cardstock [ 122924 ]")
![Basic Gray Classic Stampin' Pad [ 149165 ]](https://assets1.tamsnetwork.com/images/EC042017NF/149165s.jpg "Basic Gray Classic Stampin' Pad [ 149165 ]")
![2 3/8" (6 Cm) Circle Punch [ 161354 ]](https://assets1.tamsnetwork.com/images/EC042017NF/161354s.jpg "2 3/8\" (6 Cm) Circle Punch [ 161354 ]")
![Stylish Shapes Dies [ 159183 ]](https://assets1.tamsnetwork.com/images/EC042017NF/159183s.jpg "Stylish Shapes Dies [ 159183 ]")

![Basic Black 8-1/2" X 11" Cardstock [ 121045 ]](https://assets1.tamsnetwork.com/images/EC042017NF/121045s.jpg "Basic Black 8-1/2\" X 11\" Cardstock [ 121045 ]")
![Pretty In Pink 8 1/2" X 11" Cardstock [ 163793 ]](https://assets1.tamsnetwork.com/images/EC042017NF/163793s.jpg "Pretty In Pink 8 1/2\" X 11\" Cardstock [ 163793 ]")
![Pretty In Pink Classic Stampin Pad [ 163807 ]](https://assets1.tamsnetwork.com/images/EC042017NF/163807s.jpg "Pretty In Pink Classic Stampin Pad [ 163807 ]")
![Tuxedo Black Memento Ink Pad [ 132708 ]](https://assets1.tamsnetwork.com/images/EC042017NF/132708s.jpg "Tuxedo Black Memento Ink Pad [ 132708 ]")
![Versamark Pad [ 102283 ]](https://assets1.tamsnetwork.com/images/EC042017NF/102283s.jpg "Versamark Pad [ 102283 ]")
![Basics Wow! Embossing Powder [ 165679 ]](https://assets1.tamsnetwork.com/images/EC042017NF/165679s.jpg "Basics Wow! Embossing Powder [ 165679 ]")
![Heat Tool (Us And Canada) [ 129053 ]](https://assets1.tamsnetwork.com/images/EC042017NF/129053s.jpg "Heat Tool (Us And Canada) [ 129053 ]")
![Baker's Twine Essentials Pack [ 155475 ]](https://assets1.tamsnetwork.com/images/EC042017NF/155475s.jpg "Baker's Twine Essentials Pack [ 155475 ]")
![2024 2026 In Color™ Flat Pearls [ 165266 ]](https://assets1.tamsnetwork.com/images/EC042017NF/165266s.jpg "2024 2026 In Color™ Flat Pearls [ 165266 ]")


![Delicate Pines Bundle (English) [ 166074 ]](https://assets1.tamsnetwork.com/images/EC042017NF/166074s.jpg "Delicate Pines Bundle (English) [ 166074 ]")
![Delicate Pines Photopolymer Stamp Set (English) [ 166067 ]](https://assets1.tamsnetwork.com/images/EC042017NF/166067s.jpg "Delicate Pines Photopolymer Stamp Set (English) [ 166067 ]")
![Delicate Pines Dies [ 166073 ]](https://assets1.tamsnetwork.com/images/EC042017NF/166073s.jpg "Delicate Pines Dies [ 166073 ]")
![Cherry Cobbler 8-1/2" X 11" Cardstock [ 119685 ]](https://assets1.tamsnetwork.com/images/EC042017NF/119685s.jpg "Cherry Cobbler 8-1/2\" X 11\" Cardstock [ 119685 ]")
![Elegant Pine Snowflakes 12" X 12" (30.5 X 30.5 Cm) Designer Series Paper [ 166066 ]](https://assets1.tamsnetwork.com/images/EC042017NF/166066s.jpg "Elegant Pine Snowflakes 12\" X 12\" (30.5 X 30.5 Cm) Designer Series Paper [ 166066 ]")
![Peaceful Garden 12" X 12" (30.5 X 30.5 Cm) Glimmer Paper [ 165929 ]](https://assets1.tamsnetwork.com/images/EC042017NF/165929s.jpg "Peaceful Garden 12\" X 12\" (30.5 X 30.5 Cm) Glimmer Paper [ 165929 ]")
![Cherry Cobbler Classic Stampin' Pad [ 147083 ]](https://assets1.tamsnetwork.com/images/EC042017NF/147083s.jpg "Cherry Cobbler Classic Stampin' Pad [ 147083 ]")
![Faceted Snowflakes [ 166077 ]](https://assets1.tamsnetwork.com/images/EC042017NF/166077s.jpg "Faceted Snowflakes [ 166077 ]")

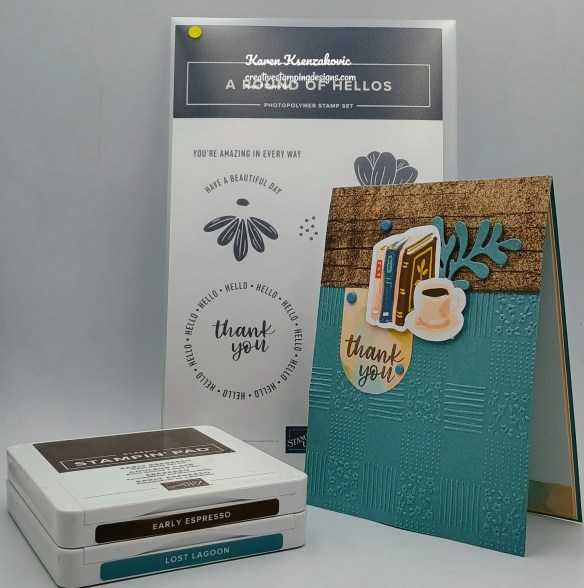
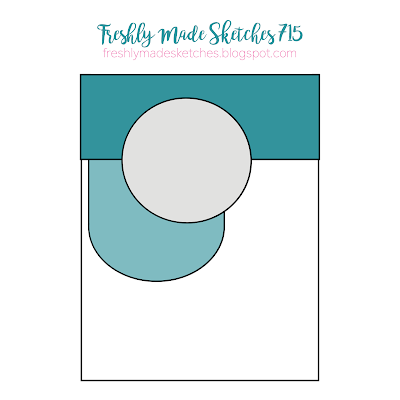


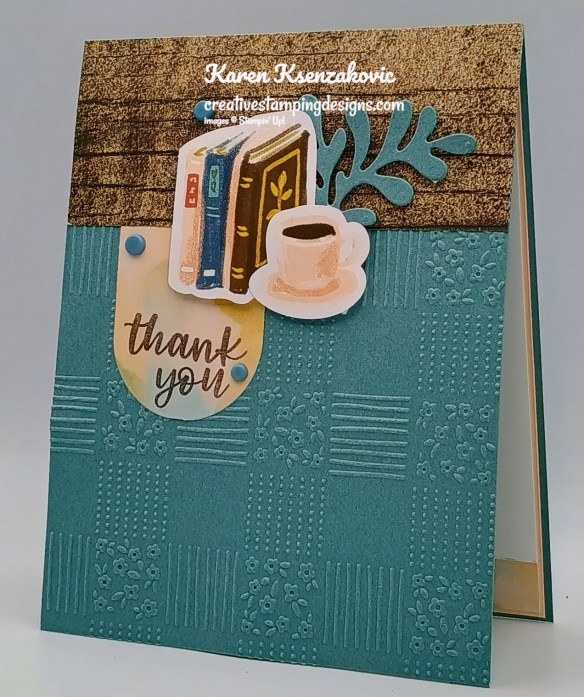
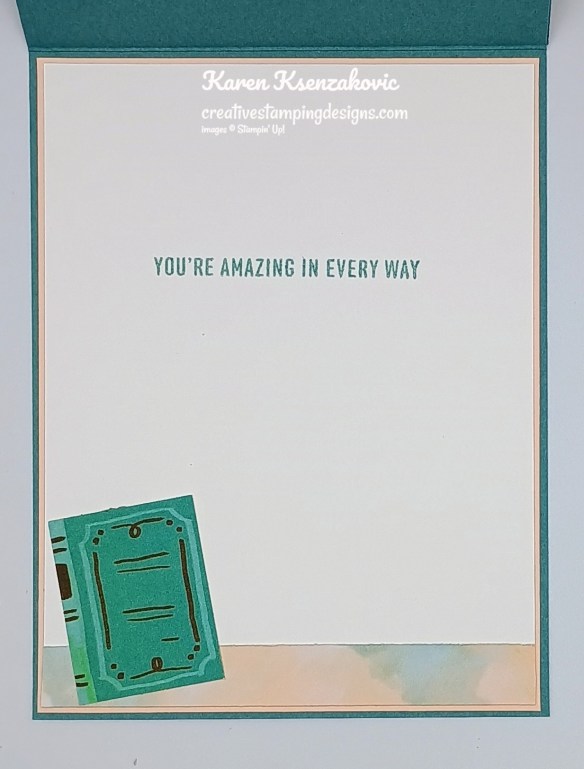
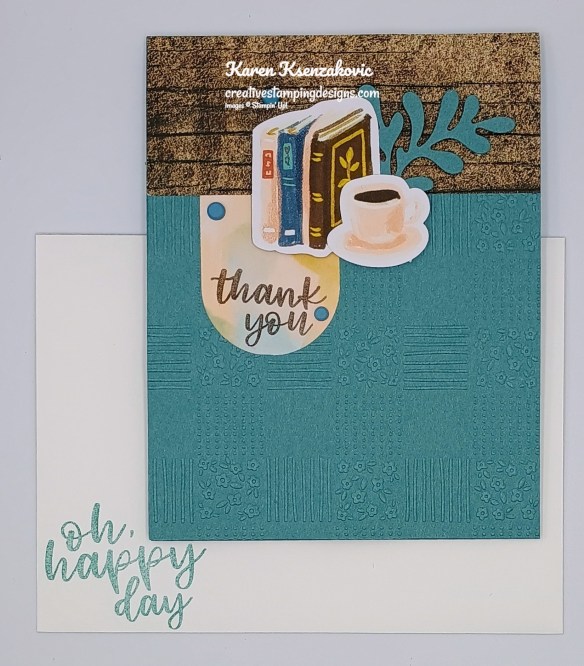
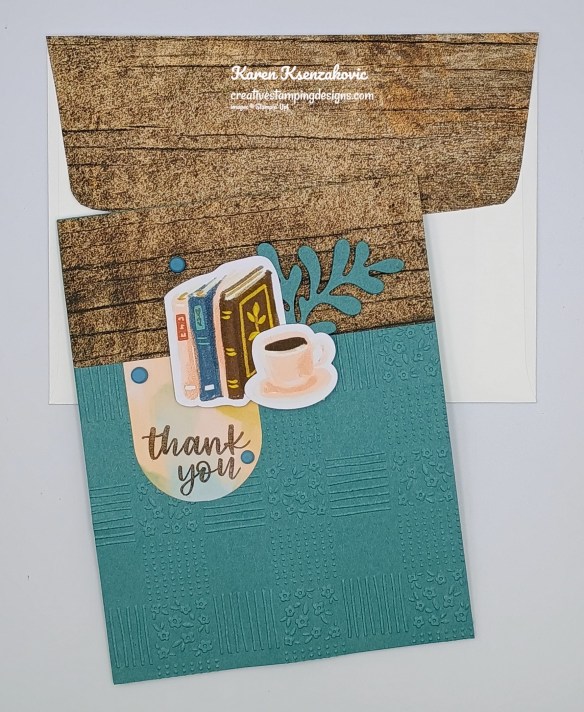
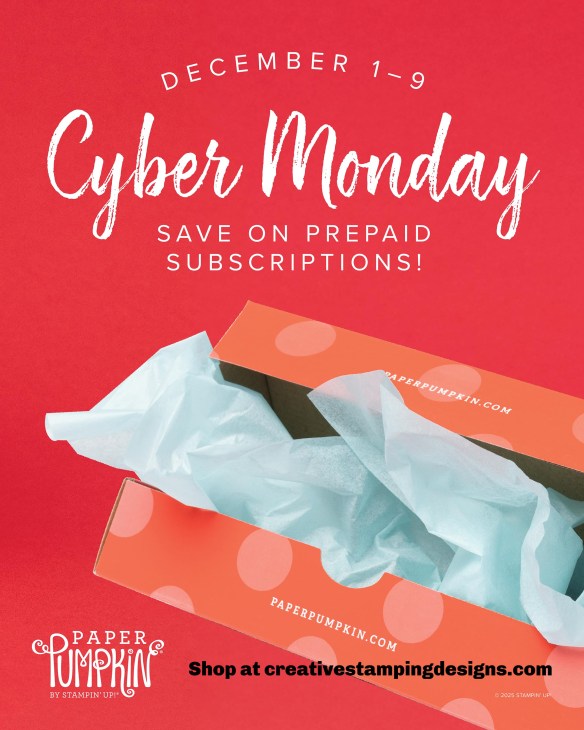
![Country Woods 12" X 12" (30.5 X 30.5 Cm) Designer Series Paper [ 163393 ]](https://assets1.tamsnetwork.com/images/EC042017NF/163393s.jpg "Country Woods 12\" X 12\" (30.5 X 30.5 Cm) Designer Series Paper [ 163393 ]")
![Earthy Matte Dots [ 167213 ]](https://assets1.tamsnetwork.com/images/EC042017NF/167213s.jpg "Earthy Matte Dots [ 167213 ]")

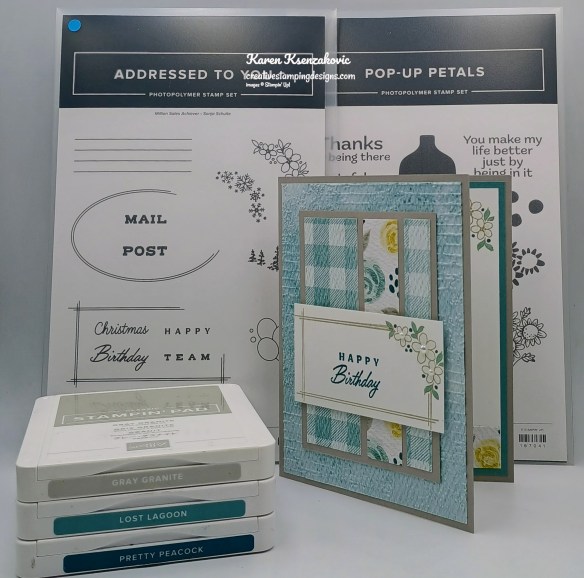
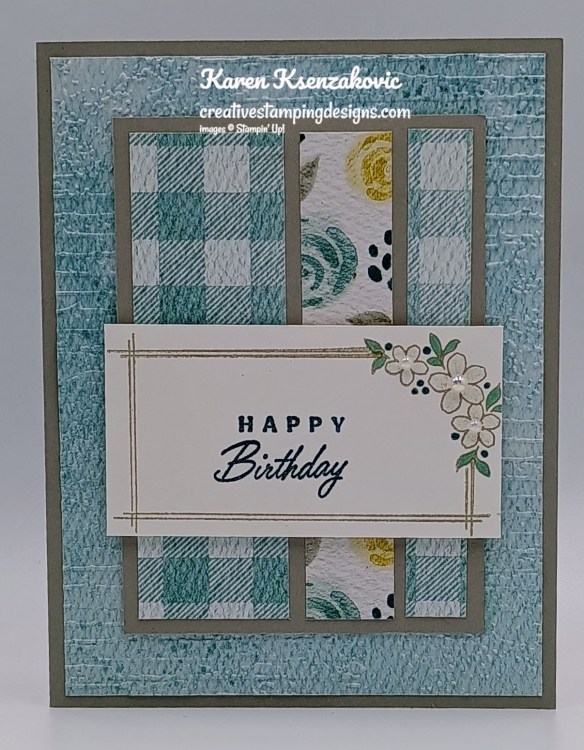
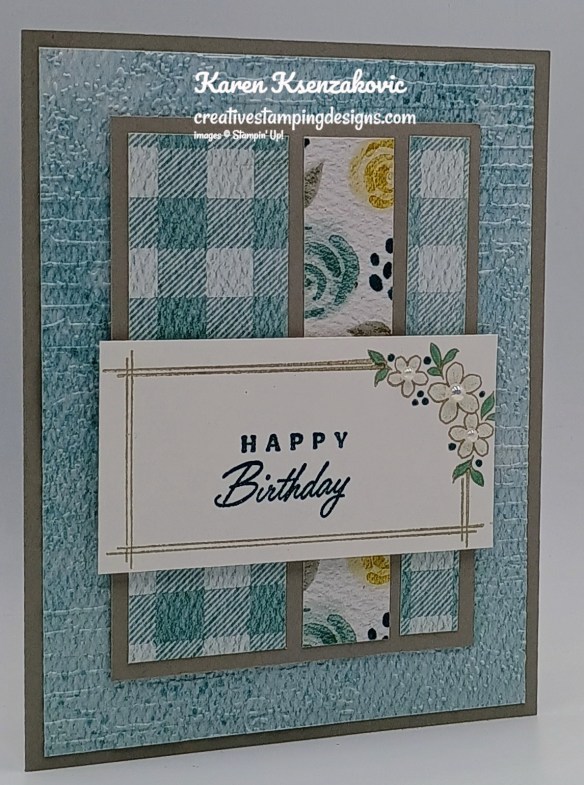
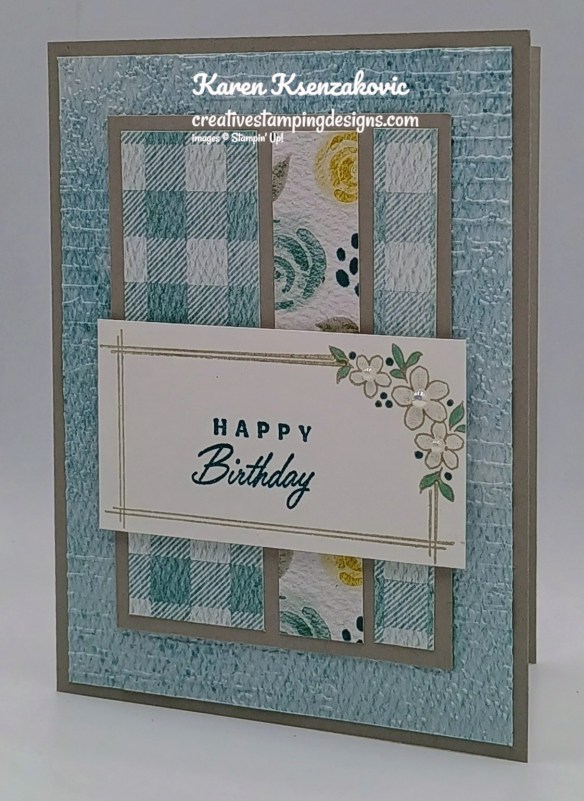
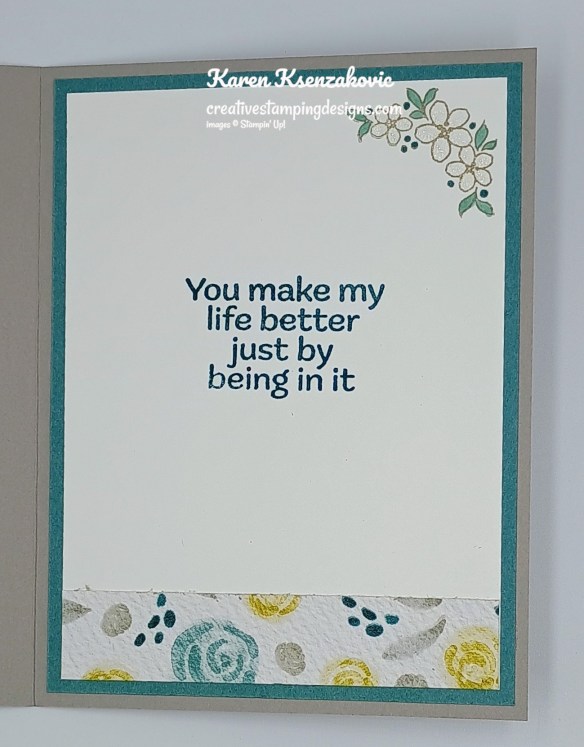
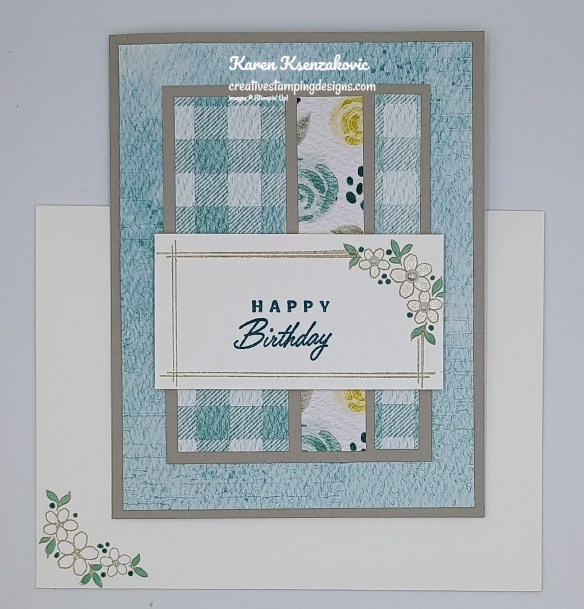
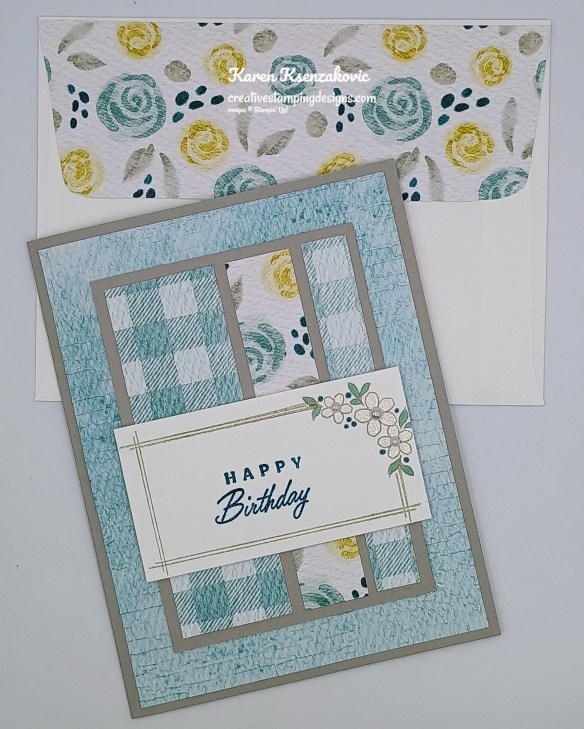
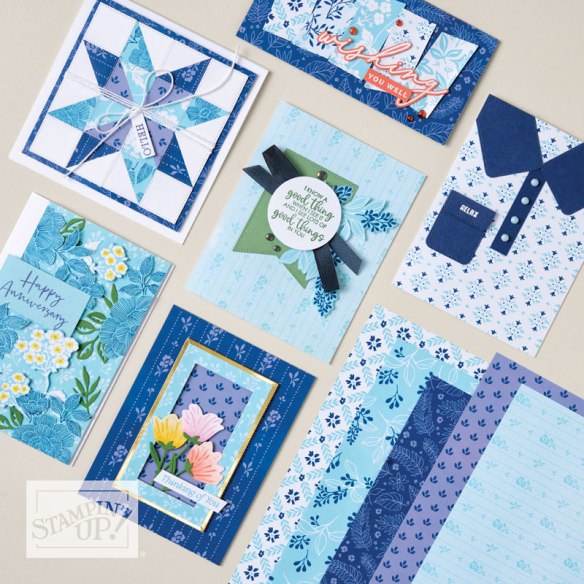

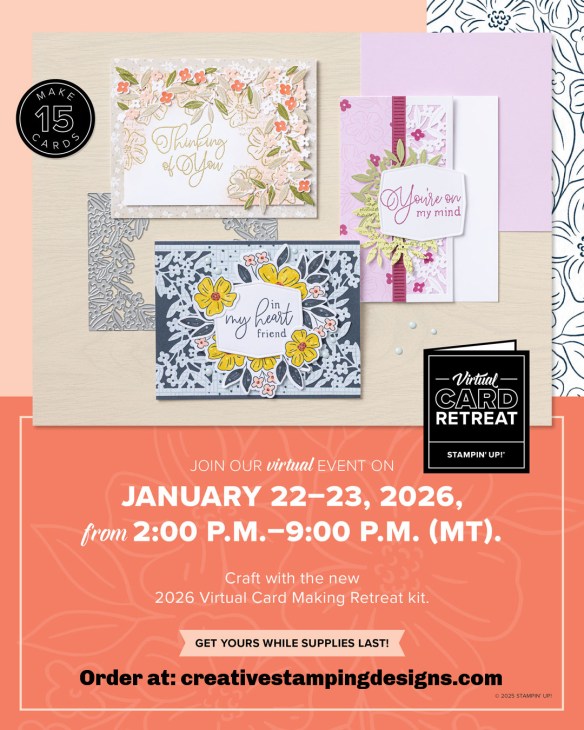
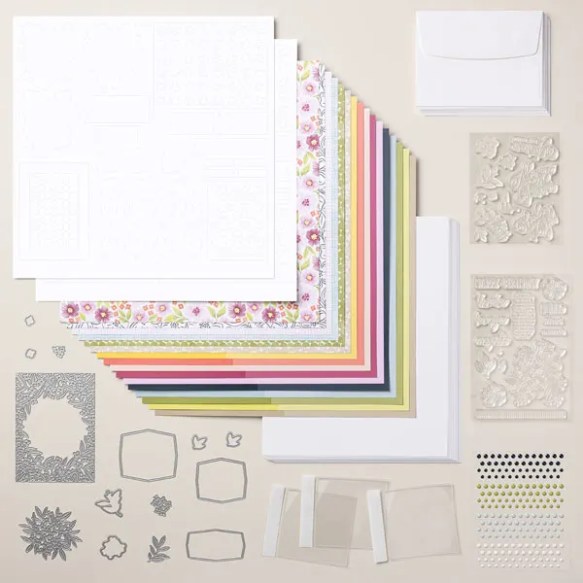
![Pop Up Petals Photopolymer Stamp Set (English) [ 167041 ]](https://assets1.tamsnetwork.com/images/EC042017NF/167041s.jpg "Pop Up Petals Photopolymer Stamp Set (English) [ 167041 ]")
![Gray Granite 8-1/2" X 11" Cardstock [ 146983 ]](https://assets1.tamsnetwork.com/images/EC042017NF/146983s.jpg "Gray Granite 8-1/2\" X 11\" Cardstock [ 146983 ]")
![Everyday Happiness 12" X 12" (30.5 X 30.5 Cm) Designer Series Paper [ 166632 ]](https://assets1.tamsnetwork.com/images/EC042017NF/166632s.jpg "Everyday Happiness 12\" X 12\" (30.5 X 30.5 Cm) Designer Series Paper [ 166632 ]")
![Gray Granite Classic Stampin' Pad [ 147118 ]](https://assets1.tamsnetwork.com/images/EC042017NF/147118s.jpg "Gray Granite Classic Stampin' Pad [ 147118 ]")
![Pretty Peacock Classic Stampin’ Pad [ 150083 ]](https://assets1.tamsnetwork.com/images/EC042017NF/150083s.jpg "Pretty Peacock Classic Stampin’ Pad [ 150083 ]")
![Lost Lagoon Stampin’ Blends Combo Pack [ 161680 ]](https://assets1.tamsnetwork.com/images/EC042017NF/161680s.jpg "Lost Lagoon Stampin’ Blends Combo Pack [ 161680 ]")
![Pretty Peacock Stampin’ Blends Combo Pack [ 161676 ]](https://assets1.tamsnetwork.com/images/EC042017NF/161676s.jpg "Pretty Peacock Stampin’ Blends Combo Pack [ 161676 ]")
![Clear Wink Of Stella Glitter Brush [ 141897 ]](https://assets1.tamsnetwork.com/images/EC042017NF/141897s.jpg "Clear Wink Of Stella Glitter Brush [ 141897 ]")
![Exposed Brick 3 D Embossing Folder [ 161600 ]](https://assets1.tamsnetwork.com/images/EC042017NF/161600s.jpg "Exposed Brick 3 D Embossing Folder [ 161600 ]")
![Iridescent Pearl Basic Jewels [ 158987 ]](https://assets1.tamsnetwork.com/images/EC042017NF/158987s.jpg "Iridescent Pearl Basic Jewels [ 158987 ]")

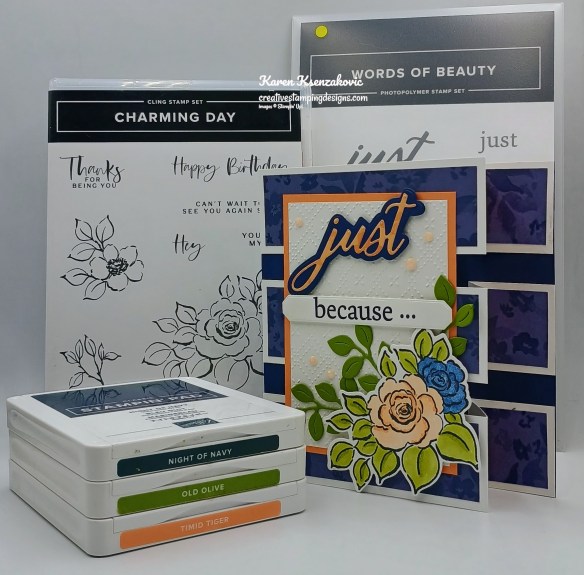
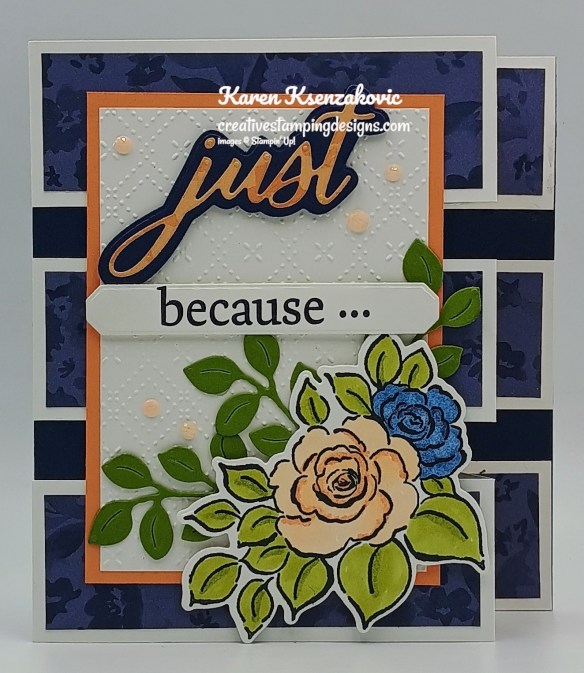
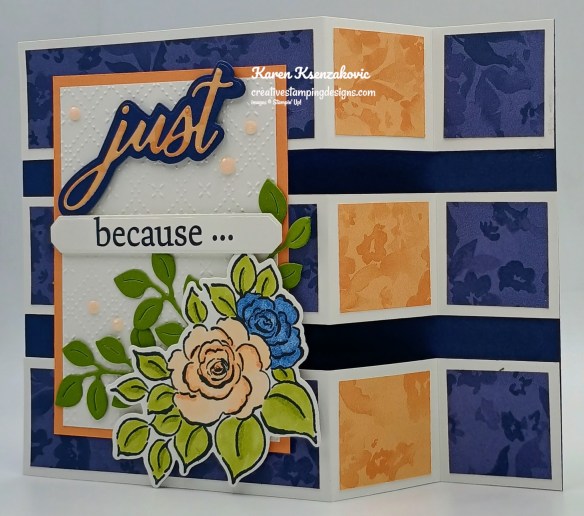
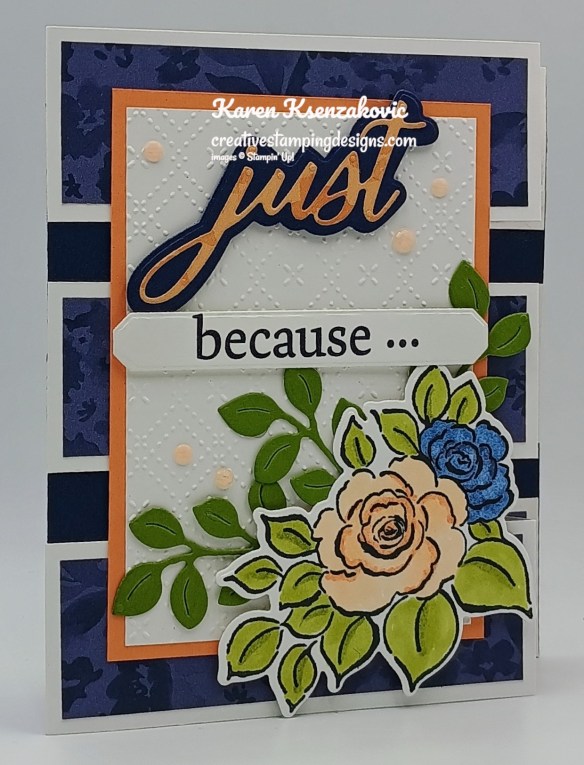
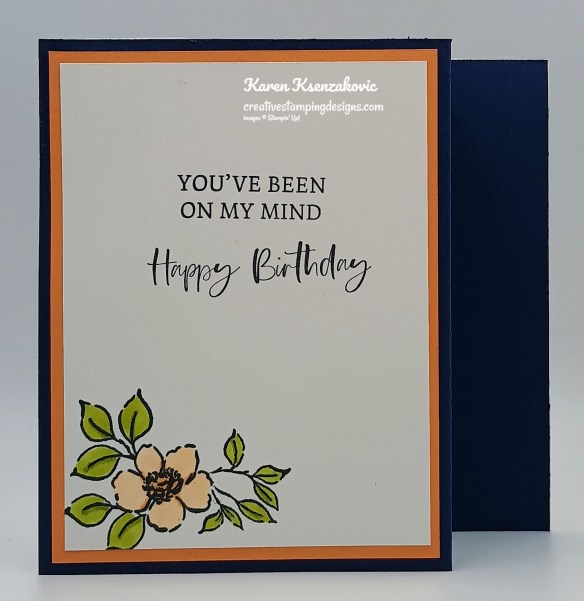
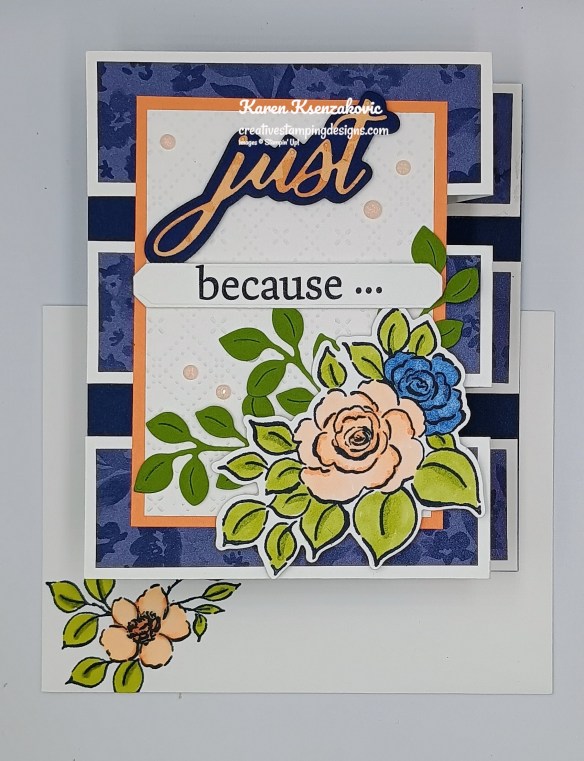
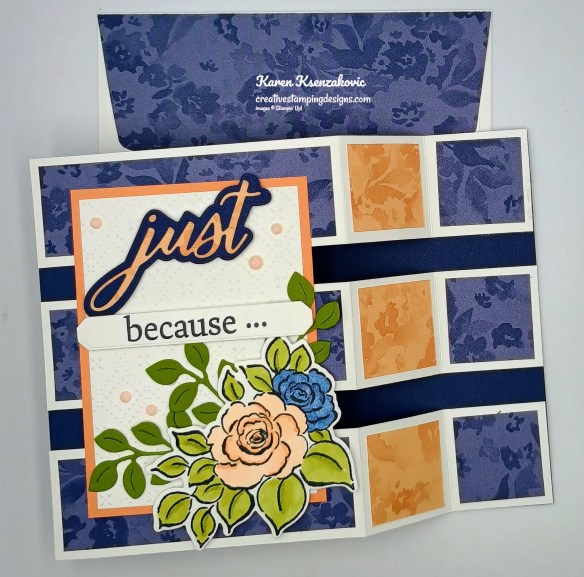


![Charming Day Bundle (English) [ 166136 ]](https://assets1.tamsnetwork.com/images/EC042017NF/166136s.jpg "Charming Day Bundle (English) [ 166136 ]")
![Charming Day Cling Stamp Set (English) [ 166126 ]](https://assets1.tamsnetwork.com/images/EC042017NF/166126s.jpg "Charming Day Cling Stamp Set (English) [ 166126 ]")
![Charming Day Dies [ 166135 ]](https://assets1.tamsnetwork.com/images/EC042017NF/166135s.jpg "Charming Day Dies [ 166135 ]")
![Words Of Beauty Bundle (English) [ 167090 ]](https://assets1.tamsnetwork.com/images/EC042017NF/167090s.jpg "Words Of Beauty Bundle (English) [ 167090 ]")
![Words Of Beauty Photopolymer Stamp Set (English) [ 167083 ]](https://assets1.tamsnetwork.com/images/EC042017NF/167083s.jpg "Words Of Beauty Photopolymer Stamp Set (English) [ 167083 ]")
![Words Of Beauty Dies (English) [ 167089 ]](https://assets1.tamsnetwork.com/images/EC042017NF/167089s.jpg "Words Of Beauty Dies (English) [ 167089 ]")
![Night Of Navy 8-1/2" X 11" Cardstock [ 100867 ]](https://assets1.tamsnetwork.com/images/EC042017NF/100867s.jpg "Night Of Navy 8-1/2\" X 11\" Cardstock [ 100867 ]")
![Old Olive 8-1/2" X 11" Cardstock [ 100702 ]](https://assets1.tamsnetwork.com/images/EC042017NF/100702s.jpg "Old Olive 8-1/2\" X 11\" Cardstock [ 100702 ]")
![Timid Tiger 8 1/2" X 11" Cardstock [ 165626 ]](https://assets1.tamsnetwork.com/images/EC042017NF/165626s.jpg "Timid Tiger 8 1/2\" X 11\" Cardstock [ 165626 ]")
![Floral Charm 12" X 12" (30.5 X 30.5 Cm) Designer Series Paper [ 166125 ]](https://assets1.tamsnetwork.com/images/EC042017NF/166125s.jpg "Floral Charm 12\" X 12\" (30.5 X 30.5 Cm) Designer Series Paper [ 166125 ]")
![Night Of Navy Classic Stampin' Pad [ 147110 ]](https://assets1.tamsnetwork.com/images/EC042017NF/147110s.jpg "Night Of Navy Classic Stampin' Pad [ 147110 ]")
![Night Of Navy Stampin' Blends Combo Pack [ 154891 ]](https://assets1.tamsnetwork.com/images/EC042017NF/154891s.jpg "Night Of Navy Stampin' Blends Combo Pack [ 154891 ]")
![Old Olive Stampin' Blends Combo Pack [ 154892 ]](https://assets1.tamsnetwork.com/images/EC042017NF/154892s.jpg "Old Olive Stampin' Blends Combo Pack [ 154892 ]")
![Petal Pink Stampin' Blends Combo Pack [ 154893 ]](https://assets1.tamsnetwork.com/images/EC042017NF/154893s.jpg "Petal Pink Stampin' Blends Combo Pack [ 154893 ]")
![Timid Tiger Stampin’ Blends Combo Pack [ 165291 ]](https://assets1.tamsnetwork.com/images/EC042017NF/165291s.jpg "Timid Tiger Stampin’ Blends Combo Pack [ 165291 ]")
![Charming Shimmer Faceted Dots [ 166139 ]](https://assets1.tamsnetwork.com/images/EC042017NF/166139s.jpg "Charming Shimmer Faceted Dots [ 166139 ]")

