Good Friday morning stamping friends and welcome to my fun fold Friday. I hope everyone had a wonderful week. Is anyone making plans for the weekend yet?
I played with the new Online Exclusive products for today’s card and made a fun fold with it. Here’s my card for today.
I used the Stampin’ Up! Otterly Amazing Bundle along with the Otterly Adorable Designer Series Paper, Stylish Shapes Dies and So Swirly 3D Embossing Folder for my card today.
Emboss a panel of Otterly Adorable DSP using the So Swirly EF. Adhere the embossed panel to the Lost Lagoon card base using Liquid Glue. Carefully score the DSP, lining up the score line from the card base in the Paper Trimmer and gently folding the layered panel into a valley fold. Adhere the smaller panel of Otterly Adorable DSP to the pop-up panel of Lost Lagoon using Liquid Glue. Carefully score the DSP by lining up the scored cardstock score line in the Paper Trimmer and gently folding the layered panel into a mountain fold. Adhere the bridge panel of Otterly Adorable DSP to the scored Lost Lagoon bridge, using Liquid Glue. Using a Bone Folder, gently curve the bridge from the back of the panel.
On a panel of Basic White, stamp the otter image from the Stampin’ Up! Otterly Amazing Photopolymer Stamp Set in Tuxedo Black Ink. Color the image using Crumb Cake, Granny Apple Green, Lemon Lime Twist and Pecan Pie Stampin’ Blends Markers. Stamp the sentiment from the Otterly Amazing stamp set in Lost Lagoon Ink on the Basic White panel. Cut the otter image out using the Otterly Amazing Dies and the sentiment out using the Stylish Shapes Dies.
Adhere the Layered pop-up panel to the card front using Tear & Tape on the folded ends. Line the score lines up and adhere the panel. Adhere the 2 – 1″ X 1″ panels that are scored @ 1/2″, to the pop-up panel. Adhere these by lining up the folded edges of the squares with the center score line. Adhere the otter image to the other edges of the squares. This will make them pop up. Adhere the bridge to the bottom front of the card base by using Tear & Tape on the folded edges of the bridge, lay both the card base and bridge flat to line them up. Add a few Riverside Irregular Pearls to the card front.
On the 2 Basic white panel, stamp the sentiment from the Otterly Amazing stamp set on one of the panels in Lost Lagoon Ink. Stamp the greenery image from the Otterly Amazing stamp set in Tuxedo Black Ink on the other panel and color the image using Lemon Lime Twist Stampin’ Blends Markers. Stamp the bubble image from the Otterly Amazing stamp set in Lost Lagoon Ink above the greenery. Adhere 2 strips of Otterly Adorable DSP to the bottom of the panels. Adhere the Basic White panels to Pool Party mats then to the back of the Lost Lagoon card base.
Finish the card by decorating a Basic White Medium Envelope. Adhere a strip of Otterly Adorable DSP to the envelope front and a panel to the envelope flap.
Thank you for stopping by my blog today. I hope you like the card and will give it a try. Happy Stamping!!
If you need any stamping supplies, I’d love to be your Demonstrator. Just click HERE to go directly to my online store or drop me an email if you have any questions.
MY CURRENT HOST CODE IS: 4RTJCBH2
Use this host code when placing an order with me. When you order $50 or greater you will receive a free gift from me! If your order is over $150, please do not use this code, but you’ll still get the free gift. The free gift is your choice of any 1 item valued up to $10.00 from the 2024 – 2025 Annual Catalog, September – December 2024 Mini Catalog or from the Online Exclusives! For any orders $50 or more I will also send you my monthly class tutorials. Click HERE or go to my Customer Rewards for more details and to see what this month’s tutorials are.
Please remember to use my current Host Code and make sure that you can see my name on the final checkout page listed as your Demonstrator when you order so that you know that you’re ordering with me, and you’ll get my rewards!
A new line of products for Online Exclusives are coming! You won’t find these items in any catalog. This is a great opportunity to spark creativity, expand a crafting collection, and discover new opportunities—all from the convenience of the online store.
Celebrate Christmas with adorable stockings and gift tags!
Details: • Makes 8 projects: 8 stockings with 8 gift tags • Precut paper pieces • Safety pins and specialty gold foil • Coordinating colors: Flirty Flamingo, Pool Party, Poppy Parade (Classic Stampin’ Spot), Shaded Spruce, Very Vanilla
Subscribe to Paper Pumpkin for a monthly, all-inclusive crafting kit that’s a fun surprise! Each kit includes a photopolymer stamp set, Classic Stampin’ Spot, and step by step instructions to complete exclusive paper craft projects, including cards, tags, and gift packaging. And don’t miss the special add-on that coordinates with the next three months!
Subscribe to the November Paper Pumpkin Kit between 11 October and 10 November by clicking here!
Don’t miss the coordinating Merry Tags & More Dies Add-On!
Add dimension and detail to your cards, scrapbook pages, and gift tags with the Merry Tags & More Dies! With a leaf and tag shape and Merry sentiment, these dies are a great way to expand your crafting experience. They even coordinate with three Paper Pumpkin Kits: Nests of Christmas, Filled with Joy, and Notes from the Heart. Such easy coordination makes these dies a must-have for any paper craft. Paper Pumpkin subscribers can purchase it beginning 11 September. The add-on is available only while supplies last, so it’s best to shop early! Please note that the Stampin’ Cut and Emboss Machine is not included and can be purchased separately.
#165639 $12
Note: Supplies may be limited toward the end of the subscription period.
Basic White Cardstock 4″ X 4″(artwork & sentiment), 2 – 2 1/4″ x 4″(back panels)
Lost Lagoon Cardstock 4 1/4″ x 5 1/2″(card base scored @ 2 3/4″), 1 1/2″ x 6 1/2″(front bridge scored & folded at 1/2″ & 6″), 2 1/2″ X 4″(Pop up scored & folded at 1/2″, 2″ & 3 1/2″), 2 – 1″ x 1″ (pop up mechanism scored @ 1/2″)
Pool Party Cardstock 2 – 2 5/8″ x 4 1/8″(back panel mats)
Otterly Amazing Designer Series Paper 4″ X 5 1/4″ (card front panel), 1 1/4″ X 5 1/4″(bridge), 2 1/4″ X 2 3/4″(pop up panel), 2 – 1/2″ X 2 1/2:(back panel), 2 1/4″ x 6″(envelope)
Good Friday morning stamping friends Happy November and welcome to my Fun Fold Friday. How was everyone’s Halloween? Did you get a lot of trick or treaters? We had an all-time high in years, we had 16 this year. Since my kids have grown, there aren’t many kids that like to come down out block. Are you ready for the weekend? Is anyone starting to make plans yet?
Today’s card I made on YouTube Live on Wednesday. If you were able to join me or watched the replay, thank you. If you’d like to watch my video and stamp along, the measurements are below, just above the supply list, along with the link to my YouTube channel. Here’s my card for today.
I used the Stampin’ Up! Poised Peony Cling Stamp Set along with the Frames & Flowers Specialty Designer Series Paper and Stampin’ Up! Enjoying Little Things Photopolymer Stamp Set for my Triple Z Fold card today.
Start by scoring and folding all the Lost Lagoon card base panels.
Adhere the Frames & Flowers DSP to each of the card base panels using Liquid Glue. Adhere the center 2 3/4″ X 11″ card base panel to the 4 1/4″ X 11″ card base panel using Tear & Tape. Adhere the bottom 1 1/2″ x 11″ card base panel to the top of the other panels using Tear & Tape.
On 1 of the wreaths from the Frames & Flowers DSP, stamp the sentiment from the Poised Peony stamp set in Lost Lagoon Ink. Adhere the wreath to the card front using Stampin’ Dimensionals. Tie a small bow using the Petal Pink 1/4″ Diagonal Trim. Adhere the bow on the wreath using a Glue Dot. Add a Petal Pink Foiled Gem by the sentiment.
On a panel of Basic White, stamp the medium peony image from the Poised Peony stamp set in Early Espresso Ink. Color the image using Lost Lagoon and Petal Pink Stampin’ Blends Markers. Adhere the image to the center section of the center card base panel
On a panel of Basic White, stamp the sentiments from the Enjoying Little Things stamp set in Lost Lagoon Ink. Stamp the medium peony image from the Poised Peony stamp set in Early Espresso Ink on the bottom of the panel. Color the image using Lost Lagoon and Petal Pink Stampin’ Blends Markers. Adhere the Basic White panel to a Petal Pink mat. Adhere the layered panel to the back of the card.
Finish the card by decorating a Basic White Medium Envelope. Stamp the large peony image from the Poised Peony stamp set in Early Espresso Ink on the envelope front. Color the image using Lost Lagoon and Petal Pink Stampin’ Blends Markers. Adhere a panel of Frames & Flowers DSP to the envelope flap.
Thank you for stopping by my blog today. I hope you liked my card and will give it a try. I hope you will CASE this card and please feel free to post it in the comments of my Facebook page under my post. I’d love to see your take it. The list of measurements are below if you’d like to stamp along while watching the video. You can watch my video on my YouTube Channel Here.
If you watch this on my YouTube channel, please remember to subscribe so that you will get notified when a new video goes live. Thank you to those that have subscribed already. Happy Stamping!!
If you need any stamping supplies, I’d love to be your Demonstrator. Just click HERE to go directly to my online store or drop me an email if you have any questions.
MY CURRENT HOST CODE IS: 4RTJCBH2
Use this host code when placing an order with me. When you order $50 or greater you will receive a free gift from me! If your order is over $150, please do not use this code, but you’ll still get the free gift. The free gift is your choice of any 1 item valued up to $10.00 from the 2024 – 2025 Annual Catalog, September-December 2024 Mini Catalog or from the Online Exclusives! For any orders $50 or more I will also send you my monthly class tutorials. Click HERE or go to my Customer Rewards for more details and to see what this month’s tutorials are.
Please remember to use my current Host Code and make sure that you can see my name on the final checkout page listed as your Demonstrator when you order so that you know that you’re ordering with me, and you’ll get my rewards!
A new line of products for Online Exclusives are coming! You won’t find these items in any catalog. This is a great opportunity to spark creativity, expand a crafting collection, and discover new opportunities—all from the convenience of the online store. These products will be available starting in November. Here’s a little sneak peek of some of the items. Click Here for a sneak peek of what’s coming.
Celebrate Christmas with adorable stockings and gift tags!
Details: • Makes 8 projects: 8 stockings with 8 gift tags • Precut paper pieces • Safety pins and specialty gold foil • Coordinating colors: Flirty Flamingo, Pool Party, Poppy Parade (Classic Stampin’ Spot), Shaded Spruce, Very Vanilla
Subscribe to Paper Pumpkin for a monthly, all-inclusive crafting kit that’s a fun surprise! Each kit includes a photopolymer stamp set, Classic Stampin’ Spot, and step by step instructions to complete exclusive paper craft projects, including cards, tags, and gift packaging. And don’t miss the special add-on that coordinates with the next three months!
Subscribe to the November Paper Pumpkin Kit between 11 October and 10 November by clicking here!
Don’t miss the coordinating Merry Tags & More Dies Add-On!
Add dimension and detail to your cards, scrapbook pages, and gift tags with the Merry Tags & More Dies! With a leaf and tag shape and Merry sentiment, these dies are a great way to expand your crafting experience. They even coordinate with three Paper Pumpkin Kits: Nests of Christmas, Filled with Joy, and Notes from the Heart. Such easy coordination makes these dies a must-have for any paper craft. Paper Pumpkin subscribers can purchase it beginning 11 September. The add-on is available only while supplies last, so it’s best to shop early! Please note that the Stampin’ Cut and Emboss Machine is not included and can be purchased separately.
#165639 $12
Note: Supplies may be limited toward the end of the subscription period.
Basic White Cardstock 2 5/8″ X 2 5/8″(inside panel), 4″ x 5 1/4″(back panel)
Lost Lagoon Cardstock 4 1/4″ X 11″(large card base scored & folded at 2 3/4″ & 5 1/2″), 2 3/4″ x 11″(center card base scored & folded at 4 1/4″ & 7″), 1 1/2″ X 11″(bottom card base scored & folded at 5 1/2″ & 8 1/4″)
Frames & Flowers Designer Series Paper 2 – 2 5/8″ x 4 1/8″ & 4 1/8″ X 5 3/8″(large card base panels), 2 5/8″ X 3 7/8″(center card base panel), 1 3/8″ X 5 3/8″ & 2 – 1 3/8″ X 2 5/8″ (bottom card base panels), 2 1/4″ x 6″(envelope flap)
Good Friday morning stamping friends and welcome to my Fun Fold Friday. I hope you are all doing well and had a wonderful week. We stayed until Magic Kingdom closed on Wednesday and had such a great time going on rides, walking around, eating some great food and of course seeing the fabulous firework show. Yesterday we spent the whole day at Epcot. The wine and food festival is going on, so we tried some great food. I was able to get my caramel apple from Germany that’s made with Werther’s Caramels. I’ve waited 4 1/2 years to get another one of these apples. After having one here, I don’t want any others. One of my husband’s co-workers happen to be here in Disney and we met up with him and his wife for a delicious dinner in Canada, at Le Cellier Steakhouse. Today we’re off to Universal Studios. This will be the 1st time we’ve ever gone there, so I can’t wait to see what’s there.
Today’s card is one that we made at our monthly stamping studio last Tuesday for our mystery stamping portion of the meeting. Jaimie sent us all the measurements and talked us through the process of putting the card together. I decided I wanted to use some of the new Online Exclusive products that will be available starting November 5th. If you are interested in getting these products early, let me know, I’d be happy to talk to you about signing up to be a demonstrator and you can add them to your starter kit. Here’s my card for today.
I used the Stampin’ Up! Online Exclusive Otterly Adorable Suite Collection for my card today.
Start with 2 panels of Pretty Peacock card stock cut at 4 1/4″ X 11″ and scored at 5 1/2″. Cut 1 of the panels from the bottom right to the left side of the score line cutting on a diagonal. Cut the other panel from the bottom left to the right side of the score line cutting on a diagonal. Adhere the 2 panels together by adhering the solid card backs together using Liquid Glue.
Adhere 1 of the triangle panels of Otterly Adorable Designer Series Paper to a Basic White triangle mat using Liquid Glue. Adhere the layered panel to the right card front using Liquid Glue. On a panel of Basic White, stamp the sentiment from the Stampin’ Up! Otterly Amazing Cling Stamp Set in Pretty Peacock Ink. Cut the sentiment out using the 1 3/4″ Circle Punch. From panels of Lost Lagoon and Pretty Peacock, cut 3 each of the greenery die from the Otterly Amazing Dies. Punch 2 circles using the 2″ Circle Punch from a panel of Pretty Peacock. Adhere the circle sentiment to the Pretty Peacock circle mat using Stampin’ Seal. Adhere the greenery to the back of the Pretty Peacock circle using Glue Dots. Adhere the 2nd circle to the back of the layered sentiment using Liquid Glue. Adhere the layered circle to the right card front using Stampin’ Dimensionals. Tie a small bow using the Lost Lagoon Soft Cording and adhere it next to the sentiment using a Glue Dot. Add a few Riverside Irregular Pearls to the sentiment.
Adhere another triangle panel of the Otterly Adorable DSP to a triangle Basic White mat using Liquid Glue. Adhere the layered panel to the left side of the card front using Liquid Glue. Using the Otterly Amazing Dies, cut the otter images from a panel of Otterly Adorable DSP. Adhere them to the left side panel using Liquid Glue.
For the inside, stamp the sentiment from the Otterly Amazing stamp set in Pretty Peacock Ink on the bottom of a panel of Otterly Adorable DSP. Adhere the stamped panel of Otterly Adorable DSP to a Basic White mat using Stampin’ Seal. Adhere the layered panel to the inside of the Pretty Peacock card base using Liquid Glue.
For the inside of the right & left sides, adhere 2 triangle panels of Otterly Adorable DSP to Basic White mats using Liquid Glue. Adhere the layered panels to the inside of the right & left sides using Liquid Glue.
Finish the card by decorating a Basic White Medium Envelope. Stamp the otter image from the Otterly Amazing stamp set in Early Espresso Ink on the envelope front. Color the image using Crumb Cake and Pecan Pie Stampin’ Blends Markers. Adhere a panel of Otterly Adorable DSP to the envelope flap.
Thank you for stopping by my blog today. I hope you like the card and will give it a try. Happy Stamping!!
If you need any stamping supplies, I’d love to be your Demonstrator. Just click HERE to go directly to my online store or drop me an email if you have any questions.
MY CURRENT HOST CODE IS: EMDXSBC9
Use this host code when placing an order with me. When you order $50 or greater you will receive a free gift from me! If your order is over $150, please do not use this code, but you’ll still get the free gift. The free gift is your choice of any 1 item valued up to $10.00 from the 2024-2025Annual Catalog, or from the Online Exclusives! Unfortunately, packs of cardstock are no longer an option for a free gift. Shipping has become too expensive to ship and it’s costing me as much to ship as the cardstock costs. For any orders $50 or more I will also send you my monthly class tutorials. Click HERE or go to my Customer Rewards for more details and to see what this month’s tutorials are.
Please remember to use my current Host Code and make sure that you can see my name on the final checkout page listed as your Demonstrator when you order so that you know that you’re ordering with me, and you’ll get my rewards!
It’s time to shop ‘til you drop! Starting October 16 at 12:00 a.m. (MT), you can purchase all* CTMH products for 30% off. That’s right—30%! And don’t wait too long—products are available only while supplies last.
*This sale does not include the September Scrapbooking Brochure and any future scrapbooking brochures. It also excludes any Stampin’ Up! scrapbooking products outside of the CTMH product category in the online store.
Starter Kit Special – Get an extra $30 Your Starter Kit October 1 – 31
Hey, friend! Stampin’ Up! has a fantastic offer for anyone who becomes a demonstrator! Join my team between October 1–31and you can choose $155 worth of product in your Starter Kit for only $99! Starter Kits normally include $125 worth of product for $99, so that’s an extra $30 worth of product at no additional cost. This offering also includes free shipping and free business supplies! That’s MORE product for EVEN MORE fun!Click Here for all the details.
Interested but you are not really sure about wanting to commit? Contact me and we can talk, and you can ask me any questions at creativestampingdesigns@gmail.com.
Read more information about becoming a demonstrator Here.
A new line of products for Online Exclusives are coming! You won’t find these items in any catalog. This is a great opportunity to spark creativity, expand a crafting collection, and discover new opportunities—all from the convenience of the online store. These products will be available starting in November, BUTyou can add these new items to your Starter Kit if you join in October. Here’s a little sneak peek of some of the items that you can add to your Starter kit and get them before customers and start to play. Click Here for a sneak peek of what’s coming.
From October 1-31 All Kits from the Kits Collection will be on sale for up to 30% off
Save up to 30% off on all your favorite kits October 1–31! Our kits come with everything you need to create a unique paper craft. We have crafting options for card kits, treat packaging, home decor, and so much more! Kits are only available while supplies last.
Here are the details for the sale:
Promotion Period: October 1-31!
ALL kits from the kits collection qualify for the discount.
There is no limit on how many kits you can order, as long as product is available.
Orders must be opened and placed during the promotion dates. Orders opened before October 1 will not qualify for the sale.
Kits on sale will NOT qualify for the Stampin’ Rewards 50% off.
Kits can be added to a Starter Kit at their discounted rate.
Celebrate Christmas with adorable stockings and gift tags!
Details: • Makes 8 projects: 8 stockings with 8 gift tags • Precut paper pieces • Safety pins and specialty gold foil • Coordinating colors: Flirty Flamingo, Pool Party, Poppy Parade (Classic Stampin’ Spot), Shaded Spruce, Very Vanilla
Subscribe to Paper Pumpkin for a monthly, all-inclusive crafting kit that’s a fun surprise! Each kit includes a photopolymer stamp set, Classic Stampin’ Spot, and step by step instructions to complete exclusive paper craft projects, including cards, tags, and gift packaging. And don’t miss the special add-on that coordinates with the next three months!
Subscribe to the November Paper Pumpkin Kit between 11 October and 10 November by clicking here!
Don’t miss the coordinating Merry Tags & More Dies Add-On!
Add dimension and detail to your cards, scrapbook pages, and gift tags with the Merry Tags & More Dies! With a leaf and tag shape and Merry sentiment, these dies are a great way to expand your crafting experience. They even coordinate with three Paper Pumpkin Kits: Nests of Christmas, Filled with Joy, and Notes from the Heart. Such easy coordination makes these dies a must-have for any paper craft. Paper Pumpkin subscribers can purchase it beginning 11 September. The add-on is available only while supplies last, so it’s best to shop early! Please note that the Stampin’ Cut and Emboss Machine is not included and can be purchased separately.
#165639 $12
Note: Supplies may be limited toward the end of the subscription period.
Basic White Cardstock 2 – 4″ X 5 1/4″ (cut on a diagonal for dsp mats), 4″ X 5 1/4″(inner liner mat), 2 1/4″ X 2 1/4″(sentiment)
Lost Lagoon Cardstock 1 1/4″ X 3″(greenery)
Pretty Peacock Cardstock 2 – 4 1/4″ X 11″(card base scored & folded at 5 1/2″), 4″ X 5 1/4″(2 – circles & greenery)
Otterly Adorable Designer Series Paper 2 – 3 7/8″ X 5 1/8″(card front & inside panels cut on a diagonal), 3 7/8″ X 5 1/8″(inner liner panel), 2 1/4″x 6″(envelope flap)
Good Friday morning stamping friends and welcome to my Fun Fold Friday. Are you ready for the weekend? Is anyone starting to make plans yet?
Today’s card I made on YouTube Live on Wednesday. If you were able to join me or watched the replay, thank you. If you’d like to watch my video and stamp along, the measurements are below, just above the supply list, along with the link to my YouTube channel. Here’s my card for today.
I used the Stampin’ Up! Winterly Tree Tops Cling Stamp Set along with the Deckled Rectangle Dies, Nests of Winter Designer Series Paper and the Stampin’ Up! Unbounded Love Photopolymer Stamp Set for my card today.
Adhere the panels of Nests of Winter DSP to coordinating Night of Navy mats using Stampin’ Seal. Adhere the 2 larger layered panels to the large Gray Granite card base using Liquid Glue. Adhere the smaller layered panels to the smaller Gray Granite card base using Liquid Glue keeping them in the order of the pattern if there is a pattern. Adhere the small card base to the larger card base using Stampin’ Seal +. To adhere the small card base, line up the first score line with the edge of the front of the large card base. Close the card and flip it over. Open the card back and add Stampin’ Seal + to the back of the small card base, close the large card base pressing it flat.
Stamp the sentiment from the Winterly Tree Tops stamp set in Night of Navy Ink on a panel of Basic White. Cut the sentiment out using the smallest Deckled Rectangle Dies. Tie a double bow using the Natural Tones Linen Thread and adhere it to the card front using a Glue Dot. Adhere the sentiment over the bow using Stampin’ Dimensionals. Add A few Night of Navy Opal Rounds Assortment to the card front.
Stamp the sentiments from the Unbounded Love stamp set in Night of Navy Ink on the 2 panels of Basic White. Adhere strips of to the bottom of the panels. Adhered the basic White panels to Night of Navy mats then to the inside of the small gray granite card base.
Finish the card by decorating a Basic White Medium Envelope. Stamp the pussy willow image from the Winterly Tree Tops stamp set on the envelope front in Gray Granite Ink. Adhere a panel of to the envelope flap.
Thank you for stopping by my blog today. I hope you liked my card and will give it a try. I hope you will CASE this card and please feel free to post it in the comments of my Facebook page under my post. I’d love to see your take it. The list of measurements are below if you’d like to stamp along while watching the video. You can watch my video on my YouTube Channel Here.
If you watch this on my YouTube channel, please remember to subscribe so that you will get notified when a new video goes live. Thank you to those that have subscribed already. Happy Stamping!!
If you need any stamping supplies, I’d love to be your Demonstrator. Just click HERE to go directly to my online store or drop me an email if you have any questions.
MY CURRENT HOST CODE IS: EMDXSBC9
Use this host code when placing an order with me. When you order $50 or greater you will receive a free gift from me! If your order is over $150, please do not use this code, but you’ll still get the free gift. The free gift is your choice of any 1 item valued up to $10.00 from the 2024-2025Annual Catalog, or from the Online Exclusives! Unfortunately, packs of cardstock are no longer an option for a free gift. Shipping has become too expensive to ship and it’s costing me as much to ship as the cardstock costs. For any orders $50 or more I will also send you my monthly class tutorials. Click HERE or go to my Customer Rewards for more details and to see what this month’s tutorials are.
Please remember to use my current Host Code and make sure that you can see my name on the final checkout page listed as your Demonstrator when you order so that you know that you’re ordering with me, and you’ll get my rewards!
Starter Kit Special – Get an extra $30 Your Starter Kit October 1 – 31
Hey, friend! Stampin’ Up! has a fantastic offer for anyone who becomes a demonstrator! Join my team between October 1–31and you can choose $155 worth of product in your Starter Kit for only $99! Starter Kits normally include $125 worth of product for $99, so that’s an extra $30 worth of product at no additional cost. This offering also includes free shipping and free business supplies! That’s MORE product for EVEN MORE fun!Click Here for all the details.
Interested but you are not really sure about wanting to commit? Contact me and we can talk, and you can ask me any questions at creativestampingdesigns@gmail.com.
Read more information about becoming a demonstrator Here.
A new line of products for Online Exclusives are coming! You won’t find these items in any catalog. This is a great opportunity to spark creativity, expand a crafting collection, and discover new opportunities—all from the convenience of the online store. These products will be available starting in November, BUTyou can add these new items to your Starter Kit if you join in October. Here’s a little sneak peek of some of the items that you can add to your Starter kit and get them before customers and start to play. Click Here for a sneak peek of what’s coming.
From October 1-31 All Kits from the Kits Collection will be on sale for up to 30% off
Save up to 30% off on all your favorite kits October 1–31! Our kits come with everything you need to create a unique paper craft. We have crafting options for card kits, treat packaging, home decor, and so much more! Kits are only available while supplies last.
Here are the details for the sale:
Promotion Period: October 1-31!
ALL kits from the kits collection qualify for the discount.
There is no limit on how many kits you can order, as long as product is available.
Orders must be opened and placed during the promotion dates. Orders opened before October 1 will not qualify for the sale.
Kits on sale will NOT qualify for the Stampin’ Rewards 50% off.
Kits can be added to a Starter Kit at their discounted rate.
Stampin’ Up! World Card Making Day Event – Last Day for Registration
It’s time to celebrate one of my favorite days of the year—World Card Making Day! Join Stampin’ Up! on October 5 as they celebrate this day with a creative virtual event. They’ll create five simple cards and show you some additional fun projects! Crafters of all skill levels are invited and welcome to join. And the event and registration are FREE! Mark your calendars now and join the event on October 5!
World Card Making Day Event Details:
Who: Everyone is invited!
When: October 5, 2024, from 2:00 to 3:00 p.m. (MT)
Where: Online
Price of Event: Free
Registration Dates: September 3–October 4, 2024, at 2:00 p.m. (MT)
You must register for this event in order to receive a link to view it. Also, those who register will receive a gift after the event ends. Register so that you don’t miss out on the event link and a special registration gift!
Language of Event: Most of the event will be presented in English with language interpretation voiceover and subtitles available in English, French, German, and Dutch.
Video on Demand: We will record our stream of this event. Anyone who has the event link will be able to watch the recorded event starting October 8.
Hashtag: You post about the World Card Making Day event on social media using #SUWorldCardMakingDay2024. If you post with the hashtag, you’ll see your post appear on the event webpage as you watch the event!
New Paper Pumpkin Subscribers – Receive 40% off Your 1st Kit
Santa Claus is comin’ to town a bit early this year—and he’s brought a holiday Paper Pumpkin sale! Starting September 11, 2024, at 12:01 a.m. (MT) until October 10, 2024, at 11:50 p.m. (MT), anyone who signs up for our monthly Paper Pumpkin subscription as a new subscriber will receive 40% off their first kit. That’s right, 40% OFF!
Where This Discount Is Applied This discount will be applied to one kit in the first kit shipment of the Paper Pumpkin subscription, which means new subscribers will get 40% off the October Nests of Christmas Paper Pumpkin Kit. After that, each month’s kit will return to the regular price of $25.00.
Qualifying for This Discount This offer is only for new month-to-month subscribers and is not valid on purchased or redeemed prepaid subscriptions. So if you have previously used an email address for a Paper Pumpkin subscription, you won’t qualify as a new subscriber to receive this discount. Also, anyone who signs up as a new subscriber to Paper Pumpkin but cancels by October 10 will not receive any kits or discounts.
Nests of Christmas
Subscribe September 11 – October 10
Spread Christmas cheer with this cozy, all-inclusive crafting kit! Coordinates with the Nests of Winter Suite Collection (item 164072)!
About the Kit: • Makes 10 cards: 5 each of 2 designs with 10 coordinating envelopes • Tri-fold card bases and precut grosgrain ribbon • Precut labels with specialty green foil • Coordinating colors: Basic Black, Coastal Cabana, Granny Apple Green, Night of Navy, Real Red, Shaded Spruce (Classic Stampin’ Spot)
Subscribe to Paper Pumpkin for a monthly, all-inclusive crafting kit that’s a fun surprise! Each kit includes a photopolymer stamp set, Classic Stampin’ Spot, and step by step instructions to complete exclusive paper craft projects, including cards, tags, and gift packaging. And don’t miss the special add-on that coordinates with the next three months!
Don’t miss the coordinating Merry Tags & More Dies Add-On!
Add dimension and detail to your cards, scrapbook pages, and gift tags with the Merry Tags & More Dies! With a leaf and tag shape and Merry sentiment, these dies are a great way to expand your crafting experience. They even coordinate with three Paper Pumpkin Kits: Nests of Christmas, Filled with Joy, and Notes from the Heart. Such easy coordination makes these dies a must-have for any paper craft. Paper Pumpkin subscribers can purchase it beginning 11 September. The add-on is available only while supplies last, so it’s best to shop early! Please note that the Stampin’ Cut and Emboss Machine is not included and can be purchased separately.
#165639 $12
Subscribe to the September Paper Pumpkin Kit between 11 September and 10 October by clicking here!
Note: Supplies may be limited toward the end of the subscription period.
Basic White Cardstock 1 1/2″ x 3″(sentiment), 2 – 2 1/4″ X 3 1/4″(inner liners)
Gray Granite Cardstock 5 1/2″ X 6 1/2″ (card base scored & folded at 4 1/4″), 3 1/2″ X 10 1/2″(small card base scored & folded at 2″, 3″, 5 1/2″ & 8″)
Night of Navy Cardstock 2 1/8″ X 5 3/8″ & 4 1/8″ X 5 3/8″(larger dsp mats), 1 7/8″ X 3 3/8″, 7/8″ X 3 3/8″, 4 – 2 3/8″ X 3 3/8″(dsp & inner liner mats)
Nests of Winter Designer Series Paper 2″ X 5 1/4″ & 4″ X 5 1/4″(large card base panels), 1 3/4″ X 3 1/4″, 3/4″ X 3 1/4″, 2 – 2 1/4″ X 3 1/4″(small card base panels), 2 1/4″ X 6″(envelope)
Good Thursday morning stamping friends and welcome to our Happy Inkin’ Thursday Blog Hop. If you are starting with me, thank you, I hope you will stop by everyone’s blog to see what they have created this week. If you are hopping over from Akiko’s blog, thank you for stopping by. This week we have Theme Challenge. If you’d like to see a quick video of how I made this card, Click Here to go to my Instagram Reels. Here is my card using this week’s theme.
I used the Stampin’ Up! Online Exclusives Sophisticated Sled Bundle and Iconic Celebrations 6 X 6 Designer Series Paper along with the Stampin’ Up! Christmas Labels Dies and Timber 3D Embossing Folder for my card today.
This is our theme for this week
Cut the Basic Beige card base at 7/8″ on both sides of the front from the score line down. Adhere 2 of the strips of Iconic Celebrations DSP to the Cherry Cobbler mats using Stampin’ Seal. Adhere the layered panels to the cut sides of the card front using Liquid Glue. Emboss the Basic Beige card front panel using the Timber EF. Adhere the embossed panel to a Cherry Cobbler mat using Liquid Glue. Adhere the layered panel to the center of the card front using Liquid Glue.
Adhere the Cherry Cobbler bridge panel to the Basic Beige bridge panel using Stampin’ Seal. Adhere the bridge only to the side panels of the card front using Tear & Tape. On a panel of Basic Beige, stamp the sentiment from the Stampin’ Up! Sophisticated Sled Photopolymer Stamp Set in Cherry Cobbler Ink. Cut the sentiment out using the Christmas Labels Dies. Adhere the sentiment to the bridge using Stampin’ Dimensionals.
On a panel of Basic Beige stamp the skate’s and bird images from the Sophisticated Sled stamp set in Tuxedo Black Ink. Color the images using Cherry Cobbler and Smoky Slate Stampin’ Blends Markers. Cut the skates and bird using the Sophisticated Sled Dies. Cut 2 boughs from panels of Mossy Meadow and Old Olive using the Sophisticated Sled Dies. Adhere the boughs to the top of the embossed panel using Liquid Glue. Adhere the bird using a Glue Dot and the skates using Stampin’ Dimensionals. Add a few Cherry Cobbler and Pearl Adhesive-Backed Berries to the panel.
On the panel of Basic Beige, stamp the sentiment from Sophisticated Sled stamp set in Cherry Cobbler Ink. Stamp the bird image from the Sophisticated Sled stamp set in Tuxedo Black Ink above the sentiment. Color the bird using Cherry Cobbler Stampin’ Blends Markers. Adhere 2 strips of Iconic Celebrations DSP to either side of a panel of Cherry Cobbler. Adhere the Basic Beige panel to the center of the panel. Adhere the layered panel to the inside of the Basic Beige card base.
Complete the card by decorating a Basic White Medium Envelope. Stamp the skate’s image from the Sophisticated Sled stamp set in Tuxedo Black Ink on the envelope front. Adhere a panel of Iconic Celebrations DSP to the envelope flap.
Thank you for stopping by my blog today. Now that you’ve seen my card, let’s get on with the hop! Click the button below to hop over to see what Tara has created today. Happy Hopping!!
Just in case you get lost along the way, here is a list of the team members involved in the hop today.
If you need any stamping supplies, I’d love to be your Demonstrator. Just click HERE to go directly to my online store or drop me an email if you have any questions.
MY CURRENT HOST CODE IS: EMDXSBC9
Use this host code when placing an order with me. When you order $50 or greater you will receive a free gift from me! If your order is over $150, please do not use this code, but you’ll still get the free gift. The free gift is your choice of any 1 item valued up to $10.00 from the 2024-2025Annual Catalog, or from the Online Exclusives! Unfortunately, packs of cardstock are no longer an option for a free gift. Shipping has become too expensive to ship and it’s costing me as much to ship as the cardstock costs. For any orders $50 or more I will also send you my monthly class tutorials. Click HERE or go to my Customer Rewards for more details and to see what this month’s tutorials are.
Please remember to use my current Host Code and make sure that you can see my name on the final checkout page listed as your Demonstrator when you order so that you know that you’re ordering with me, and you’ll get my rewards!
Stampin’ Up! World Card Making Day Event – Free Registration Open Until October 4
It’s time to celebrate one of my favorite days of the year—World Card Making Day! Join Stampin’ Up! on October 5 as they celebrate this day with a creative virtual event. They’ll create five simple cards and show you some additional fun projects! Crafters of all skill levels are invited and welcome to join. And the event and registration are FREE! Mark your calendars now and join the event on October 5!
World Card Making Day Event Details:
Who: Everyone is invited!
When: October 5, 2024, from 2:00 to 3:00 p.m. (MT)
Where: Online
Price of Event: Free
Registration Dates: September 3–October 4, 2024, at 2:00 p.m. (MT)
You must register for this event in order to receive a link to view it. Also, those who register will receive a gift after the event ends. Register so that you don’t miss out on the event link and a special registration gift!
Language of Event: Most of the event will be presented in English with language interpretation voiceover and subtitles available in English, French, German, and Dutch.
Video on Demand: We will record our stream of this event. Anyone who has the event link will be able to watch the recorded event starting October 8.
Hashtag: You post about the World Card Making Day event on social media using #SUWorldCardMakingDay2024. If you post with the hashtag, you’ll see your post appear on the event webpage as you watch the event!
Registration for this event begins on Tuesday, September 3 so look for the link to register beginning then!!
Starter Kit Special – Get an extra $30 Your Starter Kit October 1 – 31
Hey, friend! Stampin’ Up! has a fantastic offer for anyone who becomes a demonstrator! Join my team between October 1–31and you can choose $155 worth of product in your Starter Kit for only $99! Starter Kits normally include $125 worth of product for $99, so that’s an extra $30 worth of product at no additional cost. This offering also includes free shipping and free business supplies! That’s MORE product for EVEN MORE fun! For all the details, Click Here.
Interested but you are not really sure about wanting to commit? Contact me and we can talk, and you can ask me any questions at creativestampingdesigns@gmail.com.
Read more information about becoming a demonstrator Here.
From October 1-31 All Kits from the Kits Collection will be on sale for up to 30% off
Save up to 30% off on all your favorite kits October 1–31! Our kits come with everything you need to create a unique paper craft. We have crafting options for card kits, treat packaging, home decor, and so much more! Kits are only available while supplies last.
Here are the details for the sale:
Promotion Period: October 1-31!
ALL kits from the kits collection qualify for the discount.
There is no limit on how many kits you can order, as long as product is available.
Orders must be opened and placed during the promotion dates. Orders opened before October 1 will not qualify for the sale.
Kits on sale will NOT qualify for the Stampin’ Rewards 50% off.
Kits can be added to a Starter Kit at their discounted rate.
New Paper Pumpkin Subscribers – Receive 40% off Your 1st Kit
Santa Claus is comin’ to town a bit early this year—and he’s brought a holiday Paper Pumpkin sale! Starting September 11, 2024, at 12:01 a.m. (MT) until October 10, 2024, at 11:50 p.m. (MT), anyone who signs up for our monthly Paper Pumpkin subscription as a new subscriber will receive 40% off their first kit. That’s right, 40% OFF!
Where This Discount Is Applied This discount will be applied to one kit in the first kit shipment of the Paper Pumpkin subscription, which means new subscribers will get 40% off the October Nests of Christmas Paper Pumpkin Kit. After that, each month’s kit will return to the regular price of $25.00.
Qualifying for This Discount This offer is only for new month-to-month subscribers and is not valid on purchased or redeemed prepaid subscriptions. So if you have previously used an email address for a Paper Pumpkin subscription, you won’t qualify as a new subscriber to receive this discount. Also, anyone who signs up as a new subscriber to Paper Pumpkin but cancels by October 10 will not receive any kits or discounts.
Nests of Christmas
Subscribe September 11 – October 10
Spread Christmas cheer with this cozy, all-inclusive crafting kit! Coordinates with the Nests of Winter Suite Collection (item 164072)!
About the Kit: • Makes 10 cards: 5 each of 2 designs with 10 coordinating envelopes • Tri-fold card bases and precut grosgrain ribbon • Precut labels with specialty green foil • Coordinating colors: Basic Black, Coastal Cabana, Granny Apple Green, Night of Navy, Real Red, Shaded Spruce (Classic Stampin’ Spot)
Subscribe to Paper Pumpkin for a monthly, all-inclusive crafting kit that’s a fun surprise! Each kit includes a photopolymer stamp set, Classic Stampin’ Spot, and step by step instructions to complete exclusive paper craft projects, including cards, tags, and gift packaging. And don’t miss the special add-on that coordinates with the next three months!
Don’t miss the coordinating Merry Tags & More Dies Add-On!
Add dimension and detail to your cards, scrapbook pages, and gift tags with the Merry Tags & More Dies! With a leaf and tag shape and Merry sentiment, these dies are a great way to expand your crafting experience. They even coordinate with three Paper Pumpkin Kits: Nests of Christmas, Filled with Joy, and Notes from the Heart. Such easy coordination makes these dies a must-have for any paper craft. Paper Pumpkin subscribers can purchase it beginning 11 September. The add-on is available only while supplies last, so it’s best to shop early! Please note that the Stampin’ Cut and Emboss Machine is not included and can be purchased separately.
#165639 $12
Subscribe to the September Paper Pumpkin Kit between 11 September and 10 October by clicking here!
Note: Supplies may be limited toward the end of the subscription period.
Basic Beige Cardstock 4 1/4″ X 11″ (card base scored & folded at 5 1/2″), 2 1/4″ X 5 1/4″(card front), 1″ X 4 1/4″(bridge), 2 5/8″ X 5 1/4″(inner liner), 2 3/4″ X 4″(artwork)
Cherry Cobbler Cardstock 2 – 3/4″ X 5 3/8″(side panel mats), 2 3/8″ X 5 3/8″(center panel mat), 7/8″ X 4 1/8″(bridge), 4 1/8″ X 5 3/8″(inner liner mat)
Mossy Meadow Cardstock 1 3;/4″ X 3″(bough)
Old Olive Cardstock 1 3/4″ X 3″ (bough)
Iconic Celebrations 6 X 6 Designer Series Paper 4 – 5/8″ X 5 1/4″ (side & inner liner panels), 2 1/4″ X 6″(envelope flap)
Good Friday morning stamping friends and welcome to my Fun Fold Friday. Are you ready for the weekend? I can’t believe we’re done with September already. Before you know it, It’ll be Thanksgiving weekend and Christmas. Time just flies by too quickly.
Today’s card I made on YouTube Live on Wednesday. If you were able to join me or watched the replay, thank you. If you’d like to watch my video and stamp along, the measurements are below, just above the supply list, along with the link to my YouTube channel. Here’s my card for today.
I used the Stampin’ Up! Online Exclusive Frosted Forest Bundle and the Stampin’ Up! Online Exclusive So Sincere Cling Stamp Set along with the Thoughtful Journey 6 X 6 Designer Series Paper and Wanted To Say Dies for my card today.
Stamp the tree image from the Stampin’ Up! Frosted Forest Photopolymer Stamp Set 3 times on a panel of Basic Beige in Pecan Pie Ink. Using the Frosted Forest Decorative Masks and Small Blending Brushes, add Pecan Pie, Cajun Craze, Crushed Curry and Old Olive Ink to the trees. Stamp 3 of the bird image from the Frosted Forest stamp set in Tuxedo Black Ink on the panel and color them using Smoky Slate Stampin’ Blends Markers. Cut the images out using the Frosted Forest Dies.
Score and fold a Basic Beige card base at 3″, 6″ & 7″. Adhere panels of Thoughtful Journey DSP to the card base using Liquid Glue. Score and fold the small card base at 4 1/4″. Adhere a panel of Thoughtful Journey DSP to the front of the small card base using Liquid Glue. Adhere the small card base to the larger card base using Tear & Tape Adhesive, by lining up the bottom front, closing the card base and adhering the folded edge on the back using Tear & Tape. Adhere the trees to the small card base using Stampin’ Seal and Stampin’ Dimensionals.
From the panel of Basic Beige, cut the sentiment mat using the Wanted to Say Dies. from a panel of Cajun Craze, cut the detailed sentiment using the Wanted to Say Dies. Adhere the detailed sentiment to the mat. Adhere the sentiment to the card front using Stampin’ Dimensionals. Adhere the birds using Stampin’ Dimensionals.
On a panel of Basic Beige, stamp the sentiment from So Sincere stamp set in Cajun Craze Ink. Stamp the bird image from Frosted Forest stamp set in Tuxedo Black Ink and color them using Smoky Slate Stampin’ Blends Markers. Adhere the Basic Beige panel to a Cajun Craze mat then to the inside of the Basic Beige card base.
On another panel of Basic Beige, stamp the sentiment from the Frosted Forest stamp set in Cajun Craze Ink. from panels of Pecan Pie and Old Olive, cut the tree die using the Frosted Forest Dies. Snip the trees off the Old Olive die cut and adhere the Old Olive to the bottom of the Pecan Pie die cut. Adhere the die cut panel to the bottom of the Basic Beige panel. Adhere the Basic Beige panel to a Cajun Craze mat then to the back of the Basic Beige card base.
Finish the card by decorating a Basic white Medium Envelope. Stamp the tree image from the Frosted Forest stamp set on the envelope front in Pecan Pie Ink. Using the Frosted Forest Decorative Masks and the Small Blending Brushes, add Pecan Pie, Cajun Craze and Old Olive Ink to the tree. Adhere a panel of Thoughtful Journey DSP to the envelope flap.
Thank you for stopping by my blog today. I hope you liked my card and will give it a try. I hope you will CASE this card and please feel free to post it in the comments of my Facebook page under my post. I’d love to see your take it. The list of measurements are below if you’d like to stamp along while watching the video. You can watch my video on my YouTube Channel Here.
If you watch this on my YouTube channel, please remember to subscribe so that you will get notified when a new video goes live. Thank you to those that have subscribed already. Happy Stamping!!
If you need any stamping supplies, I’d love to be your Demonstrator. Just click HERE to go directly to my online store or drop me an email if you have any questions.
MY CURRENT HOST CODE IS: EPRVU3FN
Use this host code when placing an order with me. When you order $50 or greater you will receive a free gift from me! If your order is over $150, please do not use this code, but you’ll still get the free gift. The free gift is your choice of any 1 item valued up to $10.00 from the 2024-2025Annual Catalog, or from the Online Exclusives! Unfortunately, packs of cardstock are no longer an option for a free gift. Shipping has become too expensive to ship and it’s costing me as much to ship as the cardstock costs. For any orders $50 or more I will also send you my monthly class tutorials. Click HERE or go to my Customer Rewards for more details and to see what this month’s tutorials are.
Please remember to use my current Host Code and make sure that you can see my name on the final checkout page listed as your Demonstrator when you order so that you know that you’re ordering with me, and you’ll get my rewards!
The Stampin’ Up! Clearance Rack has been updated with a few new goodies!!!!
Head over to my Online Store quickly to get your hands on some great deals. But hurry!! A lot of items have sold out already. Clearance Rack deals are only while supplies last! Click Here to head over to my Online Store.
Don’t forget to use my Current Host Code EPRVU3FN when checking out.
Stampin’ Up! World Card Making Day Event – Free Registration Open
It’s time to celebrate one of my favorite days of the year—World Card Making Day! Join Stampin’ Up! on October 5 as they celebrate this day with a creative virtual event. They’ll create five simple cards and show you some additional fun projects! Crafters of all skill levels are invited and welcome to join. And the event and registration are FREE! Mark your calendars now and join the event on October 5!
World Card Making Day Event Details:
Who: Everyone is invited!
When: October 5, 2024, from 2:00 to 3:00 p.m. (MT)
Where: Online
Price of Event: Free
Registration Dates: September 3–October 4, 2024, at 2:00 p.m. (MT)
You must register for this event in order to receive a link to view it. Also, those who register will receive a gift after the event ends. Register so that you don’t miss out on the event link and a special registration gift!
Language of Event: Most of the event will be presented in English with language interpretation voiceover and subtitles available in English, French, German, and Dutch.
Video on Demand: We will record our stream of this event. Anyone who has the event link will be able to watch the recorded event starting October 8.
Hashtag: You post about the World Card Making Day event on social media using #SUWorldCardMakingDay2024. If you post with the hashtag, you’ll see your post appear on the event webpage as you watch the event!
Registration for this event begins on Tuesday, September 3 so look for the link to register beginning then!!
New Paper Pumpkin Subscribers – Receive 40% off Your 1st Kit
Santa Claus is comin’ to town a bit early this year—and he’s brought a holiday Paper Pumpkin sale! Starting September 11, 2024, at 12:01 a.m. (MT) until October 10, 2024, at 11:50 p.m. (MT), anyone who signs up for our monthly Paper Pumpkin subscription as a new subscriber will receive 40% off their first kit. That’s right, 40% OFF!
Where This Discount Is Applied This discount will be applied to one kit in the first kit shipment of the Paper Pumpkin subscription, which means new subscribers will get 40% off the October Nests of Christmas Paper Pumpkin Kit. After that, each month’s kit will return to the regular price of $25.00.
Qualifying for This Discount This offer is only for new month-to-month subscribers and is not valid on purchased or redeemed prepaid subscriptions. So if you have previously used an email address for a Paper Pumpkin subscription, you won’t qualify as a new subscriber to receive this discount. Also, anyone who signs up as a new subscriber to Paper Pumpkin but cancels by October 10 will not receive any kits or discounts.
Nests of Christmas
Subscribe September 11 – October 10
Spread Christmas cheer with this cozy, all-inclusive crafting kit! Coordinates with the Nests of Winter Suite Collection (item 164072)!
About the Kit: • Makes 10 cards: 5 each of 2 designs with 10 coordinating envelopes • Tri-fold card bases and precut grosgrain ribbon • Precut labels with specialty green foil • Coordinating colors: Basic Black, Coastal Cabana, Granny Apple Green, Night of Navy, Real Red, Shaded Spruce (Classic Stampin’ Spot)
Subscribe to Paper Pumpkin for a monthly, all-inclusive crafting kit that’s a fun surprise! Each kit includes a photopolymer stamp set, Classic Stampin’ Spot, and step by step instructions to complete exclusive paper craft projects, including cards, tags, and gift packaging. And don’t miss the special add-on that coordinates with the next three months!
Don’t miss the coordinating Merry Tags & More Dies Add-On!
Add dimension and detail to your cards, scrapbook pages, and gift tags with the Merry Tags & More Dies! With a leaf and tag shape and Merry sentiment, these dies are a great way to expand your crafting experience. They even coordinate with three Paper Pumpkin Kits: Nests of Christmas, Filled with Joy, and Notes from the Heart. Such easy coordination makes these dies a must-have for any paper craft. Paper Pumpkin subscribers can purchase it beginning 11 September. The add-on is available only while supplies last, so it’s best to shop early! Please note that the Stampin’ Cut and Emboss Machine is not included and can be purchased separately.
#165639 $12
Subscribe to the September Paper Pumpkin Kit between 11 September and 10 October by clicking here!
Note: Supplies may be limited toward the end of the subscription period.
Good Wednesday morning stamping friends. How is everyone doing today. I hope you are having a great week so far. Don’t forget, FREE SHIPPING is today only, details are below.
Today’s card is another one that we made on Sunday at our team quarterly meeting. This card was designed by one of my team members and friends Terry Lynn Bright. Here’s my card for today.
I used the Stampin’ Up! Sentimental Wishes Bundle along with the Sentimental Christmas Designer Series Paper, Exposed Brick 3D Embossing Folder and Online Exclusive Changing Leaves Dies for my card today.
Measure 7/8″ in from both sides of the front of a Basic Beige card base. Cut from the center score line down on both sides. You will be left with a 2 1/2″ panel in the center. Adhere the 2 – 5/8″ X 5 1/4″ panels of Sentimental Christmas DSP to the 2 – 3/4″ X 5 3/8″ panels of Shaded Spruce using Stampin’ Seal. Adhere the 2 layered panels to the 2-cut side card front panels using Liquid Glue.
On a panel of Basic Beige, stamp the sentiment from the Stampin’ Up! Sentimental Wishes Cling Stamp Set in Cherry Cobbler Ink. Cut the sentiment out using the die from the Changing Leaves Dies. Adhere the Shaded Spruce panel to the Basic Beige panel using Stampin’ Seal. Adhere the layered panel to the 2 side panels of the card front only. Adhere the sentiment on the bridge using Stampin’ Dimensionals.
Emboss a panel of Shaded Spruce using the Exposed Brick EF. Adhere the embossed panel to the center of the card front using Liquid Glue. Using the Sentimental Wishes Dies cut the stocking from a panel of the Sentimental Christmas DSP. Adhere the stocking to the card front using Stampin’ Dimensionals. Add a few Real Red & White Adhesive-Backed Peppermints to the card front.
Adhere the 2 – 7/8″ X 5 3/8″ panels of Sentimental Christmas DSP to the to the inside of the Basic Beige card base. On a panel of Basic White, stamp the sentiment from the Sentimental Wishes stamp set in Shaded Spruce. Using the Sentimental Wishes Dies, cut the bow from a panel of Sentimental Christmas DSP and adhere it to the top of the panel. Adhere the Basic White panel to the inside of the Basic Beige card base.
Finish the card by decorating a Basic White Medium Envelope. Stamp the stocking image from the Sentimental Wishes stamp set in Tuxedo Black Ink on the envelope front. Color the image using Cherry Cobbler, Old Olive, Poppy Parade and Shaded Spruce Stampin’ Blends Markers. Adhere a panel of Sentimental Christmas DSP to the envelope flap.
Thank you for stopping by my blog today. I hope you like the card and will give it a try, Happy Stamping!!
If you need any stamping supplies, I’d love to be your Demonstrator. Just click HERE to go directly to my online store or drop me an email if you have any questions.
MY CURRENT HOST CODE IS: EPRVU3FN
Use this host code when placing an order with me. When you order $50 or greater you will receive a free gift from me! If your order is over $150, please do not use this code, but you’ll still get the free gift. The free gift is your choice of any 1 item valued up to $10.00 from the 2024-2025Annual Catalog, or from the Online Exclusives! Unfortunately, packs of cardstock are no longer an option for a free gift. Shipping has become too expensive to ship and it’s costing me as much to ship as the cardstock costs. For any orders $50 or more I will also send you my monthly class tutorials. Click HERE or go to my Customer Rewards for more details and to see what this month’s tutorials are.
Please remember to use my current Host Code and make sure that you can see my name on the final checkout page listed as your Demonstrator when you order so that you know that you’re ordering with me, and you’ll get my rewards!
SURPRISE! It’s time for FREE SHIPPING! On September 18, you can shop and save on all qualifying orders of $75 or more. What a great way to stock up on all your favorite products from the catalog, Online Exclusives, kits, and more! This is a PERFECT time to grab all the products you need for your holiday cards too.
Free shipping is for one day only, so get your orders ready and submit them on Wednesday to get free shipping on your order of $75+!!
Here are the details:
Free shipping is for 24 hours only. Orders must be opened and closed on September 18, 2024.
Free shipping automatically applies to your cart after the qualifying amount has been met, which is $75 (before tax).
Orders must meet the qualifying amount to be eligible for free shipping.
The additional cost for expedited shipping is not covered by this promotion.
Prepaid 3-, 6-, or 12-month Paper Pumpkin subscriptions can contribute to the qualifying amount for free shipping (Month-to-month subscriptions do not qualify). Subscriptions billed and shipped this month will be charged for the normal amount ($25.00 shipping included) + tax.
Ordering Deadline: September 18, 2024 at 11:59 p.m. (MT)
Let me know if you have any questions. Get your orders placed today and get free shipping!! You can head over to the online store to start your order HERE.
How About We Add an Extra Bonus!!!!! If you place your orders by 8pm ET. I’m going to give you DOUBLE CREATIVE STAMPING DESIGNS REWARDS.
You must get those orders placed by 8pm ET tomorrow Wednesday September 18 and you MUST use my Current Host CodeEPRVU3FN
Thank you for stopping by my blog today. I hope you like the card and will give it a try. Happy Stamping!!
Stampin’ Up! World Card Making Day Event – Free Registration Open
It’s time to celebrate one of my favorite days of the year—World Card Making Day! Join Stampin’ Up! on October 5 as they celebrate this day with a creative virtual event. They’ll create five simple cards and show you some additional fun projects! Crafters of all skill levels are invited and welcome to join. And the event and registration are FREE! Mark your calendars now and join the event on October 5!
World Card Making Day Event Details:
Who: Everyone is invited!
When: October 5, 2024, from 2:00 to 3:00 p.m. (MT)
Where: Online
Price of Event: Free
Registration Dates: September 3–October 4, 2024, at 2:00 p.m. (MT)
You must register for this event in order to receive a link to view it. Also, those who register will receive a gift after the event ends. Register so that you don’t miss out on the event link and a special registration gift!
Language of Event: Most of the event will be presented in English with language interpretation voiceover and subtitles available in English, French, German, and Dutch.
Video on Demand: We will record our stream of this event. Anyone who has the event link will be able to watch the recorded event starting October 8.
Hashtag: You post about the World Card Making Day event on social media using #SUWorldCardMakingDay2024. If you post with the hashtag, you’ll see your post appear on the event webpage as you watch the event!
Registration for this event begins on Tuesday, September 3 so look for the link to register beginning then!!
New Paper Pumpkin Subscribers – Receive 40% off Your 1st Kit
Santa Claus is comin’ to town a bit early this year—and he’s brought a holiday Paper Pumpkin sale! Starting September 11, 2024, at 12:01 a.m. (MT) until October 10, 2024, at 11:50 p.m. (MT), anyone who signs up for our monthly Paper Pumpkin subscription as a new subscriber will receive 40% off their first kit. That’s right, 40% OFF!
Where This Discount Is Applied This discount will be applied to one kit in the first kit shipment of the Paper Pumpkin subscription, which means new subscribers will get 40% off the October Nests of Christmas Paper Pumpkin Kit. After that, each month’s kit will return to the regular price of $25.00.
Qualifying for This Discount This offer is only for new month-to-month subscribers and is not valid on purchased or redeemed prepaid subscriptions. So if you have previously used an email address for a Paper Pumpkin subscription, you won’t qualify as a new subscriber to receive this discount. Also, anyone who signs up as a new subscriber to Paper Pumpkin but cancels by October 10 will not receive any kits or discounts.
Nests of Christmas
Subscribe September 11 – October 10
Spread Christmas cheer with this cozy, all-inclusive crafting kit! Coordinates with the Nests of Winter Suite Collection (item 164072)!
About the Kit: • Makes 10 cards: 5 each of 2 designs with 10 coordinating envelopes • Tri-fold card bases and precut grosgrain ribbon • Precut labels with specialty green foil • Coordinating colors: Basic Black, Coastal Cabana, Granny Apple Green, Night of Navy, Real Red, Shaded Spruce (Classic Stampin’ Spot)
Subscribe to Paper Pumpkin for a monthly, all-inclusive crafting kit that’s a fun surprise! Each kit includes a photopolymer stamp set, Classic Stampin’ Spot, and step by step instructions to complete exclusive paper craft projects, including cards, tags, and gift packaging. And don’t miss the special add-on that coordinates with the next three months!
Don’t miss the coordinating Merry Tags & More Dies Add-On!
Add dimension and detail to your cards, scrapbook pages, and gift tags with the Merry Tags & More Dies! With a leaf and tag shape and Merry sentiment, these dies are a great way to expand your crafting experience. They even coordinate with three Paper Pumpkin Kits: Nests of Christmas, Filled with Joy, and Notes from the Heart. Such easy coordination makes these dies a must-have for any paper craft. Paper Pumpkin subscribers can purchase it beginning 11 September. The add-on is available only while supplies last, so it’s best to shop early! Please note that the Stampin’ Cut and Emboss Machine is not included and can be purchased separately.
#165639 $12
Subscribe to the September Paper Pumpkin Kit between 11 September and 10 October by clicking here!
Note: Supplies may be limited toward the end of the subscription period.
Basic Beige Cardstock 4 1/4″ X 11″(card base scored & folded at 5 1/2″), 1″ X 3 1/4″(sentiment), 1″ X 4 1/4″ (bridge)
Basic White Cardstock 2 1/2″ X 5 3/8″(inner liner)
Shaded Spruce Cardstock 2 – 3/4″ X 5 3/8″ & 2 – 7/8″ X 5 3/8″ (dsp mats), 2 3/8″ X 5 3/8″(card front), 7/8″ X 4 1/8″(sentiment mat)
Sentimental Christmas Designer Series Paper 2 – 5.8″ X 5 1/4″ (card front panels), 2 – 7/8″ X 5 3/8″(inner liner panels), 2 1/4″ X 6″(envelope flap), die cut stocking
Good Monday morning stamping friends and welcome to a new week. How was everyone’s weekend? It was a gorgeous one here in NJ. We had our quarterly team meeting yesterday and as I was driving up to Amy’s house, I noticed some of the trees here are starting to turn. They are still mostly green with just a touch of yellow, orange and red. Fall will be here before we know it.
Today’s card is one that we made at our meeting yesterday. This card was designed and presented by one of my team members Akiko Sudano. It’s such a pretty card and one that can be duplicated easily. Here’s my card for today.
I used the Stampin’ Up! Sentimental Wishes Bundle along with the Spotlight on Nature Dies, Something Fancy dies and Sentimental Christmas Designer Series Paper for my card today.
Adhere the floral panels of Sentimental Christmas DSP to the front of the Shaded Spruce card base using Stampin’ Seal.
Adhere the floral panel of the Sentimental Christmas DSP to the inside of the Shaded Spruce card base using Stampin’ Seal. Adhere the striped panel of the Sentimental Christmas DSP to the front of the small Poppy Parade card base using Stampin’ Seal. Adhere the small card base to the center inside of the Shaded Spruce card base using Liquid Glue.
Using the Spotlight on Nature Dies, cut the larger circle from a panel of Poppy Parade and the smaller one from a panel of Basic Beige. Adhere the Basic Beige circle to the Poppy Parade circle using Stampin’ Seal. Adhere the layered circle to the center of the small card front using Liquid Glue. Stamp the holly and candle images from the Stampin’ Up! Sentimental Wishes Cling Stamp Set in Tuxedo Black Ink on a panel of Basic White. Color the images using Lemon Lolly, Old Olive, Poppy Parade, Pumpkin Pie and Shaded Spruce Stampin’ Blends Markers. Brush the candles with Clear wink of Stella. Cut the images out using the Sentimental Wishes Dies. Adhere the candles to the Basic Beige circle using Glue Dots. Adhere the holly over the candles using Stampin’ Dimensionals. Stamp the center of the sentiment from the Sentimental Wishes stamp set by covering the top and bottom with tape. Ink up the center with Versamark, remove the tape and stamp on a panel of Poppy Parade. Sprinkle the sentiment with White Embossing Powder and set it using the Heat Tool. Cut the sentiment out using the Something Fancy Dies. Adhere the sentiment over the holly using a Glue dot and Stampin’ Dimensional on the end. Add a few White Pearls from the Cherry Cobbler and Pearl Adhesive-Backed Berries.
Adhere a striped panel of Sentimental Christmas DSP to the inside of the Shaded Spruce card base using Stampin’ Seal. Adhere a floral panel of Sentimental Christmas DSP to the inside of the Poppy Parade card base using Stampin’ Seal. Using the Sentimental Wishes Dies, cut a stocking and bow from a panel of Sentimental Christmas DSP. Adhere the stocking and bow to the inside of the card base using Liquid Glue. Stamp the sentiment from the Sentimental Wishes stamp set in Shaded Spruce Ink on a panel of Basic White. Adhere the Basic White panel to the inside of the Poppy Parade card base. On a panel of Basic White, stamp the sentiment from Sentimental Wishes stamp set in Poppy Parade Ink. Using the Something Fancy Dies, cut the sentiment and from a panel of Shaded Spruce cut the larger die for a mat. Adhere the sentiment to the mat then to the inside right of the Poppy Parade card base.
To finish the card, decorate a Basic White Medium Envelope. Stamp the candle image from the Sentimental Wishes stamp set in Tuxedo Black Ink of the envelope front. Color the image using Lemon Lolly, Old Olive, Poppy Parade, Pumpkin Pie and Shaded Spruce Stampin’ Blends Markers. Brush them with Clear Wink of Stella. Adhere a panel of Sentimental Christmas DSP to the envelope flap.
Thank you for stopping by my blog today. I hope you like the card and will give it a try. Happy Stamping!!
If you need any stamping supplies, I’d love to be your Demonstrator. Just click HERE to go directly to my online store or drop me an email if you have any questions.
MY CURRENT HOST CODE IS: EPRVU3FN
Use this host code when placing an order with me. When you order $50 or greater you will receive a free gift from me! If your order is over $150, please do not use this code, but you’ll still get the free gift. The free gift is your choice of any 1 item valued up to $10.00 from the 2024-2025Annual Catalog, or from the Online Exclusives! Unfortunately, packs of cardstock are no longer an option for a free gift. Shipping has become too expensive to ship and it’s costing me as much to ship as the cardstock costs. For any orders $50 or more I will also send you my monthly class tutorials. Click HERE or go to my Customer Rewards for more details and to see what this month’s tutorials are.
Please remember to use my current Host Code and make sure that you can see my name on the final checkout page listed as your Demonstrator when you order so that you know that you’re ordering with me, and you’ll get my rewards!
Stampin’ Up! World Card Making Day Event – Free Registration Open
It’s time to celebrate one of my favorite days of the year—World Card Making Day! Join Stampin’ Up! on October 5 as they celebrate this day with a creative virtual event. They’ll create five simple cards and show you some additional fun projects! Crafters of all skill levels are invited and welcome to join. And the event and registration are FREE! Mark your calendars now and join the event on October 5!
World Card Making Day Event Details:
Who: Everyone is invited!
When: October 5, 2024, from 2:00 to 3:00 p.m. (MT)
Where: Online
Price of Event: Free
Registration Dates: September 3–October 4, 2024, at 2:00 p.m. (MT)
You must register for this event in order to receive a link to view it. Also, those who register will receive a gift after the event ends. Register so that you don’t miss out on the event link and a special registration gift!
Language of Event: Most of the event will be presented in English with language interpretation voiceover and subtitles available in English, French, German, and Dutch.
Video on Demand: We will record our stream of this event. Anyone who has the event link will be able to watch the recorded event starting October 8.
Hashtag: You post about the World Card Making Day event on social media using #SUWorldCardMakingDay2024. If you post with the hashtag, you’ll see your post appear on the event webpage as you watch the event!
Registration for this event begins on Tuesday, September 3 so look for the link to register beginning then!!
New Paper Pumpkin Subscribers – Receive 40% off Your 1st Kit
Santa Claus is comin’ to town a bit early this year—and he’s brought a holiday Paper Pumpkin sale! Starting September 11, 2024, at 12:01 a.m. (MT) until October 10, 2024, at 11:50 p.m. (MT), anyone who signs up for our monthly Paper Pumpkin subscription as a new subscriber will receive 40% off their first kit. That’s right, 40% OFF!
Where This Discount Is Applied This discount will be applied to one kit in the first kit shipment of the Paper Pumpkin subscription, which means new subscribers will get 40% off the October Nests of Christmas Paper Pumpkin Kit. After that, each month’s kit will return to the regular price of $25.00.
Qualifying for This Discount This offer is only for new month-to-month subscribers and is not valid on purchased or redeemed prepaid subscriptions. So if you have previously used an email address for a Paper Pumpkin subscription, you won’t qualify as a new subscriber to receive this discount. Also, anyone who signs up as a new subscriber to Paper Pumpkin but cancels by October 10 will not receive any kits or discounts.
Nests of Christmas
Subscribe September 11 – October 10
Spread Christmas cheer with this cozy, all-inclusive crafting kit! Coordinates with the Nests of Winter Suite Collection (item 164072)!
About the Kit: • Makes 10 cards: 5 each of 2 designs with 10 coordinating envelopes • Tri-fold card bases and precut grosgrain ribbon • Precut labels with specialty green foil • Coordinating colors: Basic Black, Coastal Cabana, Granny Apple Green, Night of Navy, Real Red, Shaded Spruce (Classic Stampin’ Spot)
Subscribe to Paper Pumpkin for a monthly, all-inclusive crafting kit that’s a fun surprise! Each kit includes a photopolymer stamp set, Classic Stampin’ Spot, and step by step instructions to complete exclusive paper craft projects, including cards, tags, and gift packaging. And don’t miss the special add-on that coordinates with the next three months!
Don’t miss the coordinating Merry Tags & More Dies Add-On!
Add dimension and detail to your cards, scrapbook pages, and gift tags with the Merry Tags & More Dies! With a leaf and tag shape and Merry sentiment, these dies are a great way to expand your crafting experience. They even coordinate with three Paper Pumpkin Kits: Nests of Christmas, Filled with Joy, and Notes from the Heart. Such easy coordination makes these dies a must-have for any paper craft. Paper Pumpkin subscribers can purchase it beginning 11 September. The add-on is available only while supplies last, so it’s best to shop early! Please note that the Stampin’ Cut and Emboss Machine is not included and can be purchased separately.
#165639 $12
Subscribe to the September Paper Pumpkin Kit between 11 September and 10 October by clicking here!
Note: Supplies may be limited toward the end of the subscription period.
Basic White Cardstock 4″ X 5 1/4″ (stamped & die cut images & inner sentiment)), 2 3/4″ X 3 3/4″(inner liner)
Poppy Parade Cardstock 3″ X 8″ (small card base scored & folded at 4″), 3 1/2″ X 3 1/2″(die cut circle), 1″ X 3″(sentiment)
Shaded Spruce Cardstock 4 1/4″ X 8 1/2″ (card base scored & folded at 3″, 2″ X 3 1/2″(inner label mat)
Sentimental Christmas Designer Series Paper Floral Pattern – 2 3/4″ X 4″(card front panel), 2 3/4″ X 3 3/4″(small card base inner panel), 4″ X 5 1/4″(inner liner), 2 1/4″ X 6″ (envelope) Striped Pattern – 2 3/4″ X 4″(large card base inner panel), 2 3/4″ x 3 3/4″(small card base card front)
Good Friday the 13th morning stamping friends and welcome to my Fun Fold Friday. Are you ready for the weekend? I’ve got a busy one coming up. I hope you are starting to make plans for the weekend.
Today’s card is one that we made on Tuesday night at our Stamping Studio during mystery stamping. All of our cards were similar, but also different. Jaimie gave us cardstock and DSP measurements and talked us through assembling the cards. I turned my card because I like the recipient to be able to stand the card up. Here’s my card for today.
I used the Stampin’ Up! Online Exclusive Naughty & Nice Photopolymer Stamp Set along with the Take A Bow 6 X 6 Designer Series Paper, Labeled with Love Dies and Stampin’ Up! Christmas Labels Photopolymer Stamp Set for my card today.
Start by scoring the Granny Apple Green card base at 2 1/8″ on either side. Cut 1 of the 4″ X 4″ panels of Basic White in half at 2″.
Adhere the 4 panels of Take A Bow DSP to the 2 Basic White mats. Adhere the 2 layered panels to the Granny Apple Green card base using Liquid Glue.
On a panel of Basic White, stamp the outlined frame image from the Naughty & Nice stamp set in Tuxedo Black Ink. Stamp the sentiment from the Naughty & Nice stamp set inside the frame in Tuxedo Black Ink. Stamp the hat & elf feet images from the Naughty & Nice stamp set in Tuxedo Black Ink above and below the sentiment. Color the images using Granny Apple Green and Real Red Stampin’ Blends Markers. Cut the image out using the Labeled with Love Dies. Adhere the image to the card front using Stampin’ Dimensionals only on the left half of the image. Add an Iridescent Faceted Gem to the sentiment.
On a panel of Basic White, stamp the sentiment from the Christmas Labels stamp set in Tuxedo Black Ink. Stamp the bow image from the Naughty & Nice stamp set in Tuxedo Black Ink on the top of the panel. Color the bow using Real Red Stampin’ Blends Markers. Adhere 2 strips of the Take a Bow DSP to either side of the panel. Adhere the Basic White panel to a Real Red mat then to the inside of the Granny Apple Green card base.
To finish the card, decorate a Basic White Medium Envelope. Stamp the bow image from the Naughty & Nice stamp set on the top of the envelope front in tuxedo Black Ink. Color the image using real red Stampin’ Blends Markers. Adhere a strip of Take A Bow DSP to the bottom of the envelope front and a panel to the envelope flap.
Thank you for stopping by my blog today. I hope you like the card and will give it a try. Happy Stamping!!
If you need any stamping supplies, I’d love to be your Demonstrator. Just click HERE to go directly to my online store or drop me an email if you have any questions.
MY CURRENT HOST CODE IS: EPRVU3FN
Use this Host Code when placing ALL orders with me up to $149. When you order $50 or greater you will receive a free gift from me but only if you remember the Host Code! If your order is over $150, please do not use this code, but you’ll still get the free gift. The free gift is your choice of any 1 item valued up to $10.00 from the 2024-2025 Annual Catalog, or from the Online Exclusives! You MUST use the Host Code to earn this!! For any orders $50 or more I will also send you my monthly class tutorials. Click HERE or go to my Customer Rewards for more details and to see what this month’s tutorials are.
Please remember to use my current Host Code and make sure that you can see my name on the final checkout page listed as your Demonstrator when you order so that you know that you’re ordering with me, and you’ll get my rewards!
New Paper Pumpkin Subscribers – Receive 40% off Your 1st Kit
Santa Claus is comin’ to town a bit early this year—and he’s brought a holiday Paper Pumpkin sale! Starting September 11, 2024, at 12:01 a.m. (MT) until October 10, 2024, at 11:50 p.m. (MT), anyone who signs up for our monthly Paper Pumpkin subscription as a new subscriber will receive 40% off their first kit. That’s right, 40% OFF!
Where This Discount Is Applied This discount will be applied to one kit in the first kit shipment of the Paper Pumpkin subscription, which means new subscribers will get 40% off the October Nests of Christmas Paper Pumpkin Kit. After that, each month’s kit will return to the regular price of $25.00.
Qualifying for This Discount This offer is only for new month-to-month subscribers and is not valid on purchased or redeemed prepaid subscriptions. So if you have previously used an email address for a Paper Pumpkin subscription, you won’t qualify as a new subscriber to receive this discount. Also, anyone who signs up as a new subscriber to Paper Pumpkin but cancels by October 10 will not receive any kits or discounts.
Nests of Christmas
Subscribe September 11 – October 10
Spread Christmas cheer with this cozy, all-inclusive crafting kit! Coordinates with the Nests of Winter Suite Collection (item 164072)!
About the Kit: • Makes 10 cards: 5 each of 2 designs with 10 coordinating envelopes • Tri-fold card bases and precut grosgrain ribbon • Precut labels with specialty green foil • Coordinating colors: Basic Black, Coastal Cabana, Granny Apple Green, Night of Navy, Real Red, Shaded Spruce (Classic Stampin’ Spot)
Subscribe to Paper Pumpkin for a monthly, all-inclusive crafting kit that’s a fun surprise! Each kit includes a photopolymer stamp set, Classic Stampin’ Spot, and step by step instructions to complete exclusive paper craft projects, including cards, tags, and gift packaging. And don’t miss the special add-on that coordinates with the next three months!
Don’t miss the coordinating Merry Tags & More Dies Add-On!
Add dimension and detail to your cards, scrapbook pages, and gift tags with the Merry Tags & More Dies! With a leaf and tag shape and Merry sentiment, these dies are a great way to expand your crafting experience. They even coordinate with three Paper Pumpkin Kits: Nests of Christmas, Filled with Joy, and Notes from the Heart. Such easy coordination makes these dies a must-have for any paper craft. Paper Pumpkin subscribers can purchase it beginning 11 September. The add-on is available only while supplies last, so it’s best to shop early! Please note that the Stampin’ Cut and Emboss Machine is not included and can be purchased separately.
#165639 $12
Subscribe to the September Paper Pumpkin Kit between 11 September and 10 October by clicking here!
Note: Supplies may be limited toward the end of the subscription period.
Good Friday afternoon stamping friends and welcome to my Fun Fold Friday. I hope you all had a great week and are looking forward to the weekend. I’ll be working tomorrow, but I do have off on Sunday.
I’m a little late today with posting, it’s been a crazy week for me, and I didn’t get my card finished until a little while ago. This is one of those cards that I kept making mistakes and I was determined to finish the card properly. After I was all finished and loving how my card turned out, I realized the stamp set I used is no longer available in the Online Exclusive store in English. You can still purchase it in French if you just want to use the images. but you are able to make the truck part of the design using the Truck Builder Punch which is still available. I don’t usually post cards if items are not available, but with a little tweaking you can use this design for anything. If you’d like to see a quick video of how I made this card, Click Here to go to my Instagram Reels. Here is my card for today.
I used the Stampin’ Up! Trucking Along Photopolymer Stamp Set, Stampin’ Up! Scenic Pumpkin Patch Photopolymer Stamp Set, Trucking Along Builder Punch, Iconic Celebrations 6 X 6 Designer Series Paper which are all Online Exclusive products. I also used the Spotlight On Nature Dies and Stylish Shapes Dies for my card today.
Adhere panels of Iconic Celebrations DSP to Mossy Meadow mats using Stampin’ Seal. Adhere the plaid layered panel to the small Basic Beige card base using Liquid Glue. Adhere the largest layered panel to the inside of the large Basic Beige card base using Liquid Glue.
Adhere one of the layered panels to the large Basic Beige card base using Liquid Glue.
On a panel of Basic Beige, stamp the truck image from the Trucking Along stamp set in Tuxedo Black Ink. Color the image using Basic Black, Mossy Meadow and Smoky Slate Stampin’ Blends Markers. Punch the truck out using the Trucking Along Builder Punch. On a panel of Basic Beige, stamp the road image from the Trucking Along stamp set in Tuxedo Black Ink. Stamp the outline tree image in Mossy Meadow Ink, the solid tree image in Crushed Curry Ink and the outlined cloud image in Boho Blue Ink. Color the tree trunk using the Pecan Pie Stampin’ Blends Marker. Cut the stamped panel out using the 2nd largest circle from the Stylish Shapes Dies. Using the Spotlight on Nature Dies, cut a panel of Mossy Meadow using the die just a bit larger the Basic Beige circle cut. Decide where you want to put the truck and stamp the pumpkin image from the Scenic Pumpkin Patch stamp set in Cajun Craze Ink. Stamp the stem image from the Scenic Pumpkin Patch stamp set in Mossy Meadow Ink on top of the pumpkins. Adhere the Basic Beige circle to the Mossy Meadow circle using Stampin’ Seal. Adhere the truck to the circle using Stampin’ Dimensionals. Adhere the layered circle to the small card front using Stampin’ Dimensionals. On a small strip of Basic Beige, stamp set sentiment from the Trucking Along stamp set in Mossy Meadow Ink. Cut the ends on an angle using Paper Snips. Adhere the sentiment to the top of the card front using Stampin’ Dimensionals. Adhere the small card base to the inside of the larger card base, making sure the card opens left to right.
On the inside, stamp the sentiment from the Trucking Along stamp set in Mossy Meadow Ink. Stamp the outlined tree and grass image in Mossy Meadow Ink on the bottom of the panel. Stamp the solid tree image in Crushed Curry Ink. Stamp the pumpkin image from the Scenic Pumpkin Patch stamp set in Cajun Craze Ink on the bottom of the panel. Stamp the stems in Mossy Meadow Ink. Adhered the Basic Beige panel to a Mossy Meadow panel then to the inside of the small card base.
Finish the card by decorating a Basic White Medium Envelope. Stamp the pumpkin image from the Scenic Pumpkin Patch stamp set in Cajun Craze Ink across the bottom front of the envelope. Stamp the stem image in Mossy Meadow Ink on top of the pumpkins. Adhere a panel of Iconic Celebrations DSP to the envelope flap.
Thank you for stopping by my blog today. I hope you like the card and will give it a try. Happy Stamping!!
If you need any stamping supplies, I’d love to be your Demonstrator. Just click HERE to go directly to my online store or drop me an email if you have any questions.
MY CURRENT HOST CODE IS: KFUKW3ZY
Use this host code when placing an order with me. When you order $50 or greater you will receive a free gift from me! If your order is over $150, please do not use this code, but you’ll still get the free gift. The free gift is your choice of any 1 item valued up to $10.00 from the 2024-2025Annual Catalog, or from the Online Exclusives! Unfortunately, packs of cardstock are no longer an option for a free gift. Shipping has become too expensive to ship and it’s costing me as much to ship as the cardstock costs. For any orders $50 or more I will also send you my monthly class tutorials. Click HERE or go to my Customer Rewards for more details and to see what this month’s tutorials are.
Please remember to use my current Host Code and make sure that you can see my name on the final checkout page listed as your Demonstrator when you order so that you know that you’re ordering with me, and you’ll get my rewards!
CTMH Products are now available to everyone. Go to the Online Store and check out the CTMH Products Category
PLEASE NOTE: All CTMH items are available WHILE SUPPLIES LAST. And – it looks like some of the products are very limited in quantity….so place your order EARLY – starting today – for the best selection! That’s why I posted early – I wanted you to have the best possible shot at getting the things you want! If you still have Bonus Days coupons – you can use them for CTMH products too.
As a side note, Stampin’ Up has some scrapbook product releases coming soon with items available to ALL customers. I’ll share more about these scrapbook product releases as details become available.
You can Find CTMH products in the Online Store Here.
September-December 2024 Mini Catalog Paper and Ribbon Shares Open for Ordering
I’m offering a Designer Series Paper share from the September-December 2024 Mini Catalog and I’d love to have you join!! I’m placing my share order early on September 4th and I’m going to use the expedited shipping option so I should be able to have the shares cut, bundled and back out to you during the week of September 9. Wouldn’t you love to have all of the gorgeous new Designer Series Papers in the Stampin’ Up! September-December 2024 Mini Catalog? What is a Paper Share you ask? It’s a sample of each of the new Designer Series Papers from the September-December 2024 Mini Catalog. Shares give you a good working sample of all of the papers so that you can decide which ones to order in full packs! If you were to purchase all of the DSP in the new Catalog, it would cost you over $135.00 plus shipping and if you were to purchase all the ribbon it would cost you over $60.00.
New Designer Series Paper Share – $21.00 plus $9.00 for Priority Mail Shipping
How my shares work: I order full packs of all of the Designer Series Papers listed below, I cut them into 6″ X 6″ pieces (or 6″ X 12″ pieces for double shares) and give you one panel of each design from each pack on the list. I pack up the paper in a cellophane bag with labels listing the Name, Item # and Colors in the pack and mail it back out to you just as quickly as I can!
New Designer Series Paper Share – $21.00 plus $9.00 for Priority Mail shipping
You will receive one 6X6 sheet of each design from the following DSP packs (the number after the name indicates how many 6×6 sheets of that paper pack you will receive):
Nests of Winter (6)
Regal Winter (6)
Regal Distressed Patterns (3)
Reindeer Days (6)
Season of Elegance (6)
Sentimental Christmas (6)
Snowy Scenes (6)
A Little Bit Festive (3)
Festive Glimmer (3)
Splendid Autumn 6X6 (12)
Take A Bow 6X6 (4)
In all, you’ll receive 61 – 6” X 6” sheets of designer or specialty paper!
Double DSP Share – $42.00 + $9.00 Shipping by Priority Mail – if you’d like double shares of the designer paper, I’m offering those too! I’ll cut the 12″ X 12″ designer paper sheets into 6″ X 12″ so that you’ll be able to get 3 full A2 size card fronts from each sheet and you’ll get double sheets of the 6″ X 6″ since they’re already precut.
New Ribbon Share – $17.00 plus $9.00 Priority Mail Shipping
All ribbons will come individually wrapped and labeled with the name and number of the product. Please note that ribbons are being divided differently, you will be getting one fourth of a roll of each of the Ribbons.
One-Fourth of a Roll of each:
Blackberry Bliss & Gold Textured Ribbon
Cherry Cobbler & Gold Satin Ribbon
Natural Tones Linen Thread
Pool Party Pompom Ribbon
Real Red & White Baker’s Twine
Shaded Spruce Satin & Sheer Ribbon
Wild Wheat Rustic Striped Ribbon
Double Ribbon Share – $34.00 + $9.00 Priority Mail Shipping – If you’d like double shares of the Ribbon, you will be getting 1/2 of the roll or each ribbon.
If you would like the Designer Series Paper Share & the Ribbon Share the cost will be:
$38.00 for a single share + $9.00 shipping
$76.00 for a double share + $9.00 shipping.
Anyone is welcome to join in my share (please note, I can only ship to addresses within the US). If you’d like to join, email the following information to creativestampingdesigns@gmail.com
Your first and last name
Your mailing address for paper to be shipped to.
The email address that is connected to your PayPal account or let me know if you’d like to use Zelle. I will accept Zelle or PayPal for payment. ***You do not need to have a PayPal account to pay the invoice, you can choose to pay by credit card without having a PayPal account. If you’d like to use Zelle, email me and I’ll give you the number associated with my account.
Deadline to sign up for my share is Sunday September 1st at 5:00 PM ET.
Redemption Period: August 1-31, 2024 Ordering Deadline: August 31, 2024 at 11:59 p.m. (MT)
There is no limit to the number of coupon codes you can redeem on an order during the redemption period. If using multiple codes, they must be separated by a space.
Coupon codes may be redeemed one time only. They cannot be redeemed after the August 31.
Coupon codes may be redeemed for any product (excluding Starter Kits). They cannot be used on exchanges.
Bonus Days coupon codes can be applied to month-to-month Paper Pumpkin subscriptions and new prepaid subscriptions.
Designer Series Papew Sale – 15% off August 6th-31st
Between August 6-31, you can shop select Designer Series Paper from the 2024–2025 Annual Catalog at 15% off! This is the perfect time to stock up and save on some of your favorite paper.
Designer Series Paper Sale Details:
Sales Period: August 6-31, 2024
Ordering Deadlines: August 31 at 11:59 p.m. (MT)
The fourteen paper packs included in the sale can be found listed in This Flyer
Only the select packs of papers listed on the flyer are included in the sale.
You CAN redeem your Bonus Days coupons when you order the sale papers!
You must open and close the order during the allotted dates to receive the discount.
There are NO limits on ordering. However, product is only available while supplies last.
Designer Series Paper purchased with Stampin’ Rewards or as part of a Starter Kit WILL qualify for the discount.
Head over to my Online Store beginning August 6 and get 15% off your favorite packs of paper!!
Subscribe to Paper Pumpkin for a monthly, all-inclusive crafting kit that’s a fun surprise! Each kit includes a photopolymer stamp set, Classic Stampin’ Spot, and step by step instructions to complete exclusive paper craft projects, including cards, tags, and gift packaging. And don’t miss the special add-on that coordinates with the next three months!
Share your love for all things autumn with this kit! Don’t miss the whimsical, water colored ephemera pack with this month’s Paper Pumpkin!
• Makes 9 cards, 3 each of 3 designs • Project includes printed cards and coordinating envelopes • Laser cut card fronts, ephemera pack, and embellishments • Coordinating colors: Cajun Craze (Classic Stampin’ Spot), Crushed Curry, Poppy Parade, Pumpkin Pie, Very Vanilla, Wild Wheat
Don’t miss the coordinating Every Celebration Dies Add-On!
This exclusive add-on (item 164991) coordinates with the three upcoming kits! Paper Pumpkin subscribers can purchase it beginning 11 July. The add-on is available only while supplies last, so it’s best to shop early!
Subscribe to the September Paper Pumpkin Kit between 11 August and 10 September by clicking here!
Note: Supplies may be limited toward the end of the subscription period.
Basic Beige Cardstock 4 1/4″ X 8 1/2″(large card base scored & folded at 5 1/2″), 3″ X 8″ (small card base scored & folded at 4″), 3″ X 5 1/2″(artwork), 2 3/4″ X 3 3/4″(inner liner for small card base), 1/4″ X 3″(sentiment)
Mossy Meadow Cardstock 2 7/8″ X 4 1/8″(large card front mat), 2 – 2 7/8″ X 3 7/8″ (small card front mat and small inner liner mat), 4 1/8″ X 5 3/8″(large card base inner liner mat). 3″ X 3″ (circle mat)
Iconic Celebration 6 X 6 Designer Series Paper 2 3/4″ X 4″(large card front), 2 3/4″ X 3 3/4″(small card front), 4″ X 5 1/4″(large card base inner liner), 2 1/4″ X 6″(envelope flap)

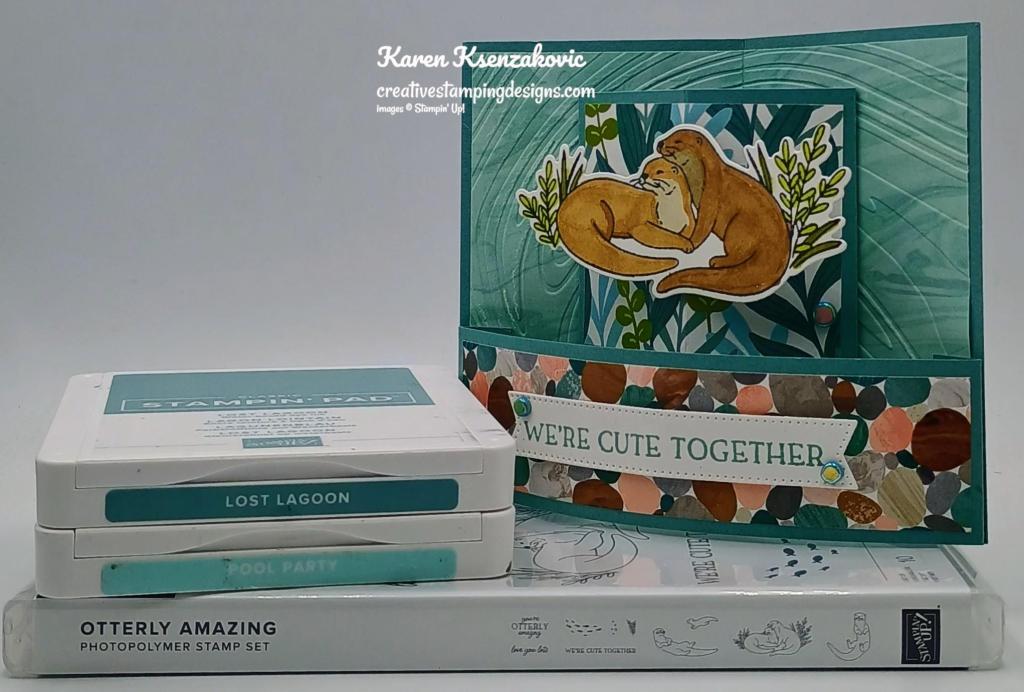
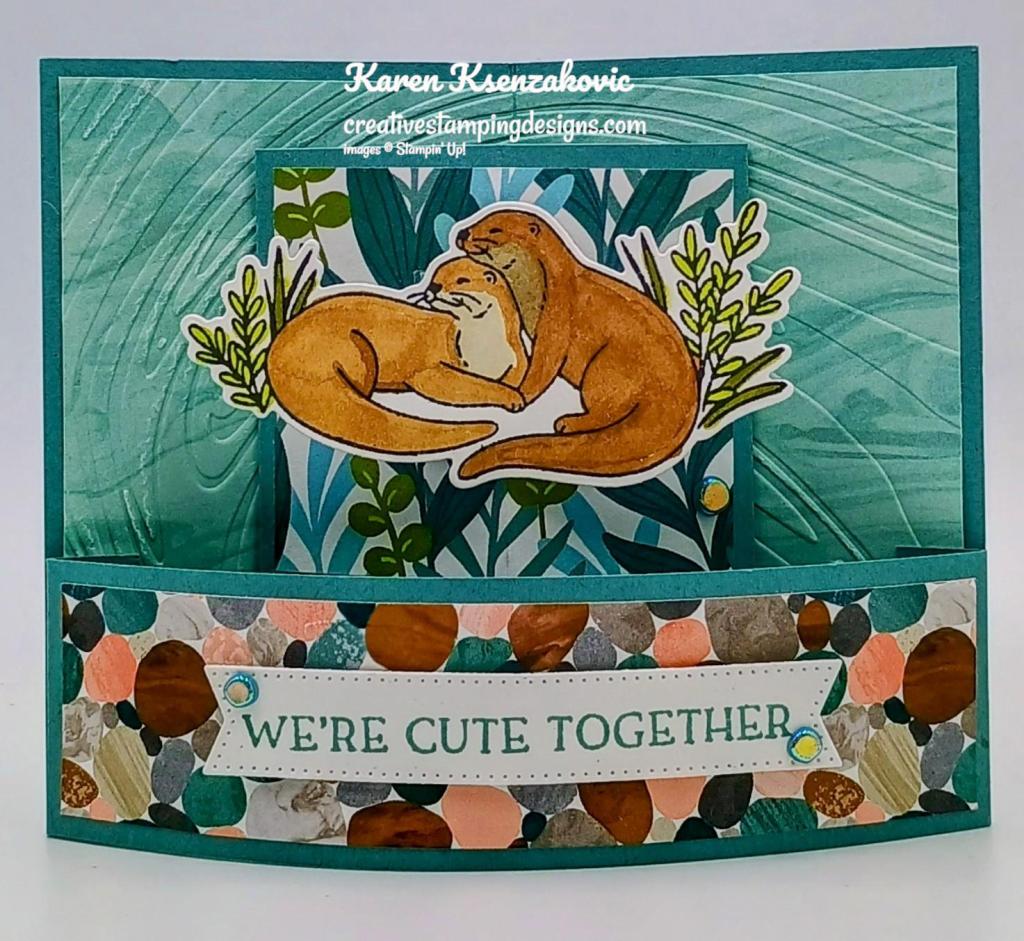
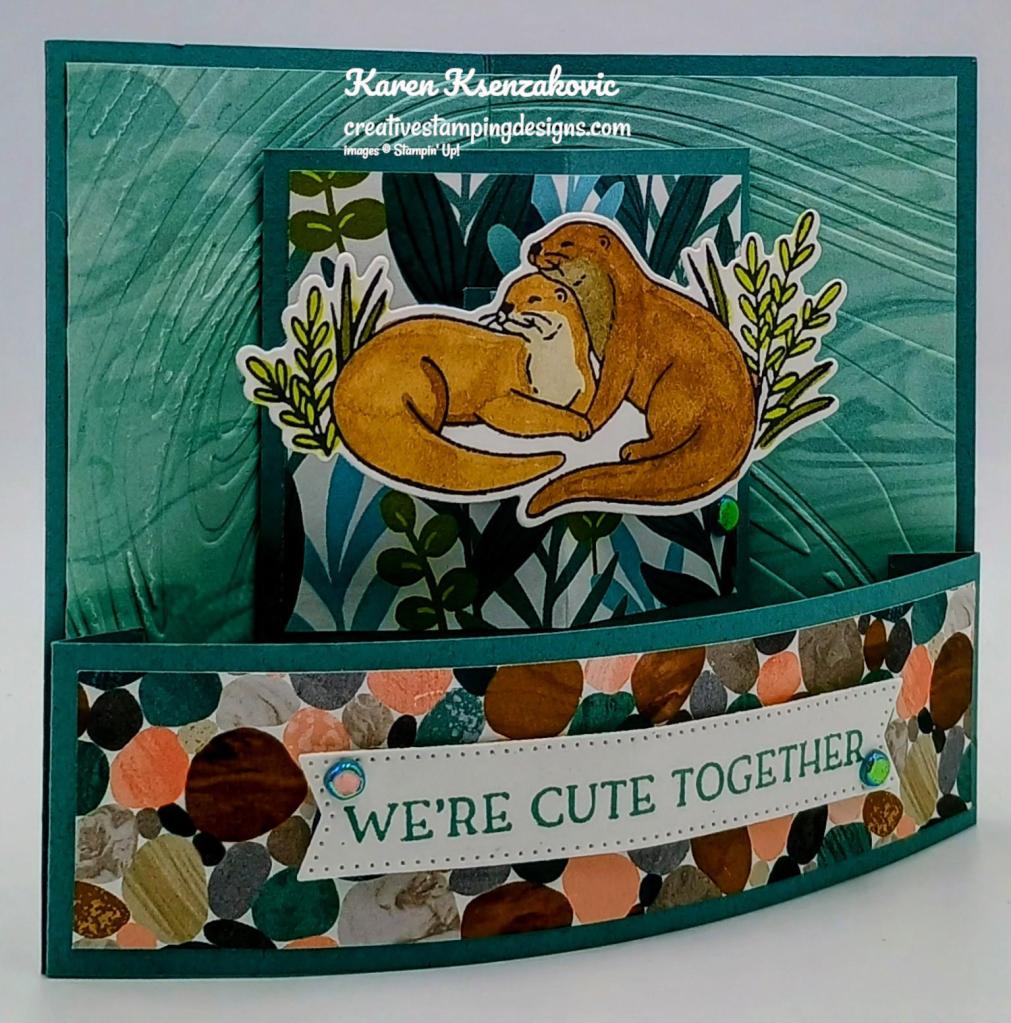
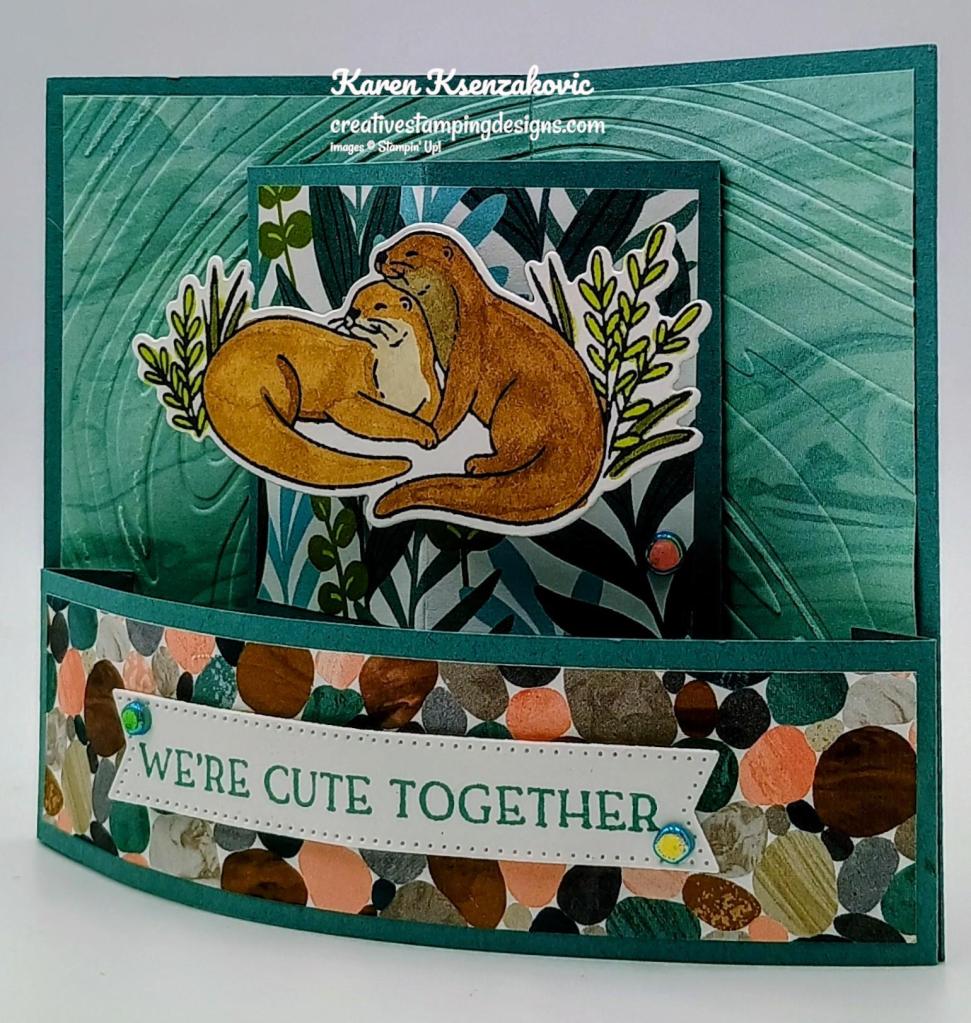
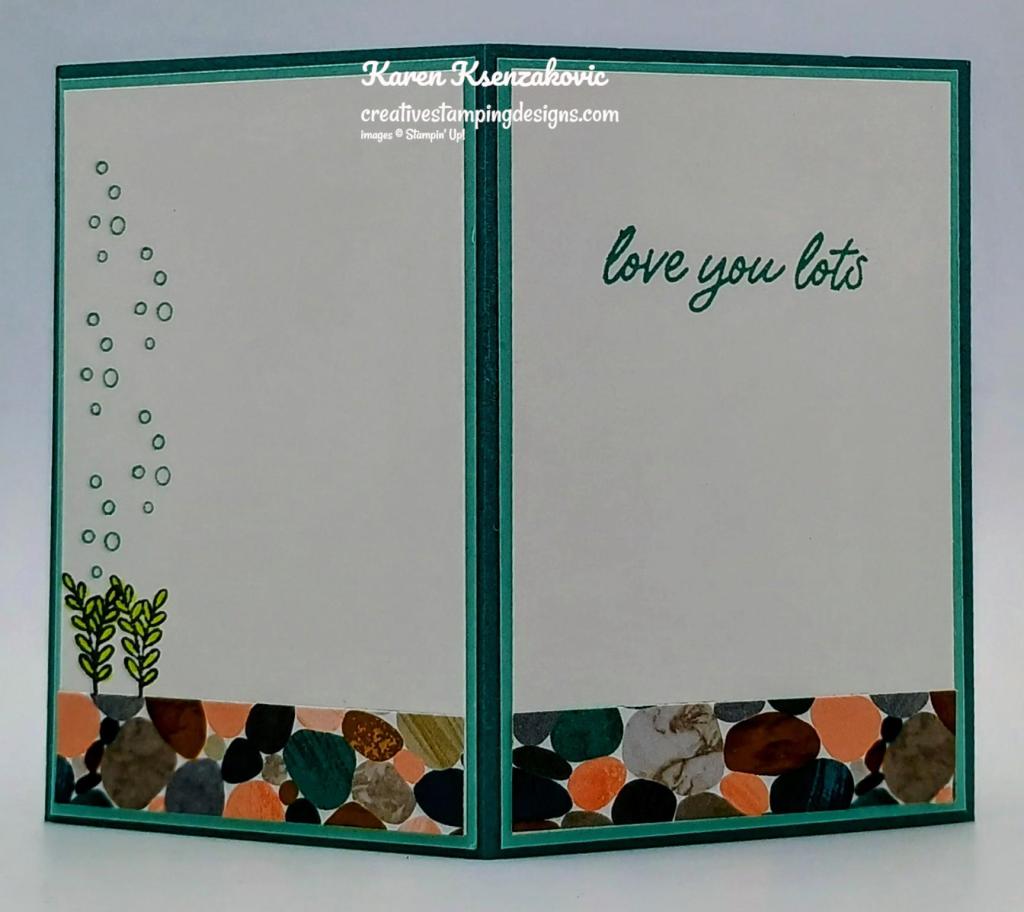
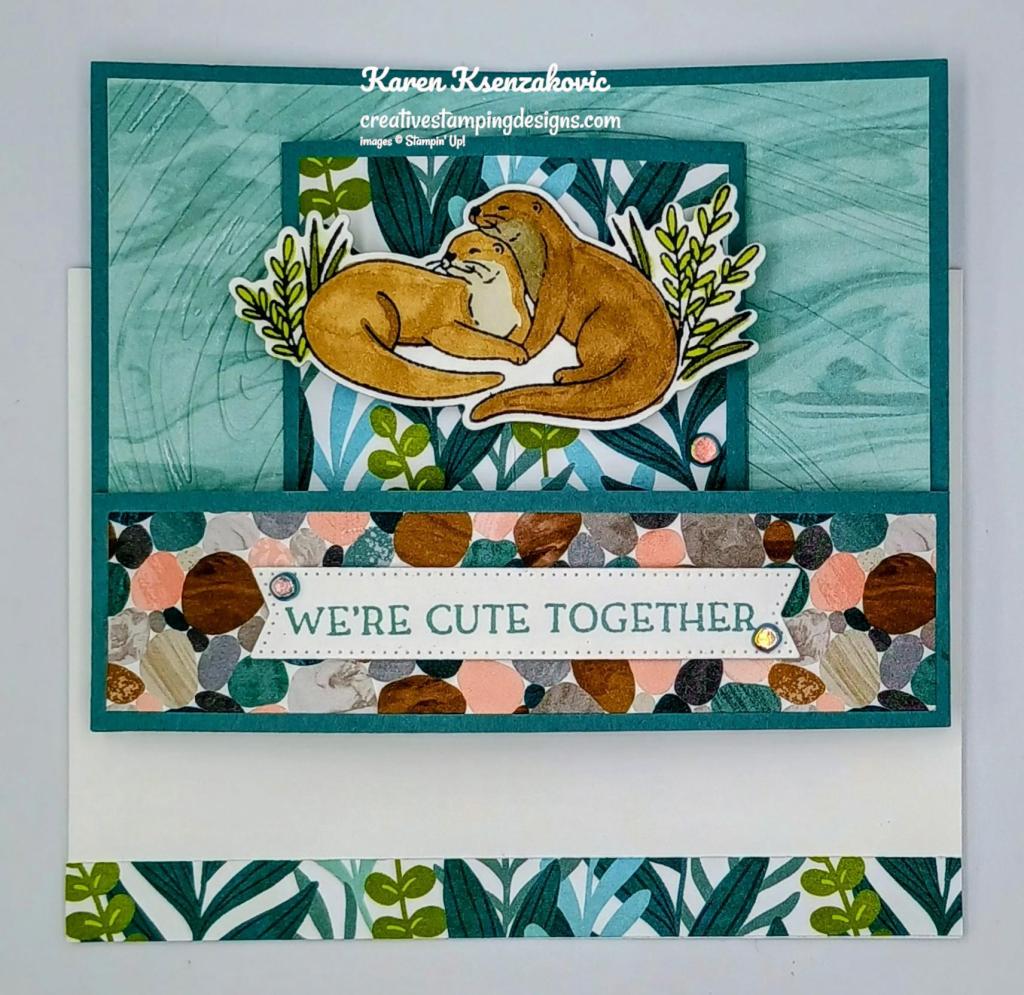
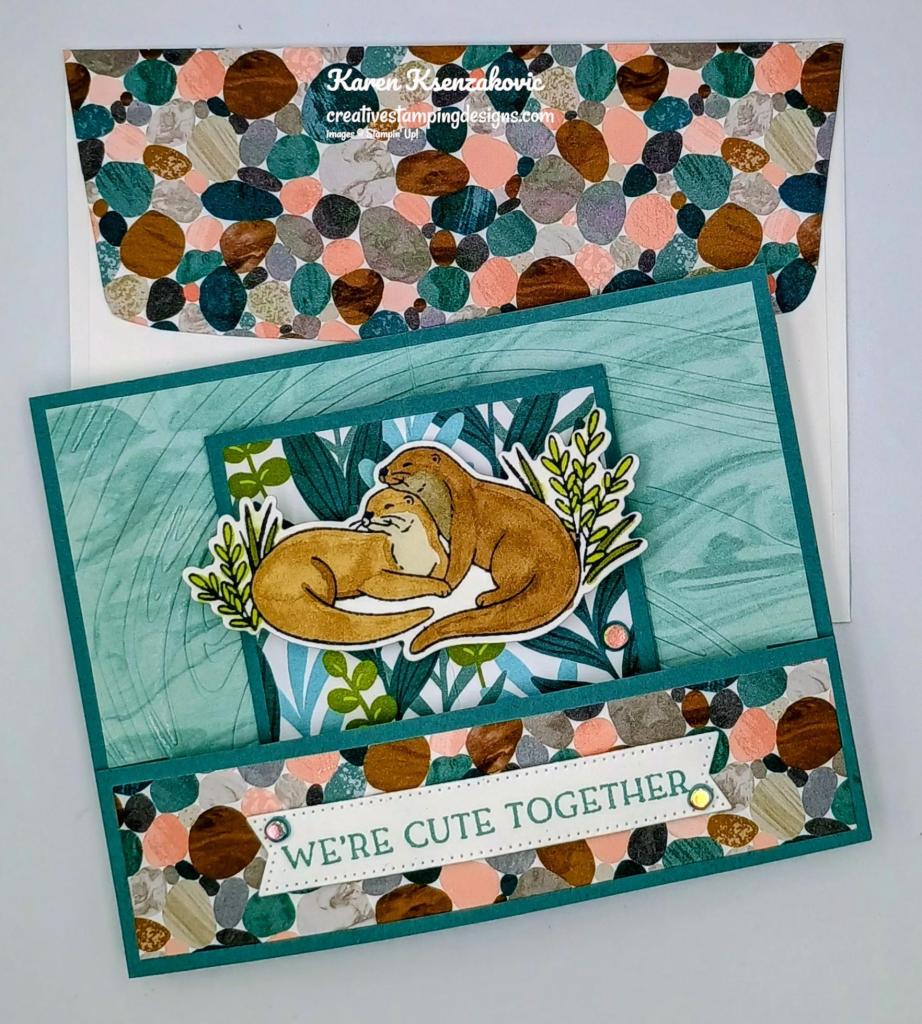

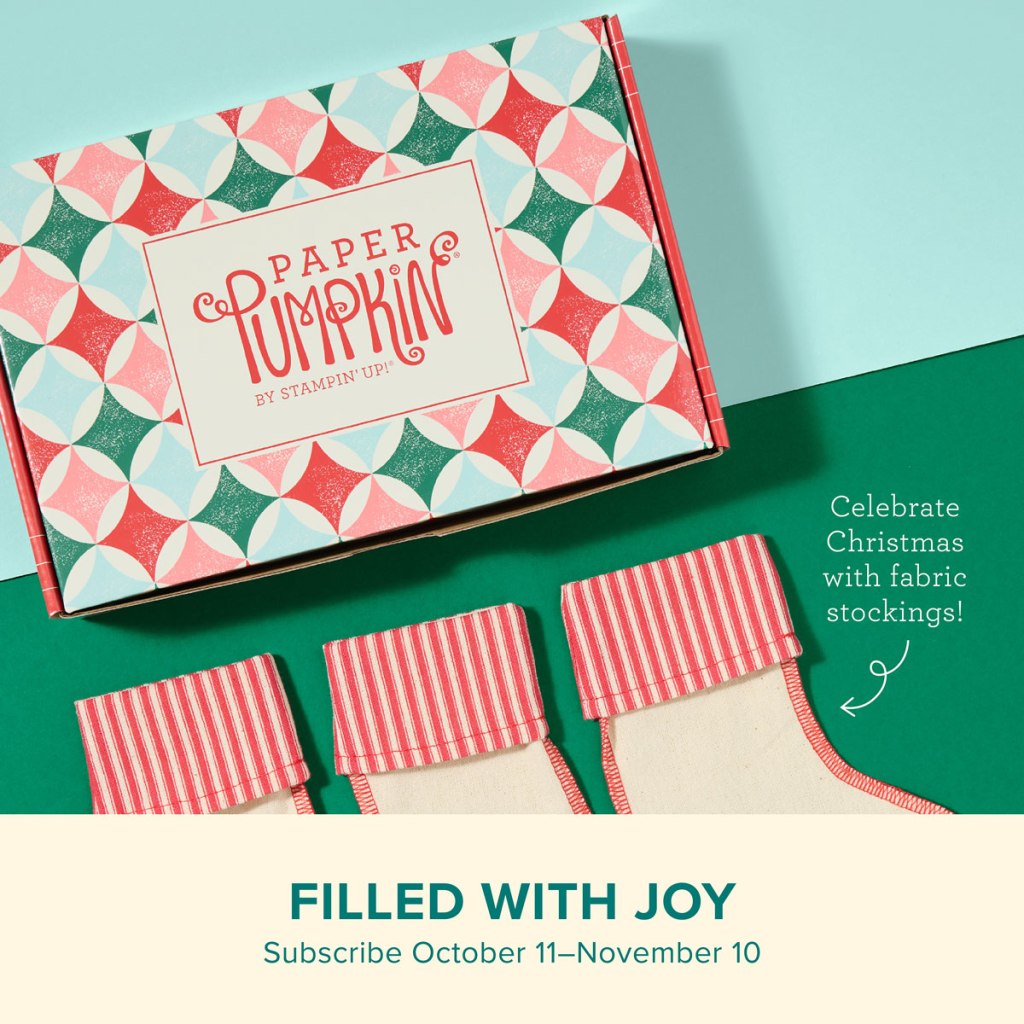
")
")


 Designer Series Paper")


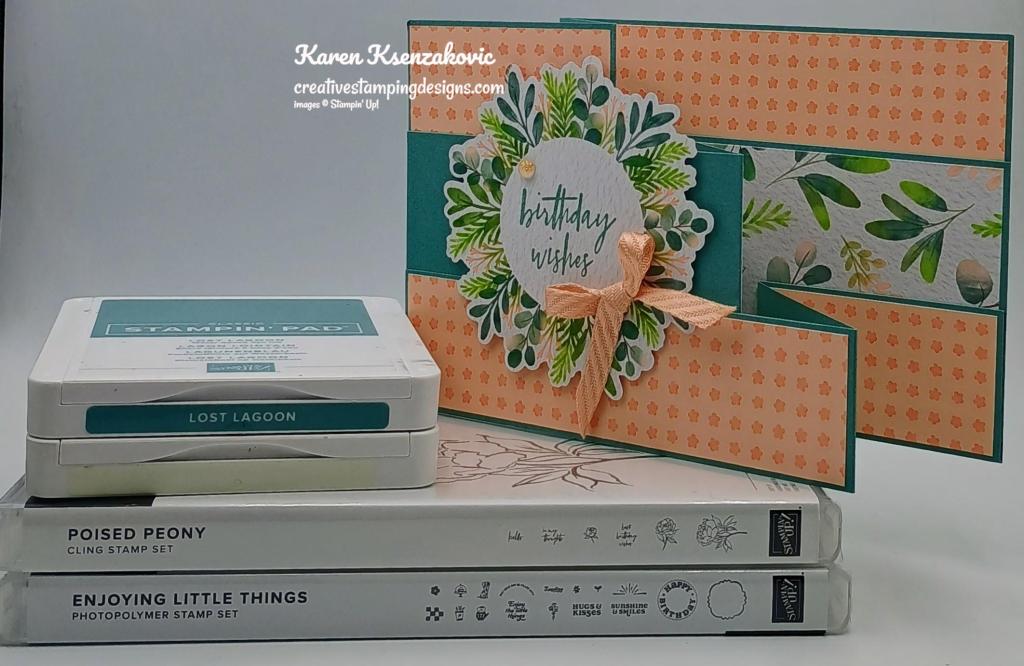


")
")

 Designer Series Paper")


 Diagonal Trim Combo Pack")


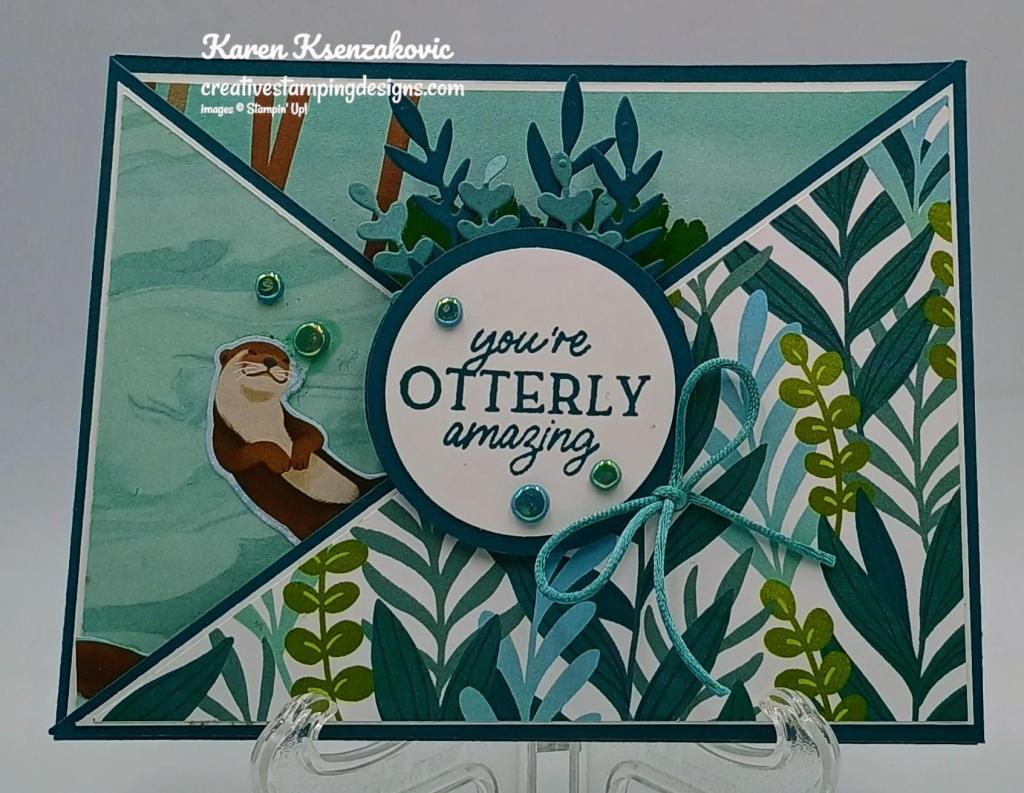
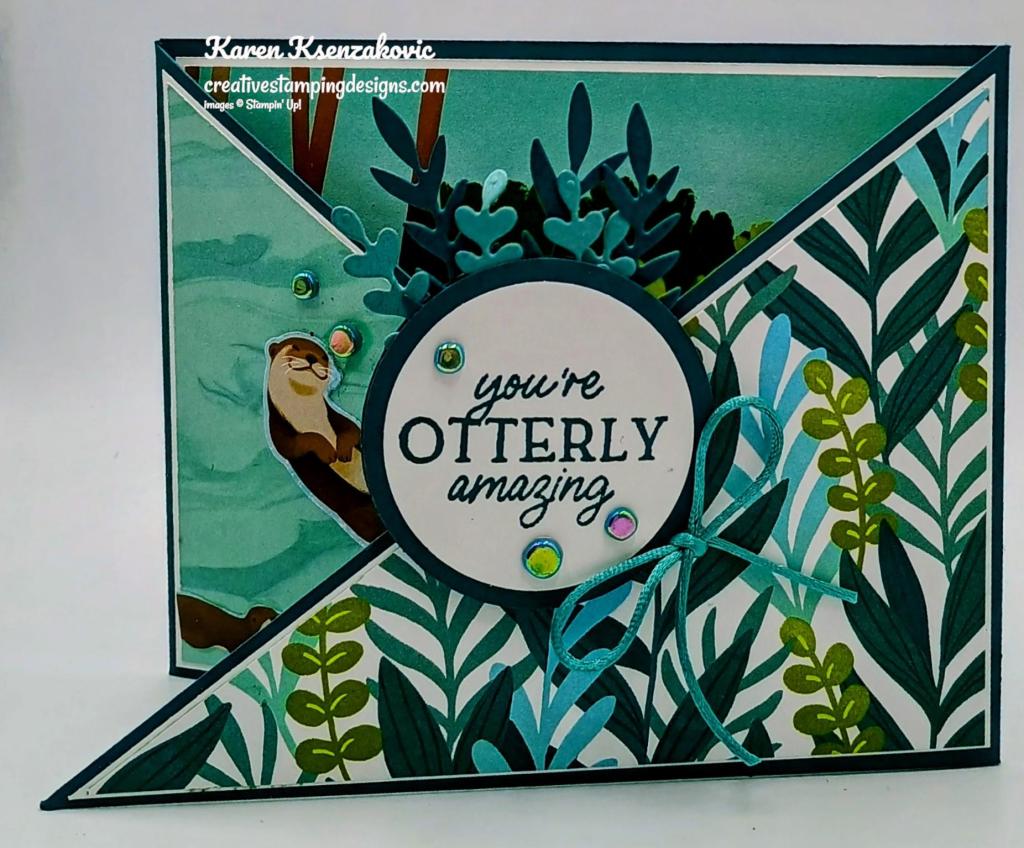
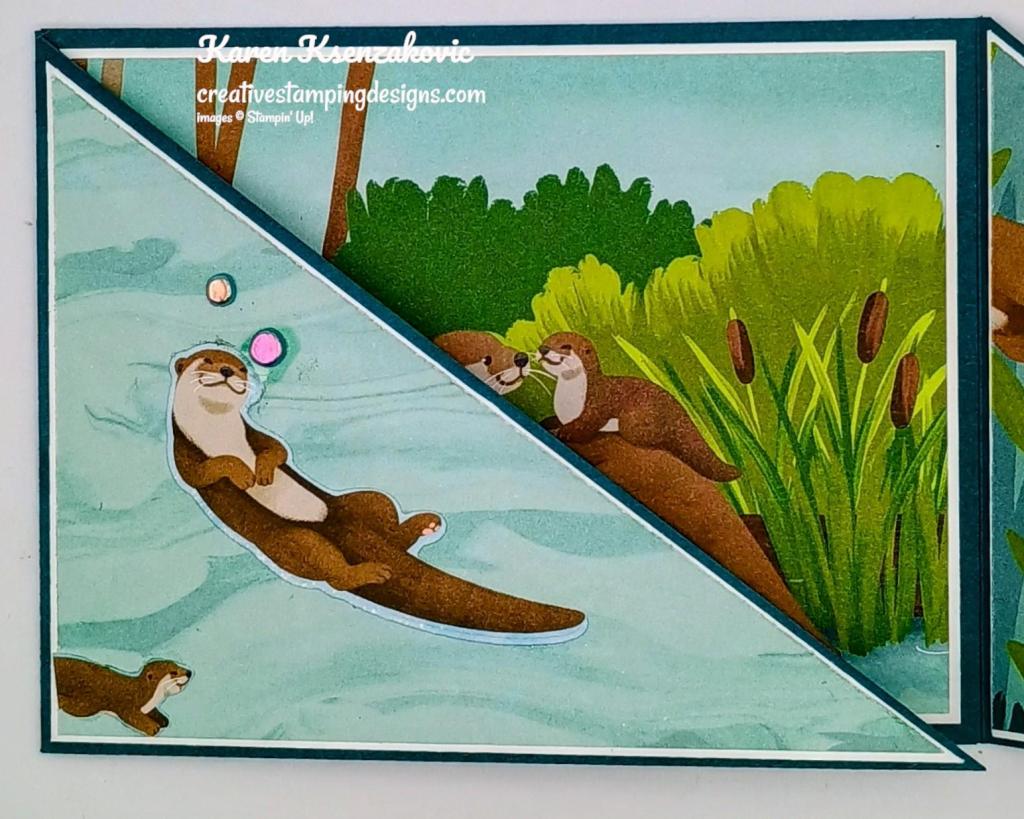
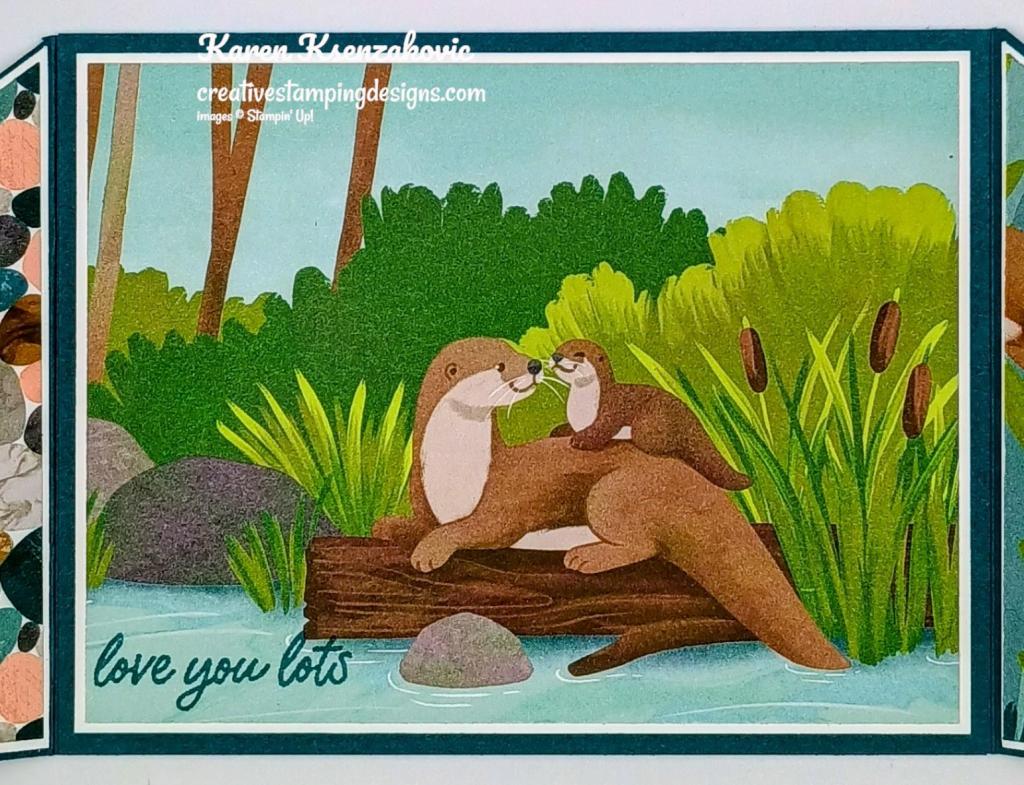
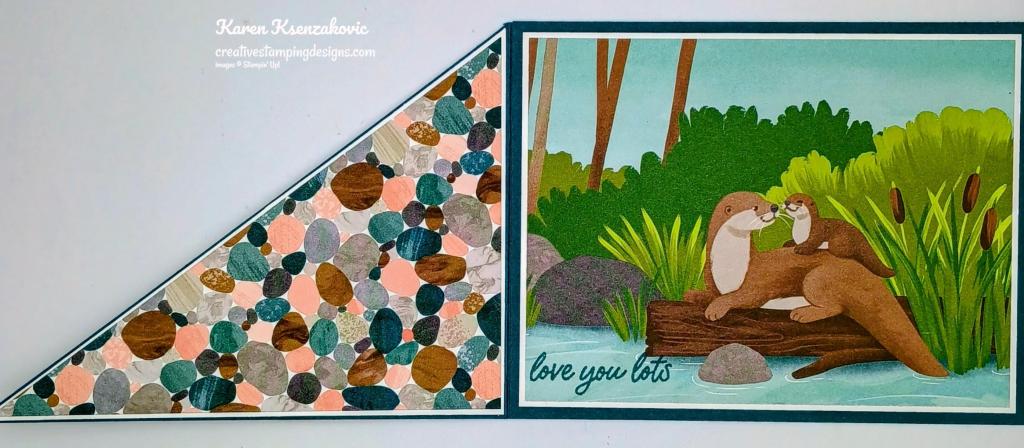
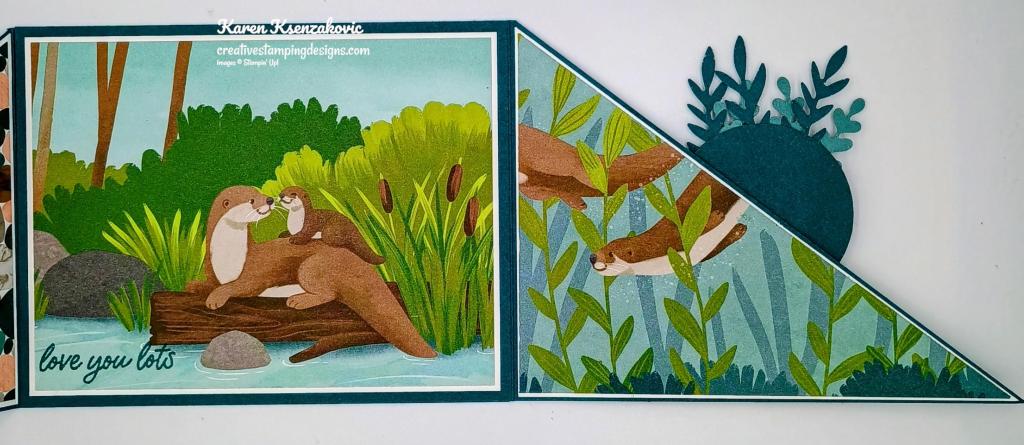
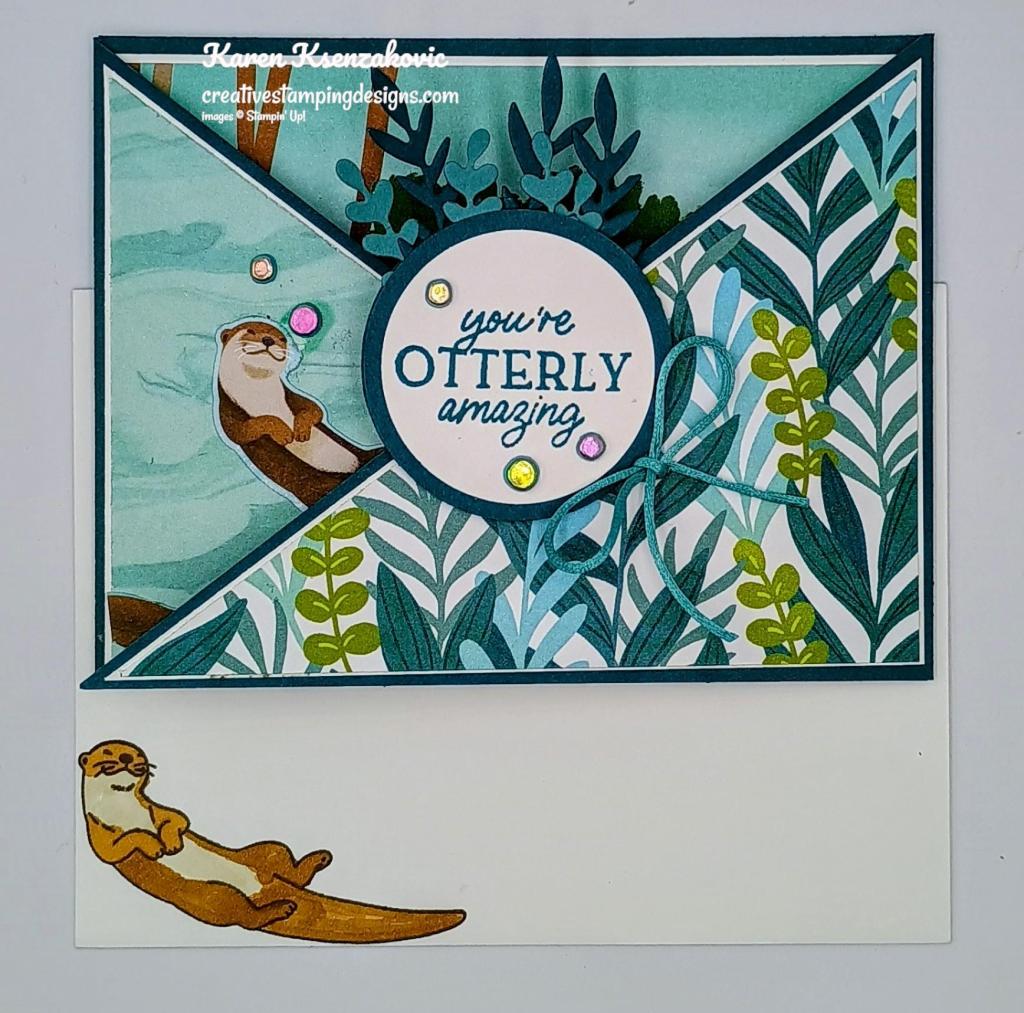
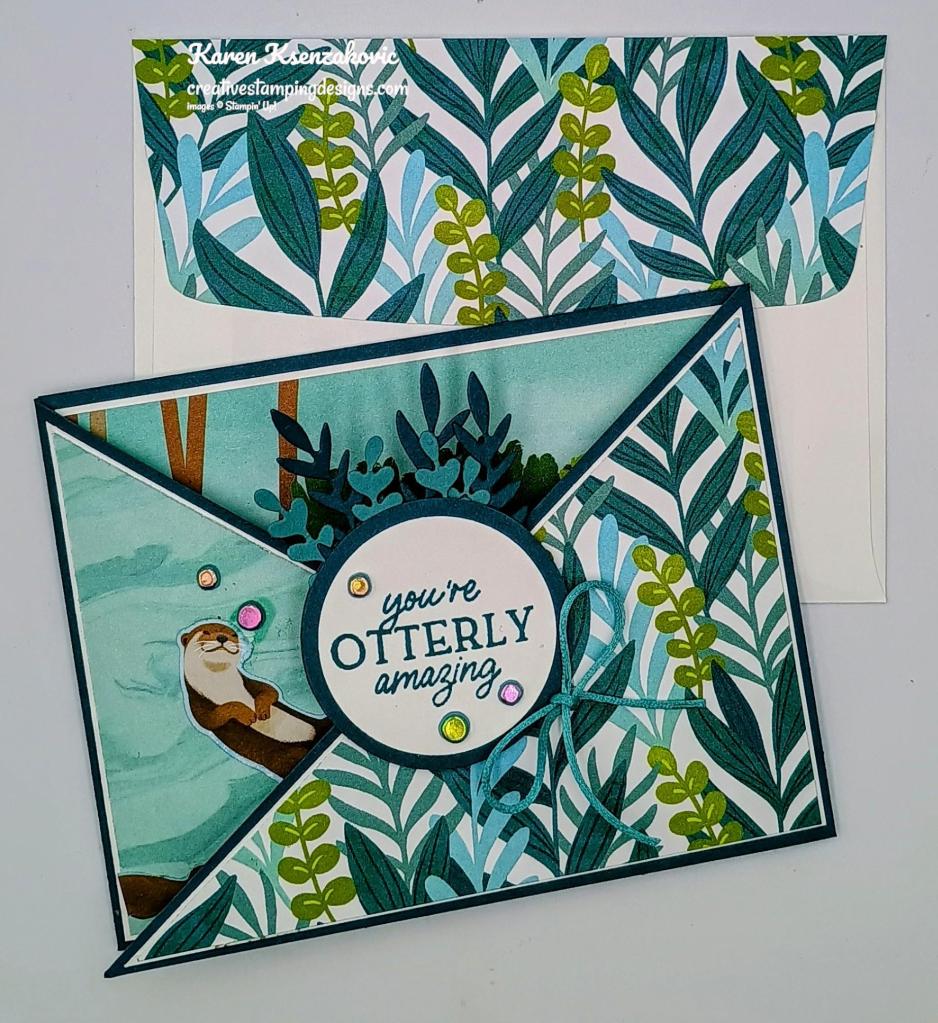


 Circle Punch")
 Circle Punch")


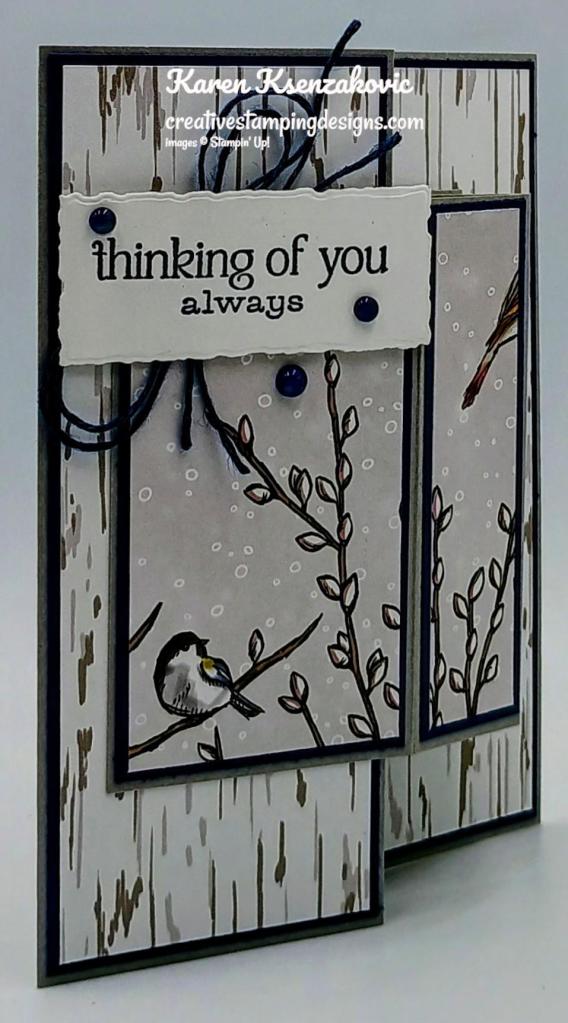

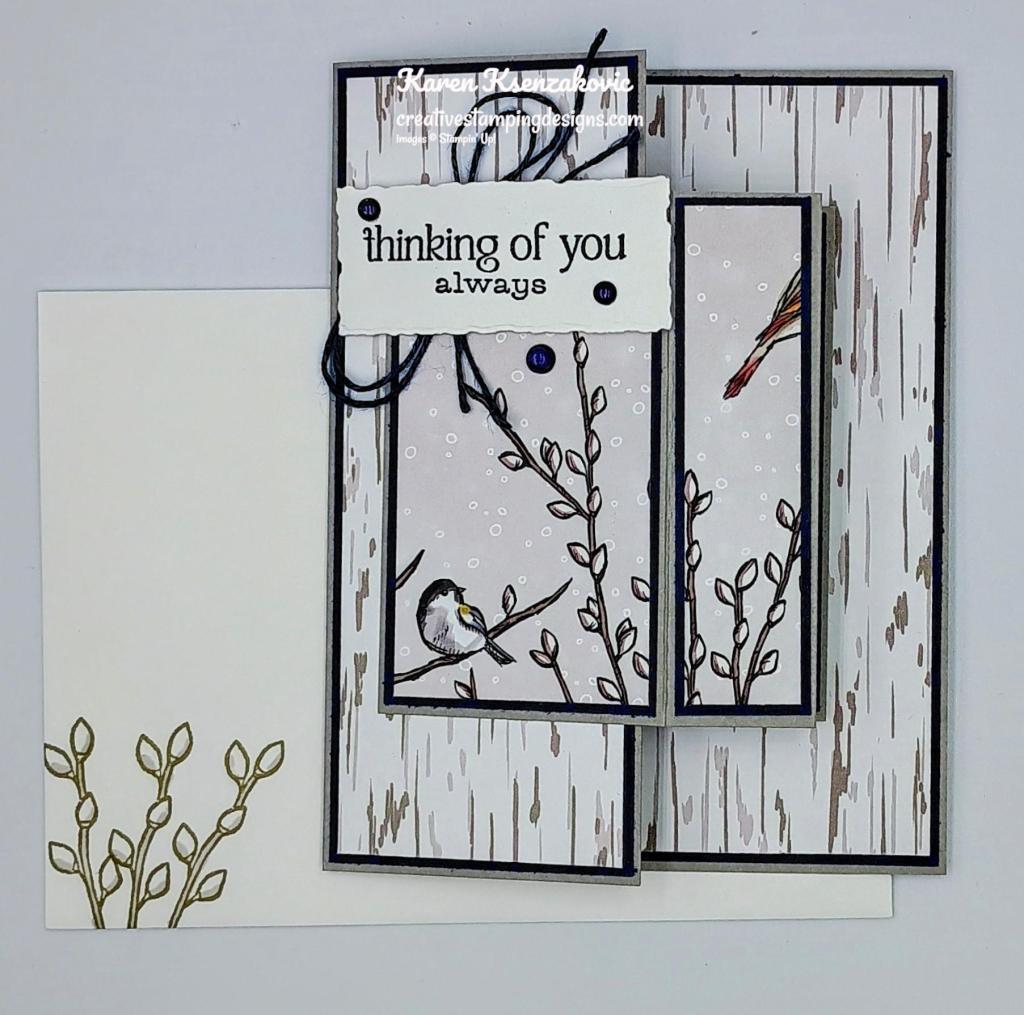


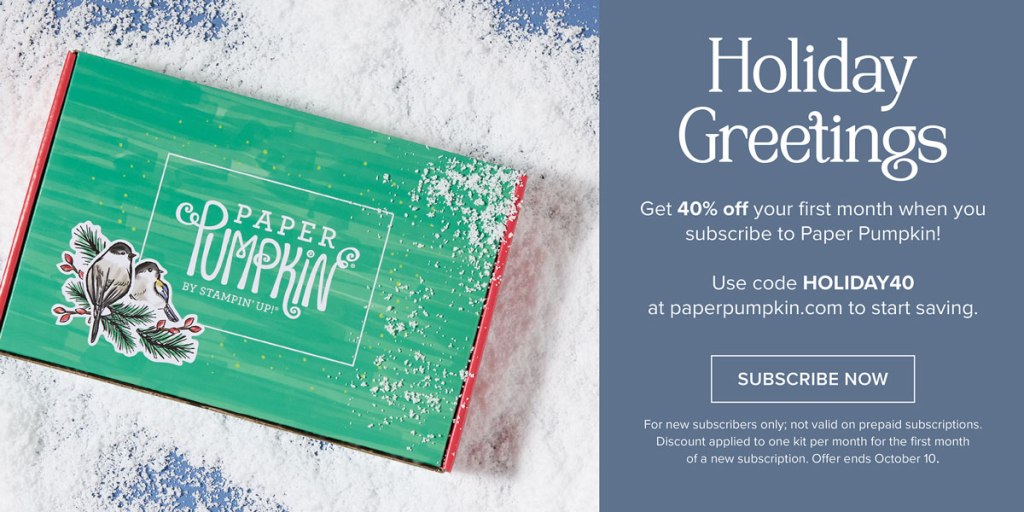

")
")


 Designer Series Paper")


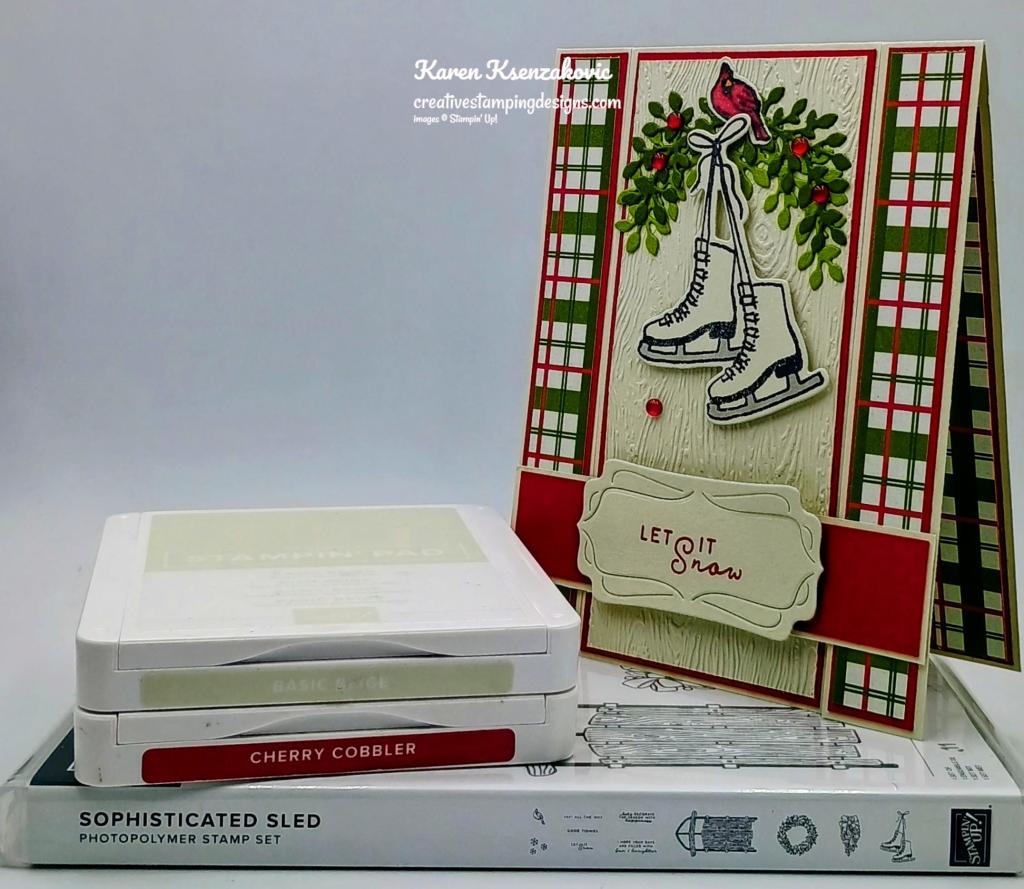

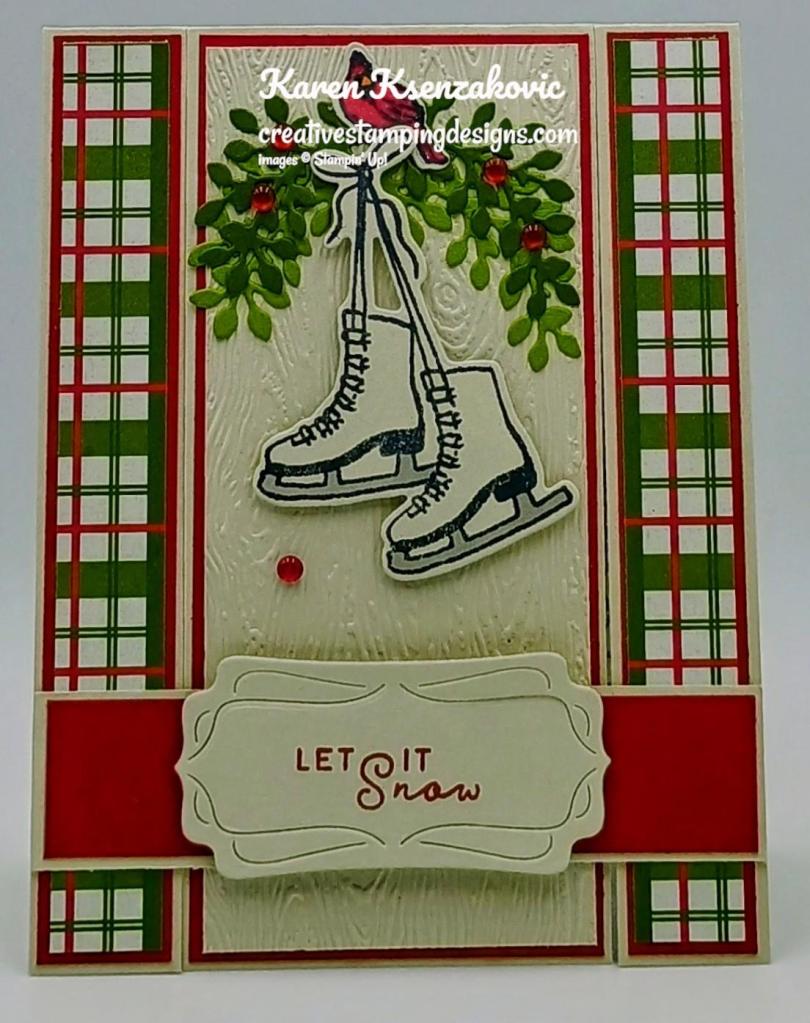
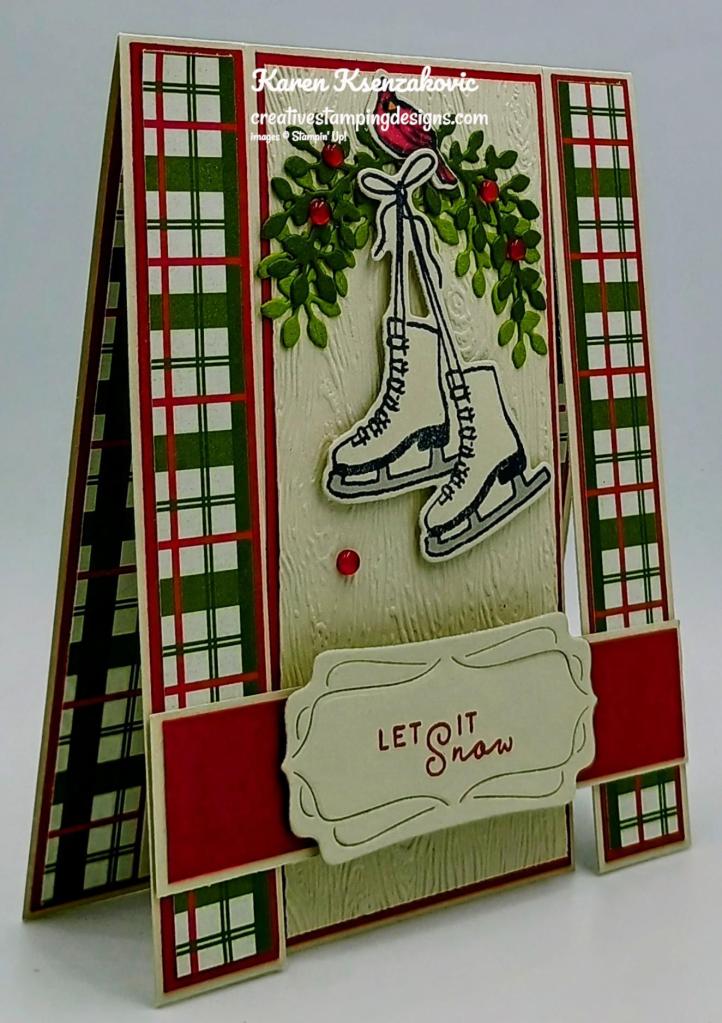
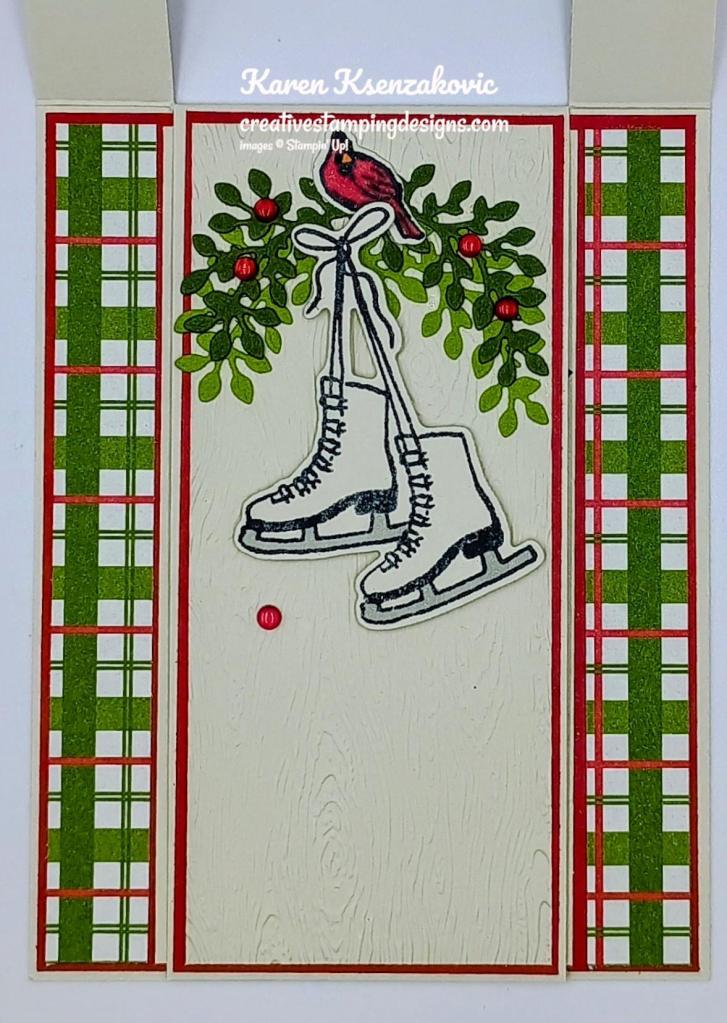
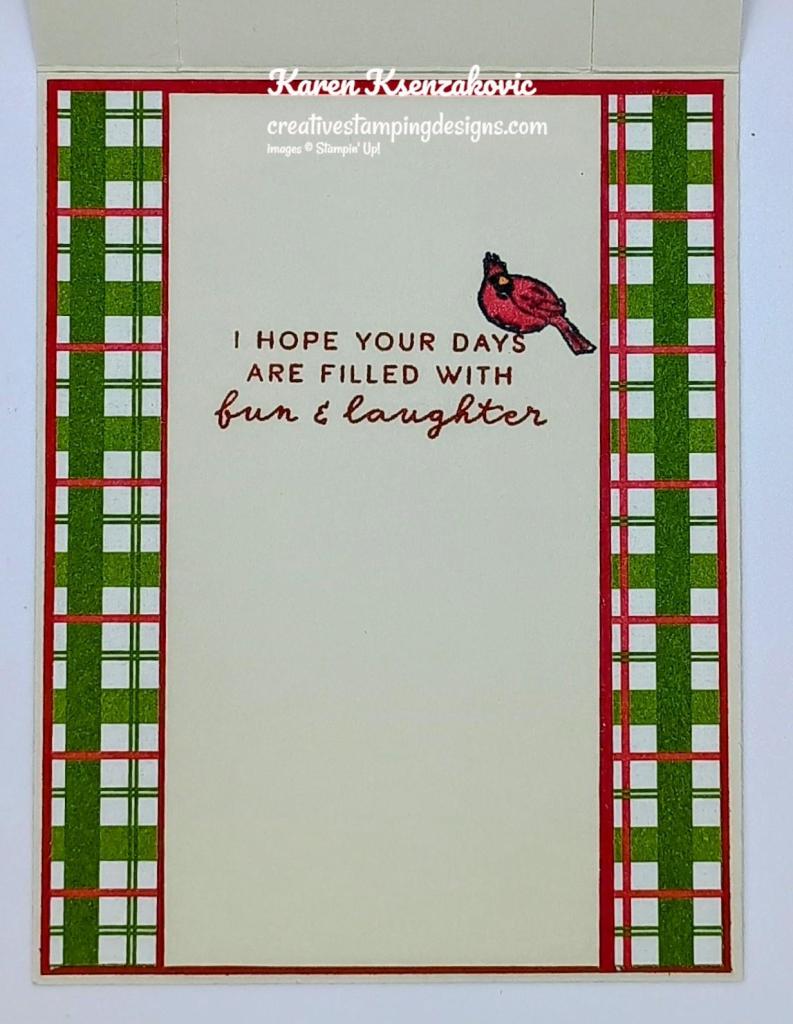
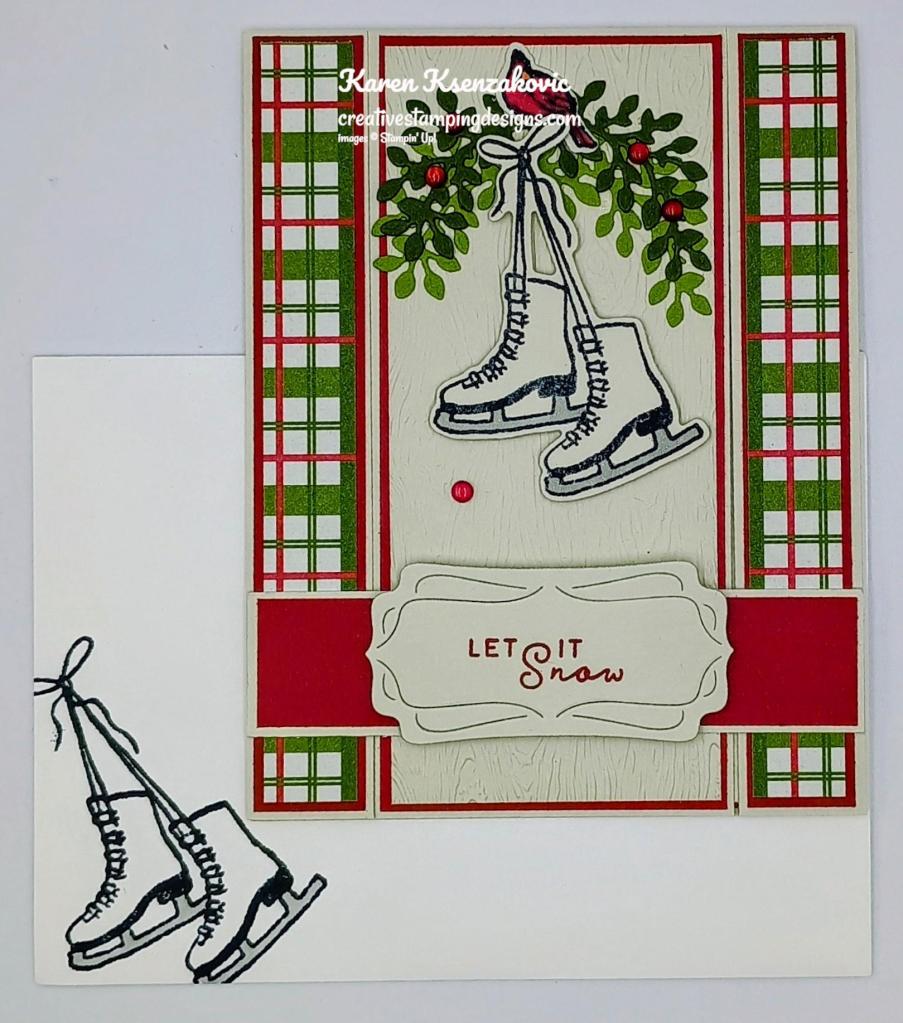


")
")


 Designer Series Paper")


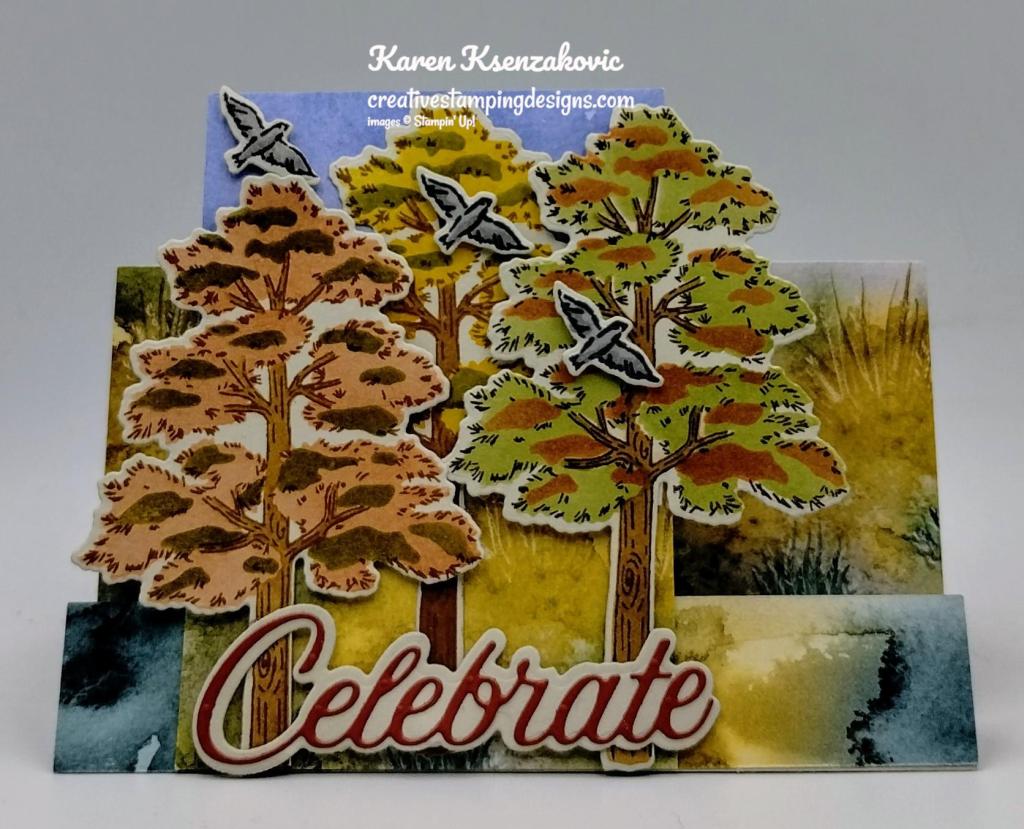


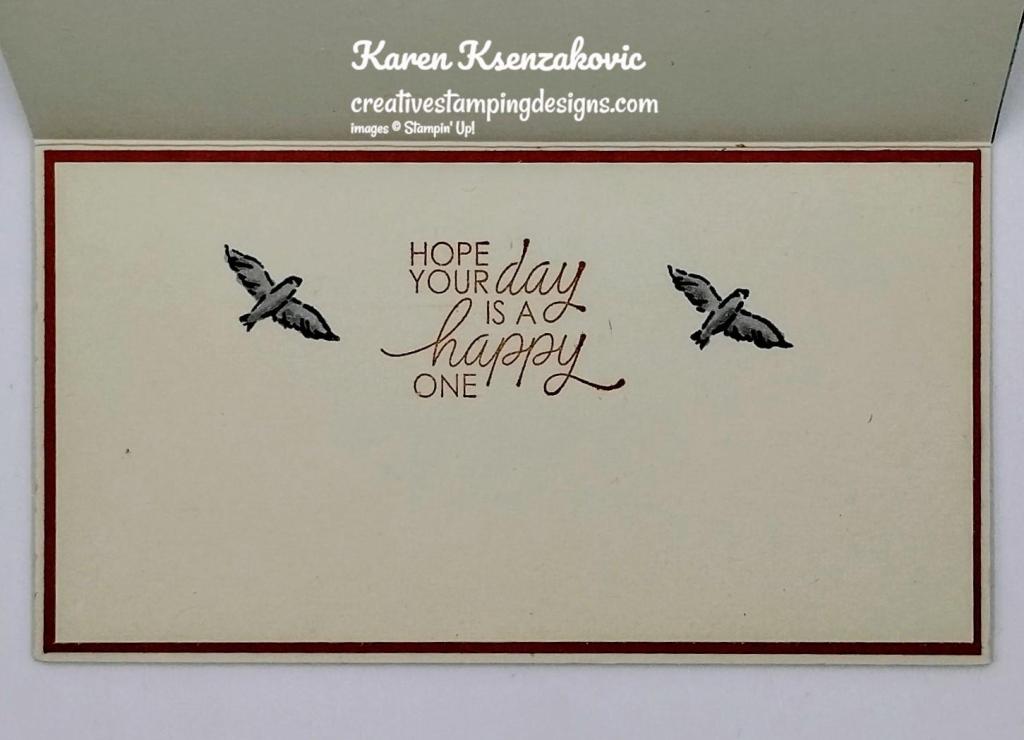


")
")


")


 Designer Series Paper")


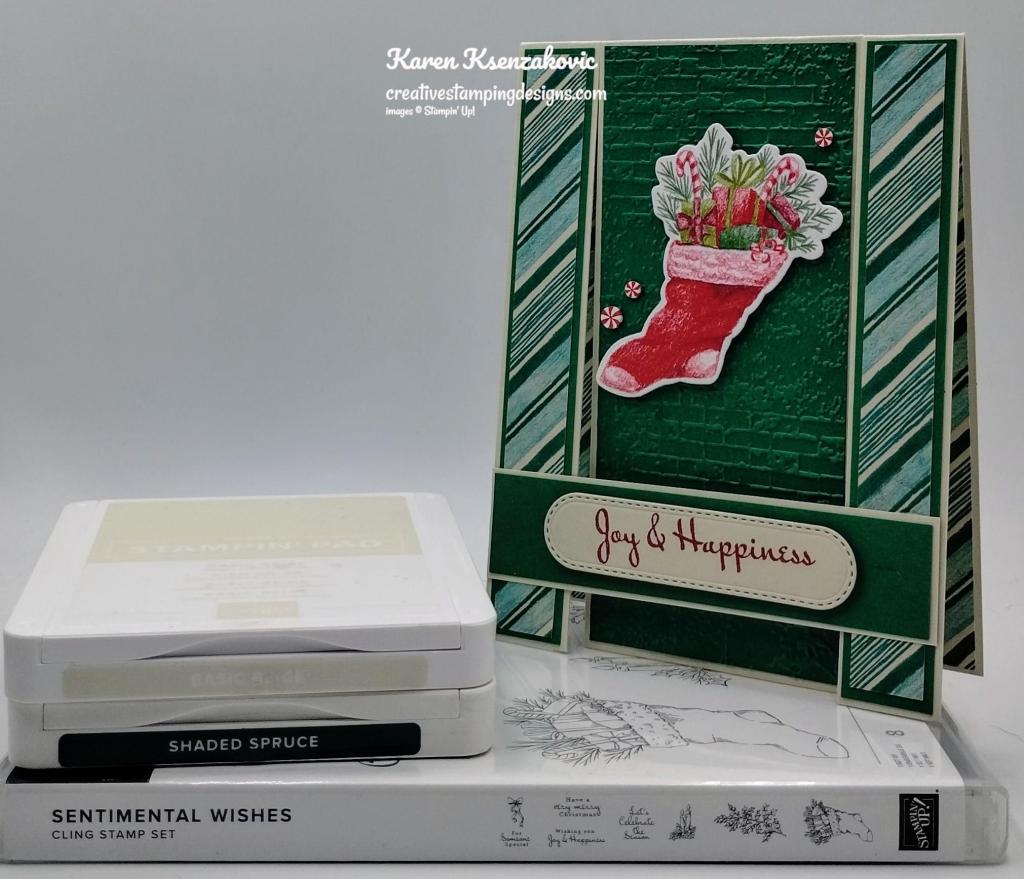


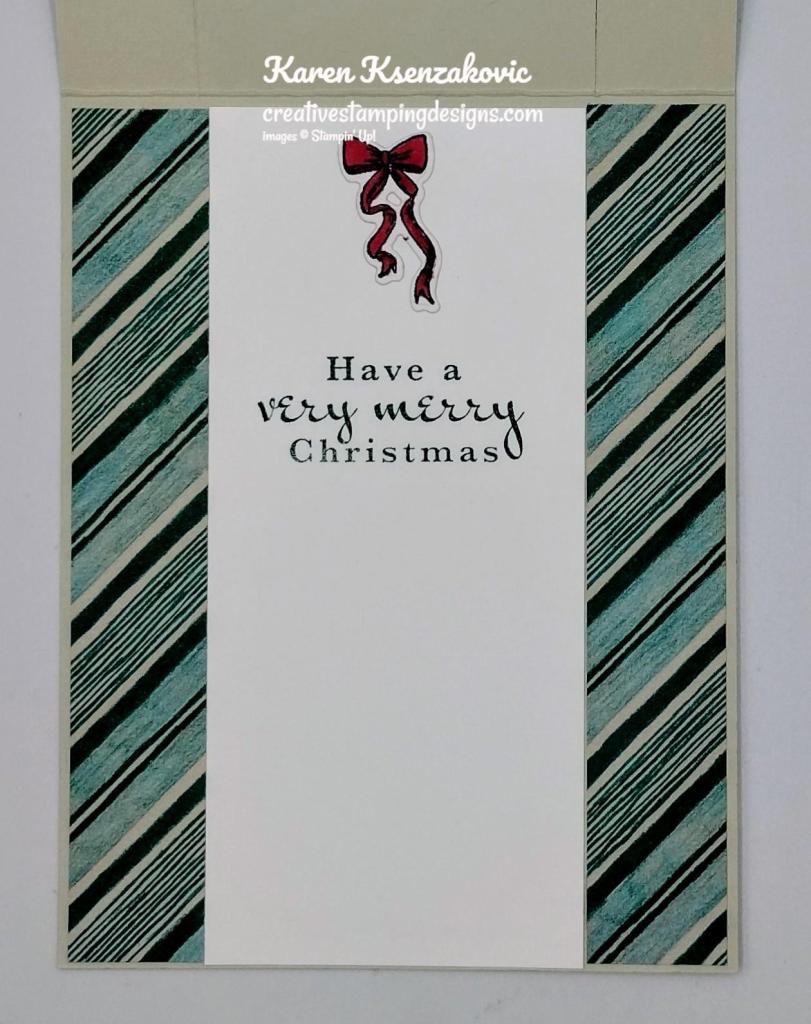

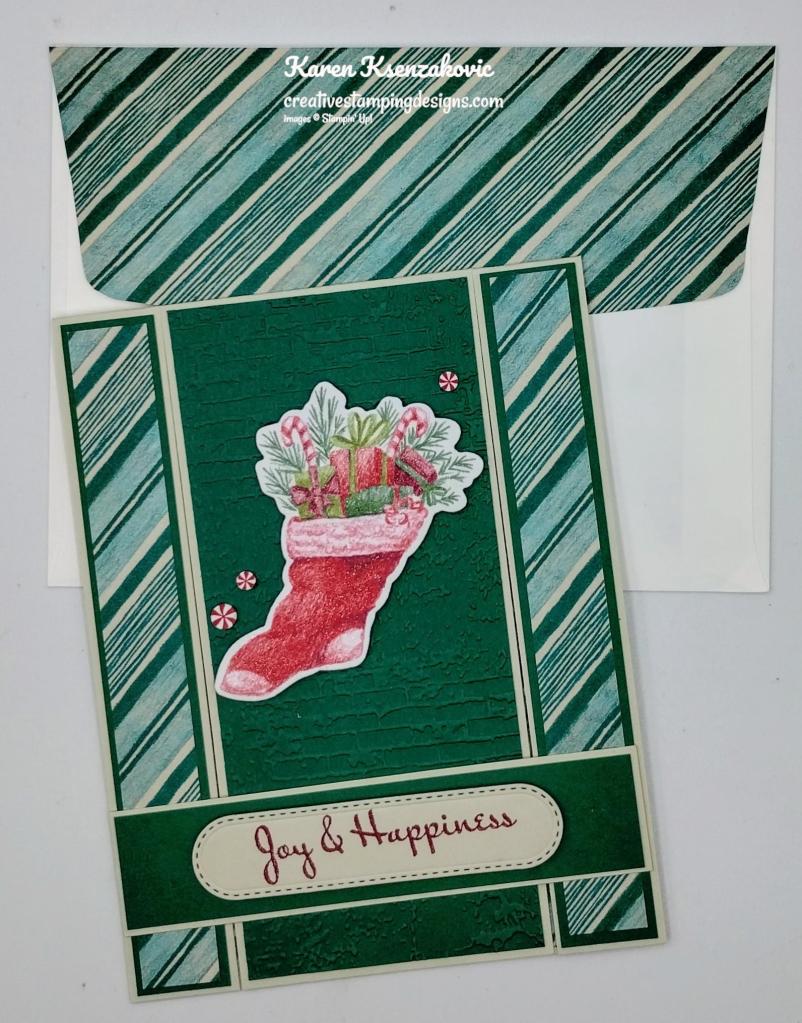

")
")


 Designer Series Paper")


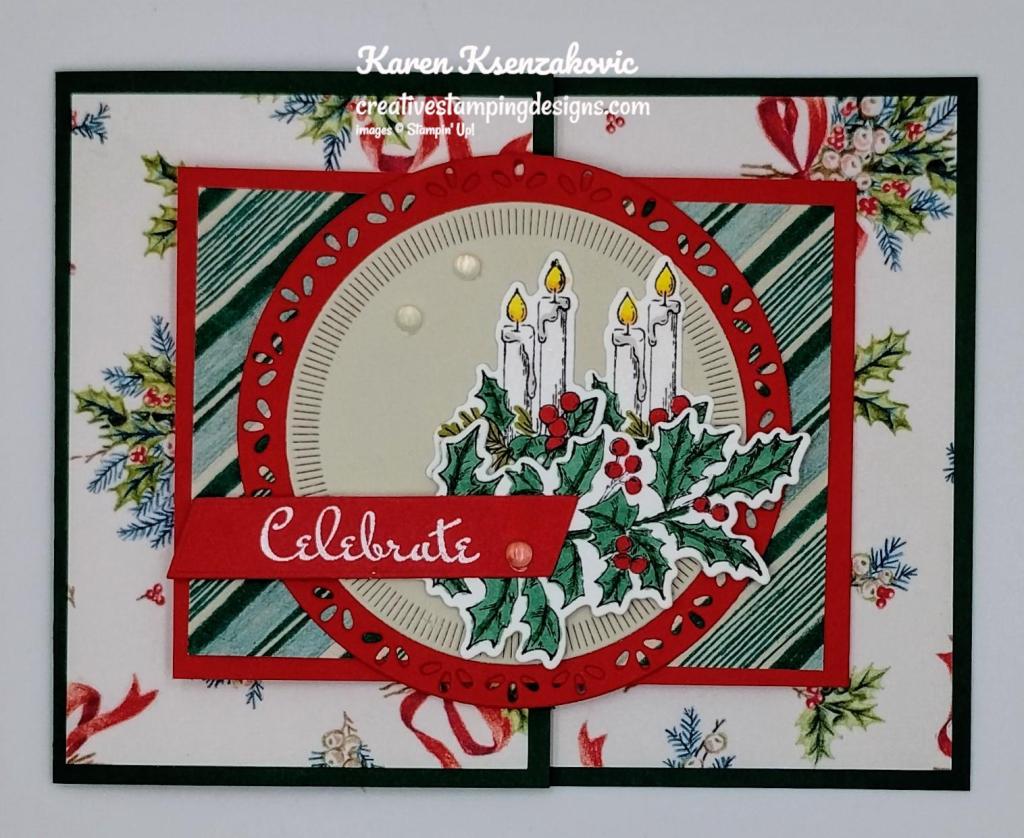
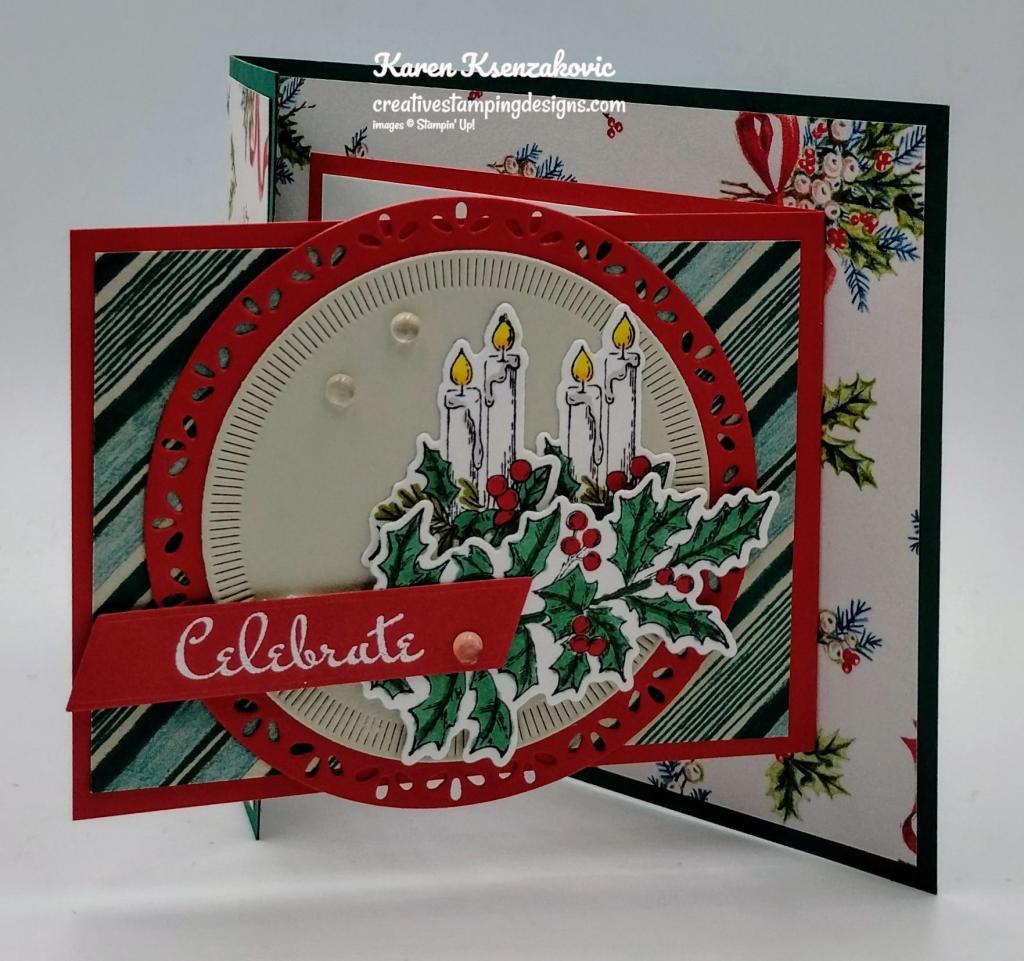


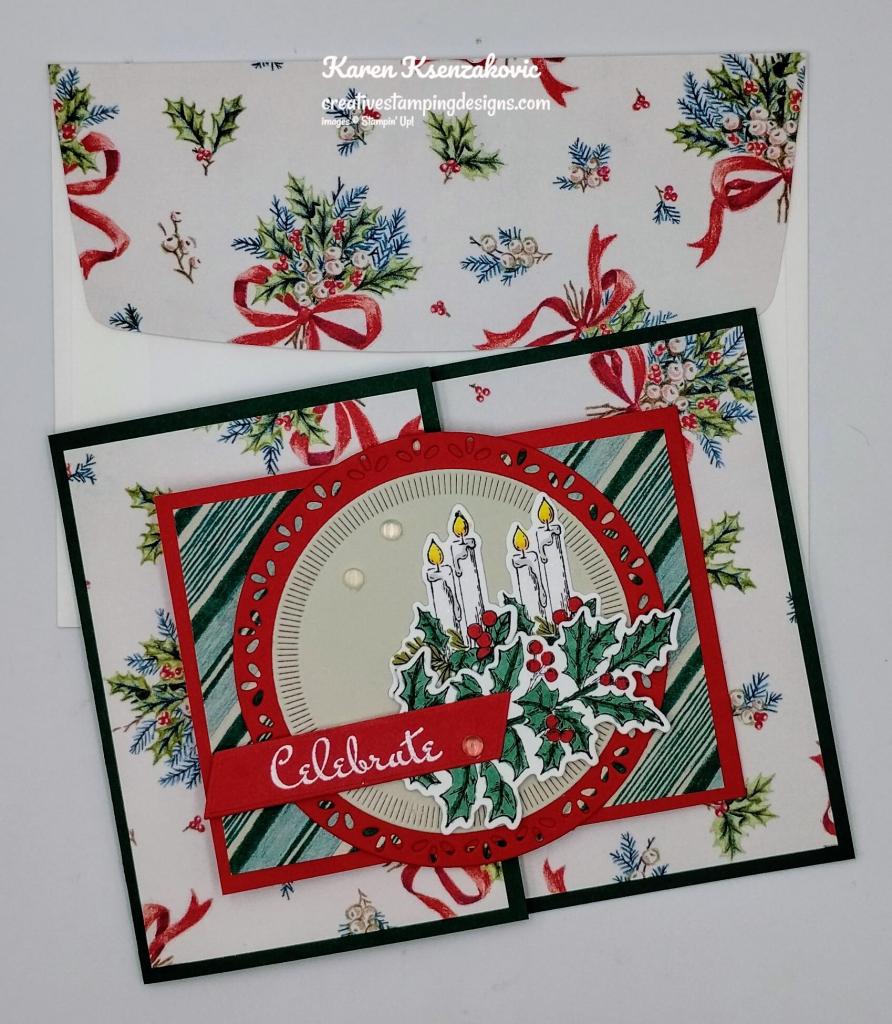


")


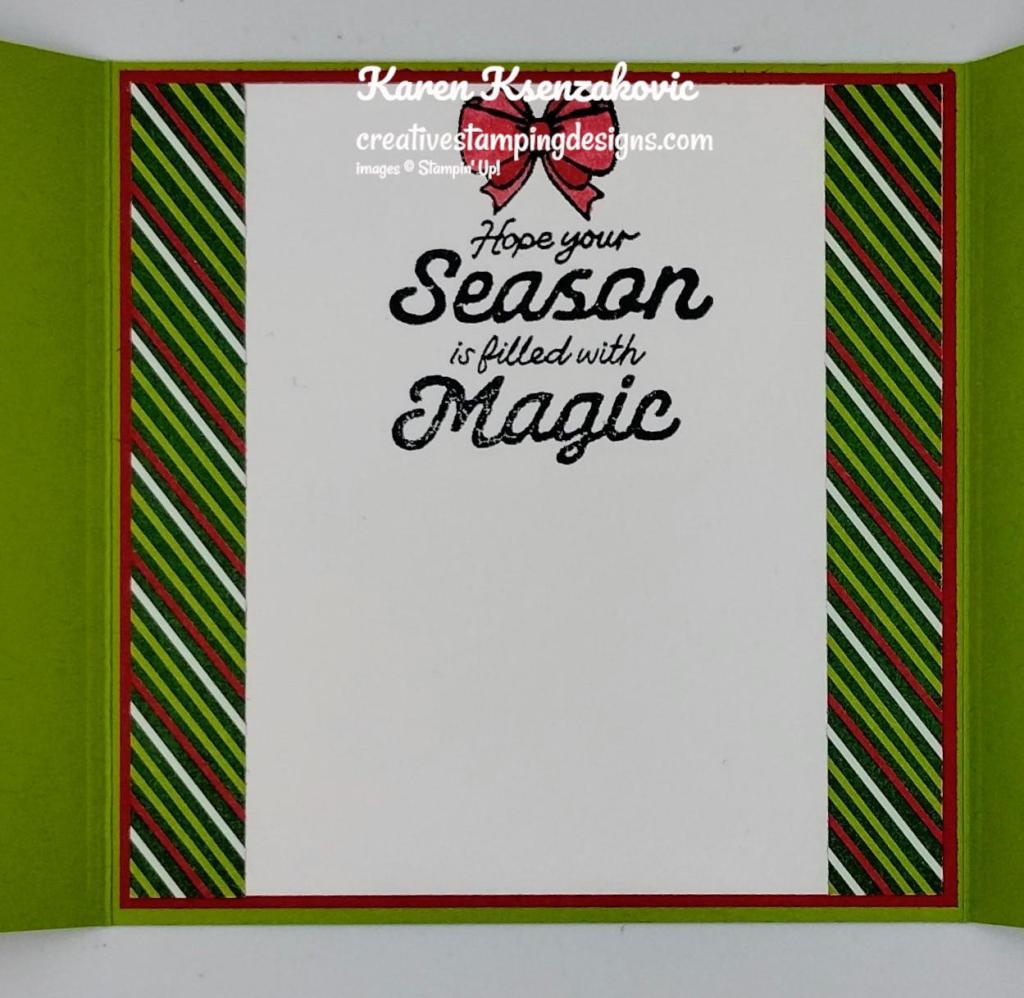

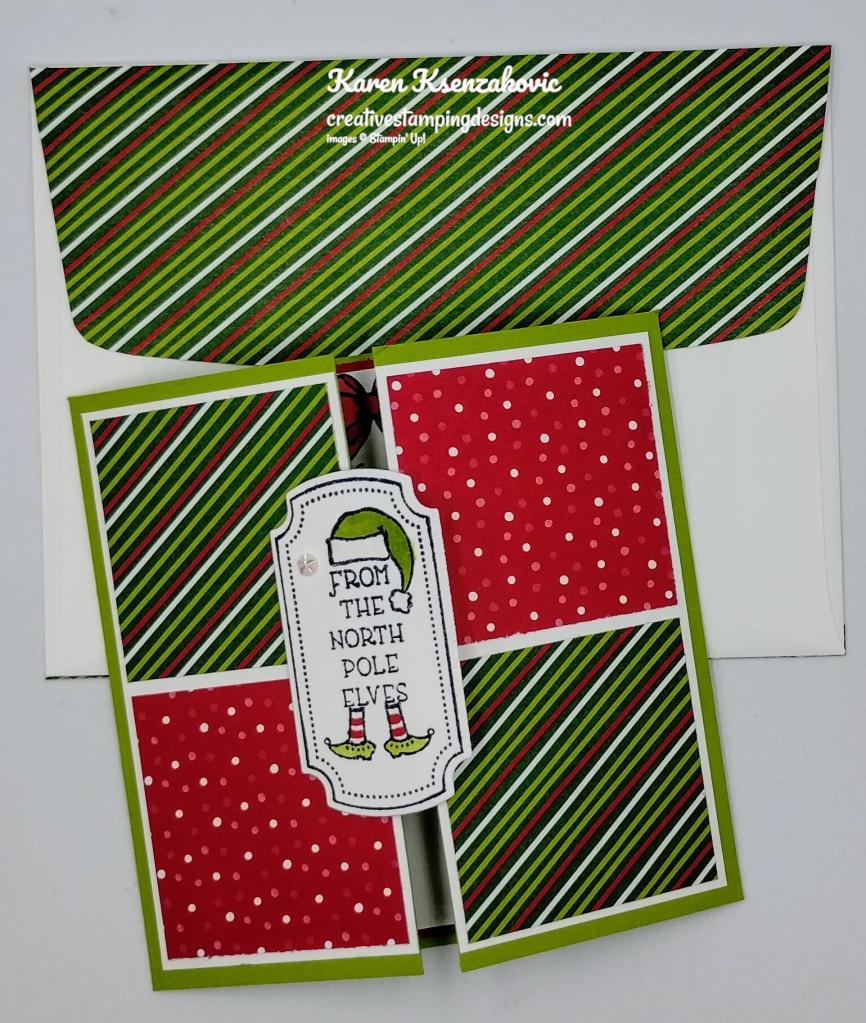
")
")


 Designer Series Paper")


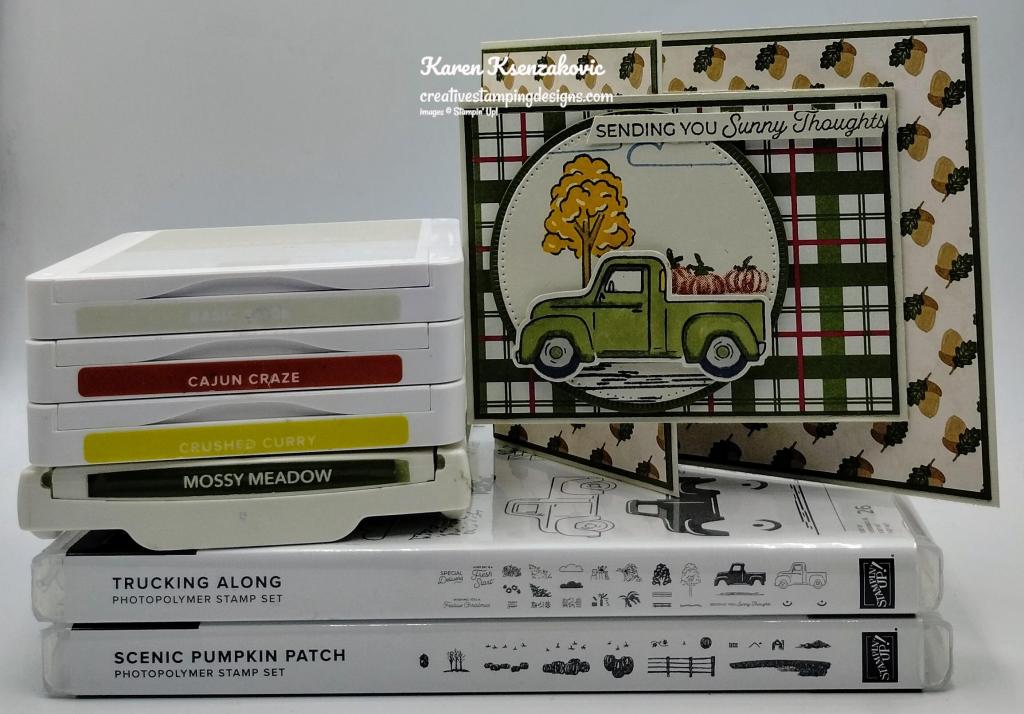

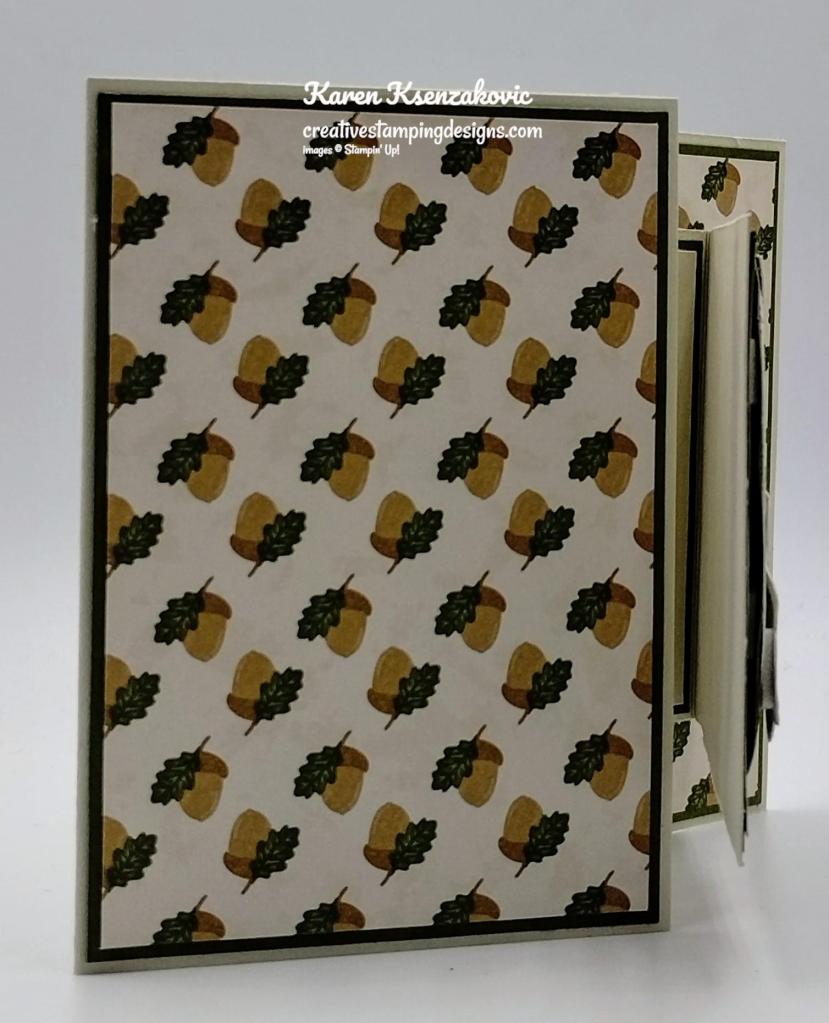


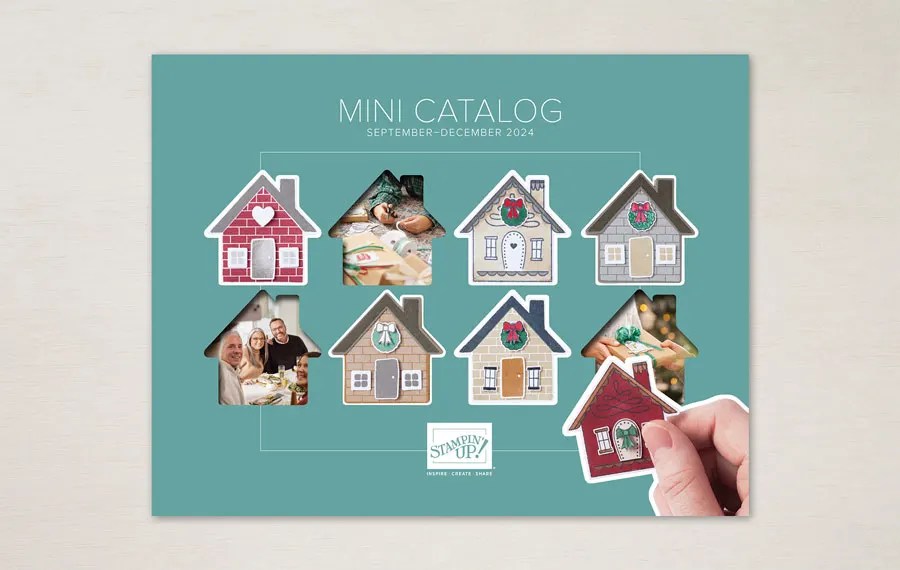

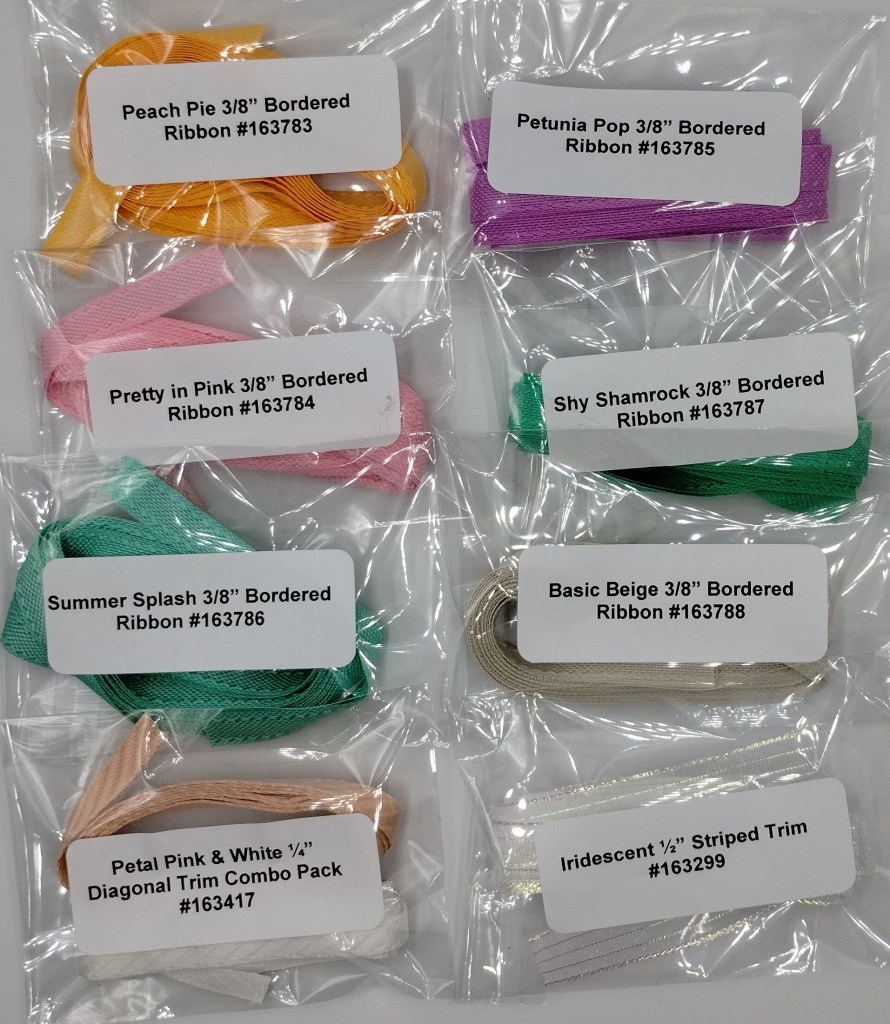


")


