Good Friday the 13th morning stamping friends. How was your week? We arrived in Long Beach yesterday afternoon and have been very busy since we arrived. That’s one thing about OnStage that I love, we’re on the go constantly. It was great getting together with the team members last night, seeing people that we’ve only seen online and chatting. We all went out to dinner together and had a great time. We’ve got lots planned for today already, can’t wait to get all the sneak peeks.
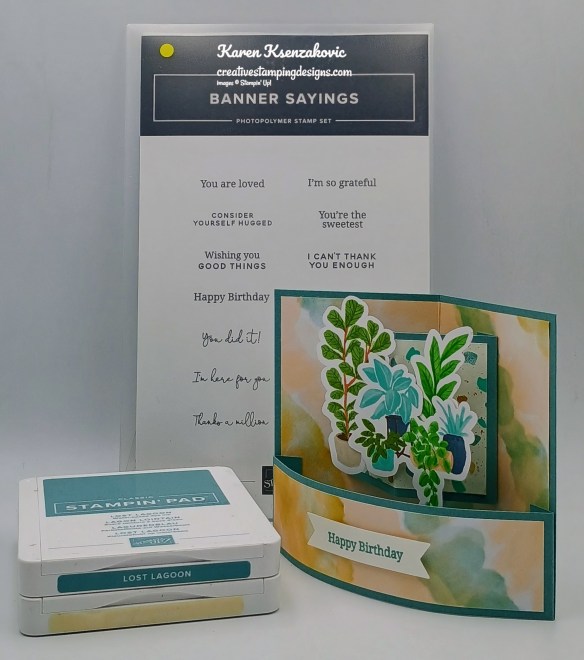
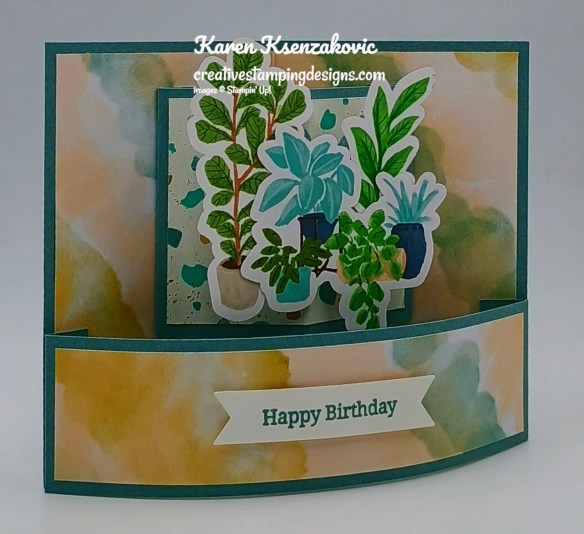
Today I have a quick fun fold card that looks a lot harder than it actually is. Here’s my card for today.
I used the Stampin’ Up! Banner Sayings Bundle along with the Hobby Haven Specialty Designer Series Paper for my card today.
Using the punch out pieces from the Hobby Haven DSP, put together a small collage adhering them together with Glue Dots and Tear & Tape on the back. Set aside. Stamp the sentiment from Banner Sayings stamp set in Lost Lagoon Ink on a panel of Basic White. Using the Three Banner Punch, cut out the sentiment and set on the side.
Adhere the panel of Hobby Haven DSP to the Lost Lagoon card base. Put panel in Paper Trimmer and score in the center, lining up the score line on the card base in the track. Fold card base & DSP slightly forward. Adhere a panel of Hobby Haven DSP to the Lost Lagoon bridge panel. Use your bone folder to curve the panel from the back. Put tear & tape on the scored ends. Adhere the bridge to the card base lining up the bottom and sides. Adhere the sentiment to the center of the bridge with Stampin’ Dimensionals. Adhere the smaller panel of Hobby Haven DSP to the panel of Lost Lagoon. Line up the center score line in Paper Trimmer in the track and score over the DSP. Fold the panel slightly back. Put Tear & Tape on the 2 scored sides. Lining up the score line from the card base and the score line from the layered panel, adhere to card base.
Fold the 2 small square pieces in half. Put Tear & Tape on both sides of the fold. With folded sides in, adhere the pieces to the small, folded panel with folded sides lined up with the score line. Adhere the collage that you created to the other side of the small, folded squares.
On the 2 Basic White panels, stamp the sentiments from the Banner Sayings stamp set in Lost Lagoon Ink. Adhere some of the punch out pieces from the Hobby Haven DSP to the bottom of the panels. Adhere the Basic White panels to Petal Pink mats then to the back of the Lost Lagoon card base.
Decorate a Basic Whtie Medium Envelope to finish your card. Adhere a strip of Hobby Haven DSP to the envelope front and a panel to the envelope flap.
Thank you for stopping by my blog today. I hope you like the card and will give it a try. Happy Stamping!!
If you need any stamping supplies, I’d love to be your Demonstrator. Just click HERE to go directly to my online store or drop me an email if you have any questions.
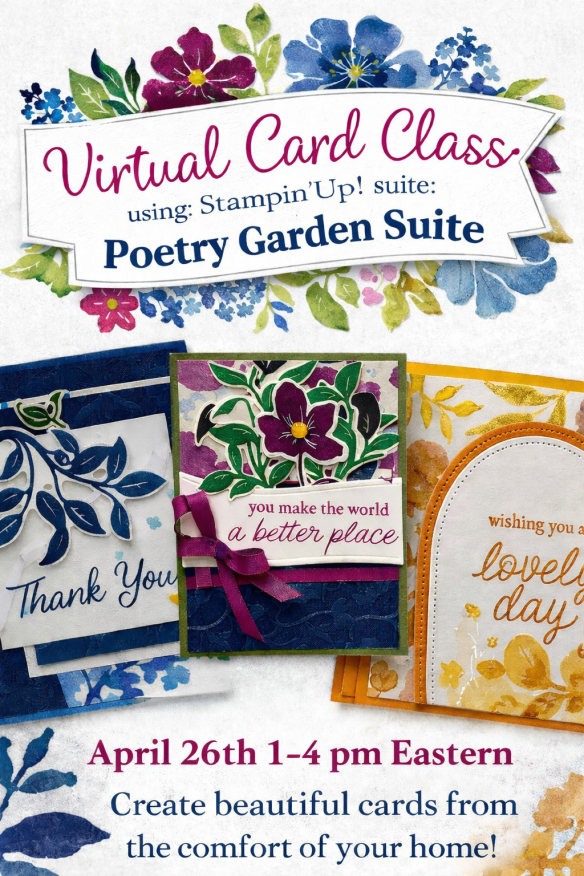
Tara Carpenter and I are teaming up to offer a fun online class using Stampin’ Up! March Online Exclusive Poetry Garden Suite. We will be creating 6 different cards during the class including 2 Fun Fold Cards. Sign Up now by Clicking Here to reserve your spot.
Zoom class with complete instructions to complete each card
PDF with detailed directions
During sign up you will have the option to add additional items to your order that you can take advantage of at no additional shipping cost. These items are optional, however if you want to recreate the cards you will need them. If you’ve attended a previous class, you were given a discount code, there is a spot to put that code on the form and the discount only applies to the products that you check off that you wish to purchase, not the class. Since the Bundles are already discounted, the discount does not apply to them either.
The class will be held Sunday April 26th from 1 to 4 pm Eastern Time via Zoom. This allows anyone in the United States to participate live! Can’t join us live… no worries, we will record the session so it can be replayed at any time.
I will email written directions that will include directions, cardstock cuts as well as photos to help you create each card.
The bundles are not included in the price of the class. You can purchase the bundle through me at an additional 10% discount of the Online Exclusive price (see below).
Class Cost $40 + $10 (Shipping)
Additional purchased items will be included in the above shipping price. I will invoice you through PayPal and invoices must be paid by April 5th to insure I can get the products delivered, packaged up and out to you with enough time.
Deadline: Sunday April 5th
Click Here to register for the class now!! Let me know if you have any questions.
Basic White Cardstock (2) – 2 1/2″ x 4″ panels, 1″ x 3″(sentiment)
Lost Lagoon Cardstock 4 1/4″ x 5 1/2″(card base scored @ 2 3/4″), 1 1/2″ x 6 1/2″ (bridge scored & folded at 1/2″ 7 6″), 2 1/2″ x 4″ (artwork panel scored & folded at 1/2″, 2″ & 3 1/2″), (2) – 1″ x 1″ (pop-up scored & folded at 1/2″)
Petal Pink Cardstock (2) – 2 5/8″ x 4 1/8″ panels
Hobby Haven Designer Series Paper 4″ x 5 1/4″(card front), 2 1/4″ x 2 3/4″ (artwork), 1 1/4″ x 5 1/4″(bridge), 2 1/4″ x 6″ & 1/2″ x 6″ (envelope), Cut out Pieces
Good Friday morning stamping friends and welcome to my fun fold Friday. I hope everyone had a wonderful week. Is anyone making plans for the weekend yet?
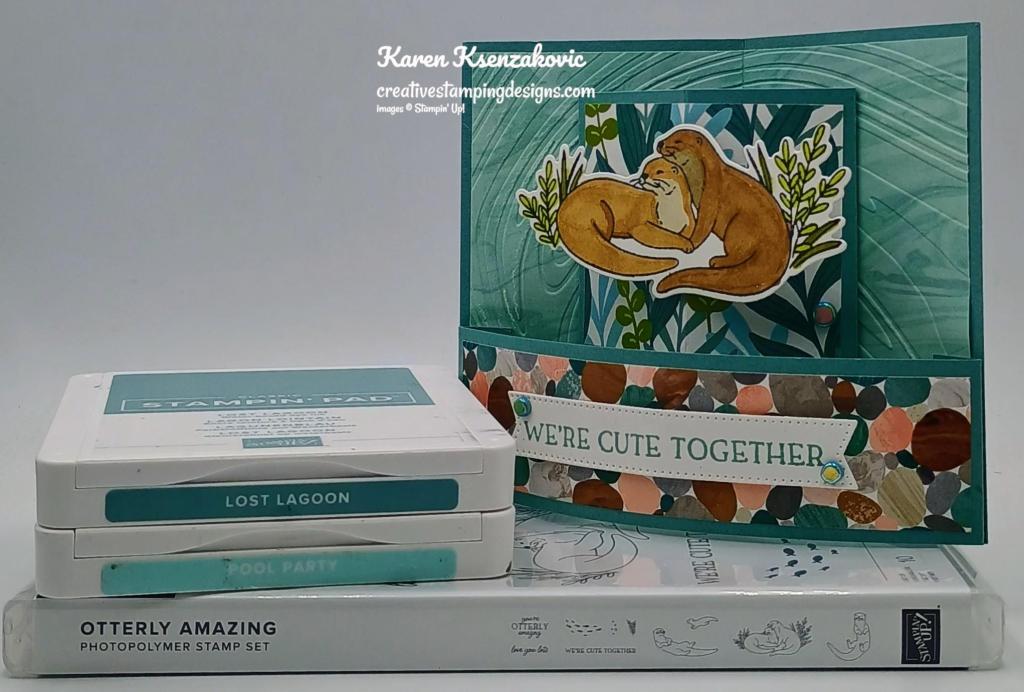
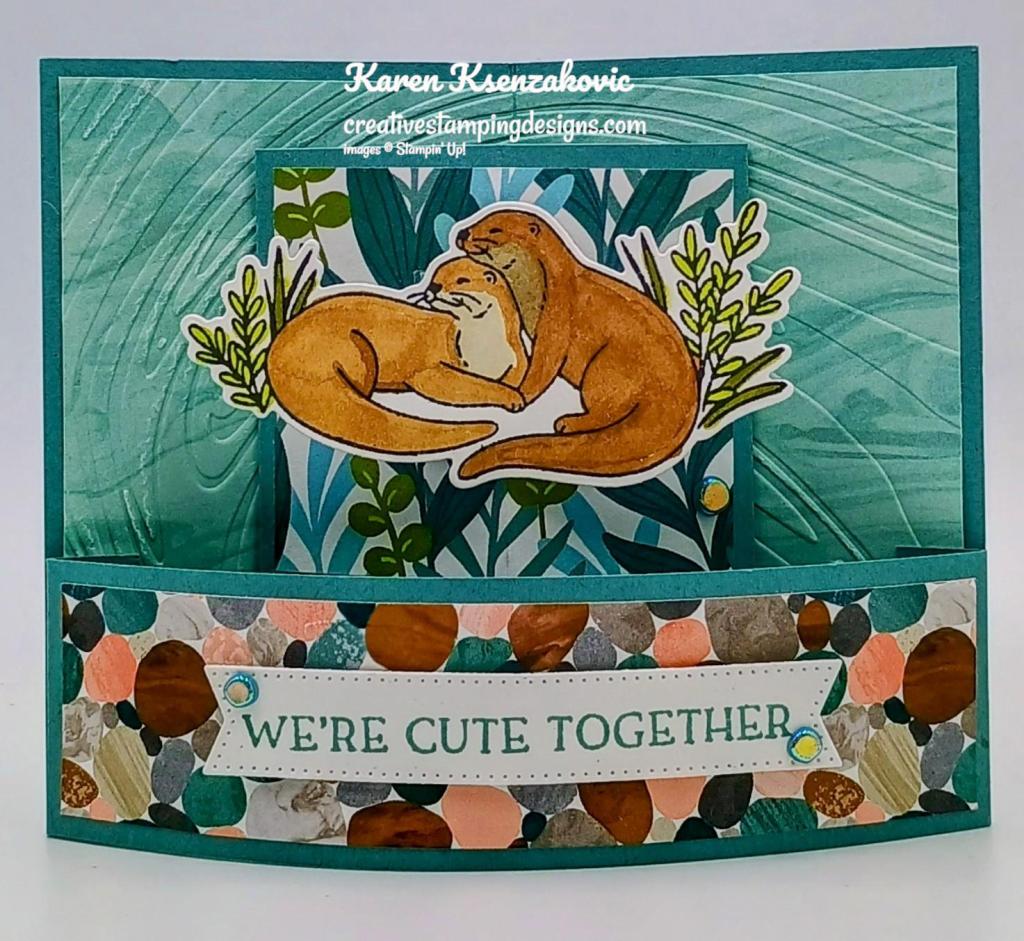
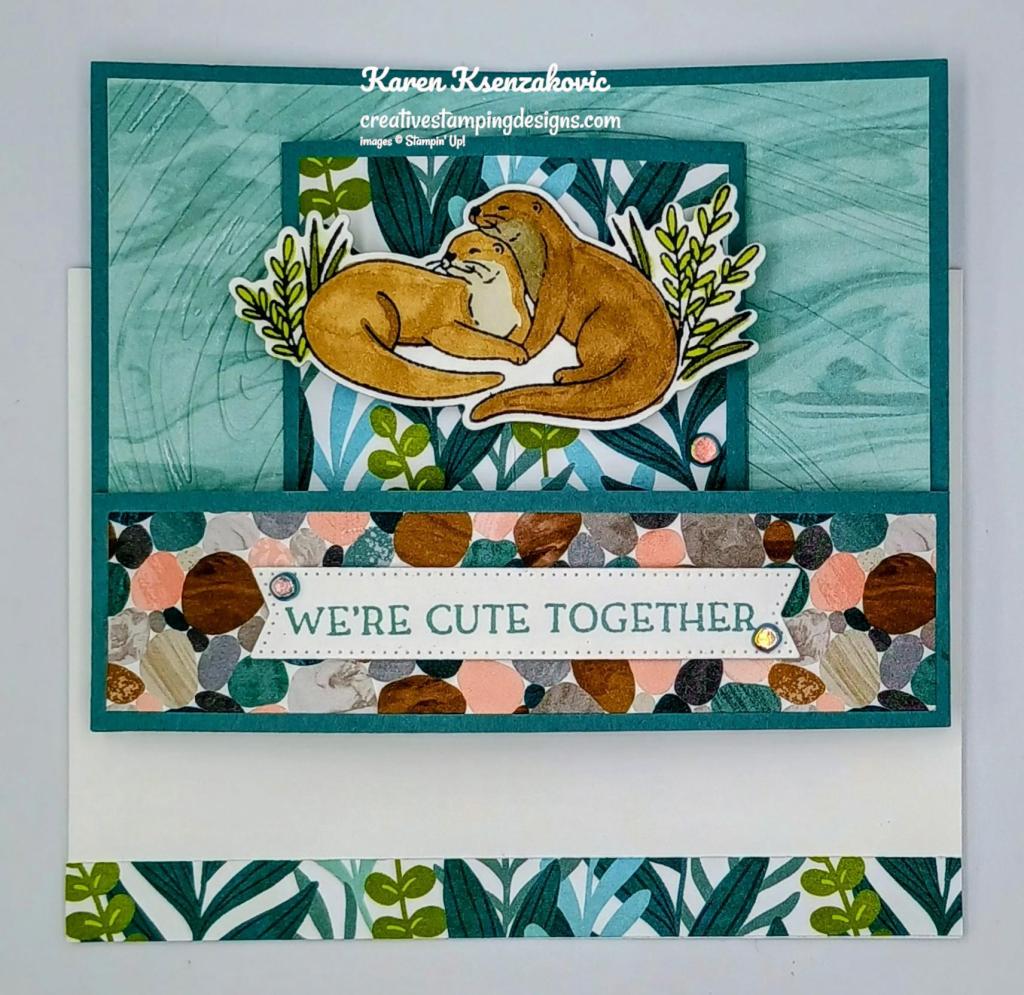
I played with the new Online Exclusive products for today’s card and made a fun fold with it. Here’s my card for today.
I used the Stampin’ Up! Otterly Amazing Bundle along with the Otterly Adorable Designer Series Paper, Stylish Shapes Dies and So Swirly 3D Embossing Folder for my card today.
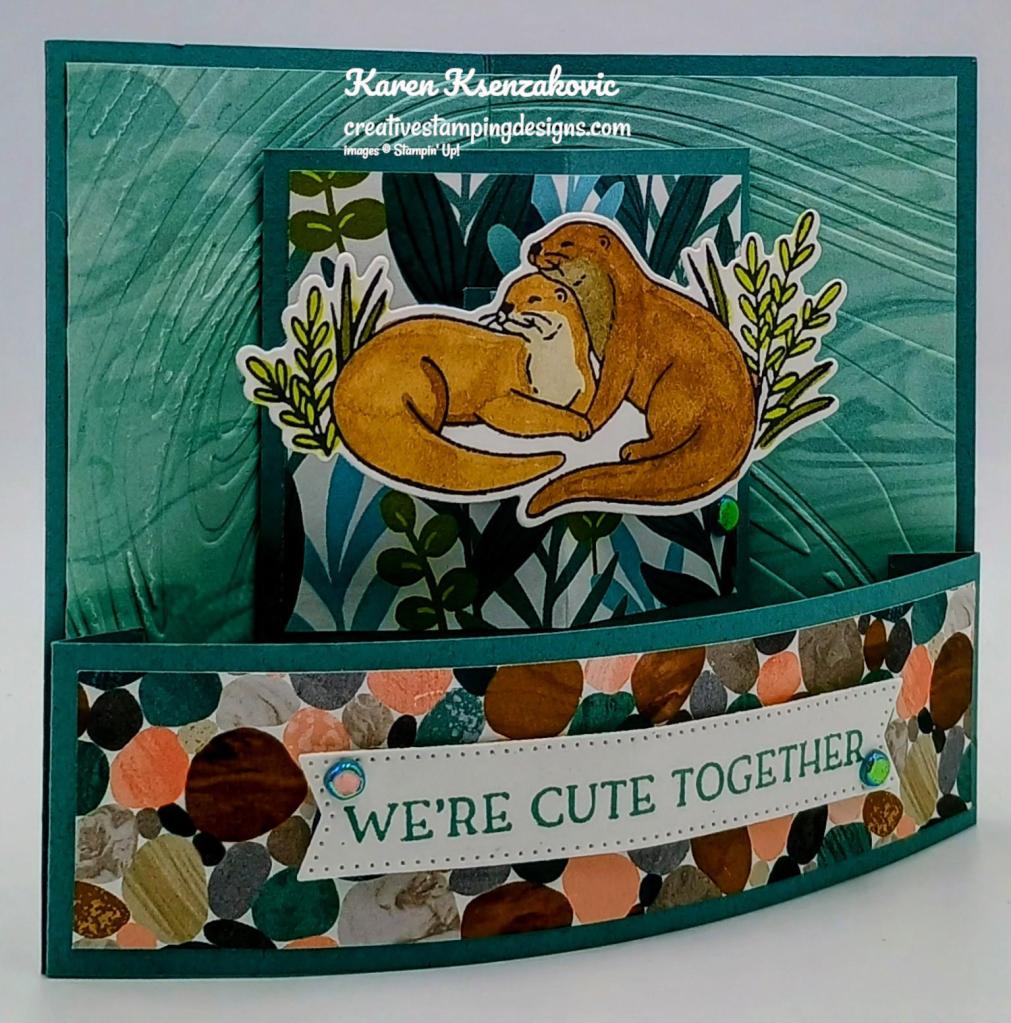
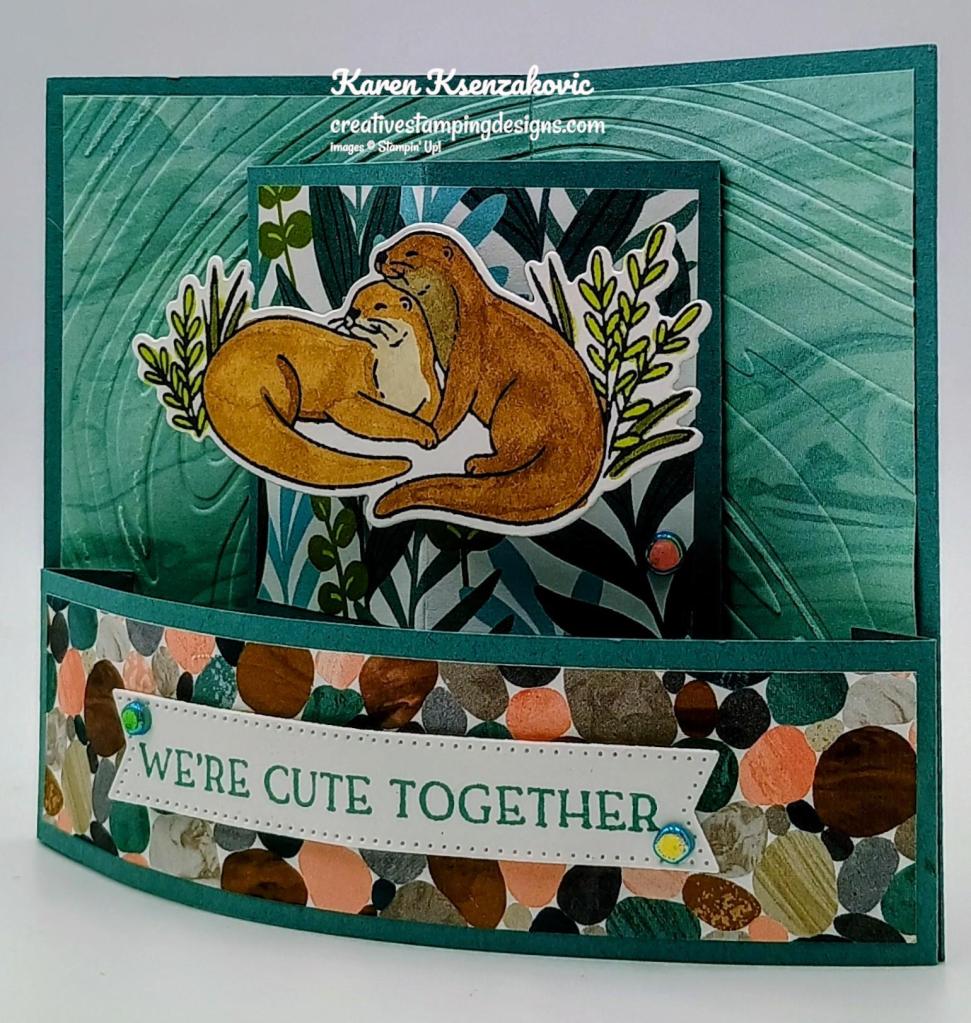
Emboss a panel of Otterly Adorable DSP using the So Swirly EF. Adhere the embossed panel to the Lost Lagoon card base using Liquid Glue. Carefully score the DSP, lining up the score line from the card base in the Paper Trimmer and gently folding the layered panel into a valley fold. Adhere the smaller panel of Otterly Adorable DSP to the pop-up panel of Lost Lagoon using Liquid Glue. Carefully score the DSP by lining up the scored cardstock score line in the Paper Trimmer and gently folding the layered panel into a mountain fold. Adhere the bridge panel of Otterly Adorable DSP to the scored Lost Lagoon bridge, using Liquid Glue. Using a Bone Folder, gently curve the bridge from the back of the panel.
On a panel of Basic White, stamp the otter image from the Stampin’ Up! Otterly Amazing Photopolymer Stamp Set in Tuxedo Black Ink. Color the image using Crumb Cake, Granny Apple Green, Lemon Lime Twist and Pecan Pie Stampin’ Blends Markers. Stamp the sentiment from the Otterly Amazing stamp set in Lost Lagoon Ink on the Basic White panel. Cut the otter image out using the Otterly Amazing Dies and the sentiment out using the Stylish Shapes Dies.
Adhere the Layered pop-up panel to the card front using Tear & Tape on the folded ends. Line the score lines up and adhere the panel. Adhere the 2 – 1″ X 1″ panels that are scored @ 1/2″, to the pop-up panel. Adhere these by lining up the folded edges of the squares with the center score line. Adhere the otter image to the other edges of the squares. This will make them pop up. Adhere the bridge to the bottom front of the card base by using Tear & Tape on the folded edges of the bridge, lay both the card base and bridge flat to line them up. Add a few Riverside Irregular Pearls to the card front.
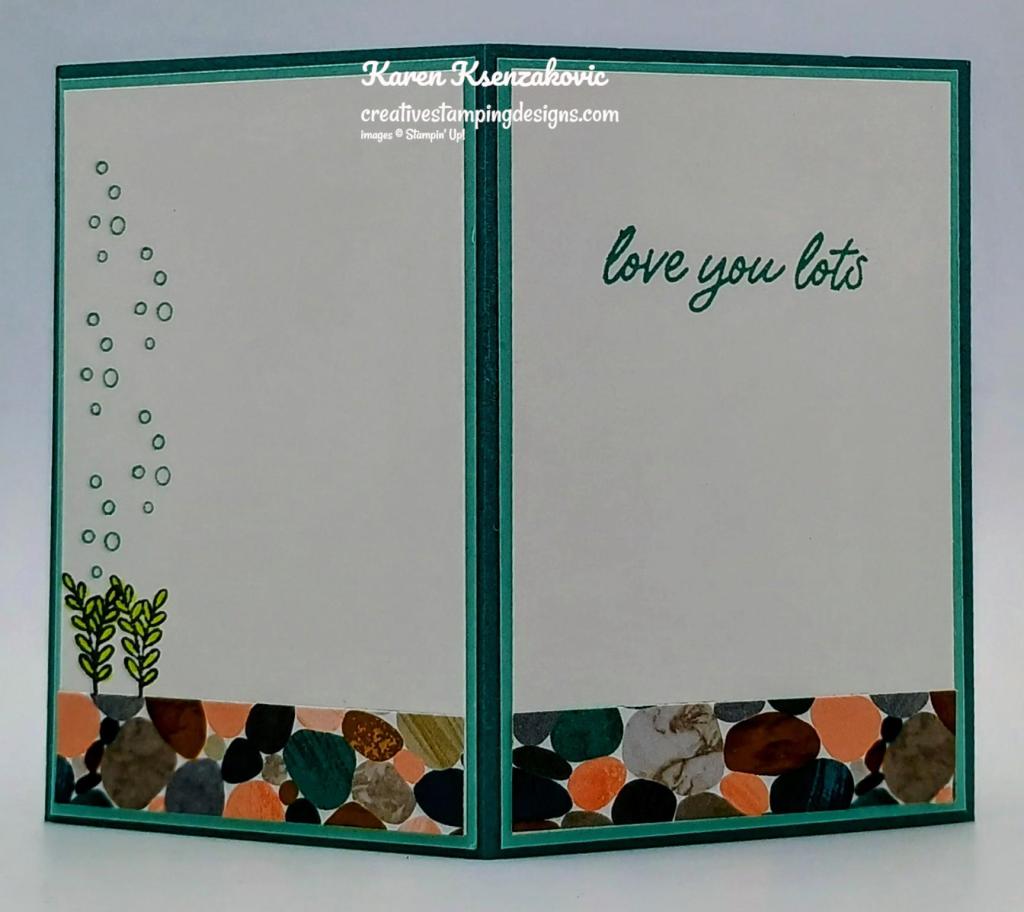
On the 2 Basic white panel, stamp the sentiment from the Otterly Amazing stamp set on one of the panels in Lost Lagoon Ink. Stamp the greenery image from the Otterly Amazing stamp set in Tuxedo Black Ink on the other panel and color the image using Lemon Lime Twist Stampin’ Blends Markers. Stamp the bubble image from the Otterly Amazing stamp set in Lost Lagoon Ink above the greenery. Adhere 2 strips of Otterly Adorable DSP to the bottom of the panels. Adhere the Basic White panels to Pool Party mats then to the back of the Lost Lagoon card base.
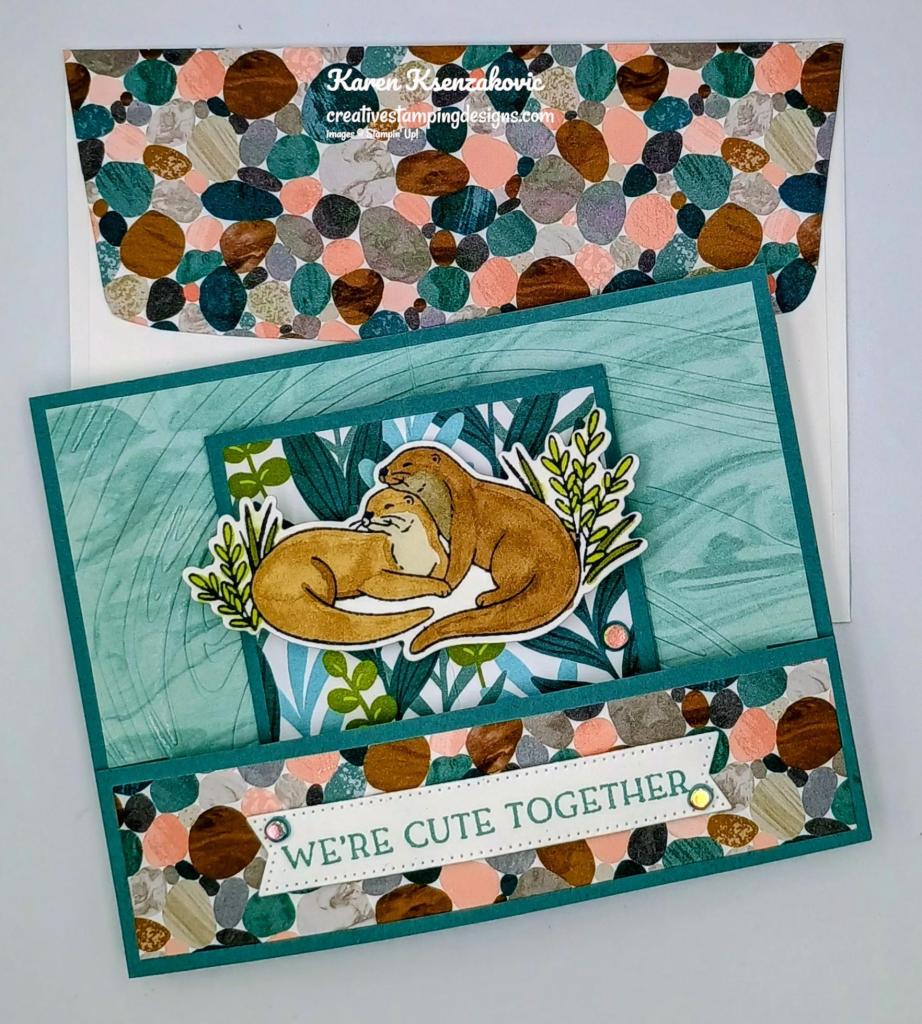
Finish the card by decorating a Basic White Medium Envelope. Adhere a strip of Otterly Adorable DSP to the envelope front and a panel to the envelope flap.
Thank you for stopping by my blog today. I hope you like the card and will give it a try. Happy Stamping!!
If you need any stamping supplies, I’d love to be your Demonstrator. Just click HERE to go directly to my online store or drop me an email if you have any questions.
MY CURRENT HOST CODE IS: 4RTJCBH2
Use this host code when placing an order with me. When you order $50 or greater you will receive a free gift from me! If your order is over $150, please do not use this code, but you’ll still get the free gift. The free gift is your choice of any 1 item valued up to $10.00 from the 2024 – 2025 Annual Catalog, September – December 2024 Mini Catalog or from the Online Exclusives! For any orders $50 or more I will also send you my monthly class tutorials. Click HERE or go to my Customer Rewards for more details and to see what this month’s tutorials are.
Please remember to use my current Host Code and make sure that you can see my name on the final checkout page listed as your Demonstrator when you order so that you know that you’re ordering with me, and you’ll get my rewards!
A new line of products for Online Exclusives are coming! You won’t find these items in any catalog. This is a great opportunity to spark creativity, expand a crafting collection, and discover new opportunities—all from the convenience of the online store.
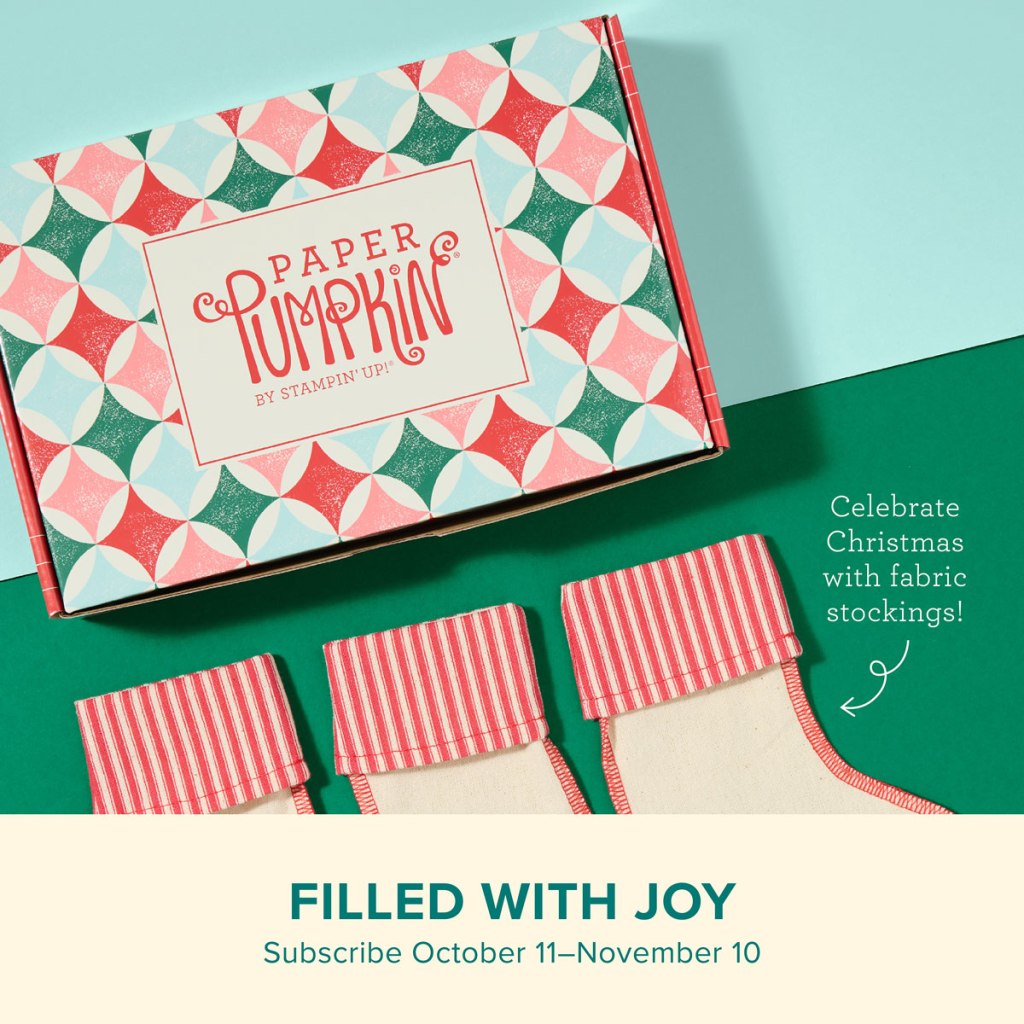
Celebrate Christmas with adorable stockings and gift tags!
Details: • Makes 8 projects: 8 stockings with 8 gift tags • Precut paper pieces • Safety pins and specialty gold foil • Coordinating colors: Flirty Flamingo, Pool Party, Poppy Parade (Classic Stampin’ Spot), Shaded Spruce, Very Vanilla
Subscribe to Paper Pumpkin for a monthly, all-inclusive crafting kit that’s a fun surprise! Each kit includes a photopolymer stamp set, Classic Stampin’ Spot, and step by step instructions to complete exclusive paper craft projects, including cards, tags, and gift packaging. And don’t miss the special add-on that coordinates with the next three months!
Subscribe to the November Paper Pumpkin Kit between 11 October and 10 November by clicking here!
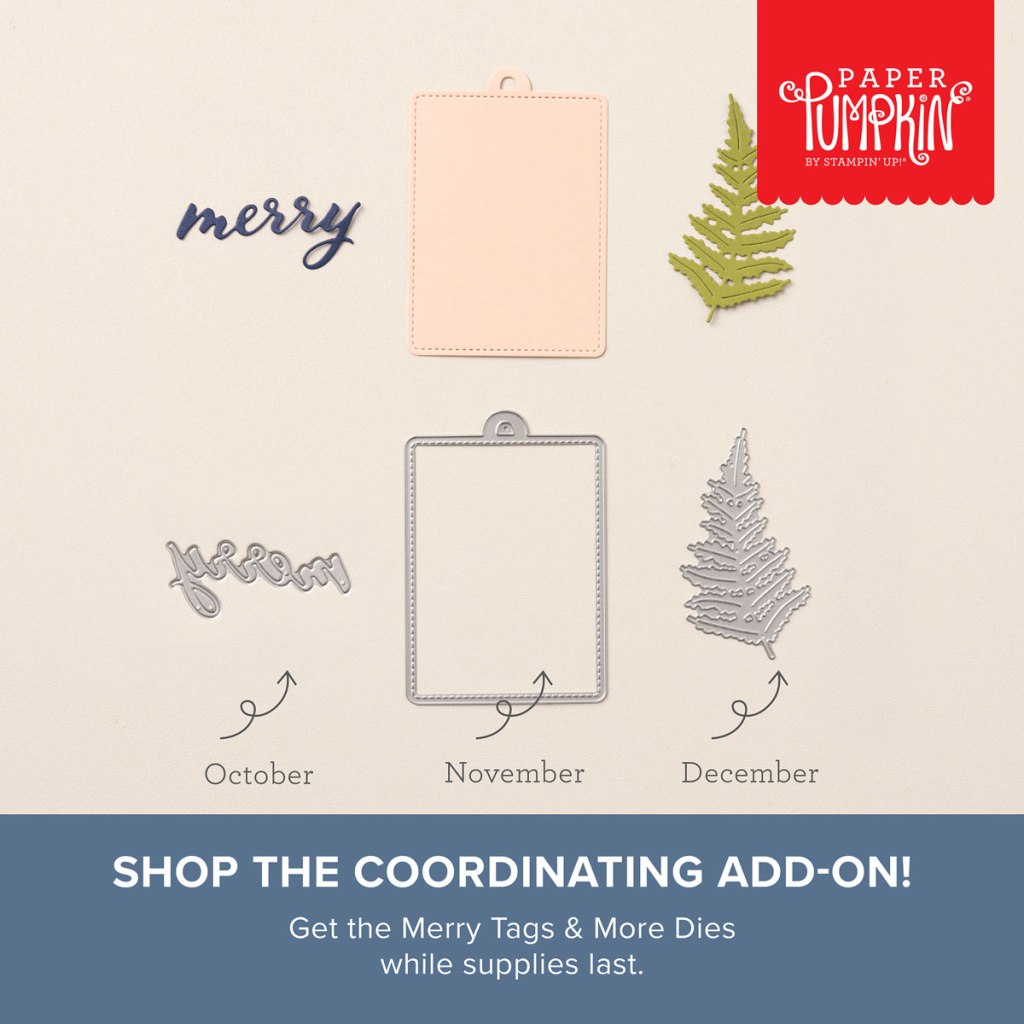
Don’t miss the coordinating Merry Tags & More Dies Add-On!
Add dimension and detail to your cards, scrapbook pages, and gift tags with the Merry Tags & More Dies! With a leaf and tag shape and Merry sentiment, these dies are a great way to expand your crafting experience. They even coordinate with three Paper Pumpkin Kits: Nests of Christmas, Filled with Joy, and Notes from the Heart. Such easy coordination makes these dies a must-have for any paper craft. Paper Pumpkin subscribers can purchase it beginning 11 September. The add-on is available only while supplies last, so it’s best to shop early! Please note that the Stampin’ Cut and Emboss Machine is not included and can be purchased separately.
#165639 $12
Note: Supplies may be limited toward the end of the subscription period.
Basic White Cardstock 4″ X 4″(artwork & sentiment), 2 – 2 1/4″ x 4″(back panels)
Lost Lagoon Cardstock 4 1/4″ x 5 1/2″(card base scored @ 2 3/4″), 1 1/2″ x 6 1/2″(front bridge scored & folded at 1/2″ & 6″), 2 1/2″ X 4″(Pop up scored & folded at 1/2″, 2″ & 3 1/2″), 2 – 1″ x 1″ (pop up mechanism scored @ 1/2″)
Pool Party Cardstock 2 – 2 5/8″ x 4 1/8″(back panel mats)
Otterly Amazing Designer Series Paper 4″ X 5 1/4″ (card front panel), 1 1/4″ X 5 1/4″(bridge), 2 1/4″ X 2 3/4″(pop up panel), 2 – 1/2″ X 2 1/2:(back panel), 2 1/4″ x 6″(envelope)
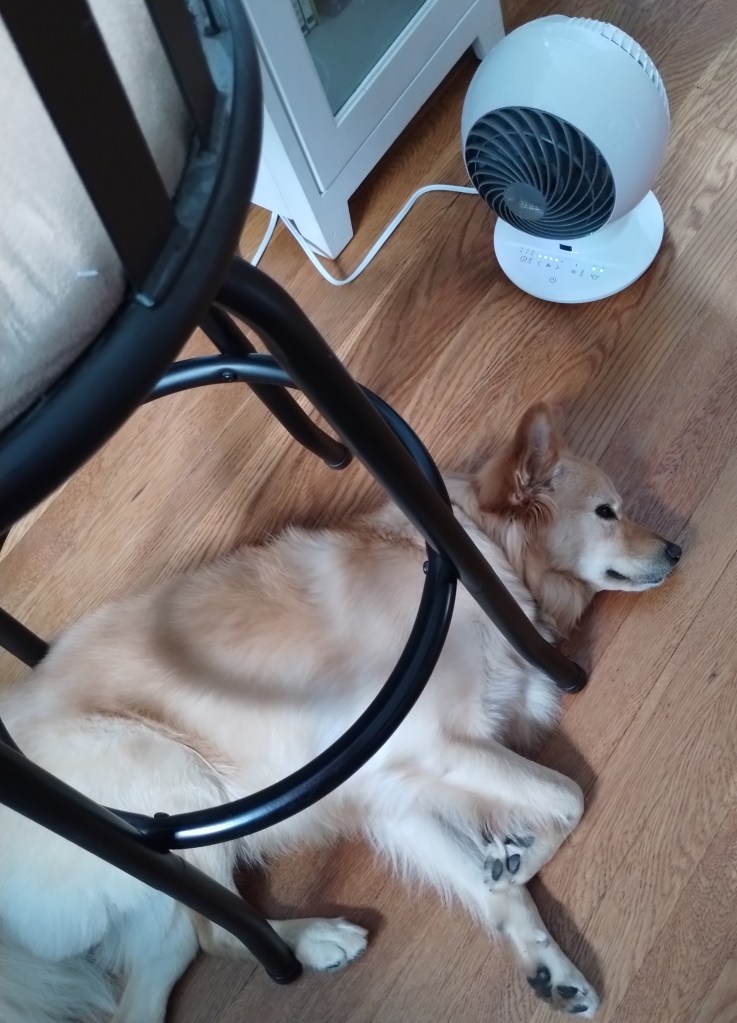
Good Friday morning stamping friends and welcome to my Fun Fold Friday. Did everyone have a nice 4th? It was a very relaxing day here at our house. My niece came over in the morning with her dog and we went out walking for a few miles with the dogs. By the time we got home they were both hot and exhausted. Here’s a picture of what Coraline did after her walk. Smart pup, laid down right in front of the fan.
A few of my husband’s friends came over in the afternoon and we barbequed hamburgers and wings. I was even able to get a little crafting time in for myself. All was good here until the fireworks started going off all around out area. Coraline does not do well with them at all. I even gave her a calming treat, which only helped for a short time. She was a very nervous puppy. Gidget on the other hand had no clue what was going on.
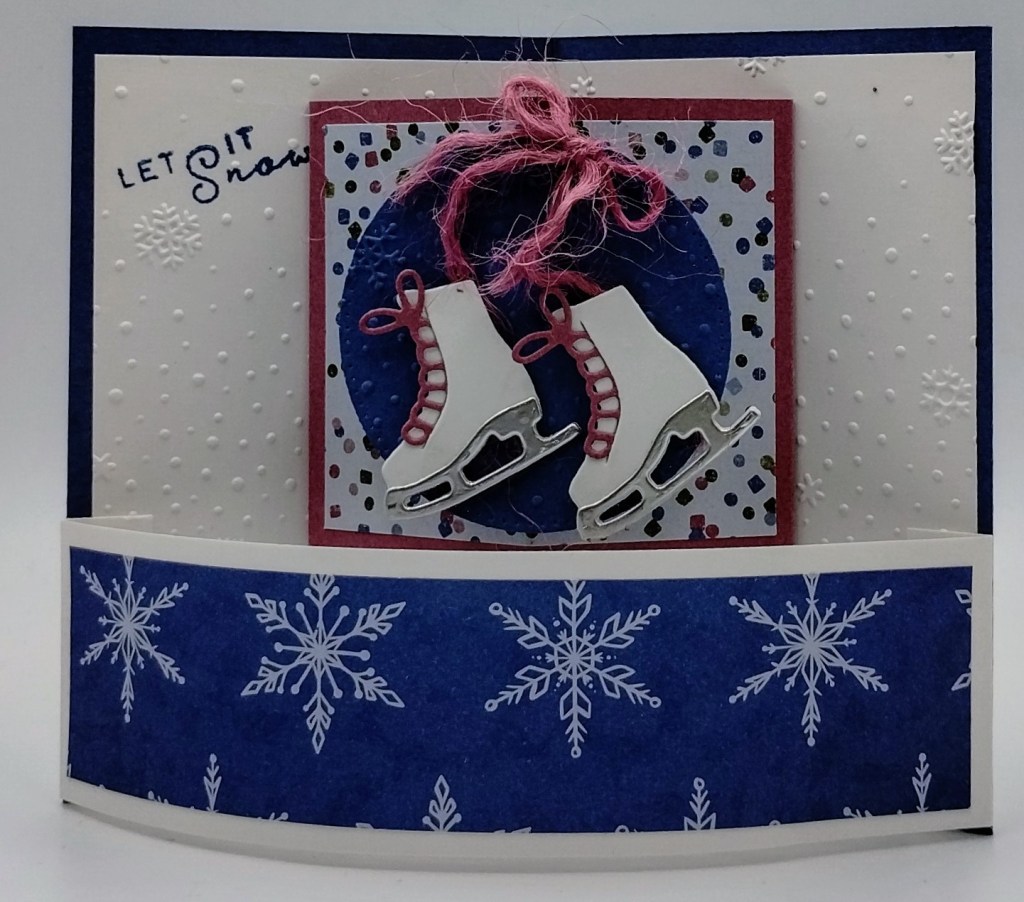
Today’s card I made on YouTube Live on Wednesday. If you were able to join me or watched the replay, thank you. If you’d like to watch my video and stamp along, the measurements are below, just above the supply list, along with the link to my YouTube channel. Here’s my card for today.
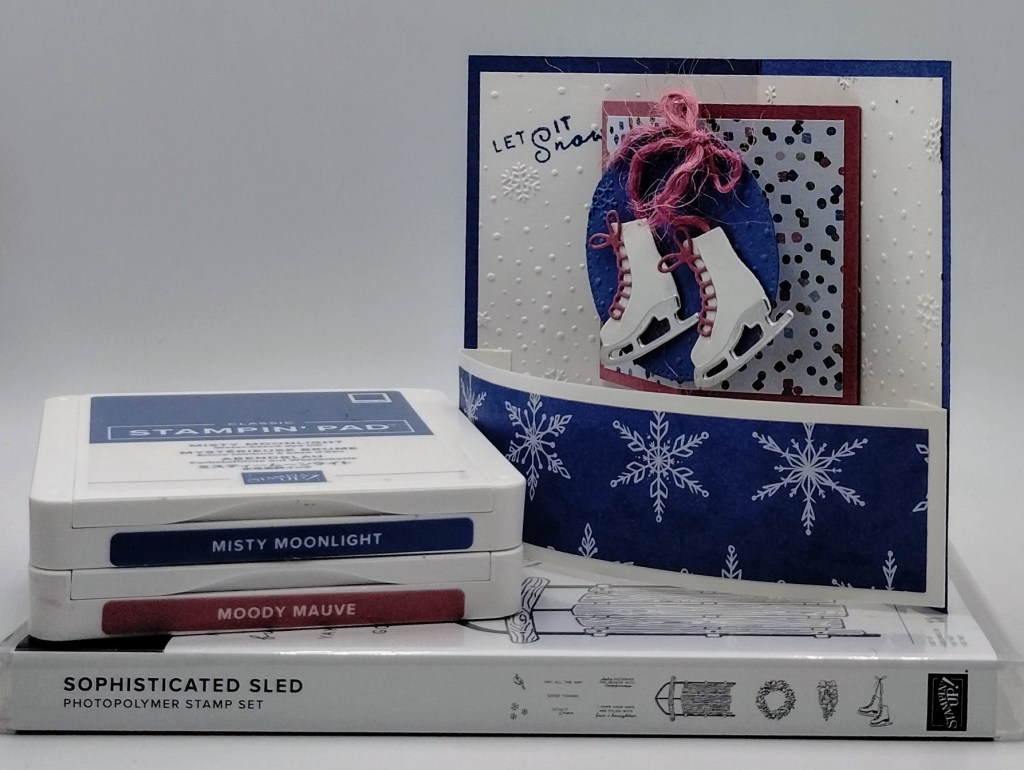
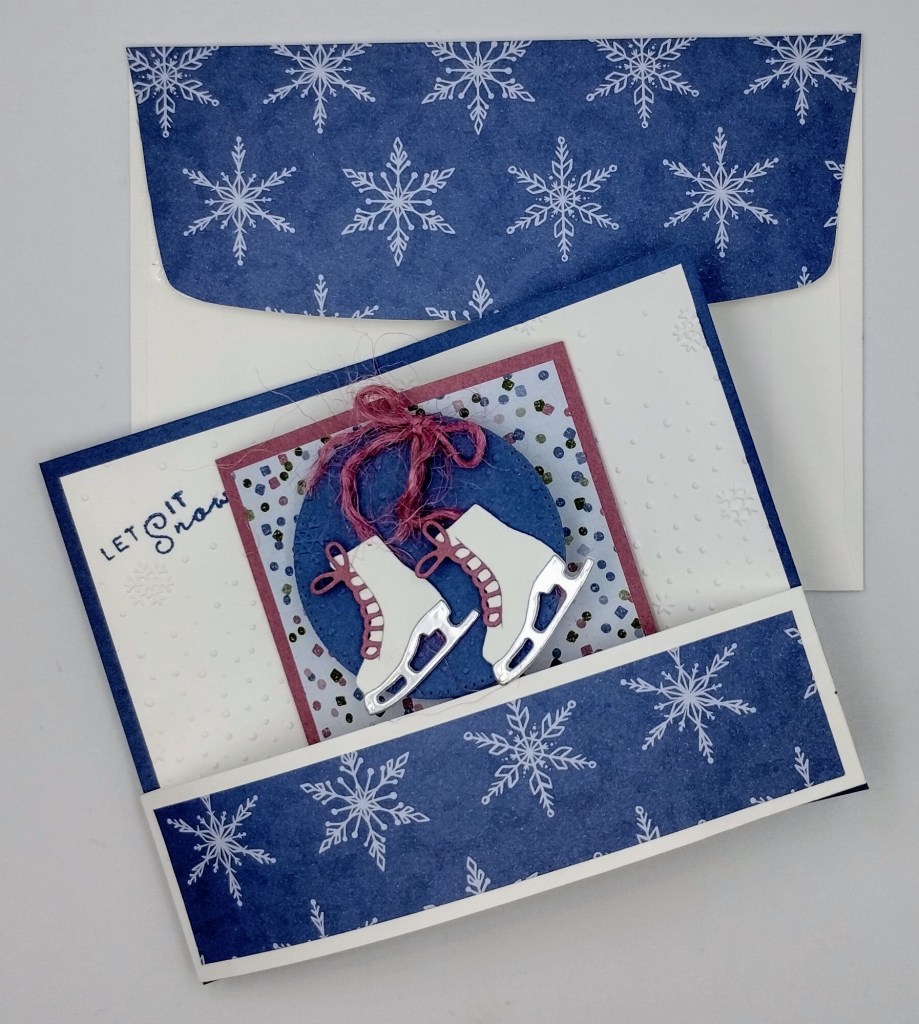
I used the Stampin’ Up! Sophisticated Sled Bundle along with the Iconic Celebrations 6 X 6 Designer Series Paper,Stylish Shapes Dies and Snowflake Sky 3D Embossing Folder for my card today
I started by stamping the sentiment from the Stampin’ Up! Sophisticated Sled Photopolymer Stamp Set in Misty Moonlight Ink on the top of a Basic White panel. I embossed the panel using the Snowflake Sky EF. I adhered the Basic White panel to a Misty Moonlight card base using Liquid Glue. I put the layered panel in my Paper Trimmer and lined up the score lines on the Misty Moonlight panel and scored the Basic White panel. I carefully folded the card base in half on the score lines. Adhere the panel of Iconic Celebrations DSP to the scored panel of Moody Mauve using Liquid Gue. I put the layered panel in my Paper Trimmer and lined up the score lines on the Moody Mauve panel and scored the DSP panel. I carefully folded the panel in half on the score lines. I folded the 2 sides back on the side score lines and adhered it to the card base, lining up the center score line on the layered panel with the score line on the card base, using Tear & Tape Adhesive.
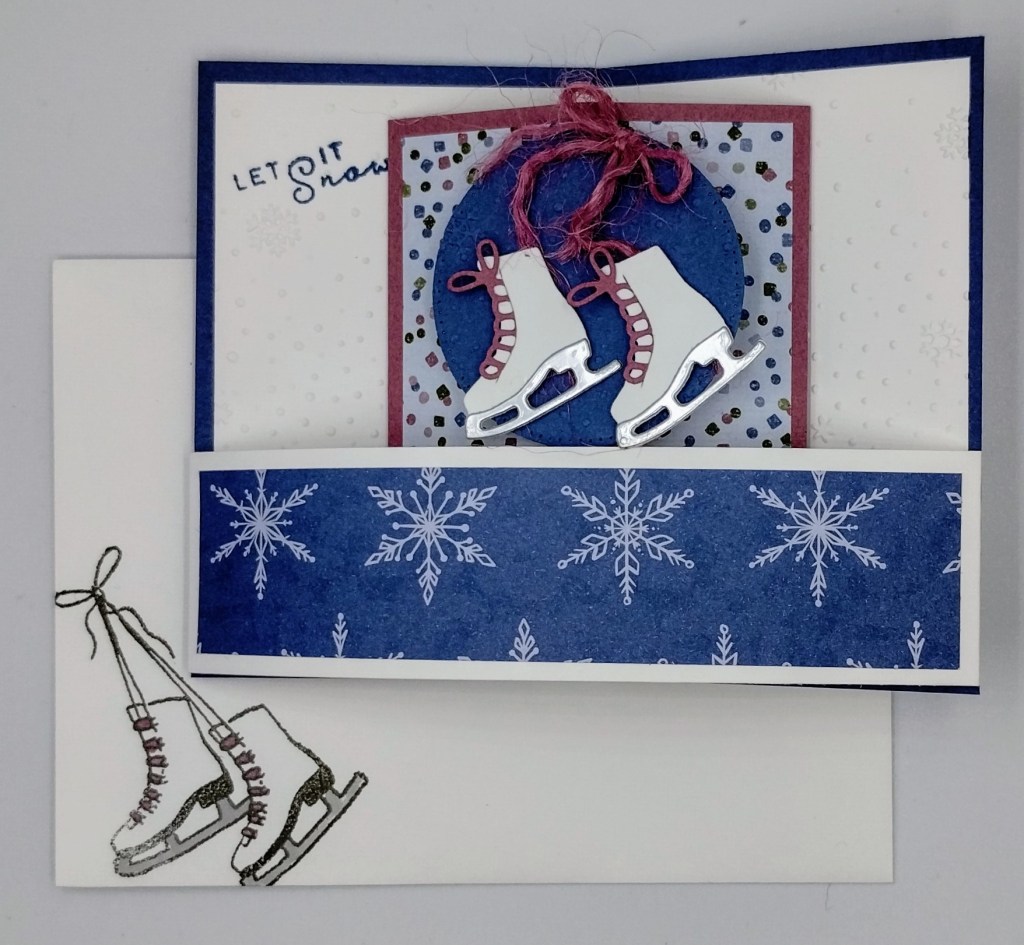
Take the 2 1″ X 1″ scored pieces and fold them in half. Adhere them to the DSP lining up the folded edged with the score line of the DSP using Tear & Tape. Cut the Misty Moonlight panel using the 3rd largest circle die from the Stylish Shapes Dies. Emboss the circle using the Snowflake Sky EF. Adhere the die cut circle to the 2 folded pieces using Tear & Tape. Using the Sophisticated Sled Dies, cut the skates from a panel of Basic White, laces from a panel of Moody Mauve and the blades from a panel of Silver Foil paper. Adhere the blades to the bottom of the skates using Liquid Glue. Insert the laces to the skates and add a couple Stampin’ Dimensionals to the back to hold them in place. Adhered a piece of 2023-2025 In-Color Jute Trim to the back of the skates using Glue Dots. Tie a bow with another piece on the top. Adhere the skates to the embossed circle. Adhere the panel of Iconic Celebrations DSP to the Basic White panel. Fold the ends on the score lines. Using a Bone Folder, curve the back of the layered panel. Adhered the layered panel to the bottom of the card base using Tear & Tape.
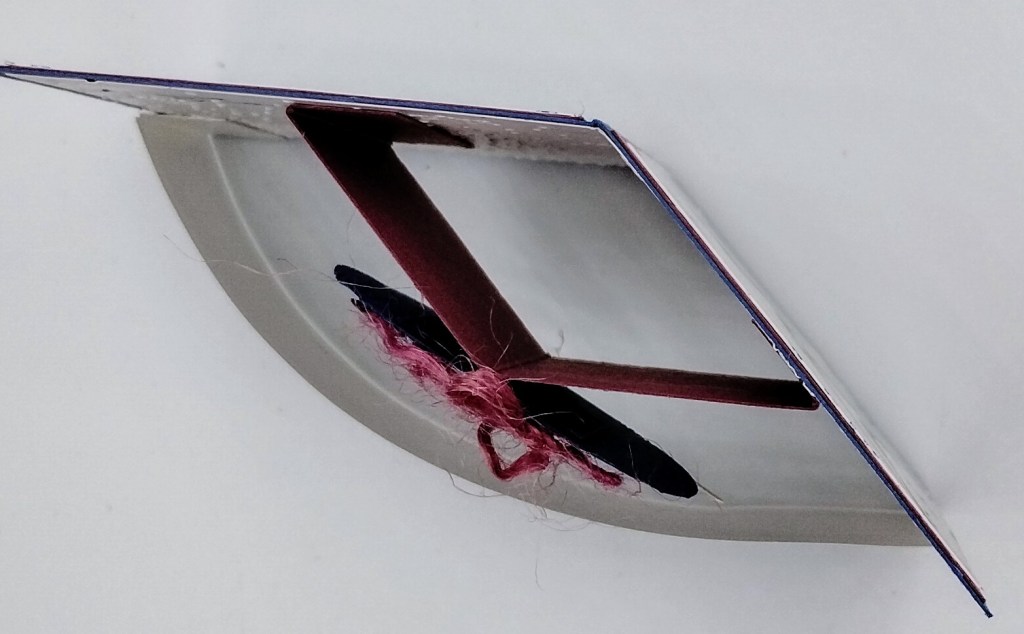
Here is a top view of how it should look.
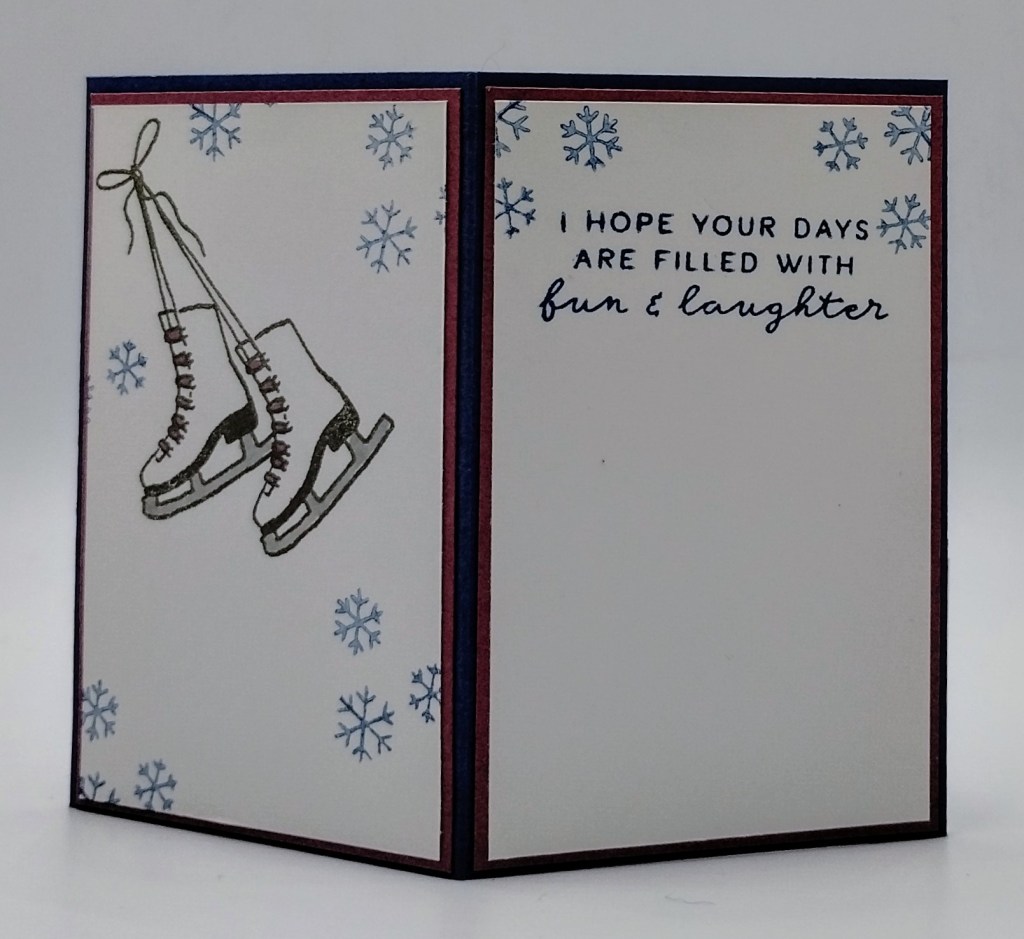
On the back, stamp the sentiment from the Sophisticated Sled stamp set on a panel of Basic White in Misty Moonlight Ink. Stamp the skates’ image from the Sophisticated Sled stamp set on the other panel of Basic White in Pebbled Path Ink. Color the image using Moody Mauve and Smoky Slate Stampin’ Blends Markers. Stamp the snowflake image from the Sophisticated Sled stamp set in Misty Moonlight Ink, stamping off once on scrap paper, around the image and sentiment. Adhered the Basic White panels to Moody Mauve mat then to the back of the Misty Moonlight card base.
To finish my card, I decorated a Basic White Medium Envelope. Stamp the skates’ image form the Sophisticated Sled stamp set in Pebbled path Ink on the envelope front. Color the image using Moody Mauve and Smoky Slate Stampin Blends Markers. Adhere a panel of Iconic Celebrations DSP to the envelope flap.
Thank you for stopping by my blog today. I hope you liked my sneak peek of my card and will give it a try. I hope you will CASE this card and please feel free to post it in the comments of my Facebook page under my post. I’d love to see your take it. The list of measurements are below if you’d like to stamp along while watching the video. You can watch my video on my YouTube Channel Here.
If you watch this on my YouTube channel, please remember to subscribe so that you will get notified when a new video goes live. Thank you to those that have subscribed already. Happy Stamping!!
If you need any stamping supplies, I’d love to be your Demonstrator. Just click HERE to go directly to my online store or drop me an email if you have any questions.
MY CURRENT HOST CODE IS: D9NW3RJ3
Use this host code when placing an order with me. When you order $50 or greater you will receive a free gift from me! If your order is over $150, please do not use this code, but you’ll still get the free gift. The free gift is your choice of any 1 item valued up to $10.00 from the 2024-2025Annual Catalog, or from the Online Exclusives! Unfortunately, packs of cardstock are no longer an option for a free gift. Shipping has become too expensive to ship and it’s costing me as much to ship as the cardstock costs. For any orders $50 or more I will also send you my monthly class tutorials. Click HERE or go to my Customer Rewards for more details and to see what this month’s tutorials are.
Please remember to use my current Host Code and make sure that you can see my name on the final checkout page listed as your Demonstrator when you order so that you know that you’re ordering with me, and you’ll get my rewards!
It’s almost time for one of your favorite promotions—BONUS DAYS! Because getting rewarded for all the crafting supplies you’re already going to buy is awesome! When you shop between July 3-31, for every $50 that you spend in one order, you will earn a $5 coupon! Make sure you save all your coupons because you can redeem them between August 1-31.
There’s no limit to how many coupons you can earn! And, as an added bonus, you’ll earn Creative Stamping Designs Reward points (my personal customer reward program) from me when you order $50+ too!!
Bonus Days Promotion Details:
Earning Period: July 3-31, 2024 Ordering Deadline: July 31, 2024 at 11:59 p.m. (MT)
Earn a $5 coupon for every $50 spent (before shipping and tax).
All coupon codes will be emailed right after a qualifying purchase has been made. You must have a valid email address to earn coupons when you shop.
If you earn multiple codes from a single order, you will receive one email with multiple codes. If you earn multiple codes from multiple orders, you will receive separate emails for each code earned.
All order types qualify for this promotion. Phone and email orders still require an email address.
Orders started before the promotion begins will not count toward earning coupon codes. You must add items to your cart and complete your purchase during the earning period.
There is no limit to the number of coupon codes you can earn per order or throughout the duration of the earning period.
Starter Kit orders are excluded from this offer.
For workshop orders, each customer who reaches a qualifying amount will receive a coupon code to their provided email address.
Redemption Period: August 1-31, 2024 Ordering Deadline: August 31, 2024 at 11:59 p.m. (MT)
There is no limit to the number of coupon codes you can redeem on an order during the redemption period. If using multiple codes, they must be separated by a space.
Coupon codes may be redeemed one time only. They cannot be redeemed after the August 31.
Coupon codes may be redeemed for any product (excluding Starter Kits). They cannot be used on exchanges.
Bonus Days coupon codes can be applied to month-to-month Paper Pumpkin subscriptions and new prepaid subscriptions.
Get your wish lists ready and earn those coupon codes in July! Then redeem them on your orders in August! Let me know if you have any questions.
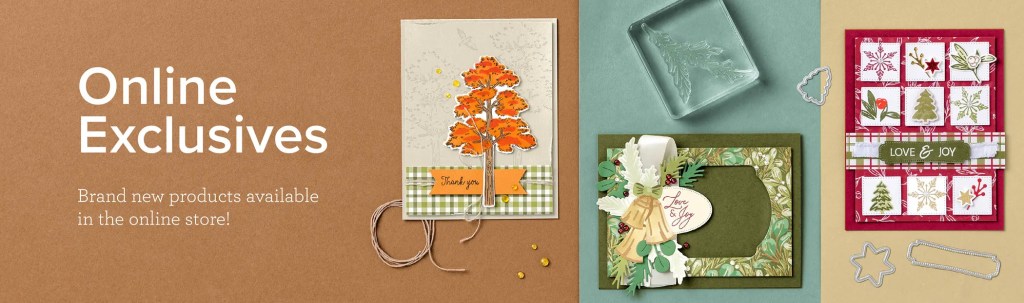
Stampin’ Up! has some New Online Exclusive items that are available to order now! You won’t find these products in any catalog. These products are a new opportunity to spark creativity, expand a crafting collection, and discover new opportunities—all from the convenience of the online store. Click HERE to go to my Online Store to see what’s available with the Online Exclusive Products.
Kits Collection by Stampin’ Up! is all about making crafting fun, accessible, and inclusive! We’re always working hard to design a collection full of different product options to allow you oodles of options when it comes to finding that perfect project or gift.
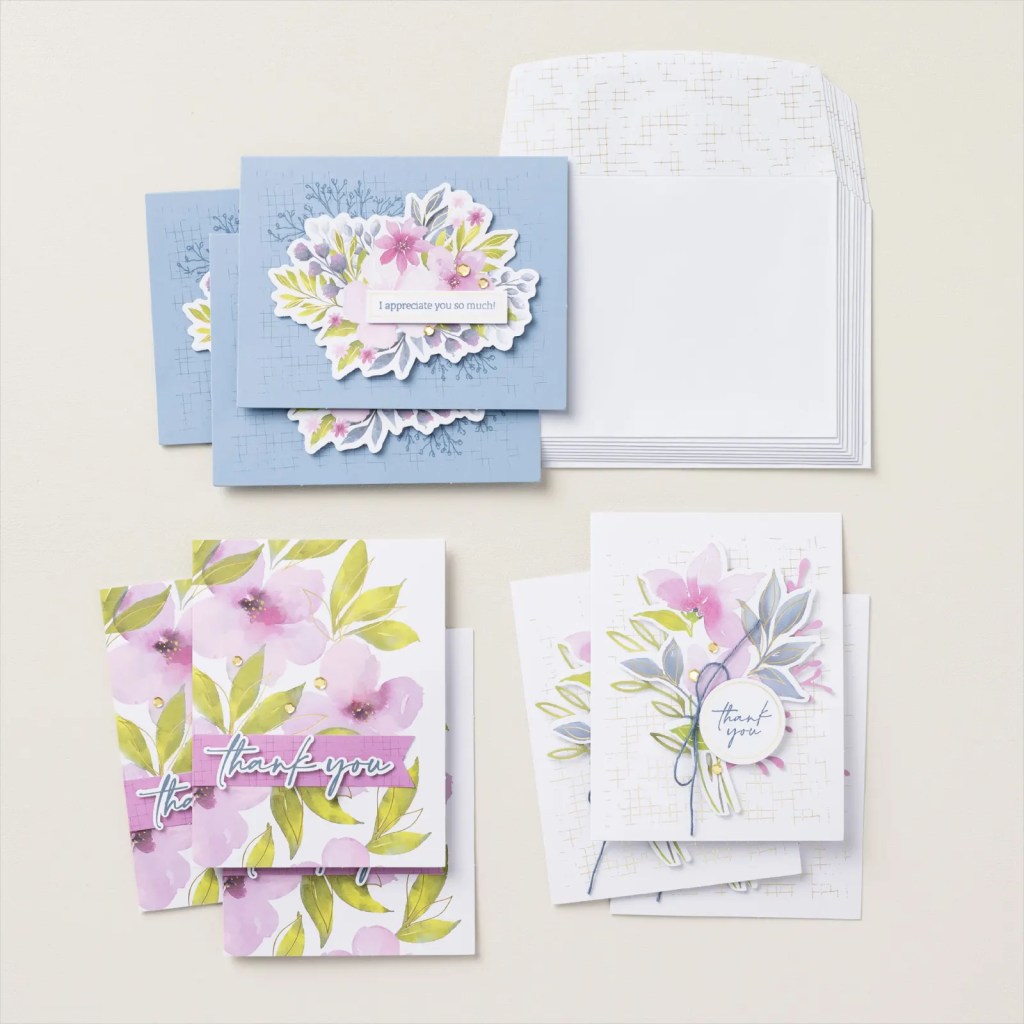
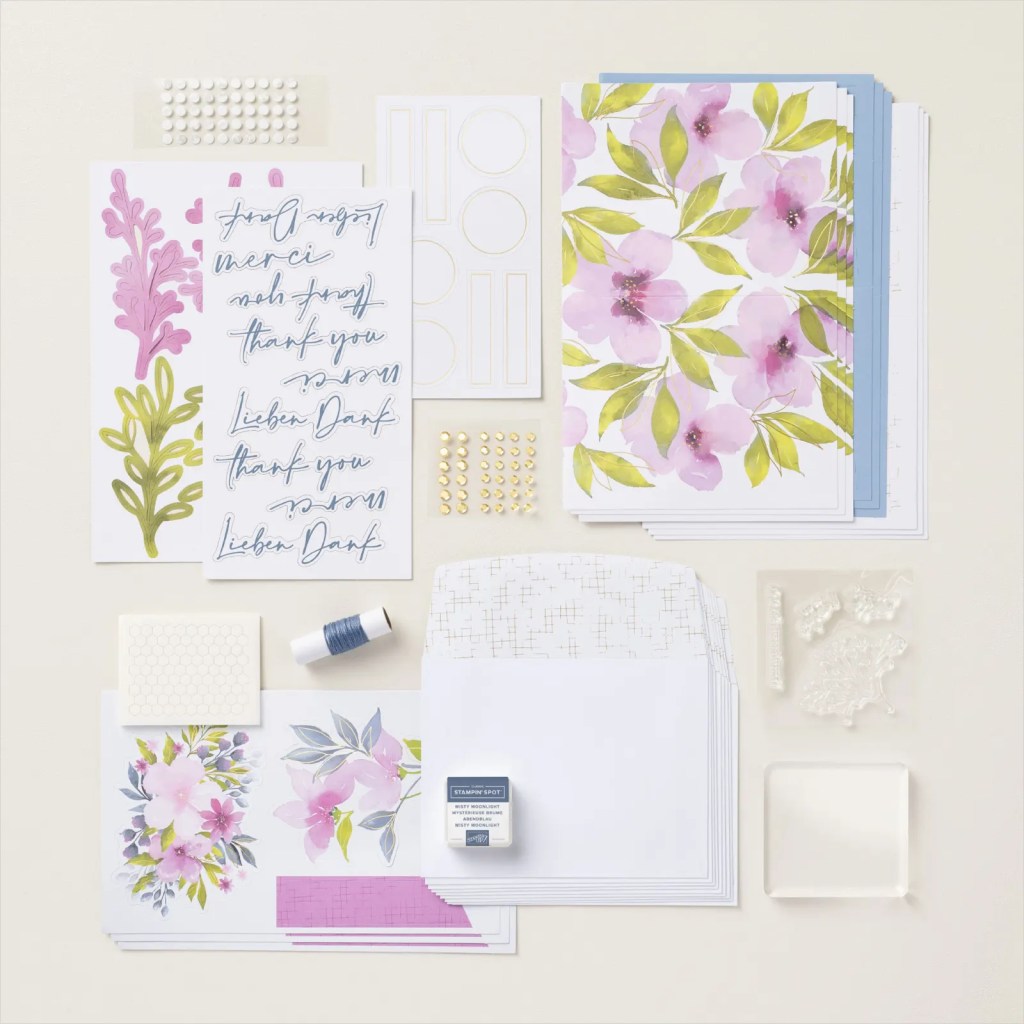
Garden of Thanks Kit
Make your gratitude gorgeous with the Garden of Thanks Kit! This DIY card making kit is centered around saying thanks in the most beautiful way. You can create three thank you cards each in three purple watercolor floral designs. Whether you want to convey your sincere thanks or love purple and blue flower gardens, this card kit is for you! Available in French.
Kit includes: * Garden of Thanks Photopolymer Stamp Set * Clear Stamp Block * Misty Moonlight Classic Stampin’ Spot * Predesigned projects * Step-by-step instructions * Precut pieces (No prep work! Get right to crafting) * Makes 9 cards: 3 each of 3 designs * Folded card size: 5-1/2″ x 4-1/4″ (14 x 10.8 cm) * 9 preprinted envelopes * Enough adhesive to complete projects * Misty Moonlight Baker’s Twine * Specialty gold foil * Gold sequins * A 9-7/8″ x 6-1/2″ x 2-3/4″ (25.1 x 16.5 x 7 cm) printed designer box for storage or crafting on the go
Product colors: Berry Burst, Boho Blue, Bubble Bath, Lemon Lime Twist, Misty Moonlight, Old Olive, Petunia Pop
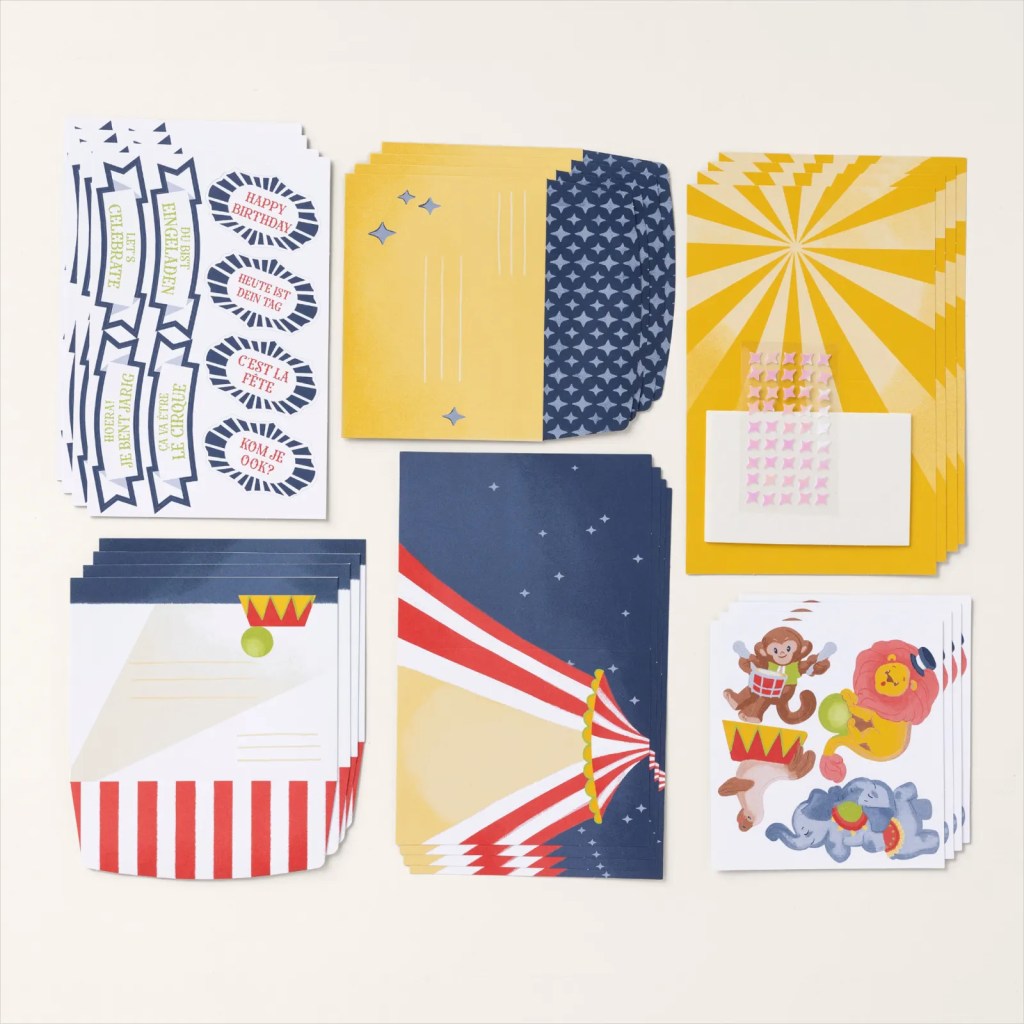
Make magical birthday cards with the Circus Celebrations Kit! This DIY card making kit has all the pieces you need to create four birthday cards in two circus-themed designs with adorable animals doing tricks for your audience. The playful designs are perfect to celebrate birthdays for all ages. This is a stamp-free kit making it even easier to craft than most so it’s great for beginners!
Kit includes: * Predesigned projects * Step-by-step instructions * Precut pieces (No prep work! Get right to crafting) * Makes 8 cards: 4 each of 2 designs * Folded card size: 5-1/2″ x 4-1/4″ (14 x 10.8 cm) * 8 preprinted envelopes * Enough adhesive to complete projects * Printed die cuts * A 9-7/8″ x 6-1/2″ x 2-3/4″ (25.1 x 16.5 x 7 cm) printed designer box for storage or crafting on the go
Product colors: Copper Clay, Crushed Curry, Granny Apple Green, Night of Navy, Poppy Parade
Subscribe to Paper Pumpkin for a monthly, all-inclusive crafting kit that’s a fun surprise! Each kit includes a photopolymer stamp set, Classic Stampin’ Spot, and step by step instructions to complete exclusive paper craft projects, including cards, tags, and gift packaging. And don’t miss the special add-on that coordinates with the next three months!
With the July Paper Pumpkin, Painted Petals, you can craft beautiful cards with unique watercolor designs and pretty layers!
• Makes 9 cards: 3 each of 3 designs • Project includes printed cards and coordinating envelopes • Precut paper pieces and embellishments • Coordinating colors: Calypso Coral, Gray Granite (Classic Stampin’ Spot), Melon Mambo, Mossy Meadow, Old Olive Kit comes in a beautiful coordinating box
Don’t miss the coordinating Every Celebration Dies Add-On!
This exclusive add-on (item 164991) coordinates with the three upcoming kits! Paper Pumpkin subscribers can purchase it beginning 11 July. The add-on is available only while supplies last, so it’s best to shop early!
Subscribe to the July Paper Pumpkin Kit between 11 June and 10 July by clicking here!
Note: Supplies may be limited toward the end of the subscription period.
Basic White Cardstock 4″ X 5 1/4″(card front), 1 1/2″ X 6 1/2″(curved mat scored & folded at 1/2″ & 6″), 1 1/2″ X 2 1/2″(skates), 2 – 2 1/2″ X 4″ (back panels)
Misty Moonlight Cardstock 4 1/4″ X 5 1/2″ (card base scored at 2 3/4″), 2 1/2″ X 2 1/2″(circle), 2 – 1″ x 1″ (pop up mechanisms scored @ 1/2″)
Moody Mauve Cardstock 2 1/2″ X 4″ (Card front pop up scored @ 1/2″, 2″ & 3 1/2″), 2 – 2 5/8″ X 4 1/8″ (back panel mats), scrap for laces)
Iconic Celebrations 6 X 6 Designer Series Paper 1 1/4″X 5 1/4″(curved card front panel), 2 1/4″ X 2 3/4″(card front pop-up panel), 2 1/4″ X 6″ (envelope flap)


![Banner Sayings Bundle (English) [ 167051 ]](https://assets1.tamsnetwork.com/images/EC042017NF/167051s.jpg "Banner Sayings Bundle (English) [ 167051 ]")
![Banner Sayings Photopolymer Stamp Set (English) [ 167044 ]](https://assets1.tamsnetwork.com/images/EC042017NF/167044s.jpg "Banner Sayings Photopolymer Stamp Set (English) [ 167044 ]")
![Three Banner Punch [ 167050 ]](https://assets1.tamsnetwork.com/images/EC042017NF/167050s.jpg "Three Banner Punch [ 167050 ]")
![Basic White 8 1/2" X 11" Cardstock [ 166780 ]](https://assets1.tamsnetwork.com/images/EC042017NF/166780s.jpg "Basic White 8 1/2\" X 11\" Cardstock [ 166780 ]")
![Lost Lagoon 8-1/2" X 11" Cardstock [ 133679 ]](https://assets1.tamsnetwork.com/images/EC042017NF/133679s.jpg "Lost Lagoon 8-1/2\" X 11\" Cardstock [ 133679 ]")
![Petal Pink 8-1/2" X 11" Cardstock [ 146985 ]](https://assets1.tamsnetwork.com/images/EC042017NF/146985s.jpg "Petal Pink 8-1/2\" X 11\" Cardstock [ 146985 ]")
![Hobby Haven 12" X 12" (30.5 X 30.5 Cm) Specialty Designer Series Paper [ 167201 ]](https://assets1.tamsnetwork.com/images/EC042017NF/167201s.jpg "Hobby Haven 12\" X 12\" (30.5 X 30.5 Cm) Specialty Designer Series Paper [ 167201 ]")
![Lost Lagoon Classic Stampin' Pad [ 161678 ]](https://assets1.tamsnetwork.com/images/EC042017NF/161678s.jpg "Lost Lagoon Classic Stampin' Pad [ 161678 ]")
![Basic White Medium Envelopes [ 159236 ]](https://assets1.tamsnetwork.com/images/EC042017NF/159236s.jpg "Basic White Medium Envelopes [ 159236 ]")
![Stampin' Cut & Emboss Machine [ 149653 ]](https://assets1.tamsnetwork.com/images/EC042017NF/149653s.jpg "Stampin' Cut & Emboss Machine [ 149653 ]")
![Mini Glue Dots [ 103683 ]](https://assets1.tamsnetwork.com/images/EC042017NF/103683s.jpg "Mini Glue Dots [ 103683 ]")
![Multipurpose Liquid Glue [ 110755 ]](https://assets1.tamsnetwork.com/images/EC042017NF/110755s.jpg "Multipurpose Liquid Glue [ 110755 ]")
![Stampin' Dimensionals [ 104430 ]](https://assets1.tamsnetwork.com/images/EC042017NF/104430s.jpg "Stampin' Dimensionals [ 104430 ]")
![Stampin' Seal [ 152813 ]](https://assets1.tamsnetwork.com/images/EC042017NF/152813s.jpg "Stampin' Seal [ 152813 ]")
![Bone Folder [ 102300 ]](https://assets1.tamsnetwork.com/images/EC042017NF/102300s.jpg "Bone Folder [ 102300 ]")
![Take Your Pick [ 144107 ]](https://assets1.tamsnetwork.com/images/EC042017NF/144107s.jpg "Take Your Pick [ 144107 ]")
![Paper Trimmer [ 152392 ]](https://assets1.tamsnetwork.com/images/EC042017NF/152392s.jpg "Paper Trimmer [ 152392 ]")


")
")


 Designer Series Paper")


")
")


 Designer Series Paper")
 Foil Sheets")


