
Good Monday morning stamping friends and welcome to a new week. Hopefully this will be a short one for most of you.
Today I’m sharing more birthday cards that I received last week from team members and customers. It was so exciting getting all of these beautiful and different cards. I’m surrounded by such talented stampers
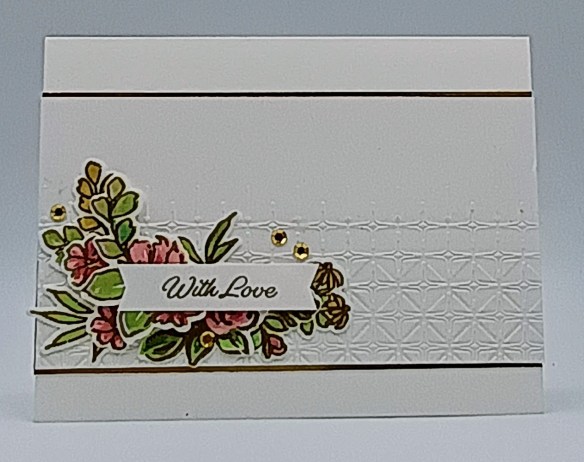
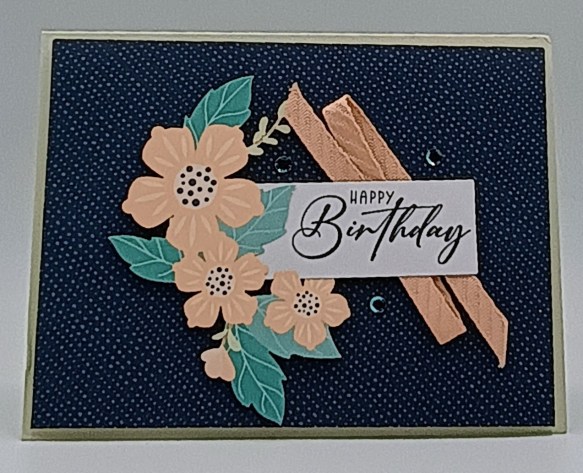
This pretty card is from my team member and friend Nikki. I just love that DSP and the embossing folder used.
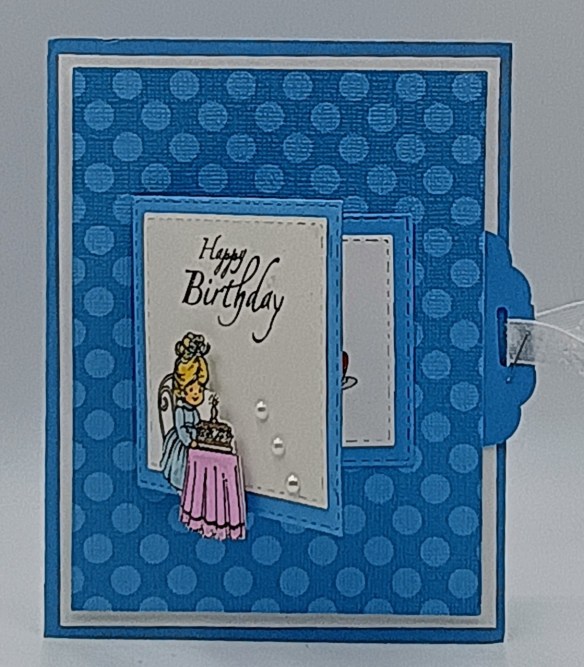
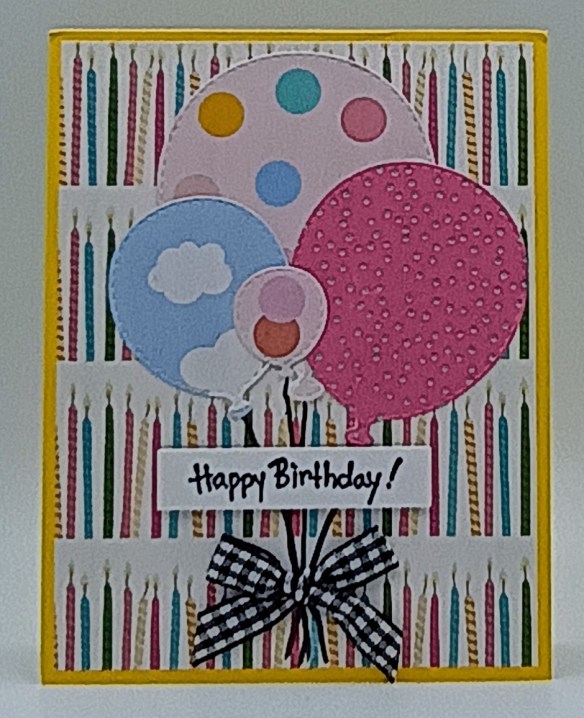
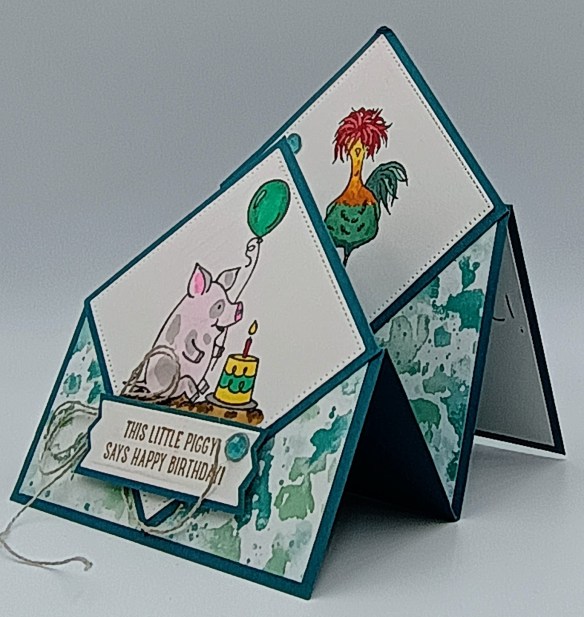
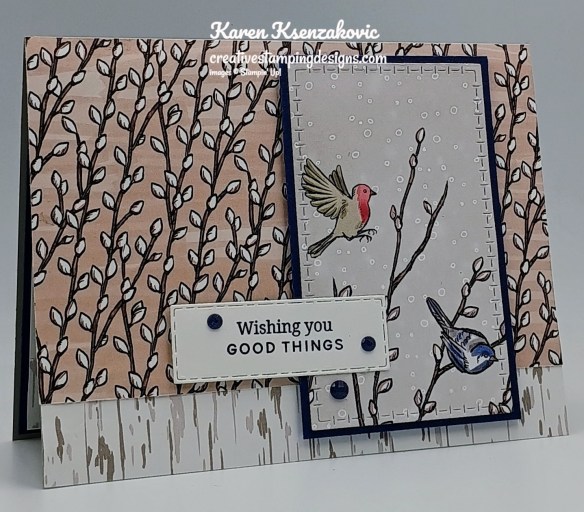
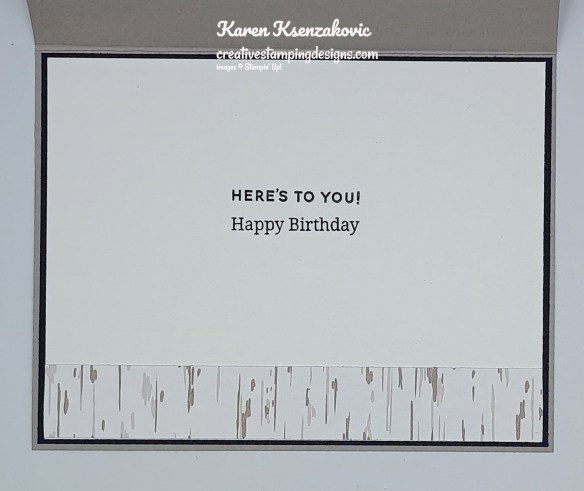
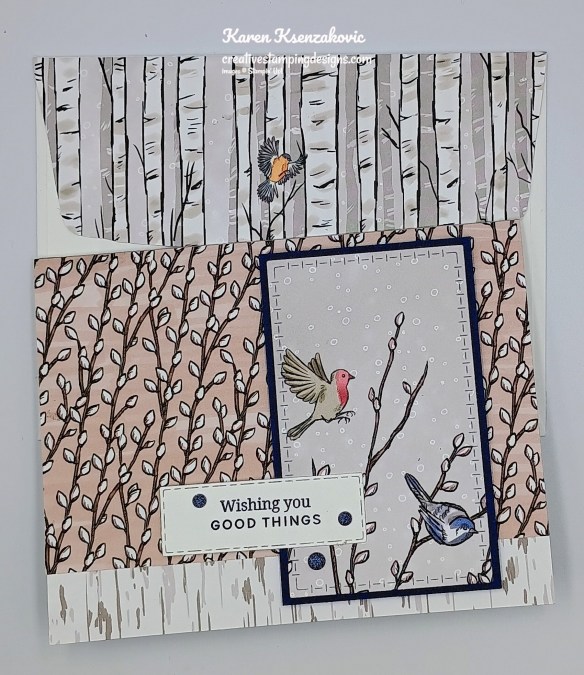
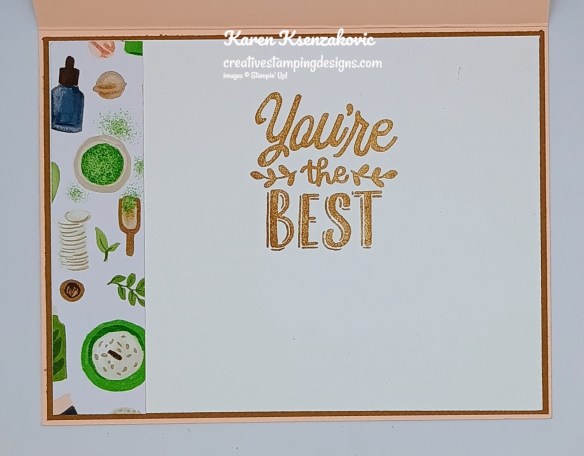
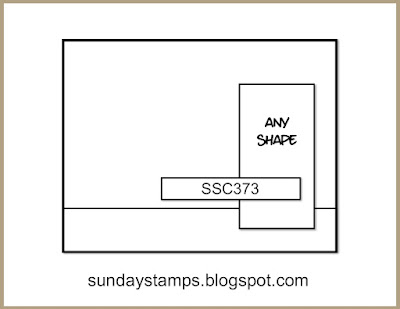
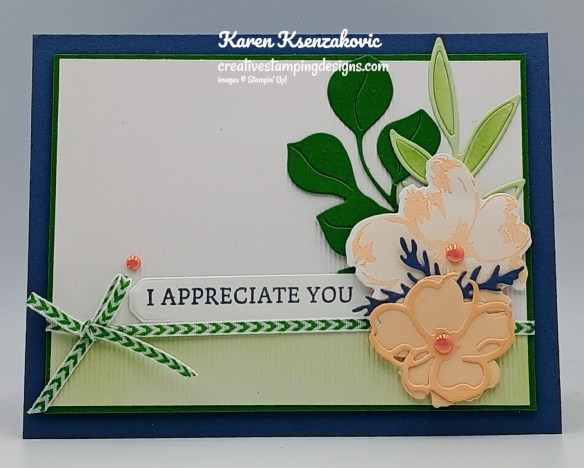
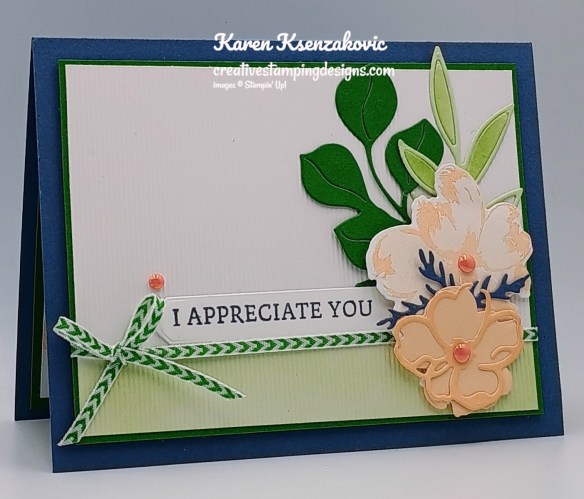
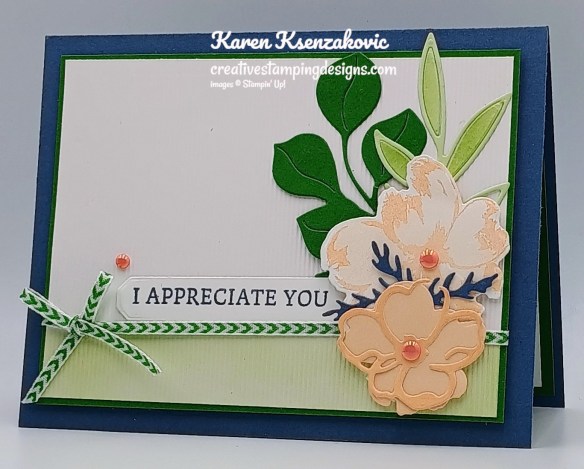
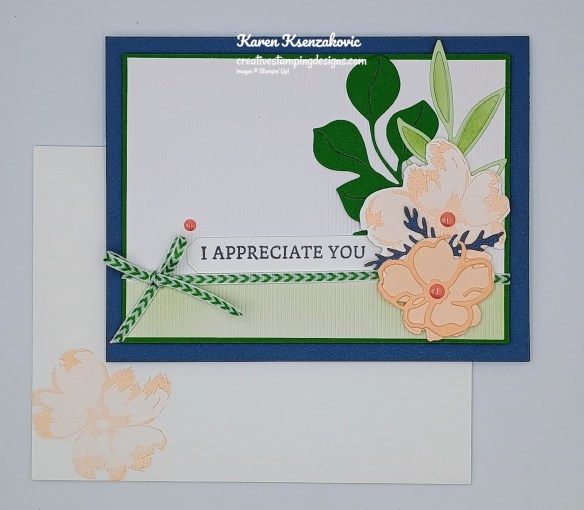
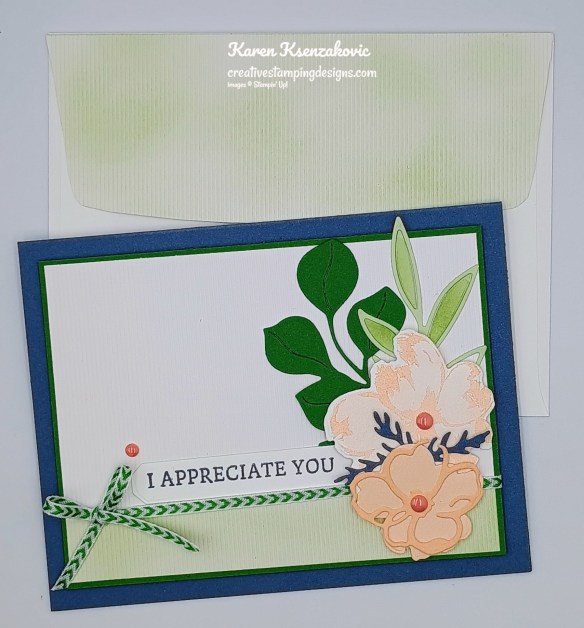
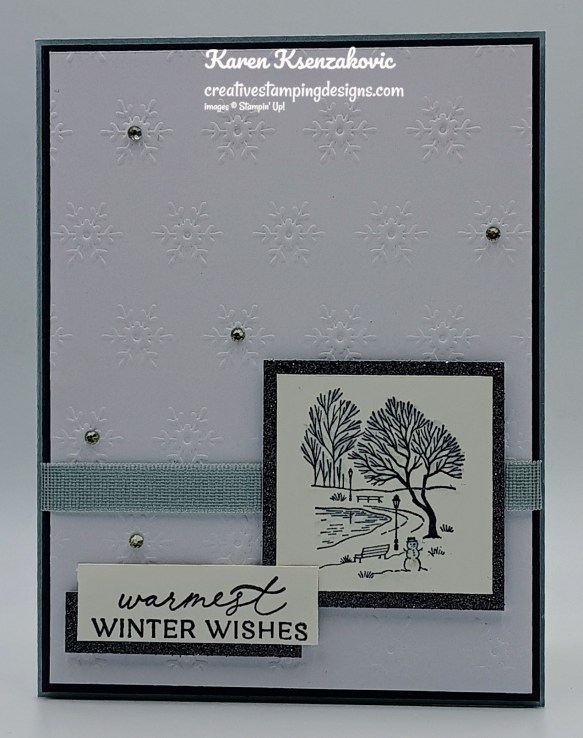
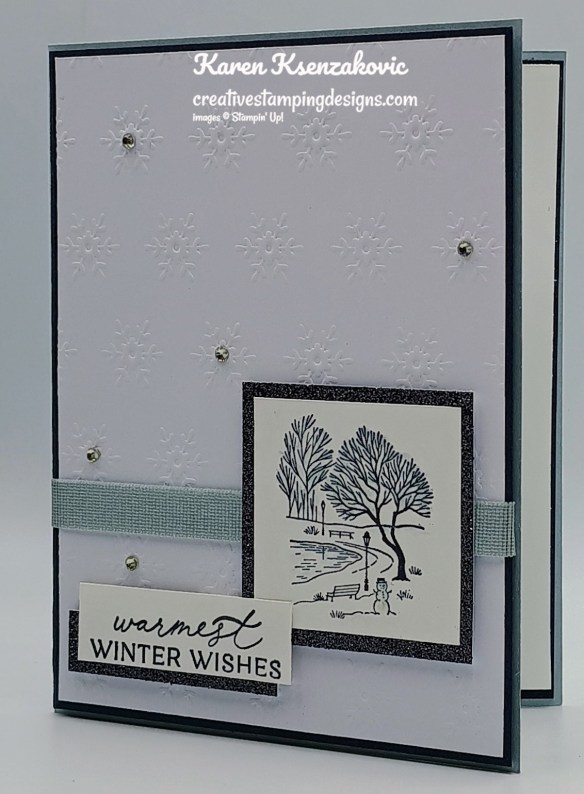
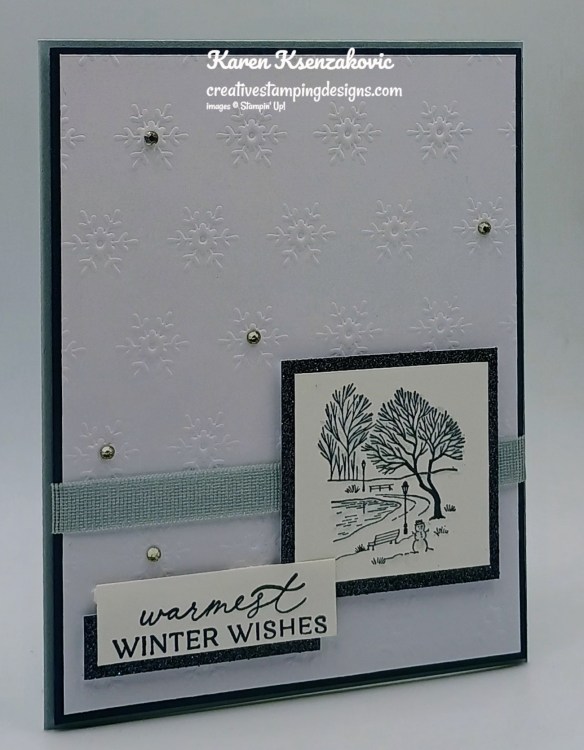
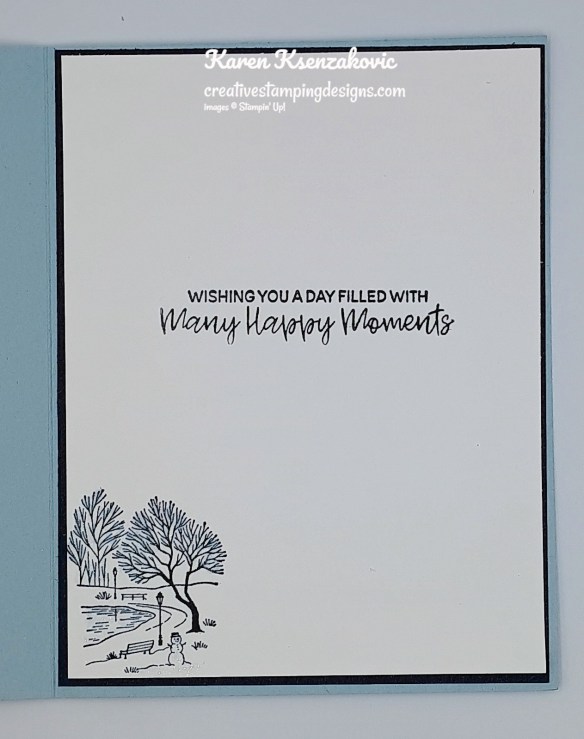
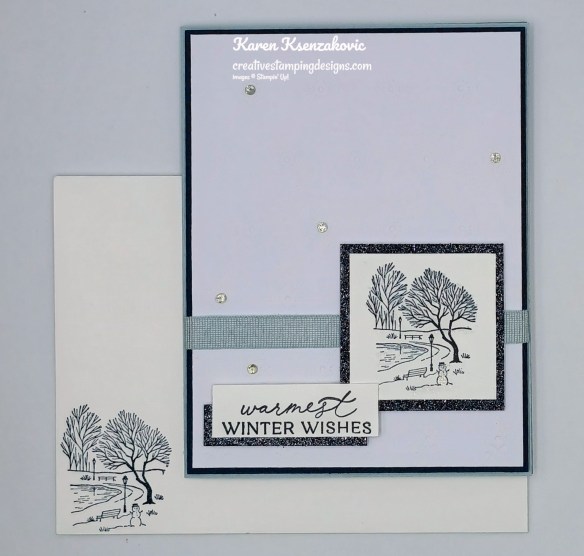
This sweet fun fold card with the slider message was made by one of my very talented team members and friends Karen. Such a cheerful blue, I love it!
This pretty card is from my team member and friend Michele who lives just over the bridge from me in NY. She also attends my monthly Online classes and is always fun to get together online with.
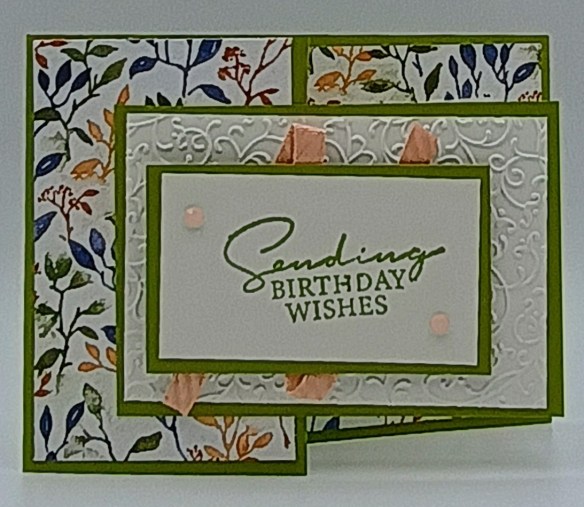
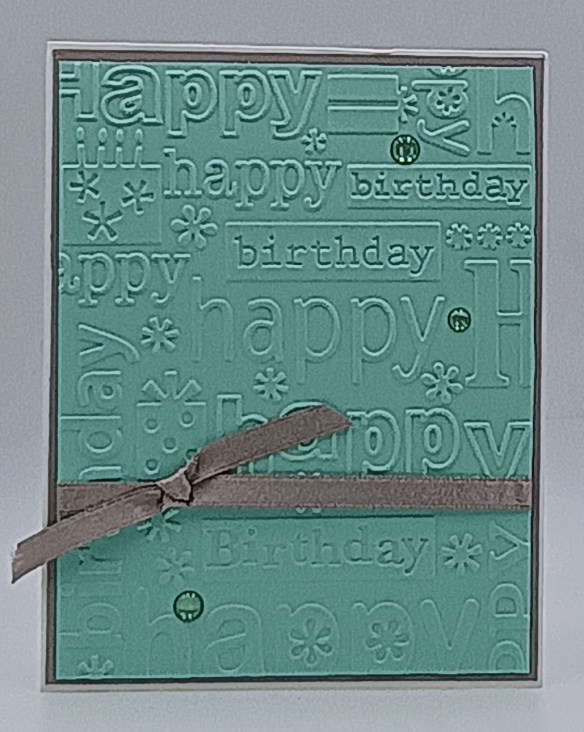
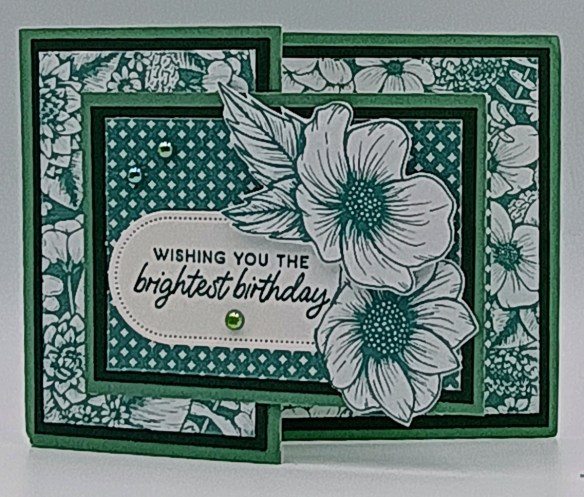
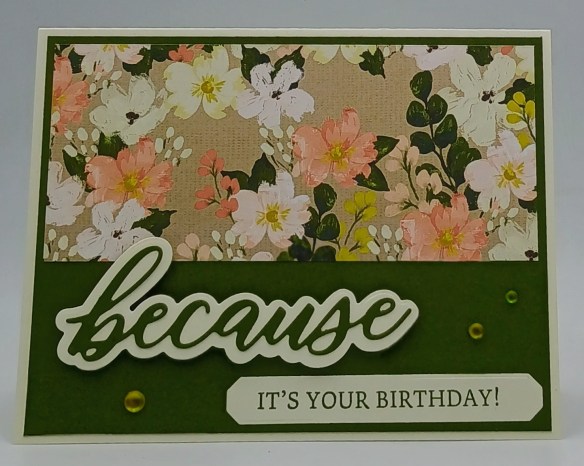
This beautiful card is from my team member and friend Marilyn. I LOVE that embossing folder and the beautiful DSP. I’ll be CASEing this design for sure.
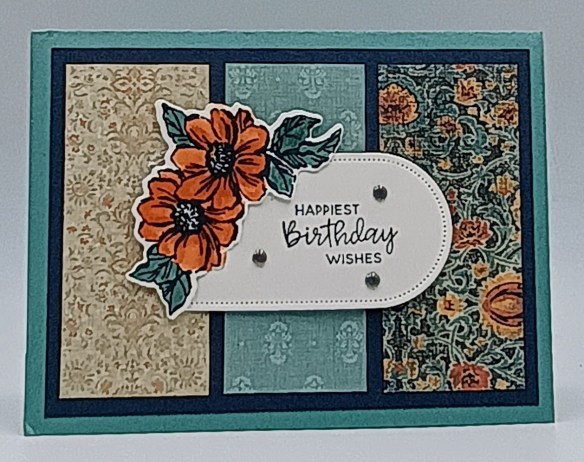
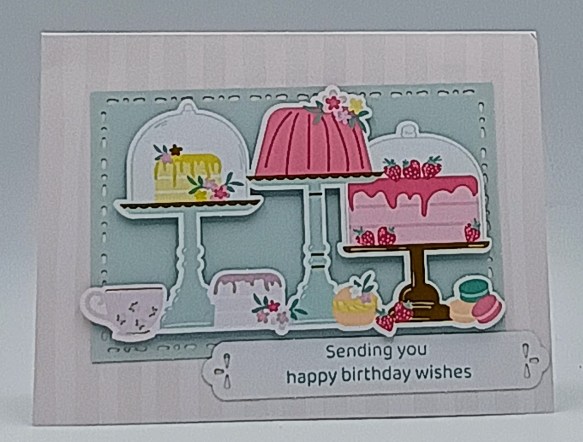
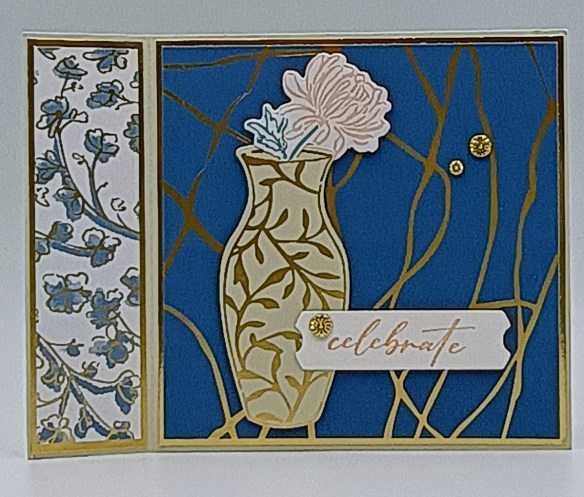
This beautiful panel card is from my team member and friend Nicole. I met Nicole for the 1st time at OnStage in March, and we’ve kept in touch ever since. She even joined Tara and I for our Online Class to be a presenter and goes by the Signing Stamper.
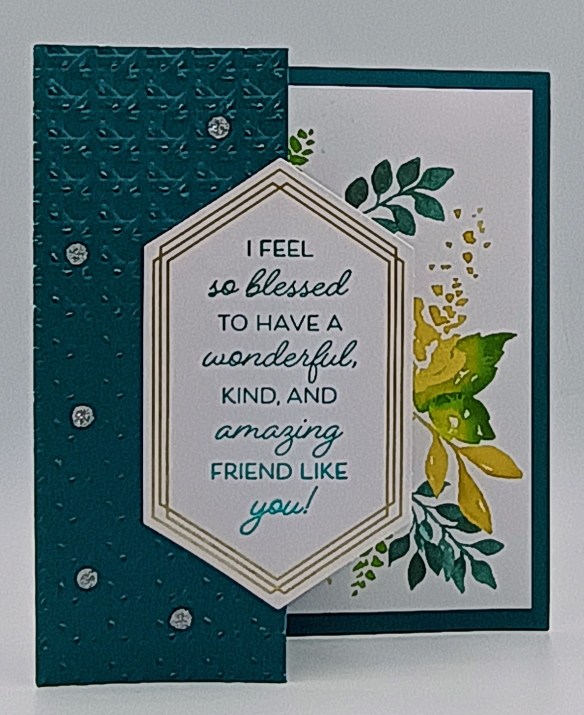
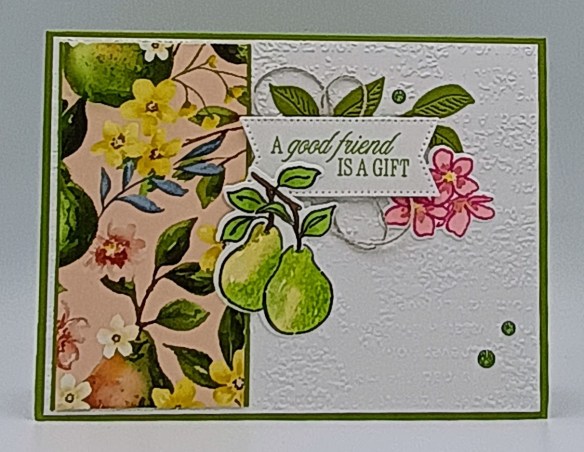
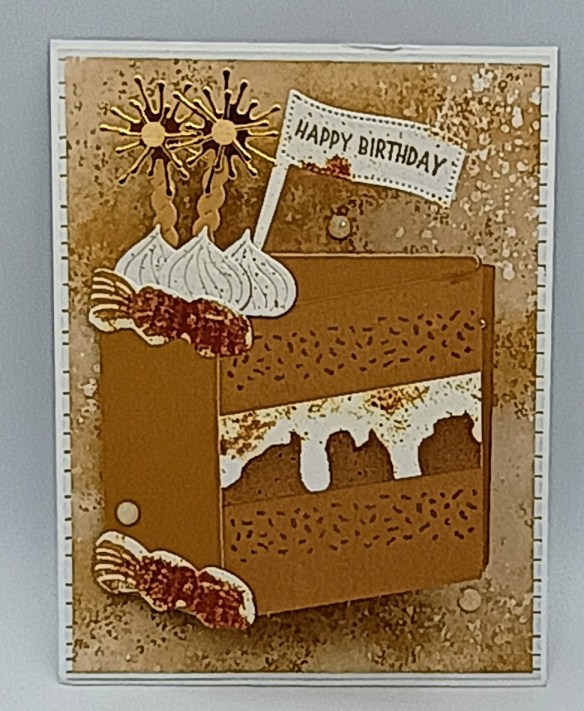
This awesome card is from my customer and friend Pam. I just love the Pool Party and Smoky Slate together along that wonderful embossing folder. I met her through my downline Michele and hope to get together with both of them one day soon.
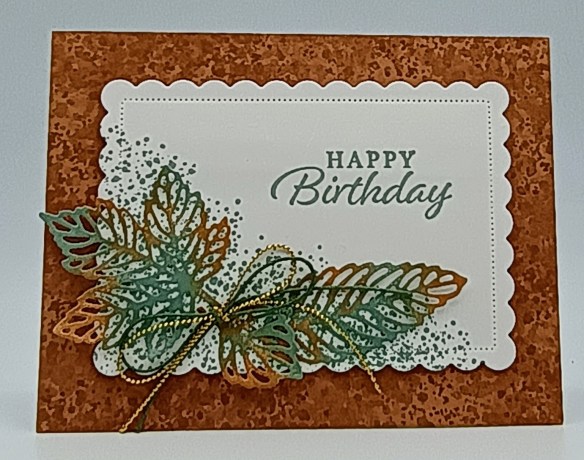
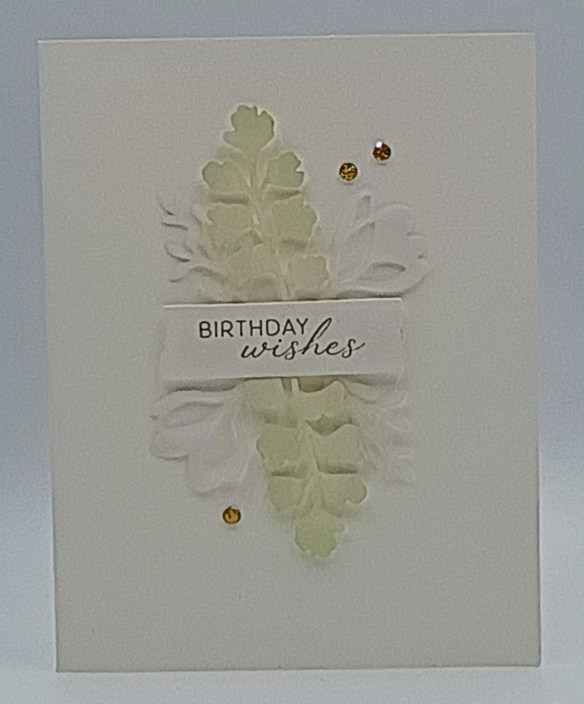
This stunning card is from my customer and friend Sanjna. I LOVE the way she did those die cut leaves. She contacted me one day about my in-person classes and has been coming ever since. I love when she comes to the classes and puts a twist on my design, she’s great at thinking outside the box.
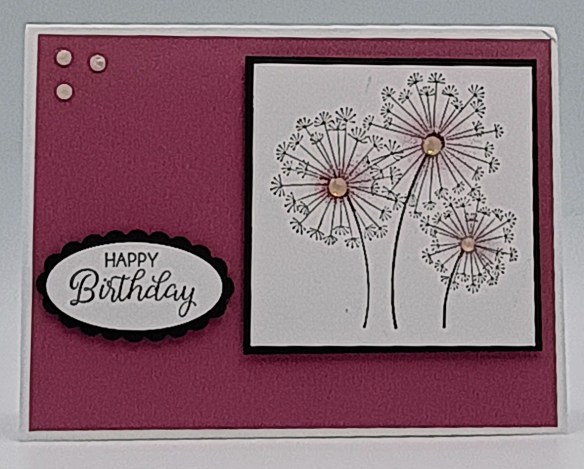
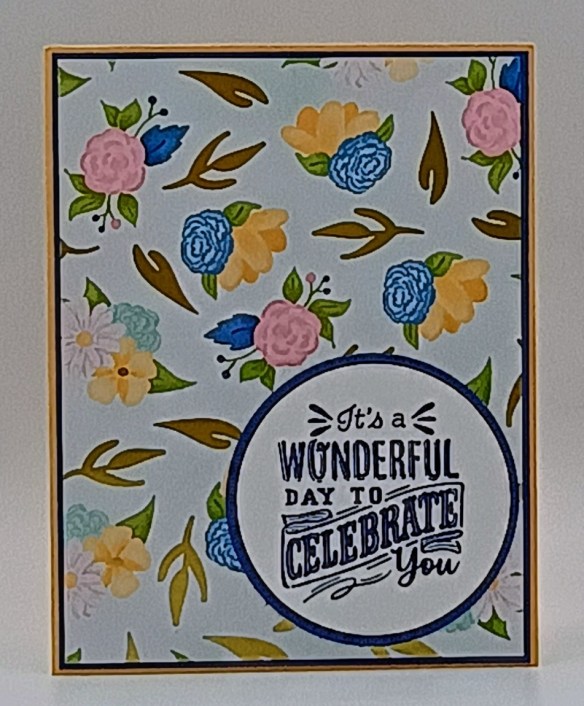
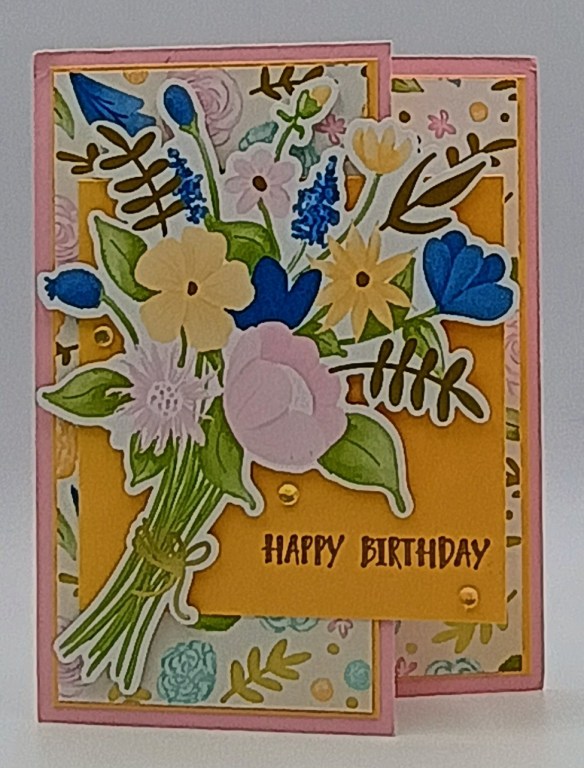
This beauty is from my customer, friend and former neighbor Val. I love the colors and how she brought the color to the flower centers. We were neighbors for about 30 years until she moved, but we still keep in touch, and she attends my Online classes.
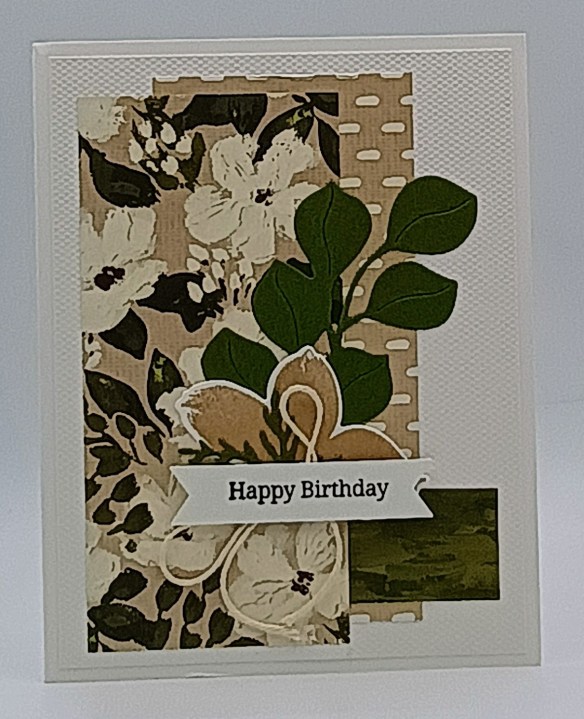
This beautiful card is from my customer and friend Arlene. I just love the greens in that beautiful DSP. I met her through my former hairdresser, and she asked me if I did in-person classes. She’s been coming to my classes for years and she asked if she could bring her sister-in-law. The 2 of them are so much fun at the classes. She also attends my Online classes.
This pretty card is from my friend and customer Carol (Arlene’s sister-in-law). She knows how much I love Pretty Peacock. Love the ‘Z’ fold card. We meet up sometimes, when I’m caught up, for dinner before my classes each month. There’s always laughing going on with her and Arlene.
Thank you for stopping by my blog today. I hope you enjoyed seeing all the beautiful cards from my team members and friends. It’s always great to get together either in person or virtually with all of them. Stamping and being a demonstrator has brought all these wonderful friends to me and my heart is so full.
*********************************************************************************************************
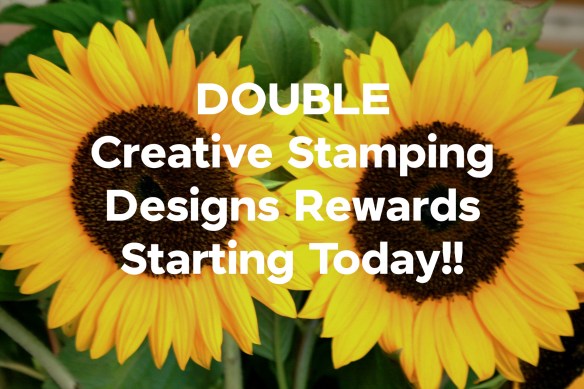
My January – April 2026 Mini Catalog and January Online Exclusive Designer Series Paper, Ribbon and Embellishment Shares are open for ordering. You can order just the DSP share, just the Two-Tone cardstock share, just the Ribbon share or just the Embellishment share, or you can it all!! Click Here to order.
I’m offering a Designer Series Paper Share, Two-Tone Cardstock Share, Ribbon Share & Embellishment Share from the January – April 2026 Mini Catalog, along with the upcoming January 2026 Online Exclusives and I’d love to have you join!! I’m placing my share order early on January 6th and I’m going to use the expedited shipping option so I should be able to have the shares cut, bundled and back out to you during the week of January 12th. Wouldn’t you love to have all of the gorgeous new Designer Series Papers in the Stampin’ Up! January – April 2026 Mini Catalog and the upcoming January 2026 Online Exclusives? What is a Paper Share you ask? It’s a sample of each of the new Designer Series Papers from the Catalog and Online Exclusives. Shares give you a good working sample of all of the papers so that you can decide which ones to order in full packs! If you were to purchase all of the DSP in the new Catalog and Online Exclusives, it would cost you over $175.00 plus shipping and if you were to purchase all the ribbon it would cost you over $50.00.
New Designer Series Paper Share – $22.00 plus $10.00 for Priority Mail Shipping

How my shares work: I order full packs of all of the Designer Series Papers listed below, I cut them into 6″ X 6″ pieces (or 6″ X 12″ pieces for double shares) and give you one panel of each design from each pack on the list. I pack up the paper in a cellophane bag with labels listing the Name, Item # and Colors in the pack and mail it back out to you just as quickly as I can!
New Designer Series Paper Share – $22.00 plus $10.00 for Priority Mail shipping
You will receive one 6×6 sheet of each design from the following DSP packs (the number after the name indicates how many 6×6 sheets of that paper pack you will receive):
- Beach Boardwalk (6)
- Cute As A Bug (6)
- Easter Joy (6)
- Love Notes Mix & Match 6 x 6 (6)
- Lovely & Beautiful Specialty (6)
- Lovely Blossoms (4)
- Made With Love (6)
- Mixed Up Patterns Mix-Ins (6)
- Natural Hues Textured (3)
- Nature Walk (6)
- Pastels Shimmer (3)
- Pleasant Patterns Specialty (3)
- Splash of Sparkles Specialty (6)
- Square Snippets (3)
In all, you’ll receive 70 – 6” x 6” sheets of designer or specialty paper!
Double Designer Series Paper Share – $44.00 Plus $10.00 Priority Mail Shipping
As a gift from me for ordering a Double Share of Designer Series Paper, I will include an Easter Time Mix & Match Ephemera Pack. This gift is only for ordering a Double DSP Share.
Two-Tone Cardstock Share
Have you been wanting to try the Two-Tone Cardstock but didn’t want to buy a whole pack? You can add a share of the 4 different Two-Tone Cardstock packs for an additional $6 or purchase them separately for $6 + $10 Priority Shipping
You will receive one 6×6 sheet of each color from each of the packs (the number after the name indicates how many 6×6 sheets of that paper pack you will receive):
- Beach Time (6)
- Currently Loving (6)
- Exploring Nature (6)
- Love Story (6)
In all, you’ll receive 24 – 6” x 6” sheets of cardstock!
Double Share of the Two-Tone Cardstock – $12.00 plus $10.00 Priority Mail Shipping
If you’d like double shares of the designer paper or cardstock, I’m offering those too! I’ll cut the 12″ x 12″ sheets into 6″ × 12″ so that you’ll be able to get 3 full A2 size card fronts from each sheet and you’ll get double sheets of the 6″ x 6″ since they’re already precut.
Ribbon Share – $13.00 plus $10.00 Priority Mail Shipping

All ribbons will come individually wrapped and labeled with the name and number of the product.
One-Fourth of a Roll of each:
- Balmy Blue 1/4″ Gingham Ribbon
- Bubble Bath 1/8″ Faux Linen Ribbon
- Cloud Cover 5/8″ Textured Ribbon
- Old Olive 3/8″ Specialty Rickrack
- Secret Sea 3/8″ Bordered Open Weave Ribbon
- White With Gold 3/8″ Ribbon
Double Ribbon Share – $26.00 Plus $10.00 Priority Mail Shipping and you will be getting 1/2 of the roll or each ribbon.
Embellishment Share – $12.00 plus $10.00 Priority Mail Shipping
I’m also offering an Embellishment Share. I will divide the embellishments up and package them in a cello bag with the name and number for easy ordering, just like I do with the paper and ribbon.
You will receive (approximate # listed:
- Easter Assortment (20)
- Faux Bronze Pentagons (20)
- Heart Gusseted Treat Bags (2)
- Ladybug Garden Epoxy Shapes (18)
- Moody Palette Glossy Dots (32)
- Pearlized Faceted Circles (24)
- Sparkle Dot Essentials (24)
Double Share of the Embellishments – $24.00 plus $10.00 Priority Mail Shipping
Anyone is welcome to join in my shares (please note, I can only ship to addresses within the US). To make ordering the shares a little easier, I have created a form for you to submit, that way you can order any combination of shares you want. Click Here for the form. I will send out PayPal Invoices by January 2nd.
Deadline to sign up for my share is Saturday January 3rd at 5:00 PM ET.
*********************************************************************************************************
Black Friday Sale Starts Tuesday November 25!!

Get ready for Stampin’ Up!’s Black Friday sale with up to 40% off Stampin’ Up! products! Shop this limited-time-only sale between November 25 to December 1!
Here is what will be on sale:
- 40% off – Stampin’ Blends – Paper Trimmer and Blades – Ink Bundles
- 25% off – Select adhesive
- 15% off – Select cardstock
Here are the details:
- Shop the full selection of discounted products online.
- Products are available while supplies last.
- Orders will likely arrive in time for the holidays.
- Ordering deadline: December 1, 2025, at 11:59 p.m. (MT)
Get your lists ready and head to the online store beginning November 25 to get those deals!!
*********************************************************************************************************
Coming Soon – Cyber Monday – Paper Pumpkin Sale – December 1 – 9
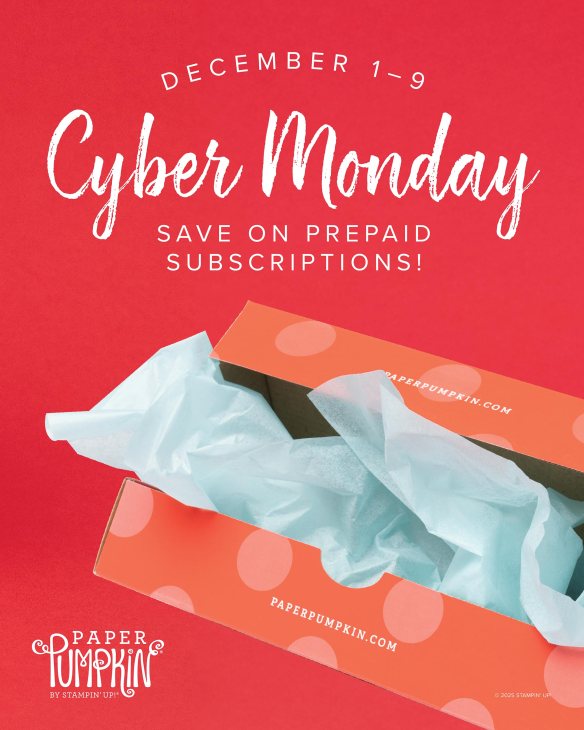
Starting December 1 at 8 a.m. (MT), Stampin’ Up! is offering big savings on prepaid Paper Pumpkin subscriptions! There’s never been a better time to subscribe to get a new all-inclusive crafting kit delivered to your door each month. Take advantage of this Cyber Monday offer for fantastic deals on 3-, 6-, and 12-month prepaid subscriptions.
Whether you’re looking for a last-minute Christmas present that sparks creativity or resolving to make time to craft in the new year, a Paper Pumpkin subscription is the gift that keeps on giving!
From December 1–9, prepaid Paper Pumpkin subscriptions will be discounted as follows:
- 3-month prepaid: $61.00 (regular price $81.00)
- 6-month prepaid: $122.00 (regular price $162.00)
- 12-month prepaid: $244.00 (regular price $324.00)
Here are the details:
- Subscriptions purchased during this promotion start immediately with the December Watercolor in Bloom Kit. This kit cannot be skipped.
- Do not purchase multiple subscriptions for the same recipient. The subscriptions will all start with the Watercolor in Bloom Kit, so the recipient will end up receiving duplicates of the same kit each month.
- Subscriptions purchased during the promotion will earn reduced rewards compared to full-priced subscriptions due to the discounted price, but they will still qualify for rewards once the threshold is met.
Don’t miss your chance to enjoy months of exciting kits at an incredible value! Stop by the Paper Pumpkin page here for more details about how Paper Pumpkin works and get ready to order your prepaid subscriptions on December 1!
*********************************************************************************************************
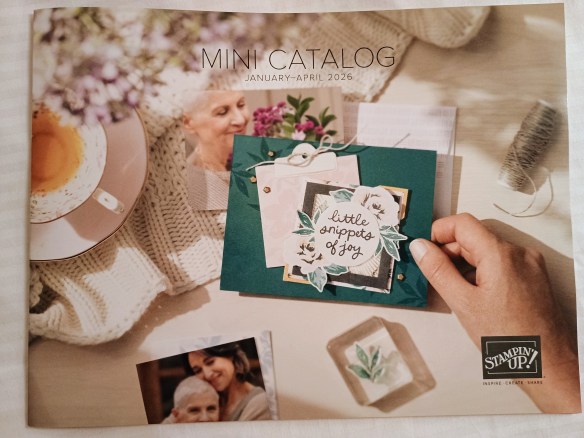
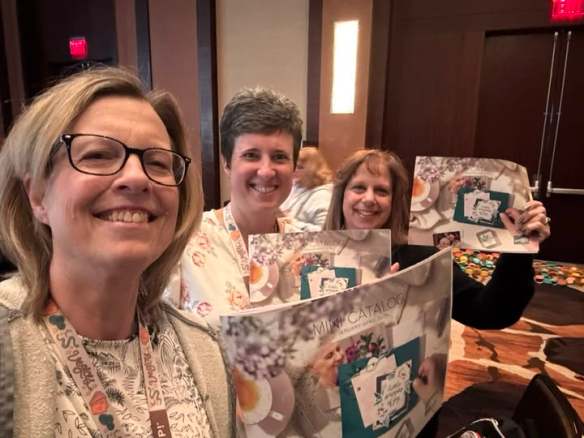
January-April 2026 Mini Catalog Coming Soon
The January – April 2026 Mini Catalog is coming soon. I’ve ordered the new mini catalog and will be shipping them out soon, if you’re one of my customers, you’ll be getting one in the mail just as soon as I receive them. To be a customer of mine, you need to have placed an order with me within the last year, and you will automatically receive the catalog. If you would like a copy of the catalog from me, just go to my Online Store and place an order and you will be on my list to receive the new catalog.
*********************************************************************************************************
If you need any stamping supplies, I’d love to be your Demonstrator. Just click HERE to go directly to my online store or drop me an email if you have any questions.


![Banner Sayings Photopolymer Stamp Set (English) [ 167044 ]](https://assets1.tamsnetwork.com/images/EC042017NF/167044s.jpg "Banner Sayings Photopolymer Stamp Set (English) [ 167044 ]")
![Basic White 8 1/2" X 11" Cardstock [ 166780 ]](https://assets1.tamsnetwork.com/images/EC042017NF/166780s.jpg "Basic White 8 1/2\" X 11\" Cardstock [ 166780 ]")
![Gray Granite 8-1/2" X 11" Cardstock [ 146983 ]](https://assets1.tamsnetwork.com/images/EC042017NF/146983s.jpg "Gray Granite 8-1/2\" X 11\" Cardstock [ 146983 ]")
![Night Of Navy 8-1/2" X 11" Cardstock [ 100867 ]](https://assets1.tamsnetwork.com/images/EC042017NF/100867s.jpg "Night Of Navy 8-1/2\" X 11\" Cardstock [ 100867 ]")
![Nests Of Winter 12" X 12" (30.5 X 30.5 Cm) Designer Series Paper [ 164183 ]](https://assets1.tamsnetwork.com/images/EC042017NF/164183s.jpg "Nests Of Winter 12\" X 12\" (30.5 X 30.5 Cm) Designer Series Paper [ 164183 ]")
![Night Of Navy Classic Stampin' Pad [ 147110 ]](https://assets1.tamsnetwork.com/images/EC042017NF/147110s.jpg "Night Of Navy Classic Stampin' Pad [ 147110 ]")
![Textured Notes Dies [ 165555 ]](https://assets1.tamsnetwork.com/images/EC042017NF/165555s.jpg "Textured Notes Dies [ 165555 ]")
![Charming Shimmer Faceted Dots [ 166139 ]](https://assets1.tamsnetwork.com/images/EC042017NF/166139s.jpg "Charming Shimmer Faceted Dots [ 166139 ]")
![Basic White Medium Envelopes [ 159236 ]](https://assets1.tamsnetwork.com/images/EC042017NF/159236s.jpg "Basic White Medium Envelopes [ 159236 ]")

![Adhesive Sheets [ 152334 ]](https://assets1.tamsnetwork.com/images/EC042017NF/152334s.jpg "Adhesive Sheets [ 152334 ]")


![Take Your Pick [ 144107 ]](https://assets1.tamsnetwork.com/images/EC042017NF/144107s.jpg "Take Your Pick [ 144107 ]")


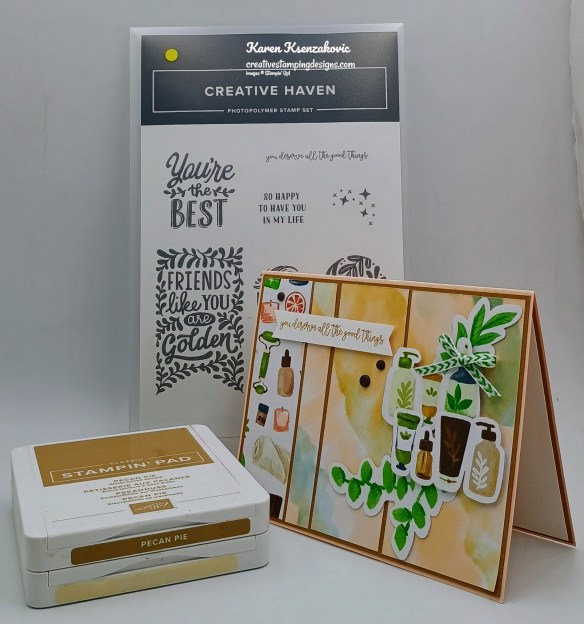
![Creative Haven Photopolymer Stamp Set (English) [ 167202 ]](https://assets1.tamsnetwork.com/images/EC042017NF/167202s.jpg "Creative Haven Photopolymer Stamp Set (English) [ 167202 ]")
![Pecan Pie 8 1/2" X 11" Cardstock [ 161717 ]](https://assets1.tamsnetwork.com/images/EC042017NF/161717s.jpg "Pecan Pie 8 1/2\" X 11\" Cardstock [ 161717 ]")
![Petal Pink 8-1/2" X 11" Cardstock [ 146985 ]](https://assets1.tamsnetwork.com/images/EC042017NF/146985s.jpg "Petal Pink 8-1/2\" X 11\" Cardstock [ 146985 ]")
![Hobby Haven 12" X 12" (30.5 X 30.5 Cm) Specialty Designer Series Paper [ 167201 ]](https://assets1.tamsnetwork.com/images/EC042017NF/167201s.jpg "Hobby Haven 12\" X 12\" (30.5 X 30.5 Cm) Specialty Designer Series Paper [ 167201 ]")
![Pecan Pie Classic Stampin' Pad [ 161665 ]](https://assets1.tamsnetwork.com/images/EC042017NF/161665s.jpg "Pecan Pie Classic Stampin' Pad [ 161665 ]")
![Earthy Matte Dots [ 167213 ]](https://assets1.tamsnetwork.com/images/EC042017NF/167213s.jpg "Earthy Matte Dots [ 167213 ]")
![Garden Green 1/8" (3.2 Mm) Chevron Ribbon [ 167212 ]](https://assets1.tamsnetwork.com/images/EC042017NF/167212s.jpg "Garden Green 1/8\" (3.2 Mm) Chevron Ribbon [ 167212 ]")


![Petals Of Beauty Bundle (English) [ 167096 ]](https://assets1.tamsnetwork.com/images/EC042017NF/167096s.jpg "Petals Of Beauty Bundle (English) [ 167096 ]")
![Petals Of Beauty Photopolymer Stamp Set [ 167093 ]](https://assets1.tamsnetwork.com/images/EC042017NF/167093s.jpg "Petals Of Beauty Photopolymer Stamp Set [ 167093 ]")
![Petals Of Beauty Dies [ 167095 ]](https://assets1.tamsnetwork.com/images/EC042017NF/167095s.jpg "Petals Of Beauty Dies [ 167095 ]")
![Words Of Beauty Bundle (English) [ 167090 ]](https://assets1.tamsnetwork.com/images/EC042017NF/167090s.jpg "Words Of Beauty Bundle (English) [ 167090 ]")
![Words Of Beauty Photopolymer Stamp Set (English) [ 167083 ]](https://assets1.tamsnetwork.com/images/EC042017NF/167083s.jpg "Words Of Beauty Photopolymer Stamp Set (English) [ 167083 ]")
![Words Of Beauty Dies (English) [ 167089 ]](https://assets1.tamsnetwork.com/images/EC042017NF/167089s.jpg "Words Of Beauty Dies (English) [ 167089 ]")
![Garden Green 8-1/2" X 11" Cardstock [ 102584 ]](https://assets1.tamsnetwork.com/images/EC042017NF/102584s.jpg "Garden Green 8-1/2\" X 11\" Cardstock [ 102584 ]")
![Misty Moonlight 8-1/2" X 11" Cardstock [ 153081 ]](https://assets1.tamsnetwork.com/images/EC042017NF/153081s.jpg "Misty Moonlight 8-1/2\" X 11\" Cardstock [ 153081 ]")
![Soft Sea Foam 8-1/2" X 11" Cardstock [ 146988 ]](https://assets1.tamsnetwork.com/images/EC042017NF/146988s.jpg "Soft Sea Foam 8-1/2\" X 11\" Cardstock [ 146988 ]")
![Petal Pink 12" X 12" (30.5 X 30.5 Cm) Two Tone Cardstock [ 166689 ]](https://assets1.tamsnetwork.com/images/EC042017NF/166689s.jpg "Petal Pink 12\" X 12\" (30.5 X 30.5 Cm) Two Tone Cardstock [ 166689 ]")
![Whispers Of Texture 12" X 12" (30.5 X 30.5 Cm) Specialty Paper [ 167106 ]](https://assets1.tamsnetwork.com/images/EC042017NF/167106s.jpg "Whispers Of Texture 12\" X 12\" (30.5 X 30.5 Cm) Specialty Paper [ 167106 ]")
![Misty Moonlight Classic Stampin' Pad [ 153118 ]](https://assets1.tamsnetwork.com/images/EC042017NF/153118s.jpg "Misty Moonlight Classic Stampin' Pad [ 153118 ]")
![Petal Pink Classic Stampin' Pad [ 147108 ]](https://assets1.tamsnetwork.com/images/EC042017NF/147108s.jpg "Petal Pink Classic Stampin' Pad [ 147108 ]")
![Soft Sea Foam Classic Stampin' Pad [ 147102 ]](https://assets1.tamsnetwork.com/images/EC042017NF/147102s.jpg "Soft Sea Foam Classic Stampin' Pad [ 147102 ]")
![Small Blending Brushes [ 160518 ]](https://assets1.tamsnetwork.com/images/EC042017NF/160518s.jpg "Small Blending Brushes [ 160518 ]")
![Pearls Of Beauty [ 167098 ]](https://assets1.tamsnetwork.com/images/EC042017NF/167098s.jpg "Pearls Of Beauty [ 167098 ]")

![Winter Scenes Cling Stamp Set (English) [ 166088 ]](https://assets1.tamsnetwork.com/images/EC042017NF/166088s.jpg "Winter Scenes Cling Stamp Set (English) [ 166088 ]")
![Delicate Pines Photopolymer Stamp Set (English) [ 166067 ]](https://assets1.tamsnetwork.com/images/EC042017NF/166067s.jpg "Delicate Pines Photopolymer Stamp Set (English) [ 166067 ]")
![Branching Out Photopolymer Stamp Set (English) [ 169204 ]](https://assets1.tamsnetwork.com/images/EC042017NF/169204s.jpg "Branching Out Photopolymer Stamp Set (English) [ 169204 ]")
![Cloud Cover 8 1/2" X 11" Cardstock [ 165621 ]](https://assets1.tamsnetwork.com/images/EC042017NF/165621s.jpg "Cloud Cover 8 1/2\" X 11\" Cardstock [ 165621 ]")
![Secret Sea 8 1/2" X 11" Cardstock [ 165624 ]](https://assets1.tamsnetwork.com/images/EC042017NF/165624s.jpg "Secret Sea 8 1/2\" X 11\" Cardstock [ 165624 ]")
![Silent Snowfall 12" X 12" (30.5 X 30.5 Cm) Specialty Designer Series Paper [ 166062 ]](https://assets1.tamsnetwork.com/images/EC042017NF/166062s.jpg "Silent Snowfall 12\" X 12\" (30.5 X 30.5 Cm) Specialty Designer Series Paper [ 166062 ]")
![Peaceful Garden 12" X 12" (30.5 X 30.5 Cm) Glimmer Paper [ 165929 ]](https://assets1.tamsnetwork.com/images/EC042017NF/165929s.jpg "Peaceful Garden 12\" X 12\" (30.5 X 30.5 Cm) Glimmer Paper [ 165929 ]")
![Secret Sea Classic Stampin' Pad [ 165285 ]](https://assets1.tamsnetwork.com/images/EC042017NF/165285s.jpg "Secret Sea Classic Stampin' Pad [ 165285 ]")
![Clear Wink Of Stella Glitter Brush [ 141897 ]](https://assets1.tamsnetwork.com/images/EC042017NF/141897s.jpg "Clear Wink Of Stella Glitter Brush [ 141897 ]")
![Cloud Cover 3/8" (1 Cm) Faux Linen Ribbon [ 165271 ]](https://assets1.tamsnetwork.com/images/EC042017NF/165271s.jpg "Cloud Cover 3/8\" (1 Cm) Faux Linen Ribbon [ 165271 ]")
![Rhinestone Basic Jewels [ 144220 ]](https://assets1.tamsnetwork.com/images/EC042017NF/144220s.jpg "Rhinestone Basic Jewels [ 144220 ]")


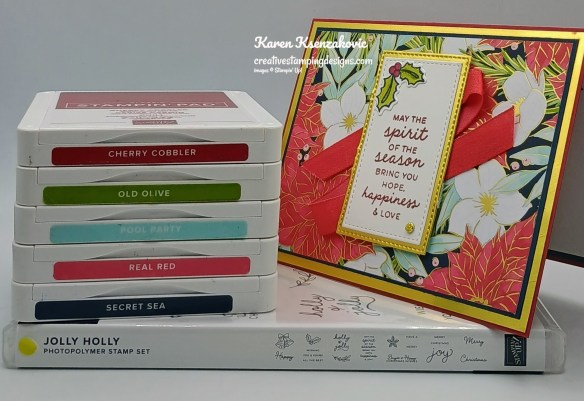

![Jolly Holly Bundle (English) [ 166120 ]](https://assets1.tamsnetwork.com/images/EC042017NF/166120s.jpg "Jolly Holly Bundle (English) [ 166120 ]")
![Jolly Holly Photopolymer Stamp Set (English) [ 166117 ]](https://assets1.tamsnetwork.com/images/EC042017NF/166117s.jpg "Jolly Holly Photopolymer Stamp Set (English) [ 166117 ]")
![Jolly Holly Hybrid Embossing Folder [ 166119 ]](https://assets1.tamsnetwork.com/images/EC042017NF/166119s.jpg "Jolly Holly Hybrid Embossing Folder [ 166119 ]")
![Cherry Cobbler 8-1/2" X 11" Cardstock [ 119685 ]](https://assets1.tamsnetwork.com/images/EC042017NF/119685s.jpg "Cherry Cobbler 8-1/2\" X 11\" Cardstock [ 119685 ]")
![Traditions Of Christmas 12" X 12" (30.5 X 30.5 Cm) Specialty Designer Series Paper [ 165853 ]](https://assets1.tamsnetwork.com/images/EC042017NF/165853s.jpg "Traditions Of Christmas 12\" X 12\" (30.5 X 30.5 Cm) Specialty Designer Series Paper [ 165853 ]")
![Gold Foil Sheets [ 132622 ]](https://assets1.tamsnetwork.com/images/EC042017NF/132622s.jpg "Gold Foil Sheets [ 132622 ]")
![Cherry Cobbler Classic Stampin' Pad [ 147083 ]](https://assets1.tamsnetwork.com/images/EC042017NF/147083s.jpg "Cherry Cobbler Classic Stampin' Pad [ 147083 ]")
![Tuxedo Black Memento Ink Pad [ 132708 ]](https://assets1.tamsnetwork.com/images/EC042017NF/132708s.jpg "Tuxedo Black Memento Ink Pad [ 132708 ]")
![Cherry Cobbler Stampin' Blends Combo Pack [ 154880 ]](https://assets1.tamsnetwork.com/images/EC042017NF/154880s.jpg "Cherry Cobbler Stampin' Blends Combo Pack [ 154880 ]")
![Old Olive Stampin' Blends Combo Pack [ 154892 ]](https://assets1.tamsnetwork.com/images/EC042017NF/154892s.jpg "Old Olive Stampin' Blends Combo Pack [ 154892 ]")
![Flower Accents [ 165171 ]](https://assets1.tamsnetwork.com/images/EC042017NF/165171s.jpg "Flower Accents [ 165171 ]")
![Real Red 1/2" (1.3 Cm) Shiny Ribbon [ 165876 ]](https://assets1.tamsnetwork.com/images/EC042017NF/165876s.jpg "Real Red 1/2\" (1.3 Cm) Shiny Ribbon [ 165876 ]")

