Stampin’ Up! Christmas To Remember for The Card Concepts

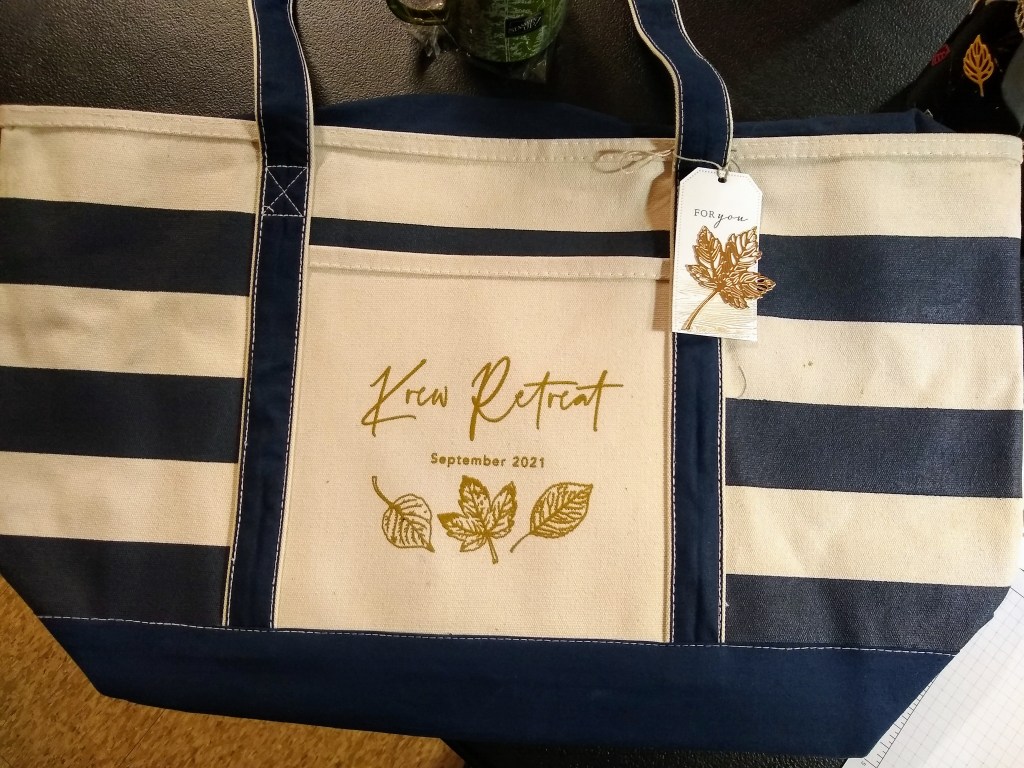
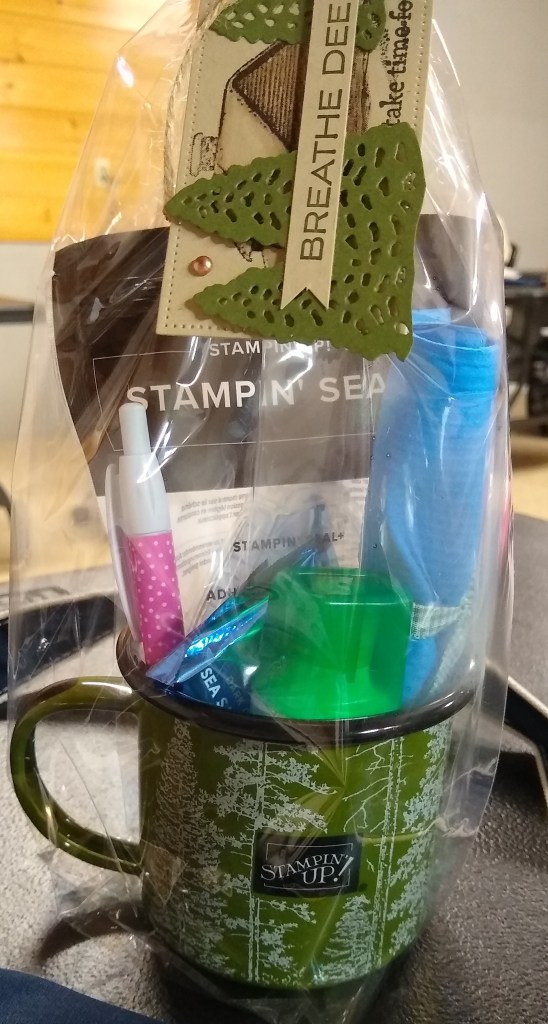
Good Wednesday morning my stamping friends. I hope everyone’s week is going well. We’re halfway through and on our way to the weekend. I’m really looking forward to this weekend coming up. I’ll be heading to Georgia for the weekend for a crafting retreat with some of my team members. There will be lots of crafting, relaxing and eating going on.

It’s time for an inspiration challenge from The Card Concepts. The inspiration photos are Harvest Bounty or Christmas Joy.  You get to pick which photo you want to work with, 182a or 182b. Here is my card that was inspired from the challenge photo.
Stampin' Up! Christmas To Remember 1 creativestampingdesigns.com

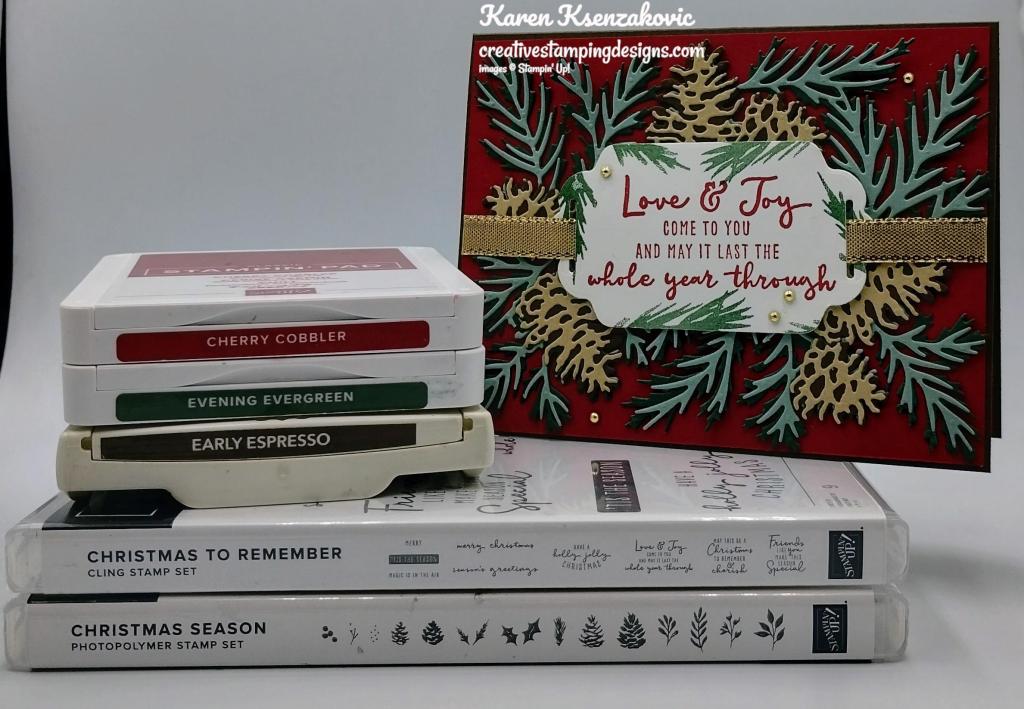
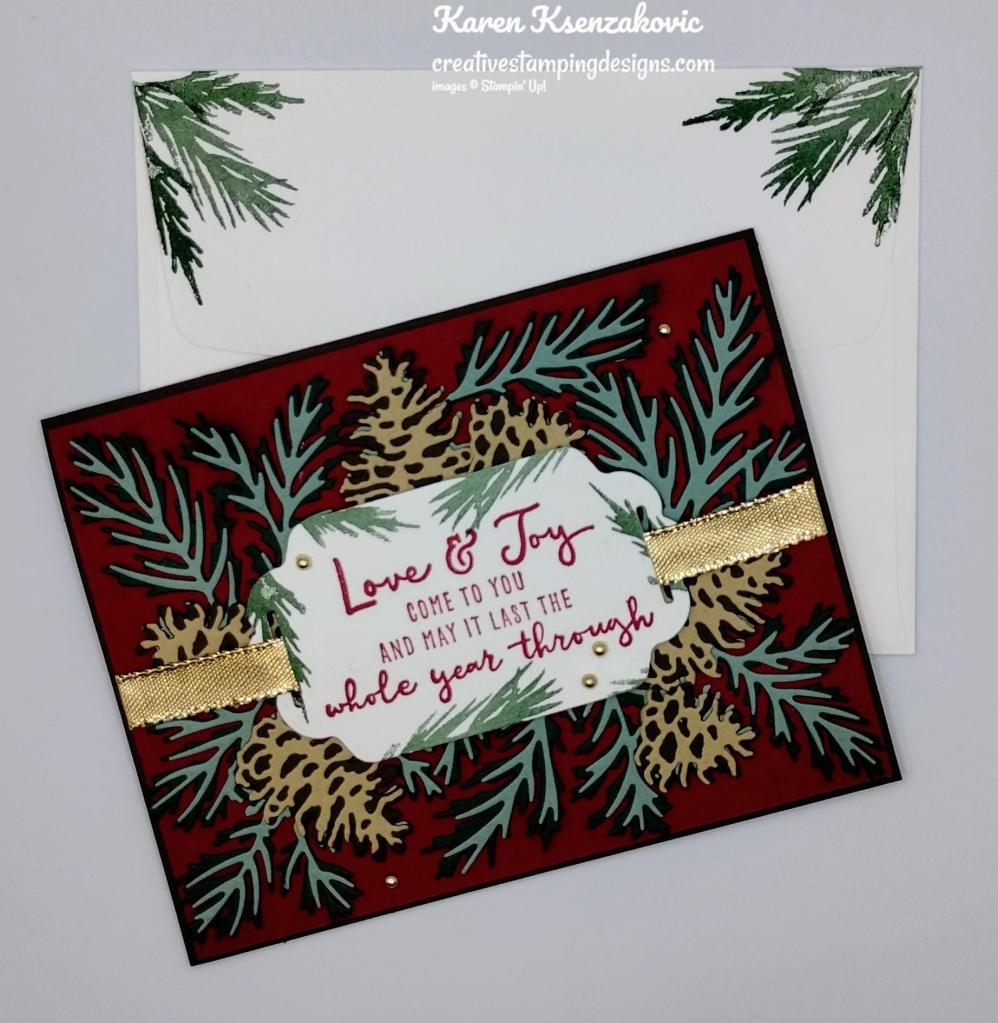
I used the Stampin’ Up! Christmas To Remember Cling Stamp Set and the Stampin’ Up! Christmas Season Photopolymer Stamp Set for my Freestyle Collage Card and I was inspired by the pine boughs and colors in the Christmas Joy photo #182b.

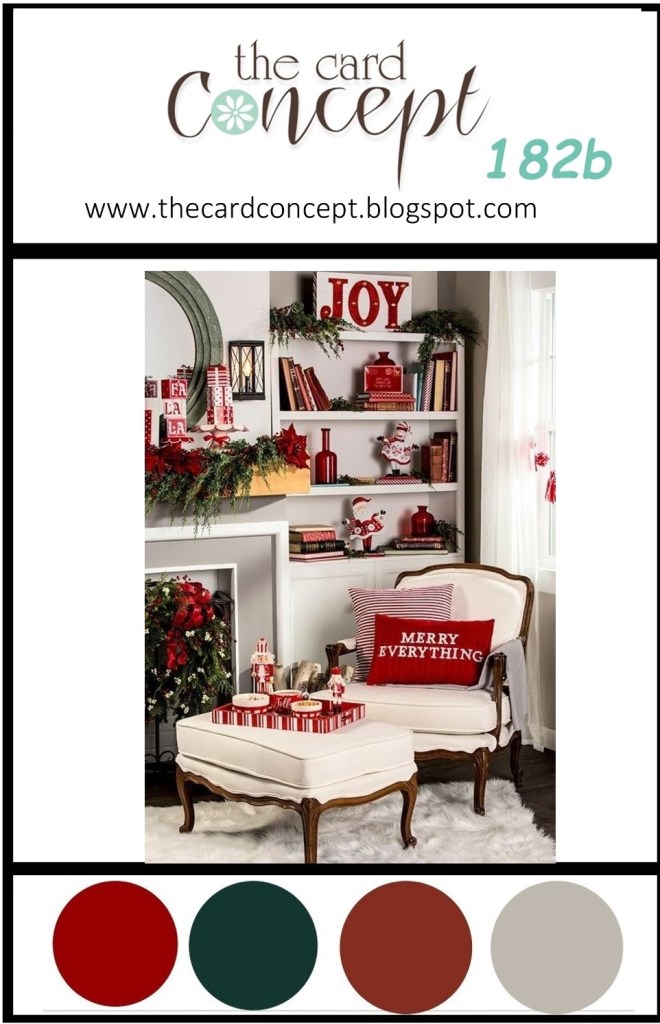
I hope you will take a moment to visit The Card Concepts and join us for our challenge #182a or 182b.  How are you inspired by the photos?

Stampin' Up! Christmas To Remember 2 creativestampingdesigns.com

I started by using the Christmas Pinecone Dies and cutting the larger one from a panel of Evening Evergreen cardstock and the smaller one from a panel of Soft Succulent cardstock. I cut the solid pinecone die from a panel of Early Espresso cardstock and the detailed pinecones from a panel of Crumb Cake cardstock.

Stampin' Up! Christmas To Remember 3 creativestampingdesigns.com

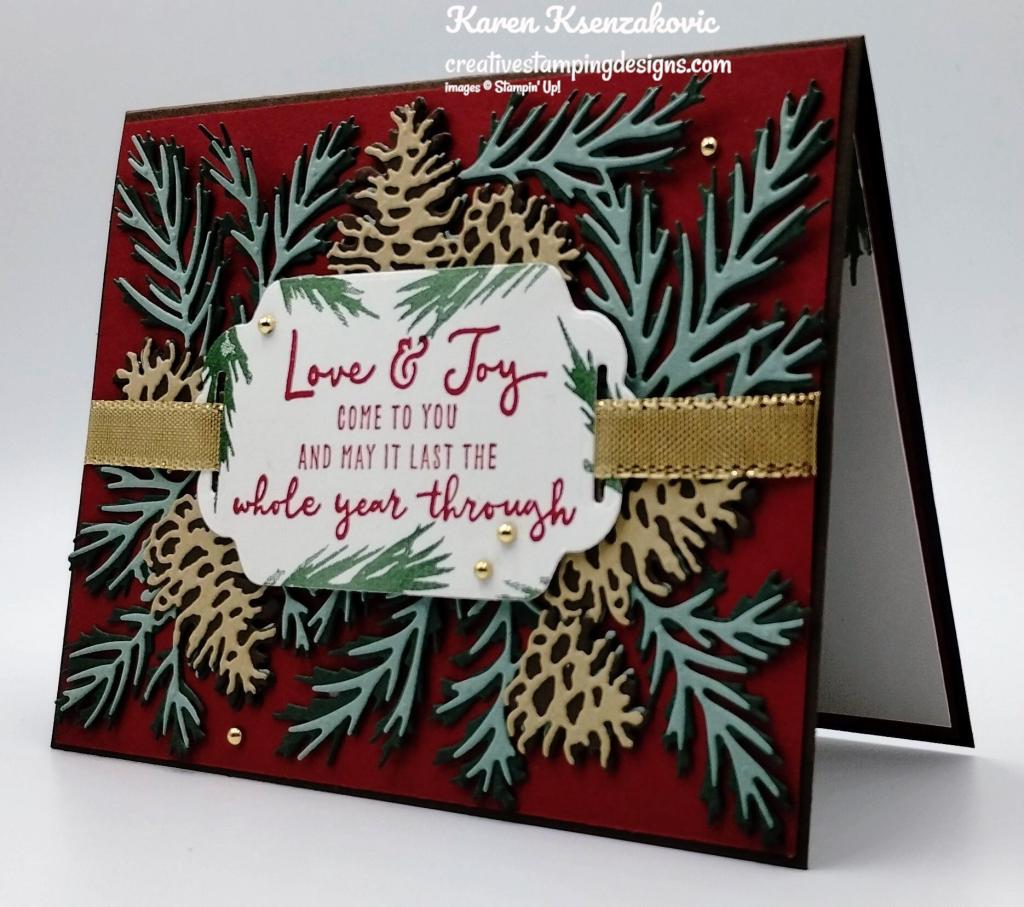
I adhered the Soft Succulent pine boughs to the Evening Evergreen pine boughs. I adhered the detailed pinecones to the solid pinecones. I adhered the layered pinecones to the pine boughs die using Multipurpose Liquid Glue. I adhered the die cut panel to a Cherry Cobbler card front using Multipurpose Liquid Glue.
Stampin' Up! Christmas To Remember 4 creativestampingdesigns.com

On a panel of Basic White cardstock, I stamped the sentiment from the Christmas To Remember stamp set in Cherry Cobbler Ink. I stamped the pine bough images from the Christmas Season stamp set in Evening Evergreen Ink around the sentiment. I cut the sentiment out using the Seasonal Labels Dies. I cut the side slits using the Seasonal Labels Dies. I threaded a piece of Gold 3/8″ Shimmer Ribbon through the slits on the die cut sentiment. I adhered the sentiment to the card front using Stampin’ Dimensionals. I adhered the ribbon to the back of the card front using Stampin’ Seal. I adhered the card front to an Early Espresso card base using Multipurpose Liquid Glue. I added a few Festive Pearls to the card front.
Stampin' Up! Christmas To Remember 5 creativestampingdesigns.com

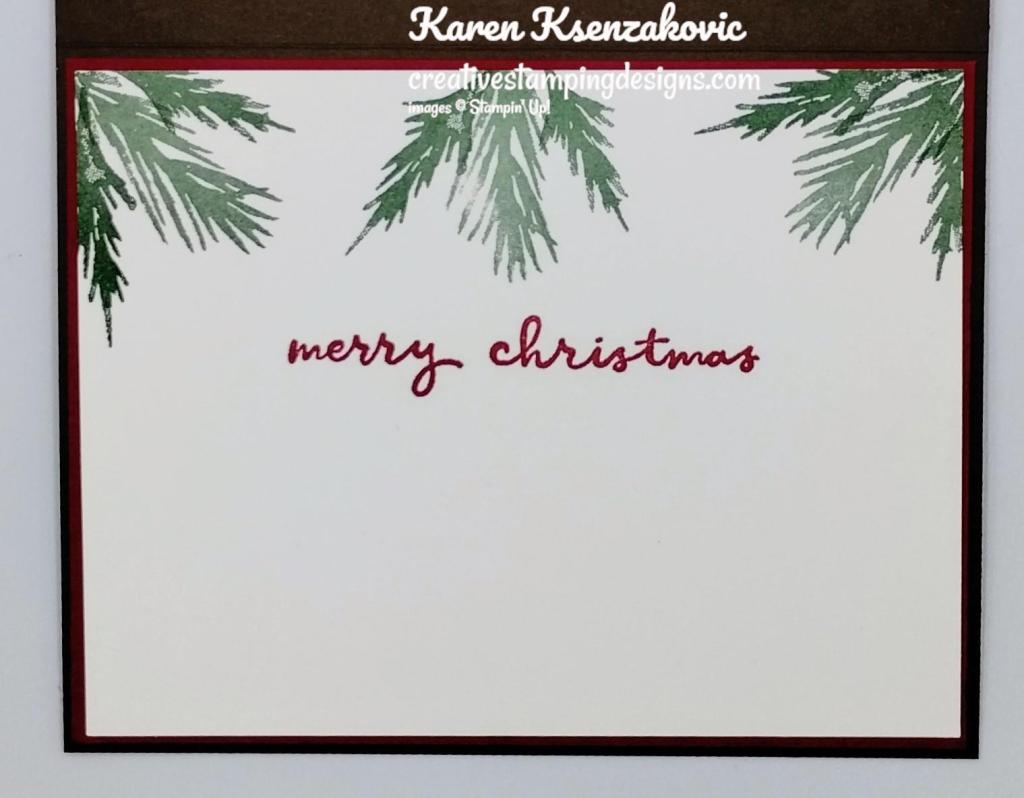
On the inside, I stamped the sentiment from Christmas To Remember stamp set in Cherry Cobbler Ink on a panel of Basic White cardstock. I stamped the pine bough images from the Christmas Season stamp set in Evening Evergreen Ink on the top of the panel. I adhered the Basic White panel to a Cherry Cobbler mat then to the Early Espresso card base.

Stampin' Up! Christmas To Remember 6 creativestampingdesigns.com

To finish my card, I decorated a Basic White Medium Envelope. I stamped the pine bough images from the Christmas Season stamp set in Evening Evergreen Ink to the envelope front and flap.
Stampin' Up! Christmas To Remember 7 creativestampingdesigns.com

Thank you for stopping by my blog today. I hope you like the card and will give it a try. Happy Stamping!!

*********************************************************************************************************

If you need any stamping supplies, I’d love to be your Demonstrator. Just click HERE to go directly to my online store or drop me an email if you have any questions. 

MY CURRENT HOST CODE IS:   76V6XDMX

Use this host code when placing an order with me. When you order $50 or greater you will receive a free gift from me! If your order is over $150, please do not use this code, but you’ll still get the free gift. The free gift is your choice of any 1 item valued up to $10.00 from the 2022-2023 Annual Catalog or the July – December 2022 Mini Catalog!   For any orders $50 or more I will also send you my monthly class tutorials.  Click HERE or go to my Customer Rewards for more details and to see what this month’s tutorials are.

Please remember to use my current Host Code and make sure that you can see my name on the final checkout page listed as your Demonstrator when you order so that you know that you’re ordering with me and you’ll get my rewards! 

Happy Stamping, Karen

*********************************************************************************************************

FITTING FLORETS COLLECTION

There’s a new Suite coming November 1st.

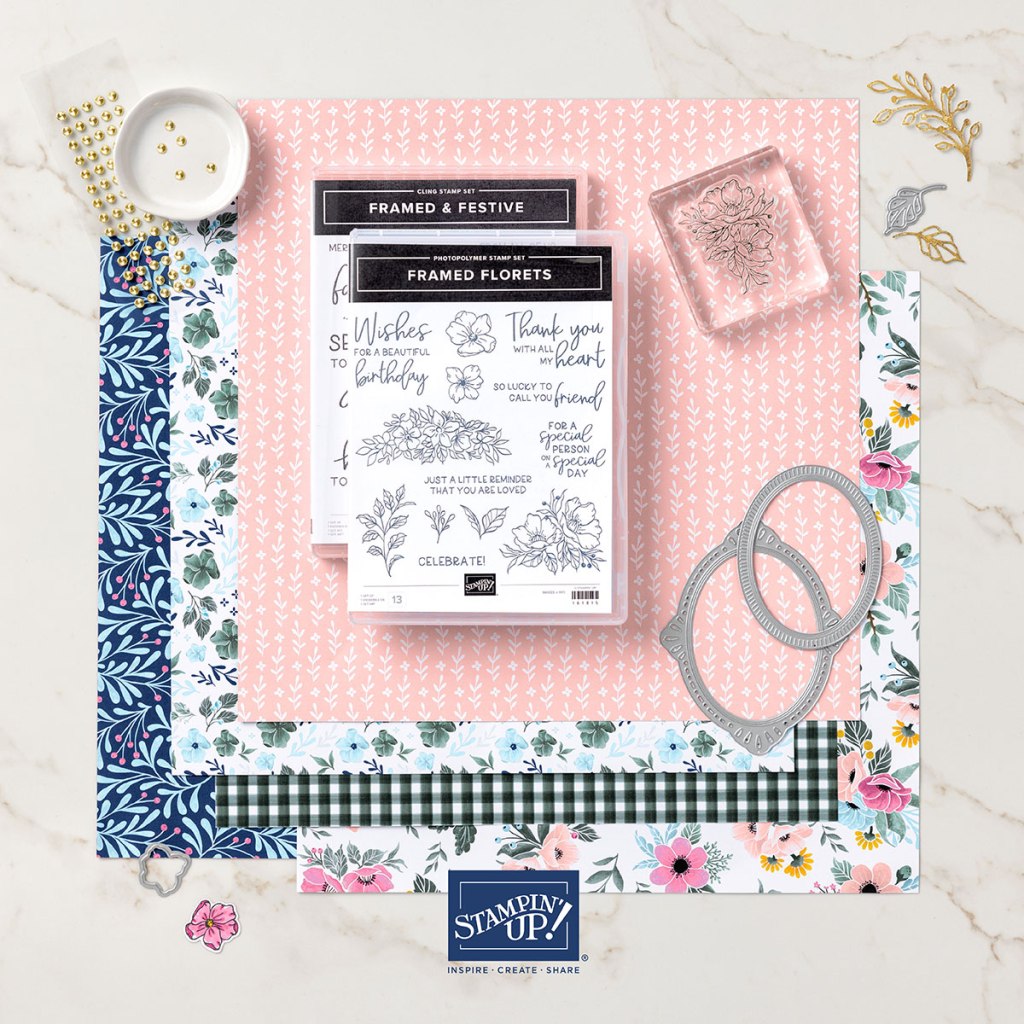
Add just the right touch of elegance to any occasion, including Christmas and seasonal celebrations, with the sweet Fitting Florets Collection. From color schemes to sentiments and embellishments to dies, these unique products blend together so that your cards and crafts fit whatever occasion you might need. Send birthday wishes, express your gratitude, or spread Christmas cheer—with so many options to mix and match you’ll be set no matter the celebration all year!

Starting 1 November 2022, you can order items from the Fitting Florets Collection. All items in the collection can be ordered separately. Click HERE or on the photo for a printable PDF flyer.

The following exclusive products are only available while supplies last:

  • Framed & Festive Cling Stamp Set (item 160888)
  • Fitting Florets Designer Series Paper (item 161814)
  • Gold Adhesive-Backed Swirls (item 161822)

The following will be available for purchase in the Mini Catalog starting January 2023:

  • Framed Florets Bundle (item 162407)
  • Framed Florets Photopolymer Stamp Set (item 161815)
  • Framed Florets Dies (item 160623)

Would you like to be able to purchase this collection early so you can get ahead with your Christmas cards? You can add it to your Starter Kit when you join Stampin’ Up! You can order the whole collection for $97.50. Then you still get to choose another $57.50 in product of your choice, and it will all only cost you $99. Everything ships for FREE and Stampin’ Up! will even throw in a past Paper Pumpkin Kit and some business supplies in case you want to start your own business. There is never an obligation to sell, you can join as a Hobby Demonstrator just to enjoy the discount for yourself. Contact me at creativestampingdesigns@gmail.com and we can talk. I would LOVE to have you on my team.

*********************************************************************************************************

Starter Kit + Promotion From Stampin’ Up! October 4-31!!

October is a fabulous time to join Stampin’ Up!  You will get even MORE FREE products in your customizable Starter Kit!  Between October 4-31, when you join, you will get $155 worth of products in your Starter Kit for only $99!!  Plus you’ll get free shipping and all the fun being a part of Stampin’ Up! and our Inkin’ Krew Team!

STARTER KIT+ PROMOTION DATES:  OCTOBER 4-31, 2022

  • When you purchase your Starter Kit, you will be able to redeem $155 of Starter Kit eligible products for just $99!!
  • You can select any eligible Stampin’ Up! products up to the stated value of $155.
  • Your Starter Kit also includes business resources like catalogs, brochures, order forms, and postcards.
  • The Starter Kit also includes a FREE past Paper Pumpkin kit!
  • In addition to the amazing added value to your Starter Kit, when you join Stampin’ Up! you get to be a part of our amazing community of crafters. Plus, you get to enjoy sharing simple and fun crafting experiences with others, early access to products, and exclusive access to training events!!
  • There is no requirement to hold events, share online or sell in any way to others.  You can join and simply get the awesome Starter Kit+ deal and then get a minimum of a 20% discount on anything that you purchase as a Demonstrator!
  • New demonstrators who submit their Independent Demonstrator Agreement (IDA) before October 4 or after October 31 will not be eligible for this offer.
  • Starter Kit + Promotion begins: October 4, 2022
  • Starter Kit + Promotion ends: October 31, 2022 @ 11:50pm MT

You can check out more information about joining our team Here and more details about the benefits of being a Demonstrator and find the link to join Here.

I’d be happy to help you and talk to you about joining. Contact me at creativestampingdesigns@gmail.com and we can connect. This is such a great deal you won’t want to pass it up.

*********************************************************************************************************

BIRTHDAY CARD ORGANIZER KIT NOW AVAILABLE
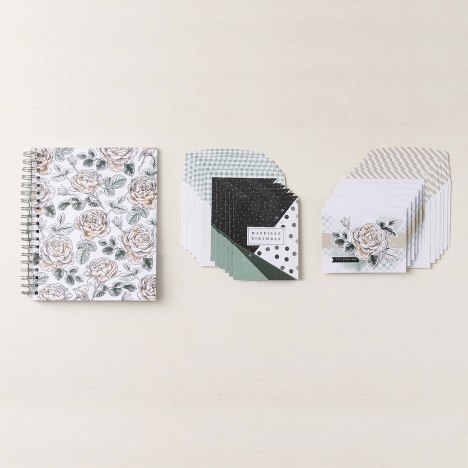
Get ready for the latest addition to the Kits Collection by Stampin’ Up! The Birthday Card Organizer Kit has everything you need to plan ahead and never forget another birthday again! 
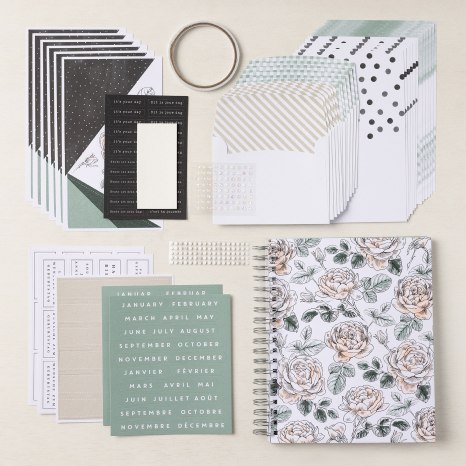
#161056 / $25 USD 

  • Kit includes one 8″ x 10″ (20.3 x 25.4 cm) monthly planner with space to record birthdays each month as well as a pocket sleeve to hold birthday cards.
  • Includes 12 full-size birthday cards, 6 of 2 designs, and 12 coordinating envelopes.
  • Includes Glue Dots, Stampin’ Dimensionals, Adhesive-Backed Embellishments, and Tear & Tape Adhesive
  • Includes die-cut florals and pieces ready for you to use­—no prep work required!
  • Includes sticker sentiments and die-cut labels in Dutch, English, French, and German
  • Coordinating colors: Basic Black, Evening Evergreen, Petal Pink, Sahara Sand, and Soft Succulent

*********************************************************************************************************

From The North Pole

Subscribe October 11 – November 10

When autumn rolls around, do you start thinking about cozy Christmas crafting projects? This November, Paper Pumpkin delivers this and more with its one-of-a-kind, holiday-themed crafting experience. This festive kit includes 12 fun, sparkly gift tags and (as always!) an exclusive stamp set—plus everything you need for a successful holiday crafting experience. 

Need unique Christmas packaging to round out your gifting? We’ve got you covered with our exclusive North Pole Sacks add on.

This kit includes:

  • This month’s kit contains enough elements to create 12 tags—4 each of 3 designs. This all-inclusive kit includes printed die-cut paper pieces, twine, adhesive, and more!
  • Includes a Cherry Cobbler Classic Stampin’ Spot!
  • You’ll love decorating your gift tags with snowflake and banner die-cut pieces on our Mint Macaron glitter specialty paper (a Paper Pumpkin exclusive).
  • Create festive gift tags for all your packaging needs this holiday season with classic Christmas colors and designs.

Finished gift tag size: 2″ x 3″ (5.1 x 7.6 cm)

Coordinating Stampin’ Up! colors: Basic Black, Cherry Cobbler, Crumb Cake, Mint Macaron, Shaded Spruce, Sweet Sorbet

Subscribe to the November Paper Pumpkin Kit between 11 October and 10 November at paperpumpkin.com!

Note: Supplies may be limited toward the end of the subscription period.

ADD-ON

Available for purchase on stampinup.com starting 11 October 2022:

North Pole Sacks Add-On
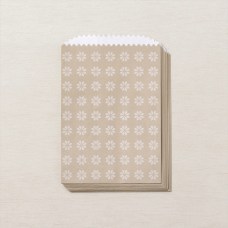
Item Number: 162416

Add-on details:

  • Includes 12 food-safe paper bags
  • Create fun packaging for your seasonal gifts and treats
  • Features a festive design in Crumb Cake
  • Bag size: 4″ x 6″ (10.2 x 15.2 cm)

Note: Supplies may be limited toward the end of the subscription period.

*********************************************************************************************************

Card stock cuts for this project:

  • Basic White Cardstock 2 1/2″ X 4″ (sentiment), 4″ X 5 1/4″ (inner liner)
  • Cherry Cobbler Cardstock 2 – 4 1/8″ X 5 3/8″ (card front & inner liner mat)
  • Crumb Cake Cardstock 2 3/4″ X 4 1/4″ (detailed pinecones)
  • Early Espresso Cardstock 8 1/2″ X 5 1/2″ (card base scored & folded at 4 1/4″), 2″ X 6″ (pinecones)
  • Evening Evergreen Cardstock 4 1/4″ X 5 1/2″ (pine boughs)
  • Soft Succulent Cardstock 4 1/4″ X 5 1/2″ (pine boughs)

*********************************************************************************************************

Product List

Stampin’ Up! Christmas Season To Remember

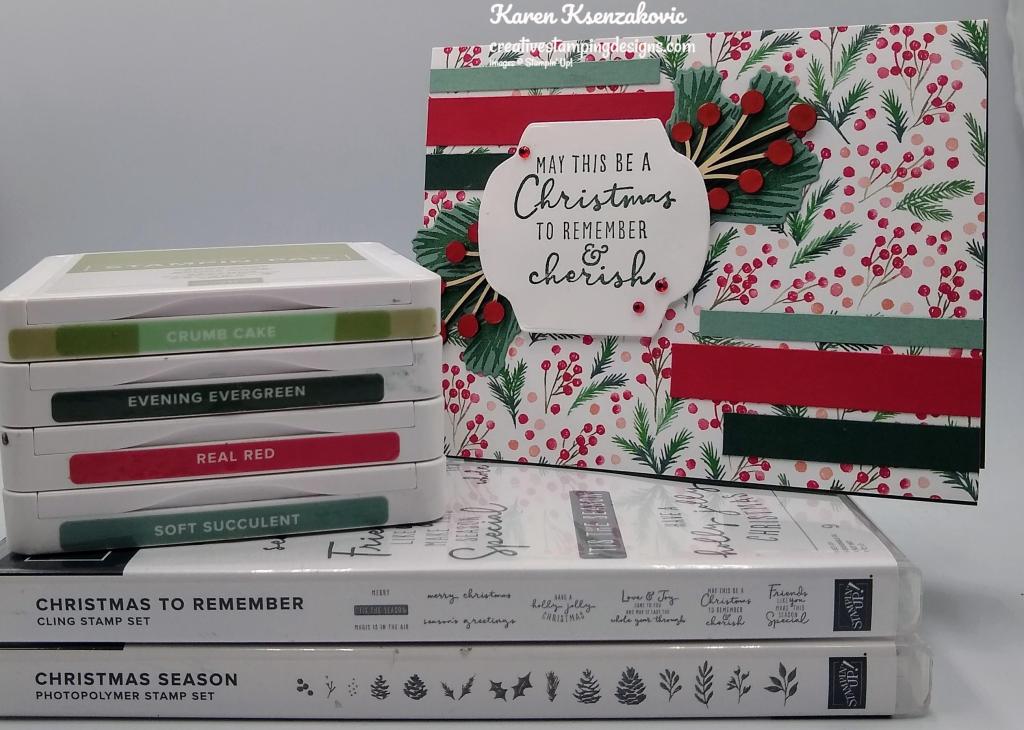
Good Tuesday morning my stamping friends. I hope your week has started out great. I’ll be taking Coraline today for her last puppy shots YAY!! Now she’ll be able to play with other dogs and socialize with everyone.

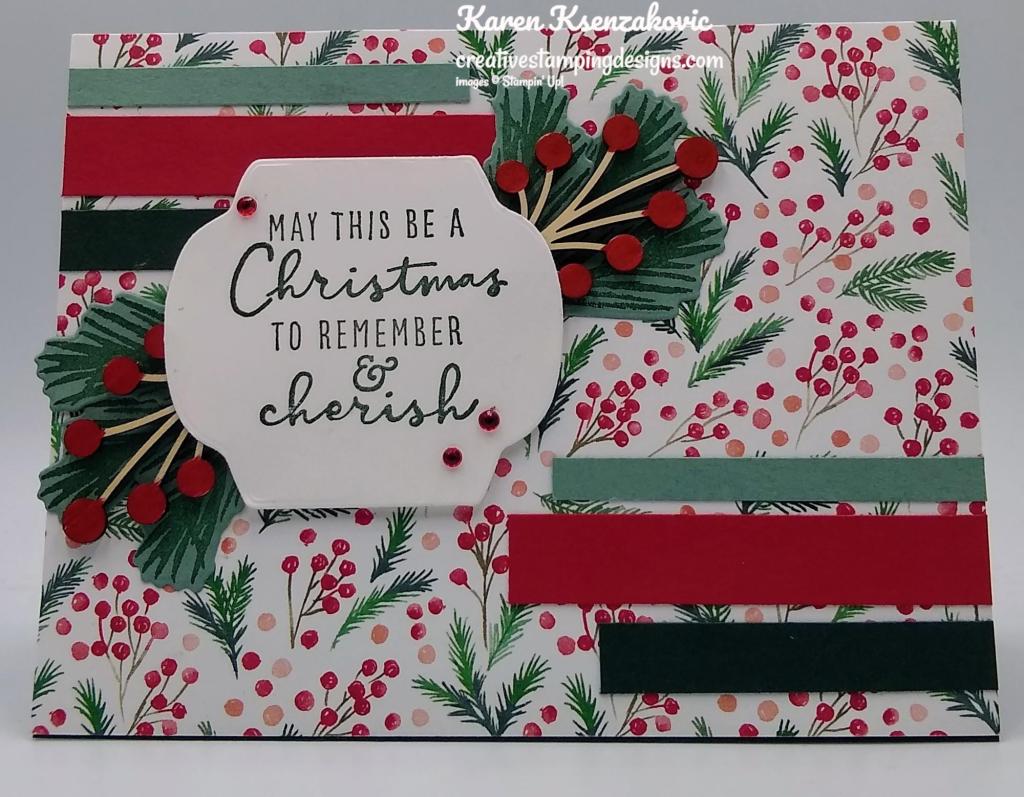
I have a Christmas card for you today. I’m trying to get at least 1 done a week for now. Once we get a little closer I’ll start getting more done. I just can’t get into making them yet with it being in the upper 80’s & 90’s I’m just not feeling it. Here’s my card for today.

Stampin' Up! Christmas Season To Remember 1 creativestampingdesigns.com

I used the Stampin’ Up! Christmas To Remember Cling Stamp Set along with the Stampin’ Up! Christmas Season Photopolymer Stamp Set and the Painted Christmas Designer Series Paper for my card today.

My design is from the Paper Craft Crew Sketch Challenge #482.

Stampin' Up! Christmas Season To Remember 2 creativestampingdesigns.com

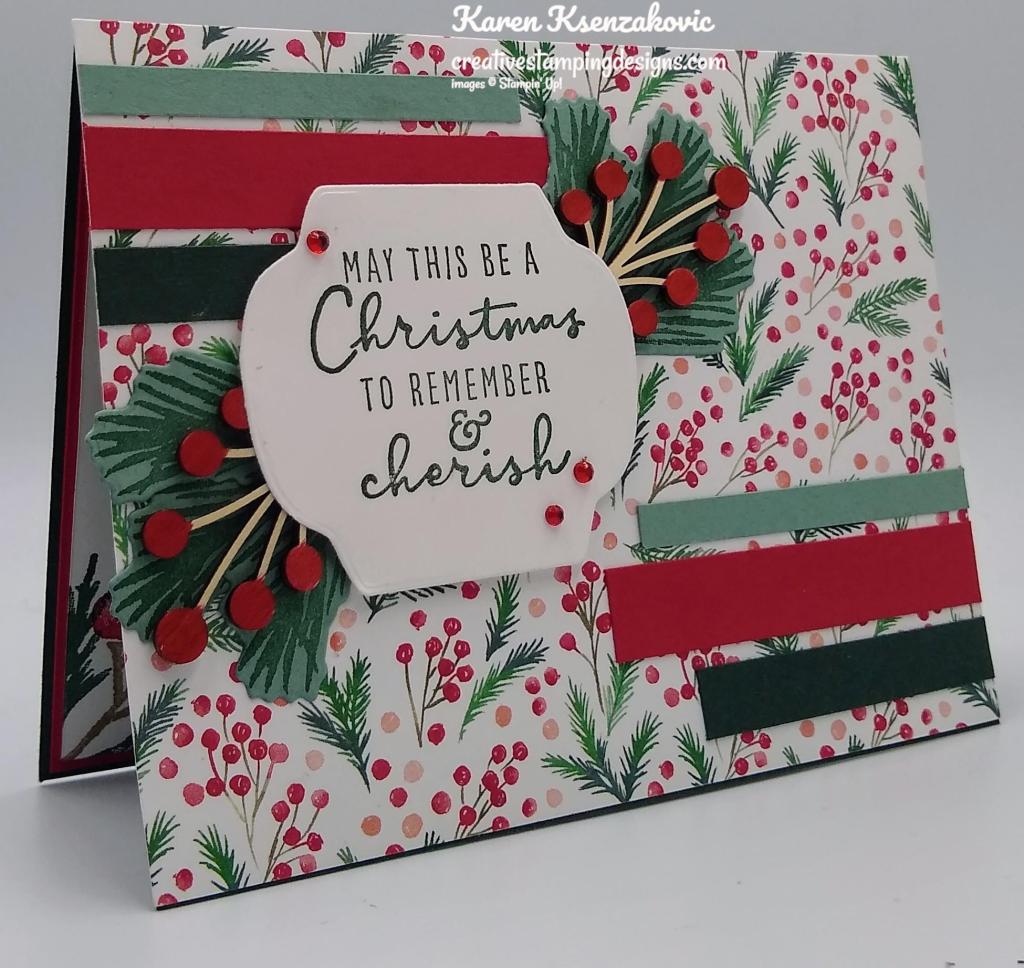
I started by adhering 6 strips of cardstock (Evening Evergreen, Real Red and Soft Succulent) to a Painted Christmas DSP card front using Multipurpose Liquid Glue. I adhered the card front to an Evening Evergreen card base using Multipurpose Liquid Glue.

Stampin' Up! Christmas Season To Remember 3 creativestampingdesigns.com

On a panel of Soft Succulent cardstock, I stamped the pine bough image from the Christmas Season stamp set in Evening Evergreen Ink 6 times. I cut the images out using the Seasonal Labels Dies. I adhered 2 sets of 3 pine boughs together using Multipurpose Liquid Glue.

Stampin' Up! Christmas Season To Remember 4 creativestampingdesigns.com

On a panel of Basic White cardstock, I stamped the sentiment from the Christmas To Remember stamp set in Evening Evergreen Ink. I cut the sentiment out using the Seasonal Labels Dies. I colored 2 of the Textural Elements using my Real Red Stampin’ Blends Marker. I adhered the sentiment to the card front using Stampin’ Dimensionals. I adhered the pine boughs under the sentiment using Multipurpose Liquid Glue. I adhered the Textural Elements on top of the pine boughs using Glue Dots. I added a few Red Rhinestone Basic Jewels to the card front.

Stampin' Up! Christmas Season To Remember 5 creativestampingdesigns.com

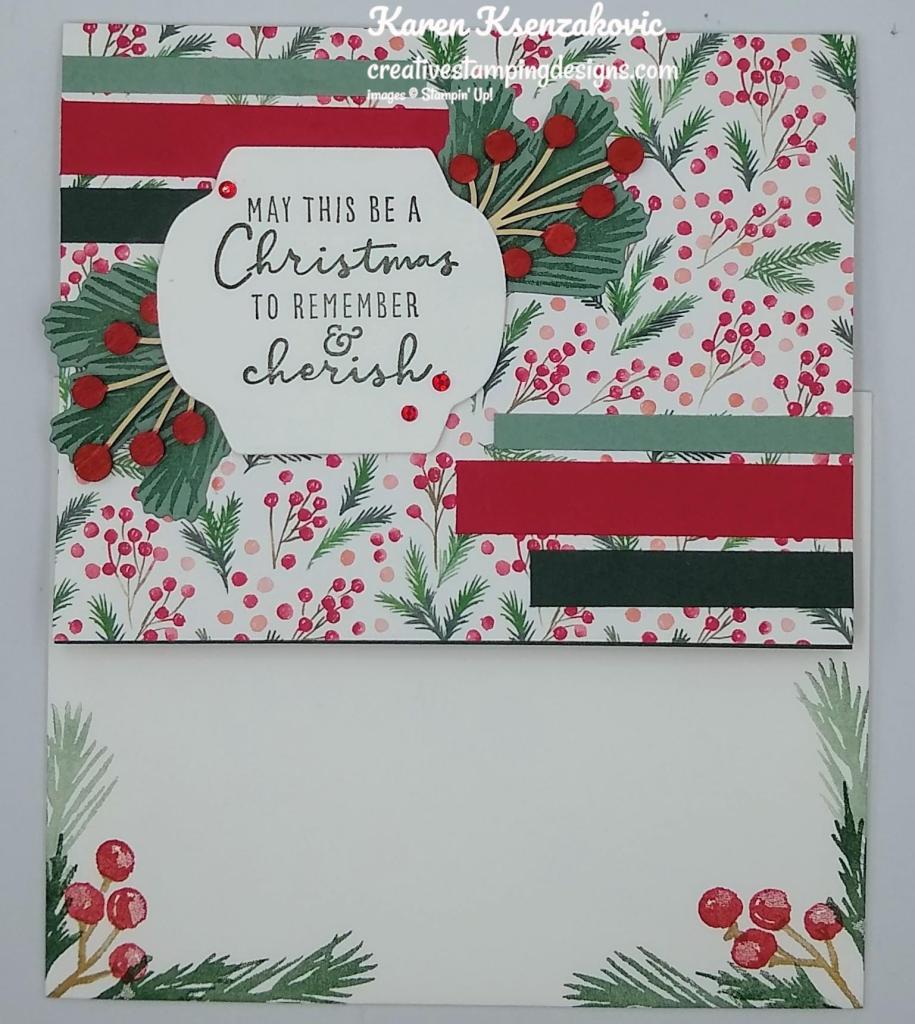
On the inside, I stamped the sentiment from the Christmas To Remember stamp set in Evening Evergreen Ink on a Basic White panel. I stamped the pine bough image from the Christmas Season stamp set on the bottom of the panel in Evening Evergreen Ink. I stamped the stem image from the Christmas Season stamp set in Crumb Cake Ink and the berry image in Real Red Ink on top of the stem. I adhered the Basic White panel to a Real Red mat and then to the inside of the Evening Evergreen card base.

Stampin' Up! Christmas Season To Remember 6 creativestampingdesigns.com

To finish my card, I decorated a Basic White Medium Envelope. I stamped the pine bough images from the Christmas Season stamp set in Evening Evergreen Ink. I stamped the berry stem image in Crumb Cake and the berry image in Real Red Inks. I adhered a panel of Painted Christmas DSP to the envelope flap.

Stampin' Up! Christmas Season To Remember 7 creativestampingdesigns.com

Thank you for stopping by my blog today. I hope you liked the card and will give it a try. Happy Stamping!!

*********************************************************************************************************

If you need any stamping supplies, I’d love to be your Demonstrator. Just click HERE to go directly to my online store or drop me an email if you have any questions. 

MY CURRENT HOST CODE IS:   QY4S2TZX

Use this host code when placing an order with me. When you order $50 or greater you will receive a free gift from me! If your order is over $150, please do not use this code, but you’ll still get the free gift. The free gift is your choice of any 1 item valued up to $10.00 from the 2021-2022 Annual Catalog or the January – June 2022 Mini Catalog!   For any orders $50 or more I will also send you my monthly class tutorials.  Click HERE or go to my Customer Rewards for more details and to see what this month’s tutorials are.

Please remember to use my current Host Code and make sure that you can see my name on the final checkout page listed as your Demonstrator when you order so that you know that you’re ordering with me and you’ll get my rewards! 

Happy Stamping, Karen

*********************************************************************************************************

Coming Soon!!! Starting September 1, 2022

Some things are great on their own but become epic when they are paired with something else: cereal and milk, toast and butter, Fred Astaire and Ginger Rogers. We may be biased, but our favorite combo is our stamp sets and dies—and that’s what the Perfect Partners promotion is all about! 

We created six new dies that coordinate with stamp sets in the 2022–2023 Annual Catalog and the July–December 2022 Mini Catalog. These coordinating dies will only be available during this promotion and will not be offered in any catalog.  

These stamp sets and dies are available separately or as a bundle. By buying the bundle, you and your customers will save 10% off the retail price. 

Put these wonderful stamp sets and dies together for more papercrafting fun!

Interested in Being Able to Order Them Now? Join My Team!!

Being a demonstrator, you are able to order products ahead of customers. You get to attend the Stampin’ Up! events and be a part of an awesome team and community. There is no obligation to sell or blog, you can join as a Hobby Demonstrator just to enjoy the discount. For just $99 you get to pick $125 in product of your choice. Stampin’ Up! includes a past Paper Pumpkin Kit along with some business items in case you want to make it a business. This all ships for FREE. After that all your future orders you get to enjoy a 20% discount. Ask me how!!

If you join during Sale-a-bration you will receive this awesome Making Plans Collection absolutely free. It includes a July 2022-December 2023 Making Plans Planner including an 8″ X 9 1/2″ Faux Leather Carrying Case, 5 1/2″ X 8 1/2″ Planer Pages, Monthly Divider Pages and Sticker Sheets. It also includes 3 – Creative Journals that are 5 3/4″ X 8″ and a Making Plans Photopolymer Stamp Set. Contact me for more information at creativestampingdesigns@gmail.com. I’d love to have you on my team. You can join as a hobby demonstrator just to enjoy the discount for yourself. No obligations to sell, hold classes or have a blog.

*********************************************************************************************************

New Sale-a-bration Items Added

Stampin’ Up! has added some additional items that you can earn for FREE with orders beginning at $50 during Sale-a-bration!  You can see the new items Here. There are some really great new items to pick from!  You’ll see them added to the list of options that you can pick for free with orders of $50+ as you go through the checkout process.  Let me know if you have any questions.  Happy Shopping!

*********************************************************************************************************

The Back To School Sales Tax Holiday is going on until September. For those of you living in Massachusetts, yours is going on now. New Jersey is from August 27th – September 5th!! Be sure to check the list.

The good news is that some items in the Stampin’ Up! Catalogs qualify for the sales tax holidays!  The list of sales tax holidays by state and items in that state that qualify Here on a printable PDF. Check it out to see when your state has the Sales Tax Holiday.

*********************************************************************************************************

Spooky Treats

Subscribe August 11 – September 10

Get your Halloween crafting on with the Spooky Treats Paper Pumpkin Kit. This month’s kit includes everything you need to make 18 absolutely adorable (and just the right amount of spooky) treat boxes—that’s 6 each of 3 unique designs! No need to let the season creep up on you; subscribe and order your kit today.


Plus, we’re putting the TREAT in trick-or-treat with a special GIVEAWAY on social media starting 5 September at 9:00am (MT)! Simply follow @PaperPumpkin on Instagram or the Paper Pumpkin page on Facebook, like either post, and mention three friends in the comments for your chance to win one of two personalized JBL speakers. You’ll have to be quick because the giveaway closes 8 September at 4:00pm (MT). Don’t miss out on this fang-tastic opportunity!

This kit includes:

  • This month’s kit contains enough elements to create 18 treat boxes—6 each of 3 designs. This all-inclusive kit includes printed box bases and tops, die-cut paper pieces, adhesives, and more!
  • The Spooky Treats Paper Pumpkin Kit includes an Orchid Oasis Classic Stampin’ Spot!
  • This kit’s stamp set puts the TREAT in trick-or-treat with fun, Halloween-themed sentiments and designs. Embrace the spooky season with ghost, bat, spider, and star images.
  • This kit also includes a special peek-through box top on one of the box designs.

Finished box size: 2-1/2″ x 3″ x 1″ (6.4 x 7.6 x 2.5 cm)

Coordinating Stampin’ Up! colors: Basic Black, Gray Granite, Orchid Oasis, Fresh Freesia, Crushed Curry, Pumpkin Pie

Subscribe to the August Paper Pumpkin Kit between 11 August and 10 September at paperpumpkin.com!

Note: Supplies may be limited toward the end of the subscription period.

*********************************************************************************************************

Card stock cuts for this project:

  • Basic White Cardstock 3″ X 4″ (sentiment), 4″ X 5 1/4″ (inner liner)
  • Evening Evergreen Cardstock 8 1/2″ X 5 1/2″ (card base scored & folded at 4 1/4″), 2 – 2 1/4″ X 3/8″ (card front strips)
  • Real Red Cardstock 2 – 2 3/4″ X 1/2″ (card front strips), 4 1/8″ X 5 3/8″ (inner liner mat)
  • Soft Succulent Cardstock 2 – 2 1/2″ X 1/4″ (card front strips), 4 1/4″ X 3″ (pine boughs)
  • Painted Christmas Designer Series Paper 4 1/4″ X 5 1/2″ (card front), 2 1/4″ X 6″ (envelope)

*********************************************************************************************************

Product List
Stampin’ Up! Christmas Season to Remember CAS

Good Sunday morning my stamping friends. How is everyone’s weekend going? Has anyone started decorating yet? Have you started your holiday shopping? I’ve got a little of my decorating done and I got my baking shopping done. I also have quite a few gifts already, but I still have more to do.

Today’s card is another one that I stamped via zoom with my upline Jaimie last week. She designed a couple cards and we stamped together. It was really a lot of fun and I love her designs. Here’s my card for today.

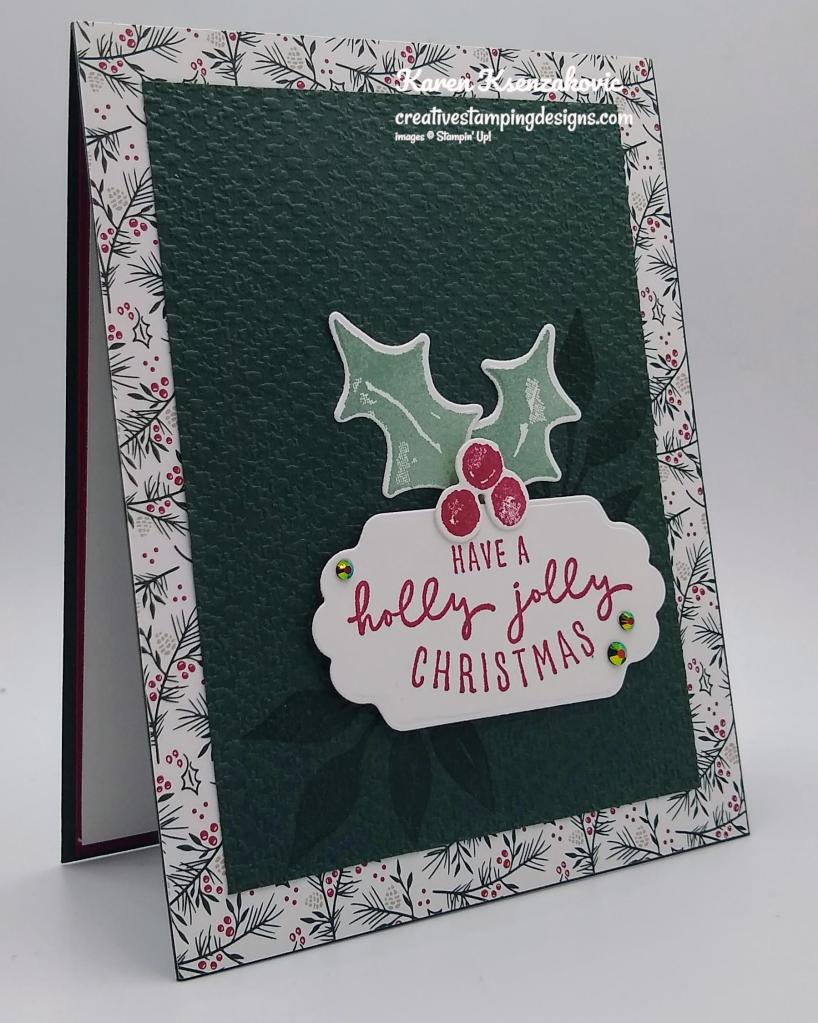
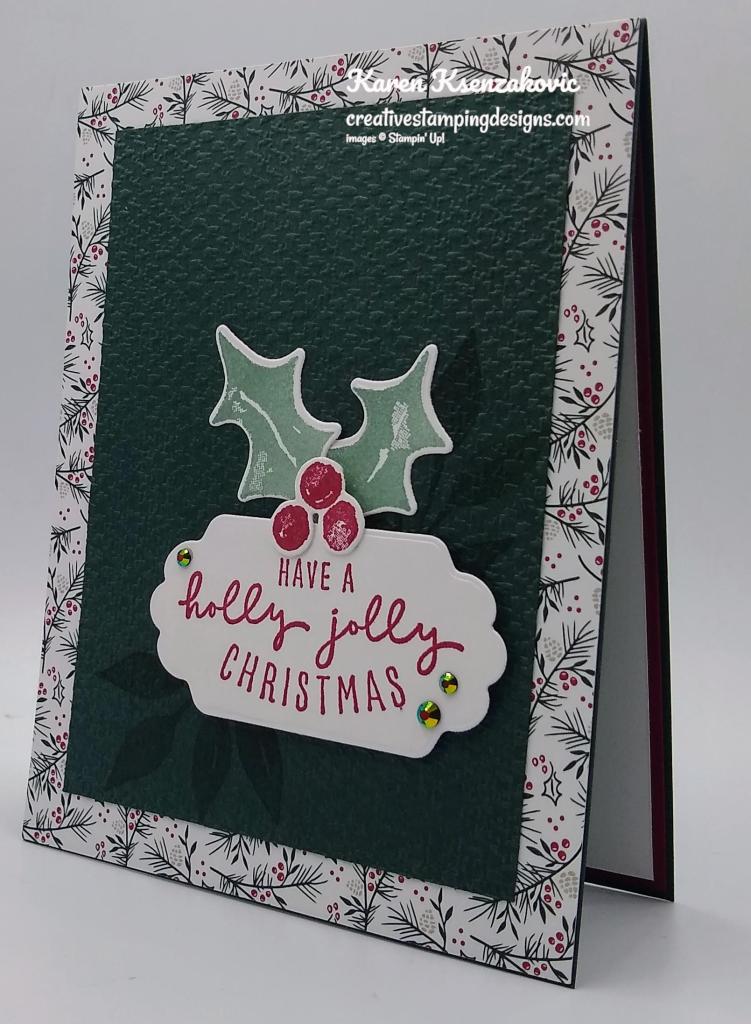
I used the Stampin’ Up! Christmas Season Bundle and the Stampin’ Up! Christmas To Remember Cling Stamp Set along with the Tidings of Christmas 6 X 6 Designer Series Paper for my card today.

I started by adhering a panel of the Tidings of Christmas DSP to an Evening Evergreen card base.

On a panel of Evening Evergreen cardstock I stamped the leaf image from the Stampin’ Up! Christmas Season Photopolymer Stamp Set in Evening Evergreen Ink. I embossed the panel using the Tasteful Textile 3D Embossing Folder and adhered it to the card front.

On a panel of Basic White cardstock I stamped the holly leaves from the Christmas Season stamp set in Soft Succulent Ink and the berries in Cherry Cobbler Ink. I cut the holly and berries out using my Seasonal Labels Dies. I stamped the sentiment from the Christmas to Remember stamp set in Cherry Cobbler Ink on a panel of Basic White cardstock and cut it our using my Seasonal Labels Dies. I adhered the sentiment to the card front using Stampin’ Dimensionals. I adhered the holly and berries above the sentiment using Stampin’ Dimensionals. I added a few Evening Evergreen 2021-2023 In-Color Jewels to the sentiment.

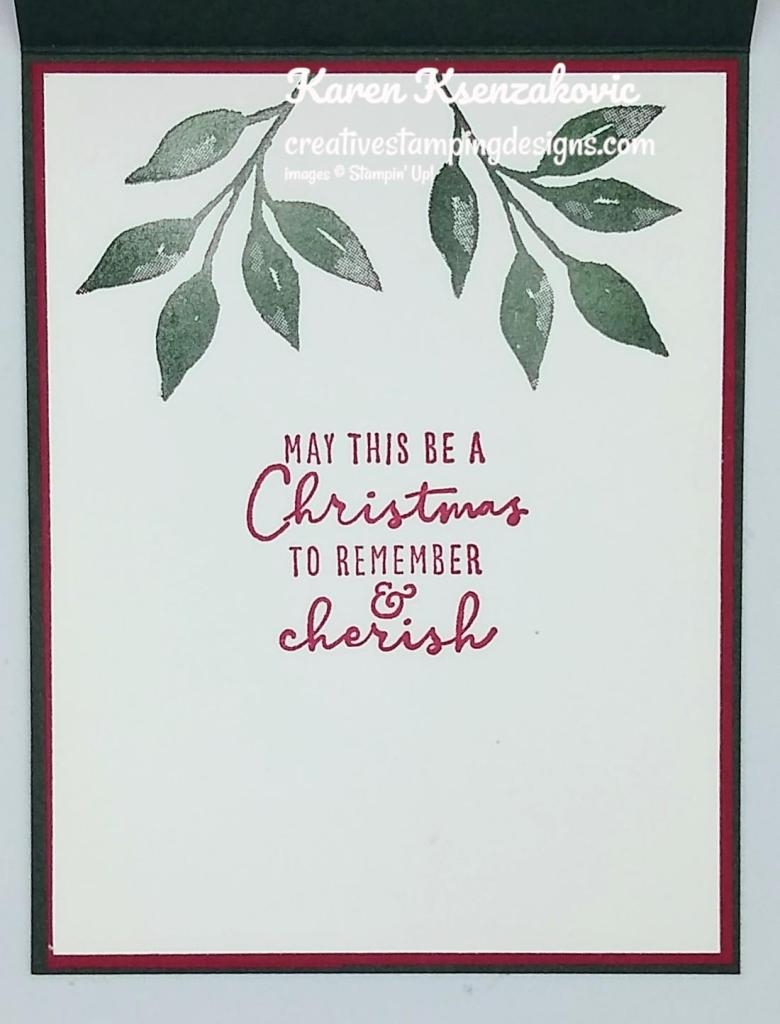
On the inside I stamped the sentiment from the Christmas to Remember stamp set in Cherry Cobbler Ink on a Basic White panel. I stamped the leaf image from the Christmas Season stamp set in Evening Evergreen Ink on the top of the panel. I adhered the Basic White panel to a Cherry Cobbler mat and then to the inside of the Evening Evergreen card base.

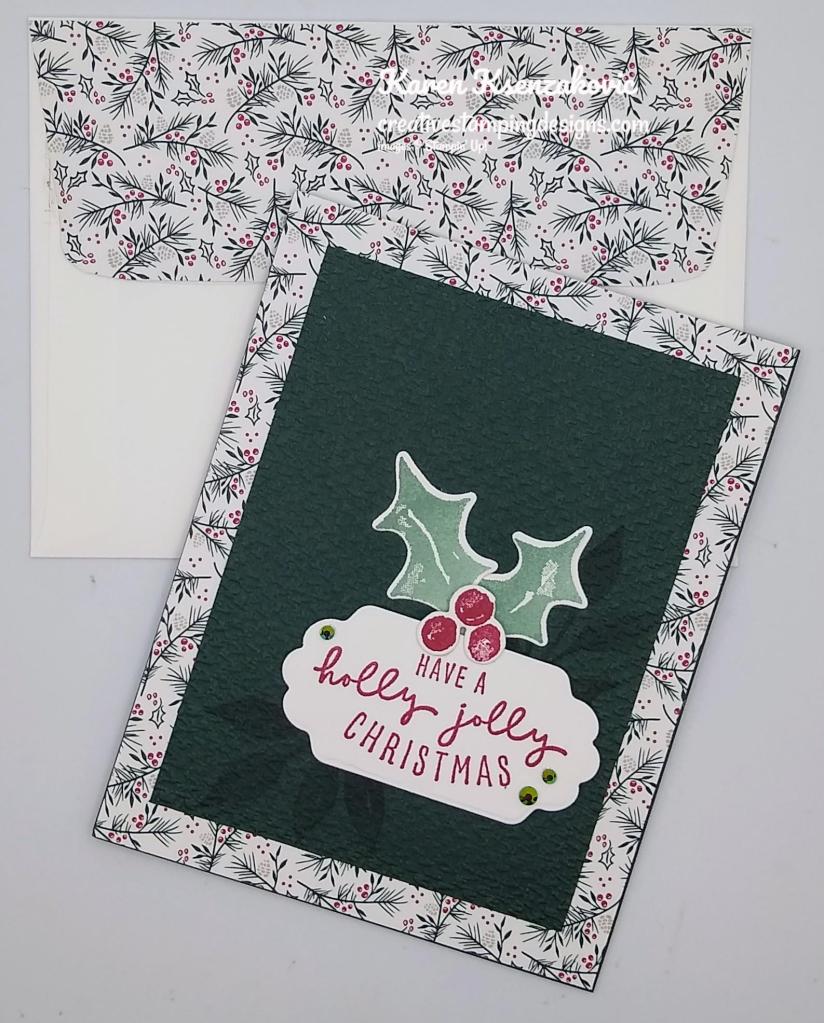
To finish my card I decorated a Basic White Medium Envelope. I stamped the leaf image from the Christmas Season stamp set in Evening Evergreen Ink on the top of the envelope front. I adhered a strip of the Tidings of Christmas DSP to the bottom of the envelope front and a panel to the envelope flap.

Thank you for stopping by my blog today. I hope you liked my card and will give it a try. Happy Stamping!!

*********************************************************************************************************

If you need any stamping supplies, I’d love to be your Demonstrator. Just click HERE to go directly to my online store or drop me an email if you have any questions. 

MY CURRENT HOST CODE IS:   TGEATYYA

Use this host code when placing an order with me. When you order $50 or greater you will receive a free gift from me! If your order is over $150, please do not use this code, but you’ll still get the free gift. The free gift is your choice of any 1 item valued up to $10.00 from the 2020-2021 Annual Catalog or the July-December 2021 Mini Catalog!   For any orders $50 or more I will also send you my monthly class tutorials.  Click HERE or go to my Customer Rewards for more details and to see what this months tutorials are.

Please remember to use my current Host Code and make sure that you can see my name on the final checkout page listed as your Demonstrator when you order so that you know that you’re ordering with me and you’ll get my rewards! 

Happy Stamping, Karen!

*********************************************************************************************************

START WITH SAVINGS JOINING SPECIAL

This image has an empty alt attribute; its file name is 11.21_shareable_nov_starter_kit_en.jpg

Do you regularly restocks your craft collection, and always wants the latest and greatest Stampin’ Up! supplies? Would you enjoy the pile of perks that come with being a demonstrator? Would you like to join our incredible community of crafters?

If you answered “yes” to any of the questions above, the Start with Savings promotion will provide you with an excellent opportunity! Instead of the standard $99 Starter Kit—which is already a steal of a deal—you can snatch up a completely custom Starter Kit for only $75. What an absolutely unbeatable bargain for a box with a value of $125!

When you purchase the Starter Kit for $75 + taxes (if applicable), the kit ships for FREE and YOU get to pick $125 in Stampin’ Up! merchandise OF YOUR CHOICE. YES PLEASE!! You will also get a past Paper Pumpkin Kit, a box of current catalogs and other supplies free in your kit.

If you are planning on placing an order of $75, you might really want to consider joining. This is such an awesome joining deal, you don’t want to pass it up. There is no obligation to sell, have workshops or do Facebook lives. You can join strictly to be a ‘hobby demonstrator’ and enjoy the 20% discount. I would love to have you on my team!!! You also get to enjoy all the demonstrator perks like early ordering, sneak peeks at what’s coming and best of all the events. Why wait, this is such a great sign up promotions, join now and be a part of our awesome Stampin’ Up! family!!!

I’d be happy to talk to you more about this, just drop me an email at creativestampingdesigns@gmail.com and we can talk.

*********************************************************************************************************

LOTS OF PUN

Subscribe November 11 – December 10

This image has an empty alt attribute; its file name is 11.21_lots_of_pun_banner1.jpg

What’s not to “loaf” about a punny joke? It never hurts to have a little laughter, light-heartedness, and humor sprinkled into your schedule. If you’re a fan of fun, get a kick out of clever crafts, and can’t keep it together when you hear a classic knee-slapper, you’ll go bananas over this month’s cute ‘n’ quirky kit!

The Lots of Pun Paper Pumpkin Kit includes enough egg-citing elements to create nine cards and coordinating envelopes. From giddy gingham to splatters and stripes, this playful Paper Pumpkin kit features a fun and fresh look with one-of-a-kind patterns and designs! Egg-cellent for any occasion, reason, or season throughout the year, the kit’s pun-packed stamp set provides completely customizable characters for a very versatile crafting experience. Pair each stamp with its matching die-cut snack, then mix up the faces and accessories for an absolutely adorable accent!

Pick up your friends and family with pun-filled projects. December’s delightful kit is sure to make ‘em smile!

Details

  • The kit contains enough elements to create 9 cards—3 each of 3 designs—and 9 coordinating envelopes. This all-inclusive kit includes printed card bases, die-cut paper pieces, embellishments, adhesive, and more!
  • The Lots of Pun Stamp Set is a builder stamp set! This means the included images can be mixed and matched to build a variety of unique characters with different looks and features.
  • Card size: 4-1/4″ x 5-1/2″ (10.8 x 14 cm)
  • Envelope size: 4-1/2″ x 5-3/4″ (11.4 x 14.6 cm)
  • Coordinating colors: Crumb Cake, Daffodil Delight, Early Espresso, Granny Apple Green, Pool Party, Poppy Parade
  • Includes a Classic Stampin’ Spot

Subscribe to the December 2021 Paper Pumpkin Kit between 11 November and 10 December at paperpumpkin.com!

Note: Supplies may be limited toward the end of the subscription period.

*********************************************************************************************************

Card stock cuts for this project:

  • Basic White Cardstock 3″ X 2″ (holly & berries), 3″ X 1 3/4″ (sentiment), 4″ X 5 1/4″ (inner liner)
  • Cherry Cobbler Cardstock 4 1/8″ X 5 3/8″ (inner liner mat)
  • Evening Evergreen Cardstock 4 1/4″ X 11″ (card base scored & folded at 5 1/2″), 4 1/4″ X 5 1/2″(card front)
  • Tidings of Christmas 6 X 6 Designer Series Paper 4 1/4″ x 5 1/2″(card front), 1/2″ X 6″ & 2 1/4″ X 6″ (envelope)

*********************************************************************************************************

Product List

Stampin’ Up! Christmas Season Birthday Card

Good Sunday morning my stamping friends. Happy Halloween!!!! Are you ready for your trick or treaters? We don’t usually get many, last year we got 5. Maybe we’ll be surprised this year and get a few more. My husband loves Halloween and decorates the outside music and all.

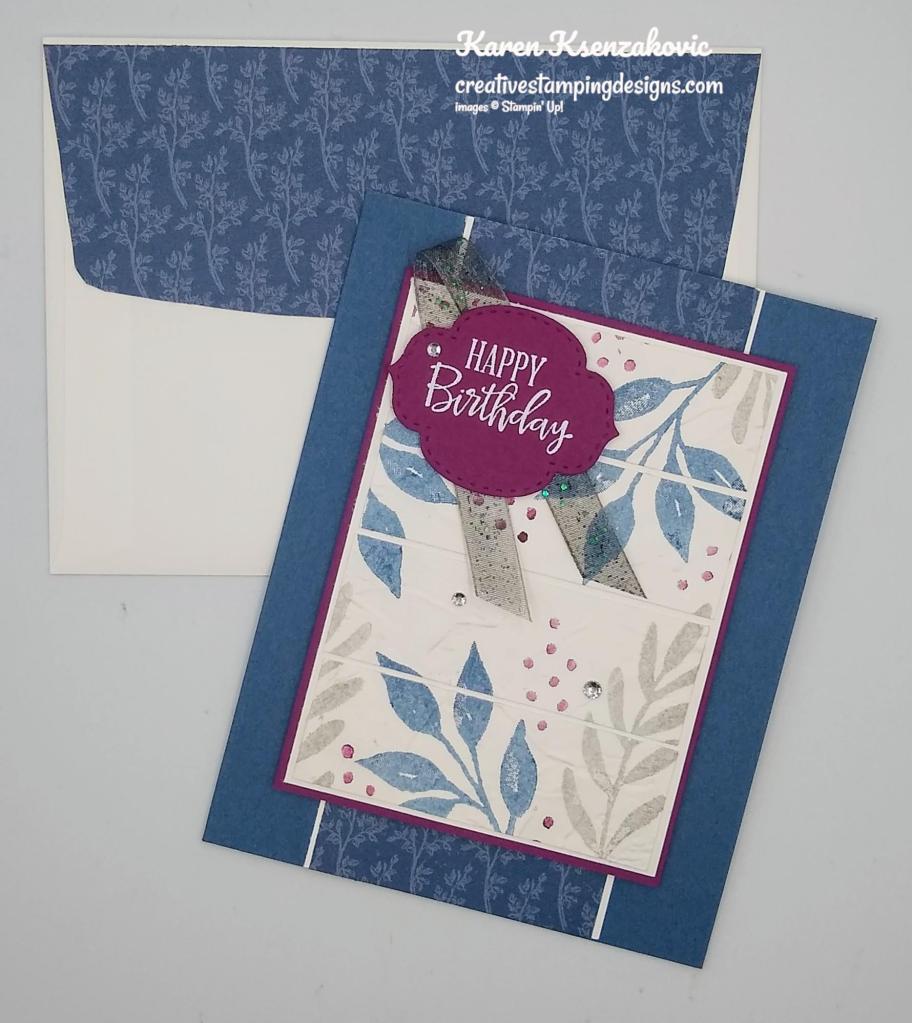
Today’s card is one that we made back in August during one of our Mystery Stamping meetings. My upline Jaimie designed the card and we had to pick the colors and stamp set we wanted to use. I liked this design so much I had to make it again using a different stamp set, DSP and colors. I think I may even have the ladies make this card at my next class. Here’s my card for today.

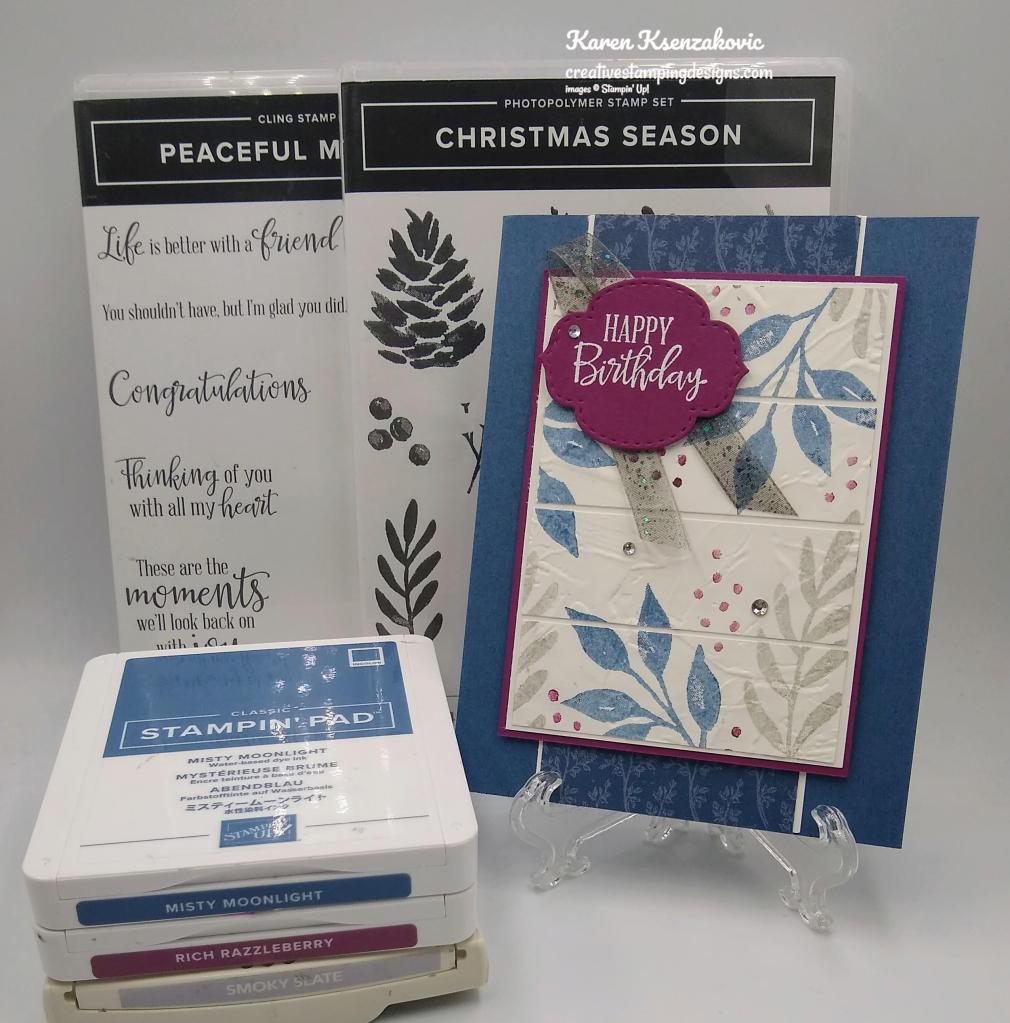
I used the Stampin’ Up! Christmas Season Photopolymer Stamp Set along with the Stampin’ Up! Peaceful Moments Cling Stamp Set for my card today.

My colors are from Hand Stamped Sentiments Challenge #375.

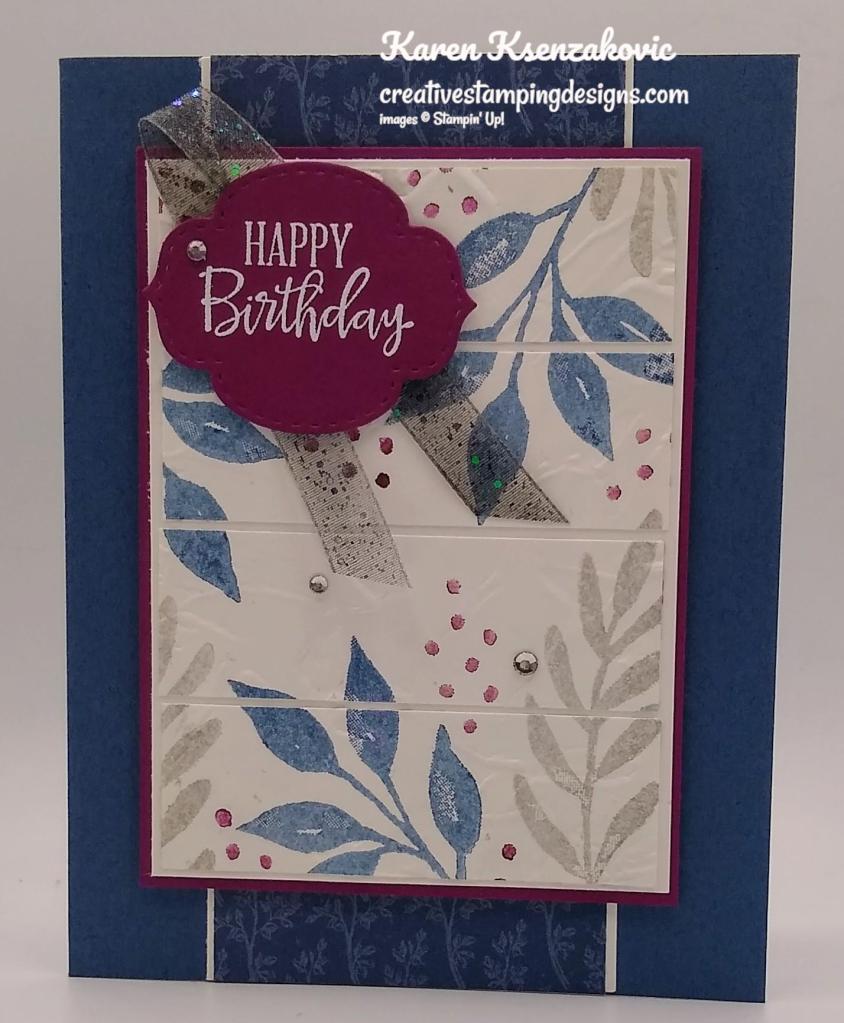
I started by randomly stamping the images from the Christmas Season stamp set in Misty Moonlight, Rich Razzleberry and Smoky Slate Inks, stamping off once, on a panel of Basic White cardstock. I embossed the panel using my Painted Textures 3D Embossing Folder.

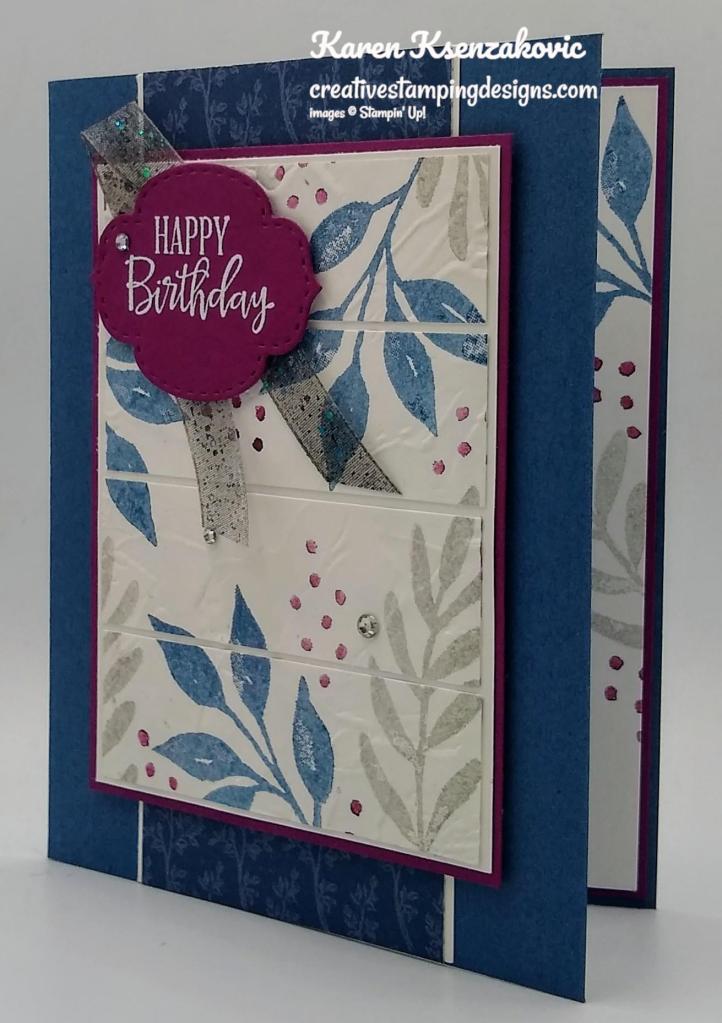
I cut the artwork into 1″ strips using my Paper Trimmer and adhered them to the Basic White mat, leaving a tiny space between the strips, using Multipurpose Liquid Glue. I adhered the layered panel to a Rich Razzleberry mat using Stampin’ Seal. I adhered a panel of Pattern Party Host Designer Series Paper to a Basic White mat using Stampin’ Seal and then to a Misty Moonlight card base. I adhered the layered artwork to the card front using Stampin’ Dimensionals.

On a panel of Rich Razzleberry cardstock I stamped the sentiment from the  Peaceful Moments stamp set in Versamark Ink. I immediately sprinkled it with White Embossing Powder and set it using my Heat Tool. I cut the sentiment out using my Stitched So Sweetly Dies. I colored a length of  3/8″ Glittered Organdy Ribbon using my Smoky Slate Stampin’ Blends Marker and adhered it to the top of the artwork using a tiny amount of Stampin’ Seal. I adhered the sentiment over the ribbon using Stampin’ Dimensionals. I added a few Rhinestone Basic Jewels to the card front.

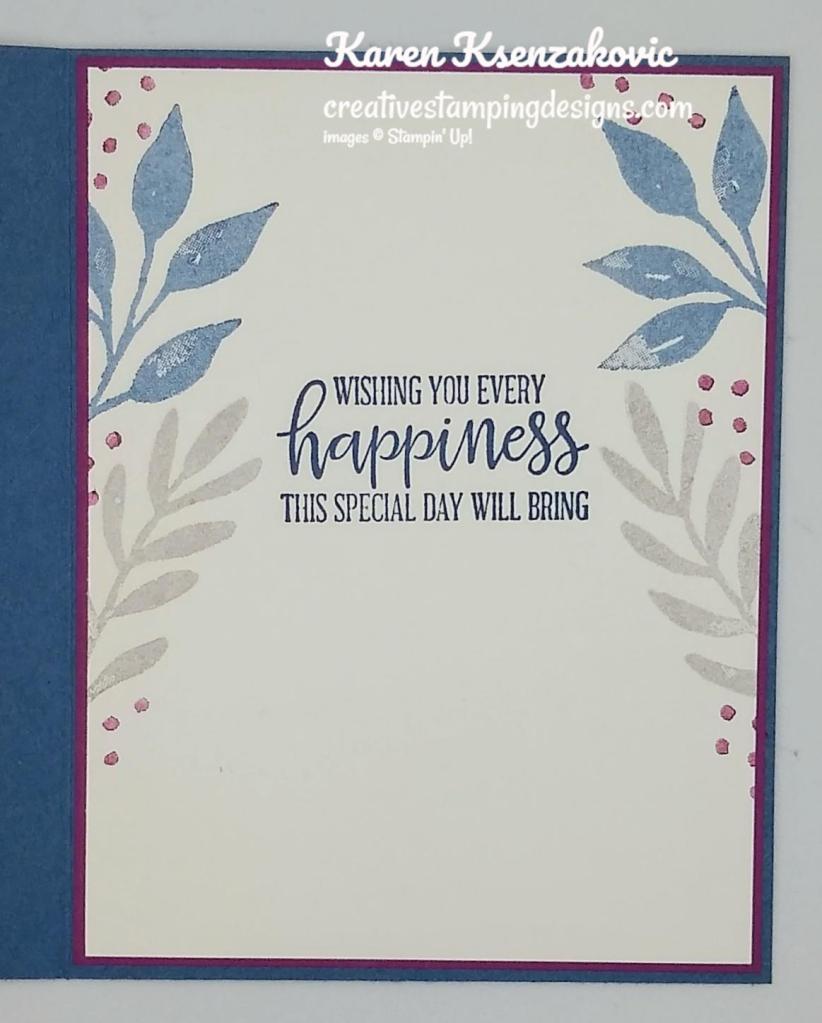
On the inside I stamped the sentiment from the Peaceful Moments stamp set in Misty Moonlight Ink on a panel of Basic White cardstock. I stamped the images from the Christmas Season stamp set in Misty Moonlight, Rich Razzleberry and Smoky Slate Inks, stamping off once, on the panel. I adhered the Basic White panel to a Rich Razzleberry mat using Stampin’ Seal and then to the inside of the Misty Moonlight card base.

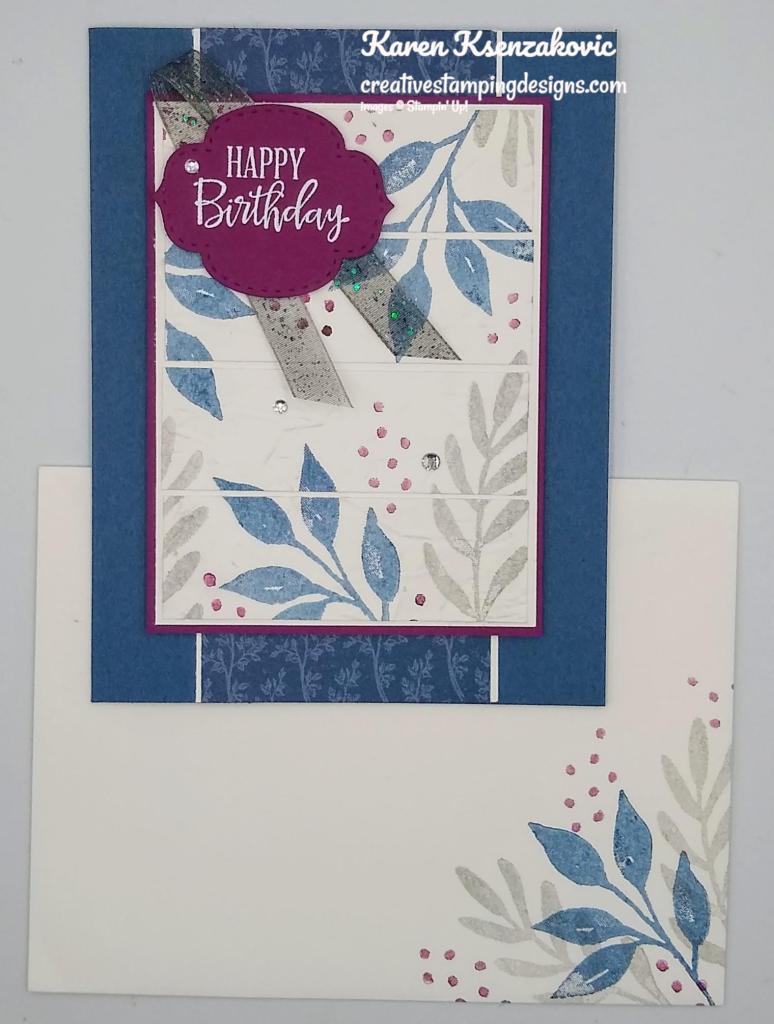
To finish my card I decorated a Basic White Medium Envelope . I stamped the images from the Christmas Season stamp set on the envelope front in Misty Moonlight, Rich Razzleberry and Smoky Slate Inks, stamping off once. I adhered a panel of the Pattern Party Host DSP to the envelope flap.

Thank you for stopping by my blog today. I hope you liked my card and will give it a try. Happy Stamping!!

*********************************************************************************************************

If you need any stamping supplies, I’d love to be your Demonstrator. Just click HERE to go directly to my online store or drop me an email if you have any questions. 

MY CURRENT HOST CODE IS:   BM9R7DQX

Use this host code when placing an order with me. When you order $50 or greater you will receive a free gift from me! If your order is over $150, please do not use this code, but you’ll still get the free gift. The free gift is your choice of any 1 item valued up to $10.00 from the 2020-2021 Annual Catalog or the July-December 2021 Mini Catalog!   For any orders $50 or more I will also send you my monthly class tutorials.  Click HERE or go to my Customer Rewards for more details and to see what this months tutorials are.

Please remember to use my current Host Code and make sure that you can see my name on the final checkout page listed as your Demonstrator when you order so that you know that you’re ordering with me and you’ll get my rewards! 

Happy Stamping, Karen!

*********************************************************************************************************

Gifts Galore

Subscribe October 11 – November 10

This image has an empty alt attribute; its file name is 11-21_dheader_giftsgalore_novpp_na.jpg

We all love to see piles of presents on Christmas morning. Make that your reality with the Gifts Galore Paper Pumpkin Kit! With classic Christmas sentiments, bright and festive colors, a sweet snowman, a tree with all the trimmings, or a playful pile of presents, you’ll have everything you need to make eye-catching treat packages that are sure to spread Christmas cheer. Each Gifts Galore box contains enough supplies to create nine treat packages—three each of three designs—and nine food-safe bags that are adorably styled for easy Christmas gifting. There’s plenty of joy to share with Gifts Galore!

  • Kit contains enough supplies to create nine treat packages—three each of three designs—and nine food-safe bags. 
  • This all-inclusive kit includes printed die cuts, die-cut boxes, cellophane treat bags, adhesive, and more!
  • Includes an exclusive stamp set and a Classic Stampin’ Spot
  • Coordinating colors: Evening Evergreen, Flirty Flamingo, Old Olive, Pool Party, Poppy Parade

Subscribe to the November 2021 Paper Pumpkin Kit between 11 October and 10 November at paperpumpkin.com!

Note: Supplies may be limited toward the end of the subscription period.

*********************************************************************************************************

Card stock cuts for this project:

  • Basic White Cardstock 3″ X 4″ (artwork), 3 1/8″ x 4 1/4″ (artwork mat), 2 1/2″ X 5 1/2″ (dsp mat), 4″ X 5 1/4″ (inner liner)
  • Misty Moonlight Cardstock 8 1/2″ X 5 1/2″ (card base scored & folded at 4 1/4″)
  • Rich Razzleberry Cardstock 3 1/4″ x 4 3/8″ (artwork mat), 2 3/4″ X 2 1/4″ (sentiment), 4 1/8″ x 5 3/8″ (inner liner mat)
  • Pattern Party Host Designer Series Paper 2 3/8″ x 5 1/2″ (card front), 2 1/4″ X 6″ (envelope)

*********************************************************************************************************

Product List

Stampin’ Up! Christmas Season Snow Wonder

Good Saturday morning my stamping friends. I hope your weekend is starting out fun. Mine is for sure. I’m so happy to be here in Blue Ridge Georgia with my stamping friends. The place we’re staying in is absolutely gorgeous out in the wilderness. The craft room is just wonderful. I’d love to have something like this at home, I’d be in heaven.

The craft room across from the cabin
Inside the craft room.
Ladies busy at crafting

Gifts from Amy and Mary

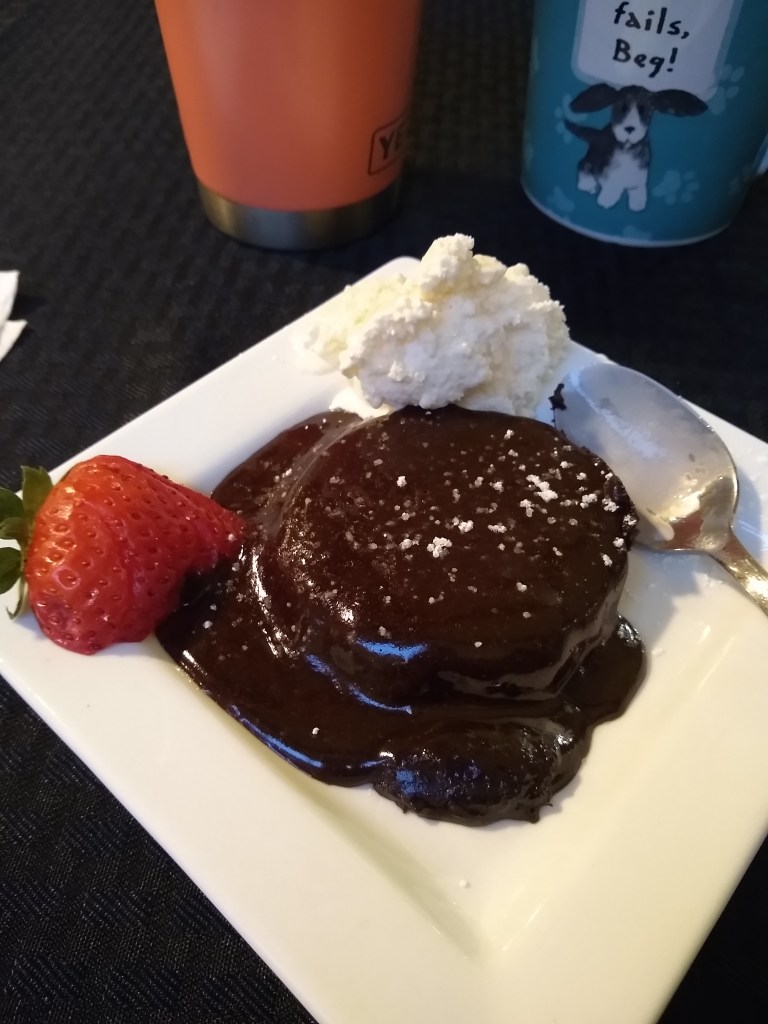
One of the best parts of this retreat, other than the company and crafting of course, is that I don’t have to do a thing for a couple days. No cleaning, cooking or driving anyone around YAY!!! James is doing it all for us and he is an amazing cook. Here’s our first meal here ending with an amazing dessert.

Beef Lasagna, Roasted Broccoli, Balsamic-Glazed Green Beans & Mushroom & Cinnamon-Maple Squash
Salad with all the fixings
Chocolate Lava Cake w/ Vanilla Ice Cream

Today’s card is another card we made last weekend at our quarterly in per team meeting. This one was designed by our wonderful team leader Amy Koenders. I always love her style. Here’s my card for today.

I used the Stampin’ Up! Christmas Season Bundle along with the Stampin’ Up! Snow Wonder Cling Stamp Set for my card today. I didn’t have a chance to finish my card at the meeting and I didn’t have the stamp set everyone else used, so I picked my own sentiments from a set that I had.

I started by embossing a small panel of Basic White cardstock using the Merry Melody 3D Embossing Folder. I adhered the embossed panel to a Basic White mat using Multipurpose Liquid Glue.

On a panel of Basic White cardstock I stamped the sentiment from the Snow Wonder stamp set in Cherry Cobbler Ink on the bottom of the panel. I adhered the Basic White panel to a Basic White mat using Stampin’ Seal. I adhered the layered embossed panel next to the sentiment using Stampin’ Seal.

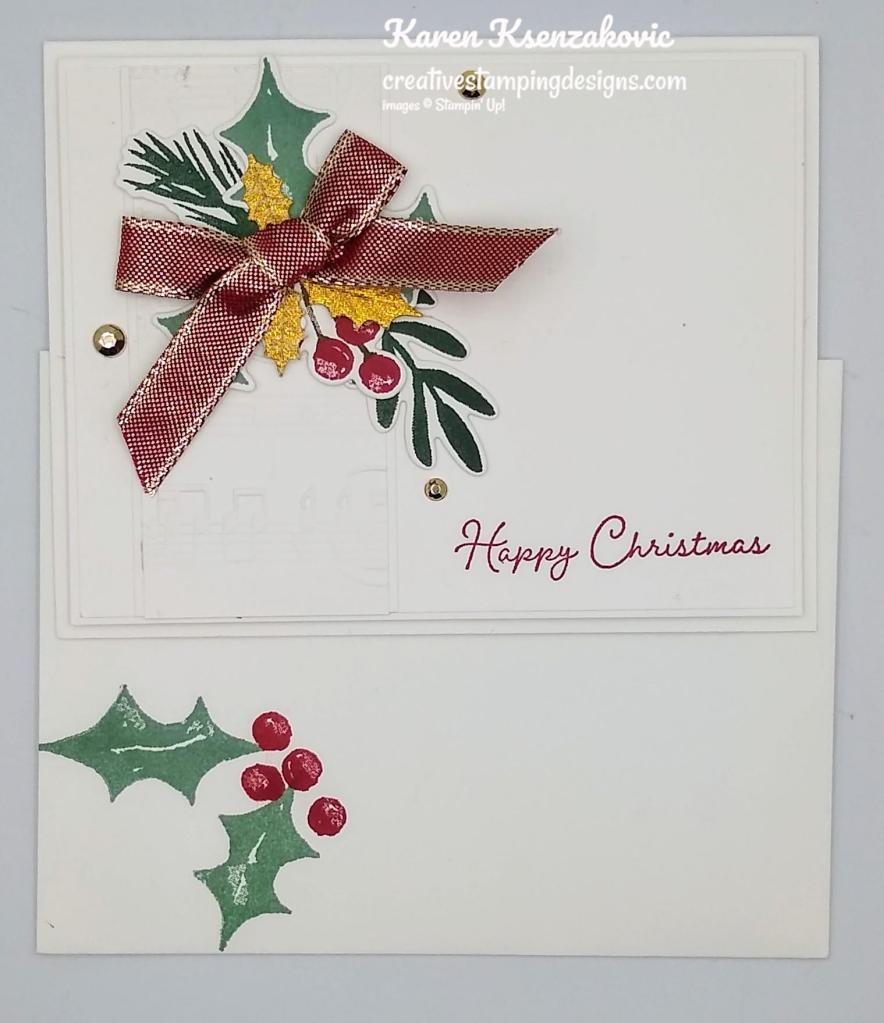
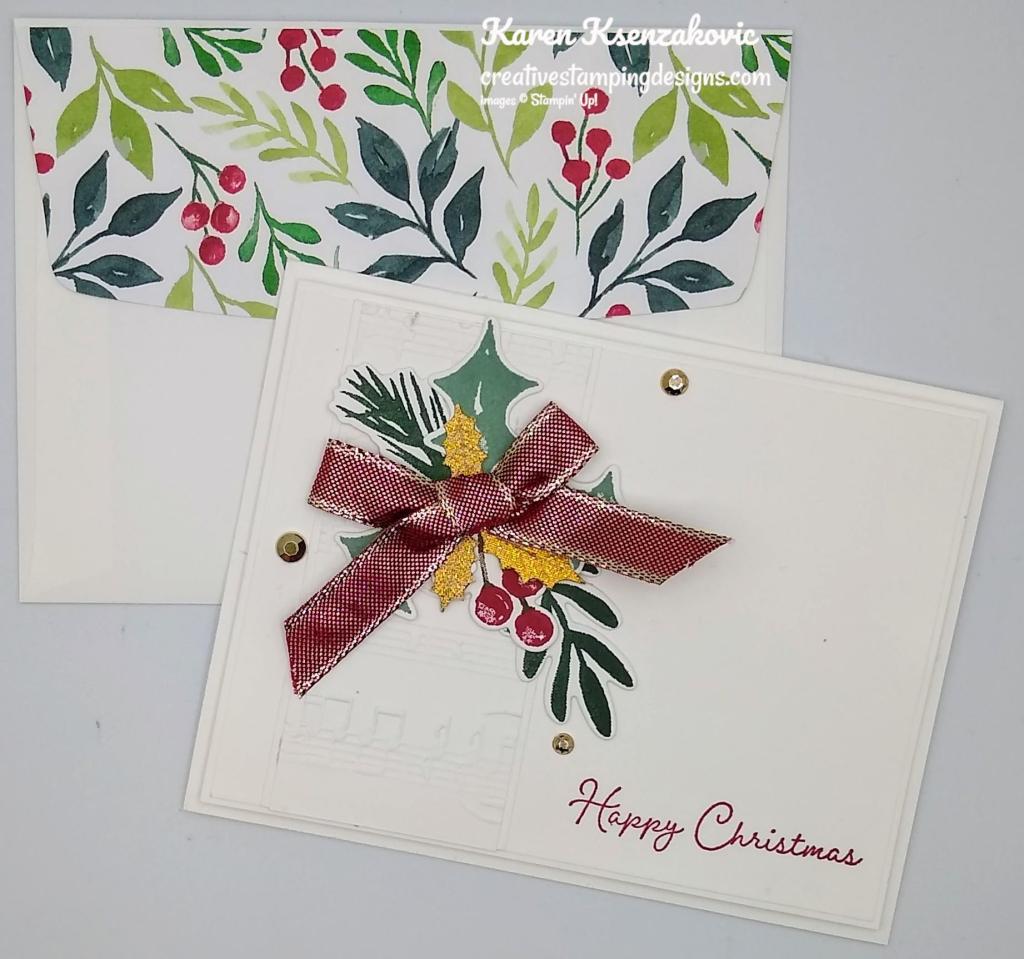
On another panel of Basic White cardstock using the Stampin’ Up! Christmas Season Photopolymer Stamp Set, I stamped the holly leaf image in Soft Succulent Ink, the pine bough and sprig images in Evening Evergreen Ink, the berry stem image in Soft Suede Ink and the berries in Cherry Cobbler Ink. I arranged the die cut pieces the way I wanted them on the embossed panel adhering them with Glue Dots. I tied a bow using the Cherry Cobbler & Gold Metallic Ribbon and adhered it on top of the small collage using a Glue Dot. I tucked a few of the Gold Holly Leaves under the bow using Glue Dots. I added a few Gold Gilded Gems to the card front. I adhered the card front to a Basic White Thick card base using Stampin’ Dimensionals.

On the inside I stamped the sentiment from the Snow Wonder stamp set on a Basic White panel. I stamped the holly leaves from the Christmas Season stamp set in Soft Succulent Ink and the berries in Cherry Cobbler Ink. I adhered the Basic White panel to the inside of the Basic White Thick card base using Stampin’ Seal.

To complete my card I decorated a Basic White Medium Envelope. I stamped the holly leaves from the Christmas Season stamp set in Soft Succulent Ink and the berries in Cherry Cobbler Ink on the envelope front. I adhered a panel of the Painted Christmas Designer Series Paper to the envelope flap.

Thank you for stopping by my blog today. I hope you like the card and will give it a try. Happy Stamping!!

*********************************************************************************************************

If you need any stamping supplies, I’d love to be your Demonstrator. Just click HERE to go directly to my online store or drop me an email if you have any questions. 

MY CURRENT HOST CODE IS:   JAK446GF

Use this host code when you order $50 or greater and receive a free gift from me! If your order is over $150, please do not use this code, but you’ll still get the free gift. The free gift is your choice of any 1 item valued up to $10.00 from the 2020-2021 Annual Catalog or the January-June 2021 Mini Catalog!   For any orders $50 or more I will also send you my monthly class tutorials.  Click HERE or go to my Customer Rewards for more details and to see what this months tutorials are.

Please remember to use my current Host Code and make sure that you can see my name on the final checkout page listed as your Demonstrator when you order so that you know that you’re ordering with me and you’ll get my rewards! 

Happy Stamping, Karen!

*********************************************************************************************************

Awesome Joining Promotions Until September 30, 2021

This image has an empty alt attribute; its file name is CRw3UiG1VcNw0fLUGVJqZ-YwyPUUS6uG8wmP4PTx-IdrSjQTpH-NKMtihO-191VvLnyi4n_MrGC7EEfGuHnVm2X-oA9cb_oiKgAHZnJdAnlMVA66mu2wtYmqiqWygCR5dtYtoVNkHcCb9w7RzyU6p9P124S08o1A2FmIRA8VDYEA1jbiHaw=s0-d-e1-ft

There is an AWESOME joining promotion happening!  If you purchase the Starter Kit between August 3 and September 30, you’ll get to pick a FREE bundle from this list!

  • Frosted Gingerbread
  • Christmas Season
  • Christmas To Remember
  • Whimsical Trees
  • Peaceful Deer
  • Sweet Little Stockings
  • Penguin Place
  • Peaceful Cabin
  • Arctic Bears
  • Beauty Of Tomorrow
  • Gorgeous Leaves
  • Nature’s Harvest

When you purchase the Starter Kit for $99 + taxes (if applicable), the kit ships for FREE and YOU get to pick $125 in Stampin’ Up! merchandise OF YOUR CHOICE. If you purchase the kit during Sale-a-bration, you’ll get an additional FREE bundle from the select twelve listed above (with a value up to $60.25!!) with your kit!  A free bundle in addition to $125 in merchandise for $99, YES PLEASE!! You will also get a past Paper Pumpkin Kit and other supplies free in your kit.

If you are planning on placing an order of $100, you might really want to consider joining. This is such an awesome joining deal, you don’t want to pass it up. There is no obligation to sell, have workshops or do Facebook lives. You can join strictly to be a ‘hobby demonstrator’ and enjoy the 20% discount. I would love to have you on my team!!! You also get to enjoy all the demonstrator perks like early ordering, sneak peeks at what’s coming and best of all the events. Why wait, this is such a great sign up promotions, join now and be a part of our awesome Stampin’ Up! family!!!

If you have any questions about joining, please drop me a note at creativestampingdesigns@gmail.com, I’d love to talk with you about it! You can find more information about joining on my blog @ creativestampingdesigns.com

*********************************************************************************************************

Peaceful Christmas

Subscribe September 11 – October 10

This image has an empty alt attribute; its file name is 09-11-21_header_peaceful_christmas.jpg


When you picture a peaceful Christmas, what comes to mind? Do you see snow outside your window, softly swirling through the sky? A tree trimmed with tinsel, a fire crackling nearby? Maybe you’re dreaming of decorating a holly jolly gingerbread house. Can you catch a whiff of Christmas cookies wafting through the air?

Whatever it is you think about when Christmas comes to town, picture a peaceful Christmas with the Peaceful Christmas Paper Pumpkin Kit! This glimmering and gleaming kit is your creative kickstart to Christmas cardmaking. With sprinkles of snow, shimmering silver skies, and heartwarming holiday wishes, you’ll have enough elements and embellishments to create 10 Christmas cards and coordinating envelopes.

Speaking of coordination, make even more Christmas magic with Peaceful Place products! Our stunning Peaceful Place Suite Collection (item 156277) pairs perfectly with the kit’s components. Brew a cup of cocoa, snuggle up with a soft blanket, and prepare for a cozy craft night in!

Details:

  • The kit contains enough elements to create 10 Christmas cards—5 each of 2 designs—and coordinating envelopes. This all-inclusive kit includes printed card bases, die-cut paper pieces, embellishments, adhesive, and more!
  • October’s kit arrives in a cute collectible box covered with enchanting evergreen trees. Use this special, limited-edition box to store your holiday handicrafts, or transform it into a well-wrapped package for a present!
  • The kit’s contents pair perfectly with the Peaceful Place Suite Collection (item 156277). To continue your Christmas crafting, combine the kit’s components with the suite’s patterned paper, shimmery sequins, and more!
  • Card size: 4-1/4″ x 5-1/2″ (10.8 x 14 cm)
  • Envelope size: 4-1/2″ x 5-3/4″ (11.4 x 14.6 cm)
  • Coordinating colors: Basic Gray, Real Red, Shaded Spruce, silver foil

Subscribe to the October 2021 Paper Pumpkin Kit between 11 September and 10 October at paperpumpkin.com!

Note: Supplies may be limited toward the end of the subscription period.

*********************************************************************************************************

Card stock cuts for this project:

  • Basic White Cardstock 2 – 4″ X 5 1/4″ (card front mat and inner liner), 3 7/8″ x 5 1/8″ (card front), 1 7/8″ x 3 7/8″ (embossed mat), 1 3/4″ X 3 7/8″ (embossed panel), 4 1/4′ X 5 1/2″ (artwork)
  • Basic White Thick Cardstock 8 1/2″ X 5 1/2″ (card base scored & folded at 4 1/4″)
  • Painted Christmas Designer Series Paper 2 1/4″ X 6″ (envelope flap)

*********************************************************************************************************

Product List

Stampin’ Up! Christmas Season To Remember

Good Sunday morning my stamping friends. How is everyone’s weekend going? I’ll be off to my quarterly team meeting this afternoon to meet up with some of my team members in person, finally!! I’m so looking forward to seeing them again.

Today’s card is one of the cards we will be making today at our meeting. I’m going to be presenting the card and making it with my team members in person and via Zoom meeting. Here’s my card for today.

I used the Stampin’ Up! Christmas Season Photopolymer Stamp Set, the Stampin’ Up! Christmas To Remember Cling Stamp Set and the Painted Christmas Designer Series Paper for my card today.

I started by adhering a panel of the Painted Christmas DSP to a Cherry Cobbler mat using Stampin’ Seal and then to a Basic White Thick card base using Multipurpose Liquid Glue.

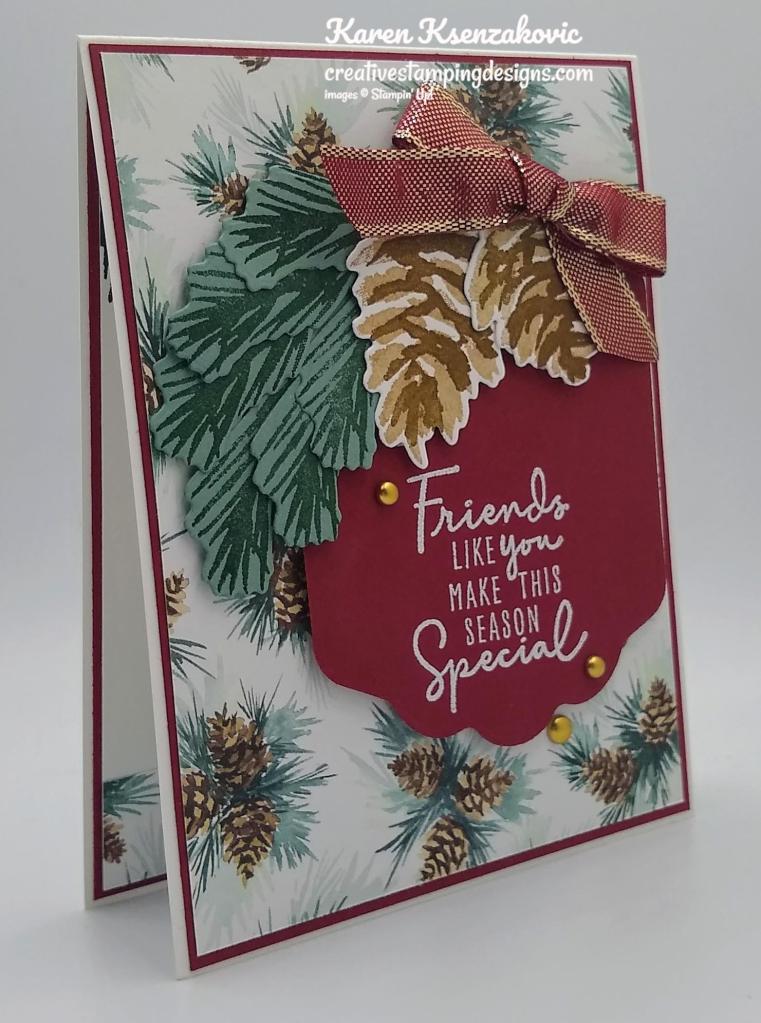
On a panel of Soft Succulent cardstock I stamped the pine bough image from the Christmas Season stamp set in Evening Evergreen Ink 6 times. I cut the images out using my Seasonal Labels Dies. On a panel of Basic White cardstock I stamped the large and small pinecone images from the Christmas Season stamp set. I stamped the solid pinecone image in Soft Suede Ink, stamping off once and the detailed pinecone image over the solid image in Soft Suede Ink full strength. I cut the images out using my Seasonal Labels Dies. I cut the largest label die from the Seasonal Labels Dies from a panel of Cherry Cobbler cardstock. On the bottom of the label, I stamped the sentiment from the Christmas To Remember stamp set in Versamark Ink. I immediately sprinkled it with White Embossing Powder and set it using my Heat Tool.

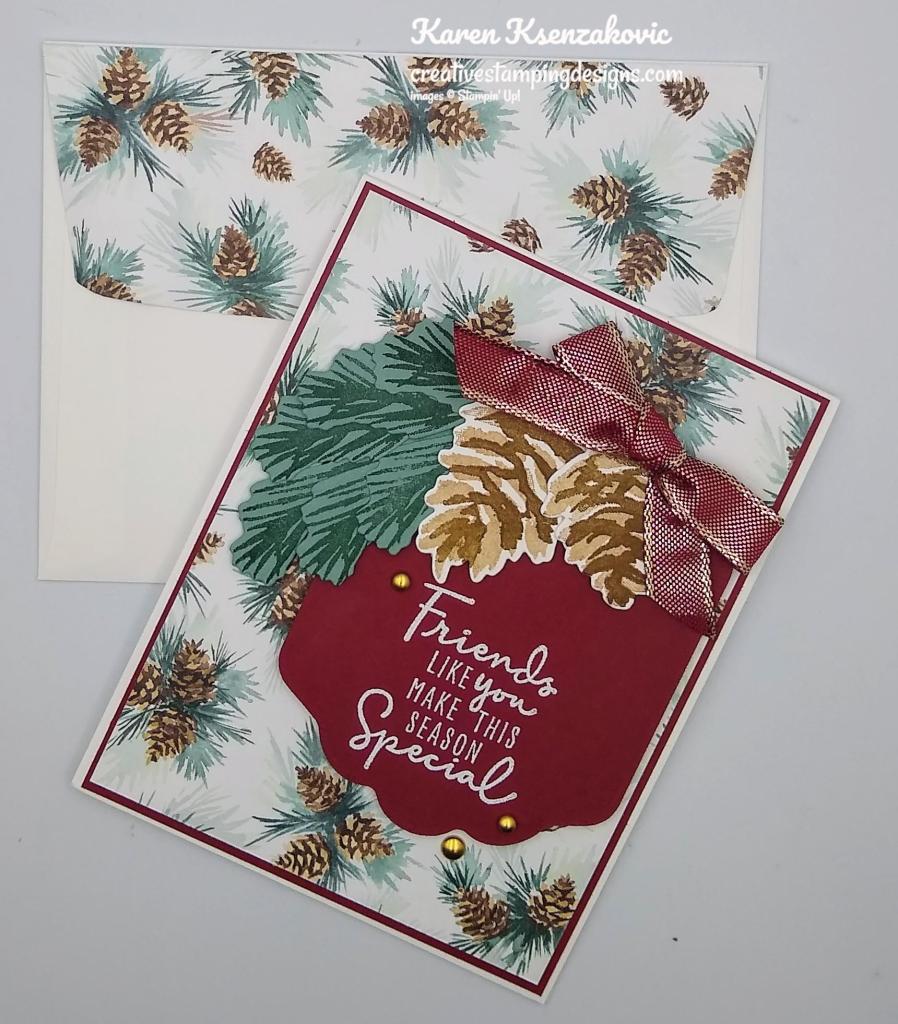
I adhered 2 sets of 3 of the pine bough dies together using Glue Dots. I adhered the pinecone dies to the top of the Cherry Cobbler label using Stampin’ Dimensionals, just on the top and bottom of the pinecones. I adhered the 2 sets of pine boughs dies under the pinecones using Glue Dots. I adhered the layered label to the card front using Stampin’ Dimensionals. I tied a small bow using the Cherry Cobbler & Gold 1/2″ Metallic Ribbon and adhered it to the top of the pinecones using a Glue Dot. I added a few gold Brushed Metallic Dots to the card front.
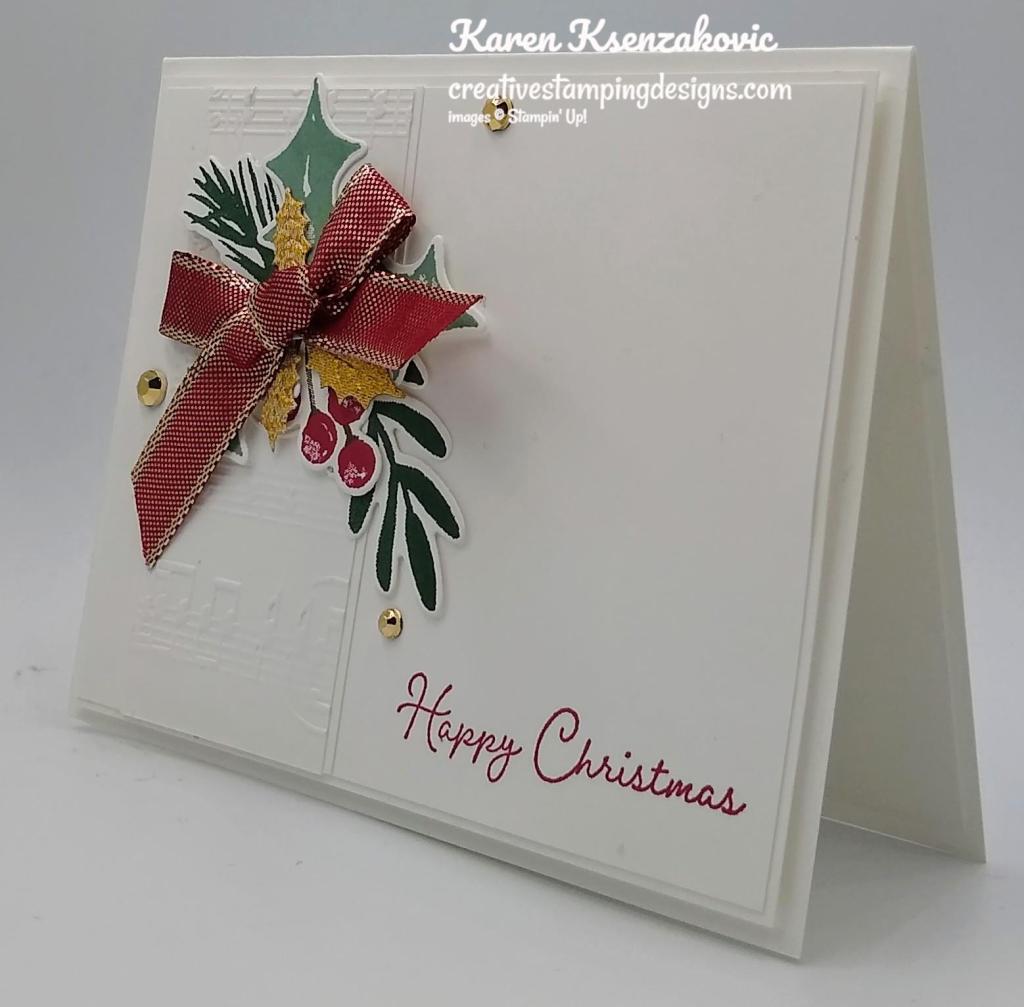
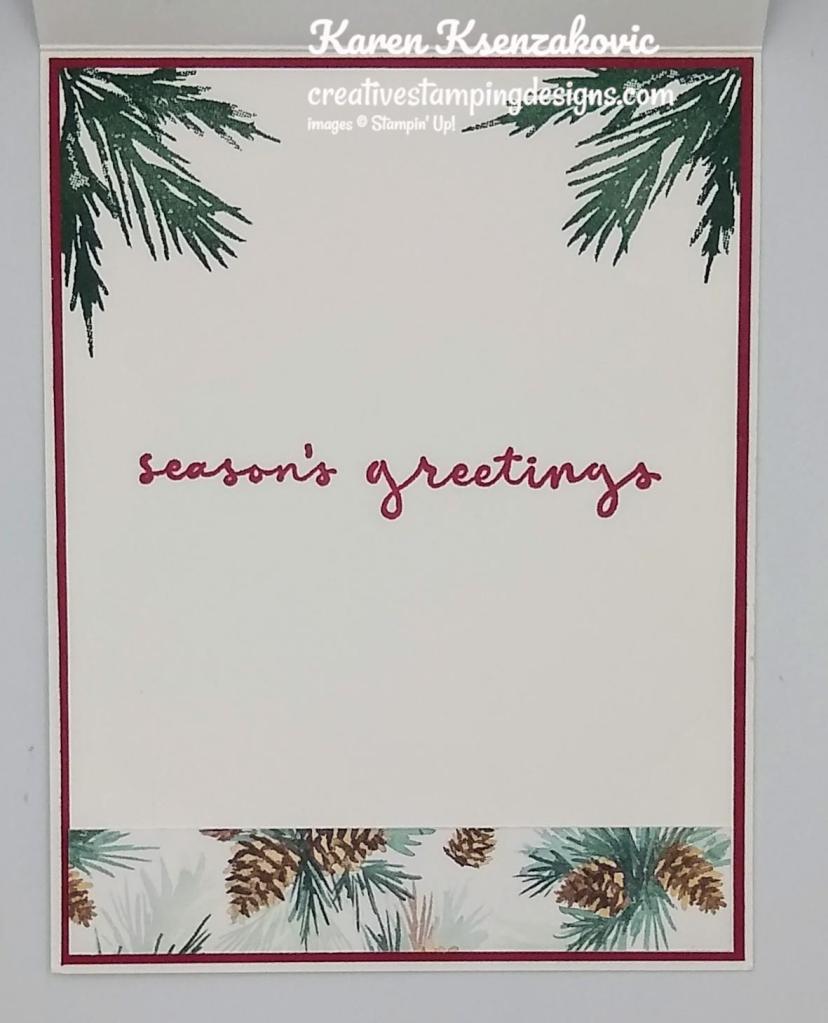
On the inside I stamped the sentiment from the Christmas To Remember stamp set in Cherry Cobbler Ink on a panel of Basic White cardstock. I adhered a strip of the Painted Christmas DSP to the bottom of the panel using Stampin’ Seal. I adhered the Basic White panel to a Cherry Cobbler mat using Stampin’ Seal and then to the inside of the Basic White Thick card base using Multipurpose Liquid Glue.

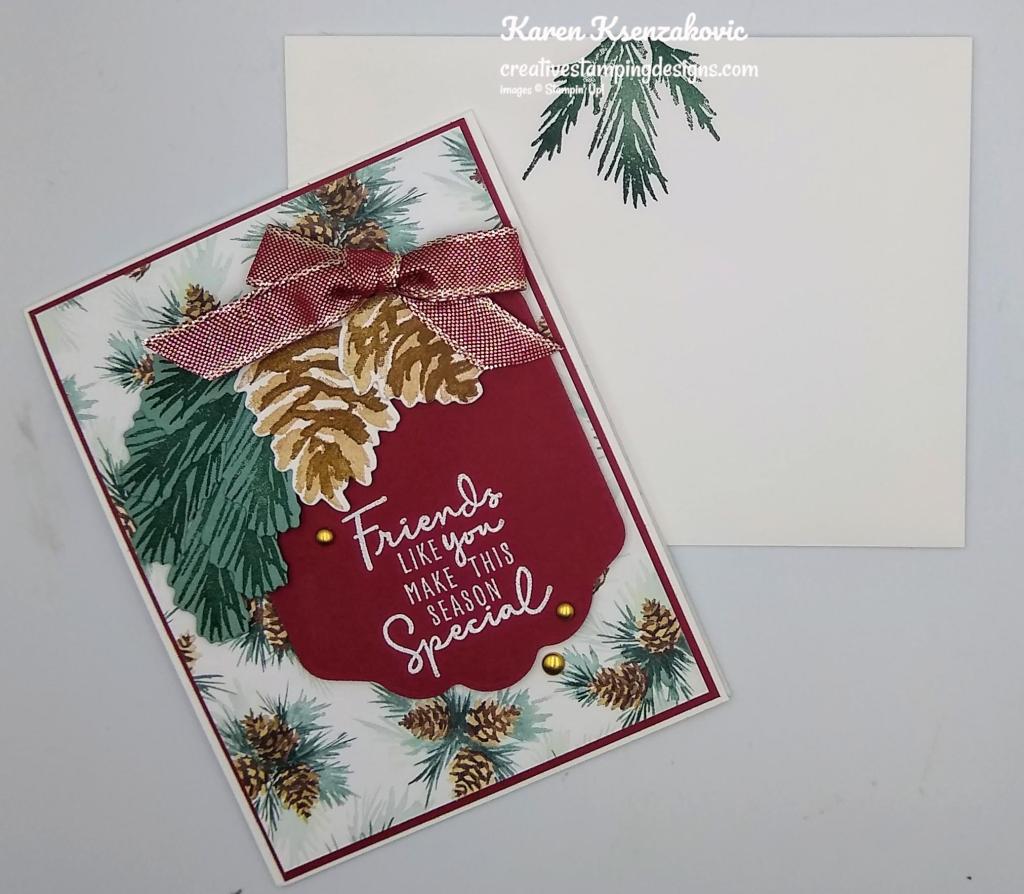
To complete my card I decorated a Basic White Medium Envelope. I stamped the 2 pine bough images from the Christmas Season stamp set on the top of the envelope front in Evening Evergreen Ink. I adhered a panel of the Painted Christmas DSP to the envelope flap.

Thank you for stopping by my blog today. I hope you liked my card and will give it a try. Happy Stamping!!

*********************************************************************************************************

If you need any stamping supplies, I’d love to be your Demonstrator. Just click HERE to go directly to my online store or drop me an email if you have any questions. 

MY CURRENT HOST CODE IS:   JAK446GF

Use this host code when you order $50 or greater and receive a free gift from me! If your order is over $150, please do not use this code, but you’ll still get the free gift. The free gift is your choice of any 1 item valued up to $10.00 from the 2020-2021 Annual Catalog or the January-June 2021 Mini Catalog!   For any orders $50 or more I will also send you my monthly class tutorials.  Click HERE or go to my Customer Rewards for more details and to see what this months tutorials are.

Please remember to use my current Host Code and make sure that you can see my name on the final checkout page listed as your Demonstrator when you order so that you know that you’re ordering with me and you’ll get my rewards! 

Happy Stamping, Karen!

*********************************************************************************************************

Awesome Joining Promotions Until September 30, 2021

This image has an empty alt attribute; its file name is CRw3UiG1VcNw0fLUGVJqZ-YwyPUUS6uG8wmP4PTx-IdrSjQTpH-NKMtihO-191VvLnyi4n_MrGC7EEfGuHnVm2X-oA9cb_oiKgAHZnJdAnlMVA66mu2wtYmqiqWygCR5dtYtoVNkHcCb9w7RzyU6p9P124S08o1A2FmIRA8VDYEA1jbiHaw=s0-d-e1-ft

There is an AWESOME joining promotion happening!  If you purchase the Starter Kit between August 3 and September 30, you’ll get to pick a FREE bundle from this list!

  • Frosted Gingerbread
  • Christmas Season
  • Christmas To Remember
  • Whimsical Trees
  • Peaceful Deer
  • Sweet Little Stockings
  • Penguin Place
  • Peaceful Cabin
  • Arctic Bears
  • Beauty Of Tomorrow
  • Gorgeous Leaves
  • Nature’s Harvest

When you purchase the Starter Kit for $99 + taxes (if applicable), the kit ships for FREE and YOU get to pick $125 in Stampin’ Up! merchandise OF YOUR CHOICE. If you purchase the kit during Sale-a-bration, you’ll get an additional FREE bundle from the select twelve listed above (with a value up to $60.25!!) with your kit!  A free bundle in addition to $125 in merchandise for $99, YES PLEASE!! You will also get a past Paper Pumpkin Kit and other supplies free in your kit.

If you are planning on placing an order of $100, you might really want to consider joining. This is such an awesome joining deal, you don’t want to pass it up. There is no obligation to sell, have workshops or do Facebook lives. You can join strictly to be a ‘hobby demonstrator’ and enjoy the 20% discount. I would love to have you on my team!!! You also get to enjoy all the demonstrator perks like early ordering, sneak peeks at what’s coming and best of all the events. Why wait, this is such a great sign up promotions, join now and be a part of our awesome Stampin’ Up! family!!!

If you have any questions about joining, please drop me a note at creativestampingdesigns@gmail.com, I’d love to talk with you about it! You can find more information about joining on my blog @ creativestampingdesigns.com 

*********************************************************************************************************

Peaceful Christmas

Subscribe September 11 – October 10


When you picture a peaceful Christmas, what comes to mind? Do you see snow outside your window, softly swirling through the sky? A tree trimmed with tinsel, a fire crackling nearby? Maybe you’re dreaming of decorating a holly jolly gingerbread house. Can you catch a whiff of Christmas cookies wafting through the air?

Whatever it is you think about when Christmas comes to town, picture a peaceful Christmas with the Peaceful Christmas Paper Pumpkin Kit! This glimmering and gleaming kit is your creative kickstart to Christmas cardmaking. With sprinkles of snow, shimmering silver skies, and heartwarming holiday wishes, you’ll have enough elements and embellishments to create 10 Christmas cards and coordinating envelopes.

Speaking of coordination, make even more Christmas magic with Peaceful Place products! Our stunning Peaceful Place Suite Collection (item 156277) pairs perfectly with the kit’s components. Brew a cup of cocoa, snuggle up with a soft blanket, and prepare for a cozy craft night in!

Details:

  • The kit contains enough elements to create 10 Christmas cards—5 each of 2 designs—and coordinating envelopes. This all-inclusive kit includes printed card bases, die-cut paper pieces, embellishments, adhesive, and more!
  • October’s kit arrives in a cute collectible box covered with enchanting evergreen trees. Use this special, limited-edition box to store your holiday handicrafts, or transform it into a well-wrapped package for a present!
  • The kit’s contents pair perfectly with the Peaceful Place Suite Collection (item 156277). To continue your Christmas crafting, combine the kit’s components with the suite’s patterned paper, shimmery sequins, and more!
  • Card size: 4-1/4″ x 5-1/2″ (10.8 x 14 cm)
  • Envelope size: 4-1/2″ x 5-3/4″ (11.4 x 14.6 cm)
  • Coordinating colors: Basic Gray, Real Red, Shaded Spruce, silver foil

Subscribe to the October 2021 Paper Pumpkin Kit between 11 September and 10 October at paperpumpkin.com!

Note: Supplies may be limited toward the end of the subscription period.

*********************************************************************************************************

Card stock cuts for this project:

  • Basic White Cardstock 2″ X 4″ (pinecones), 4″ X 5 1/4″ (inner liner)
  • Basic White Thick Cardstock 4 1/4″ X 11″ (card base scored & folded at 5 1/2″)
  • Cherry Cobbler Cardstock 2 – 4 1/8″ X 5 3/8″ (card front & inner liner mats), 3 1/2″ X 4 1/4″ (label)
  • Soft Succulent Cardstock 4 1/4″ X 3″ (pine boughs)
  • Painted Christmas Designer Series Paper 4″ X 5 1/4″ (card front), 3/4″ X 4″ (inner liner strip), 2 1/4″ X 6″ (envelope flap)

*********************************************************************************************************

Product List