

Good Tuesday morning my stamping friends welcome to Amy’s Inkin’ Krew Team Blog Hop. It’s the 2nd Tuesday of the month so that means Blog Hop Day!! If you are starting with me, be sure to hop around to see everyone’s projects. If you’ve hopped over from Christie’s blog, welcome to my blog and thank you for stopping by. The theme this month is “Celebrate Summer”. If you’d like to see a quick video on how I made this card, Click Here to go to my Instagram Reels. Here’s my card for today.
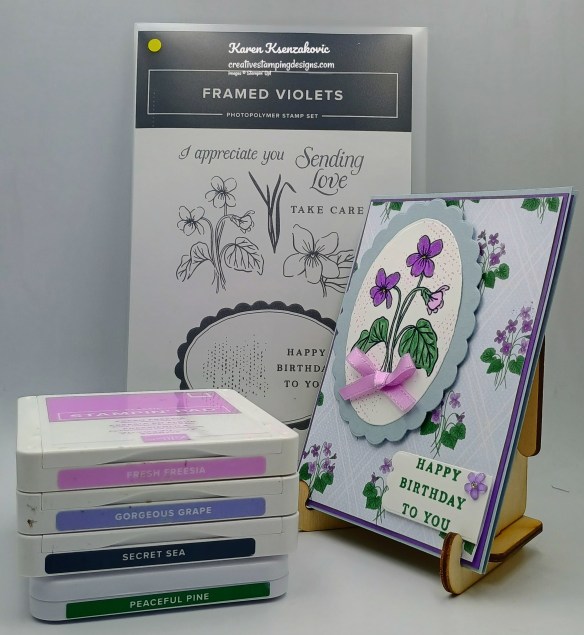
I have a little sneak peek for you today. I used the New Stampin’ Up! Online Exclusive Framed Violets Bundle and Violet Dreams Specialty Designer Series Paper for my card. these items will be available starting July 1.
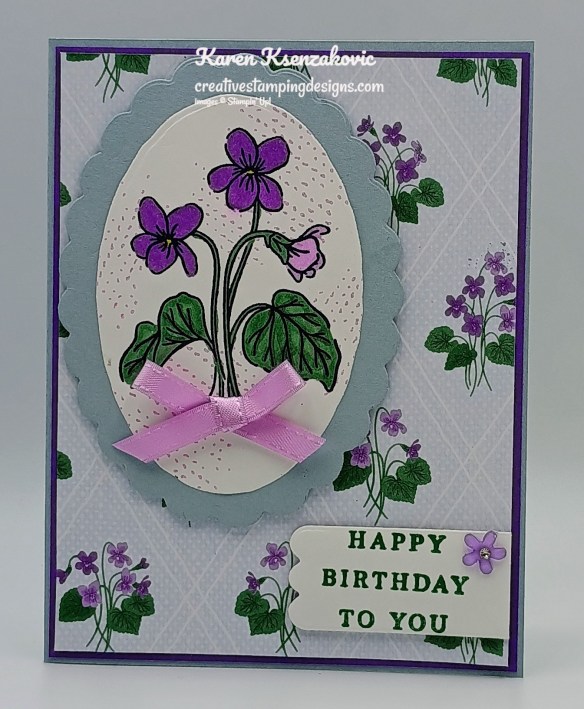
Adhere a panel of Violet Dreams DSP (available July 1) to a Gorgeous Grape mat. Adhere the layered panel to a Cloud Cover card base.
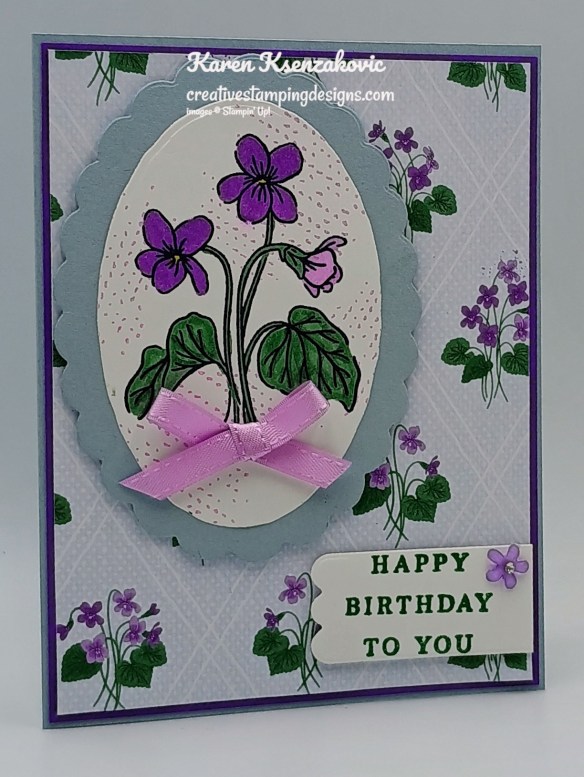
Using the Framed Violets Dies, cut the scalloped frame from a panel of Cloud Cover and the inside oval from a panel of Basic White. Stamp the splatter image from the Framed Violets stamp set in Fresh Freesia Ink on the Basic White Oval. Stamp the floral image from the Framed Violets stamp set in Secret Sea Ink. Color the image with Darling Duckling, Fresh Freesia, Highland Heather and Peaceful Pine Stampin’ Blends Markers. adhere the artwork to the center of the scalloped Cloud Cover oval. Adhere the layered artwork to the card front with Stampin’ Dimensionals. Tie a small bow using the Fresh Freesia 1/4″ Satin Ribbon (available July 1) and adhere it to the stems.
Stamp the sentiment from the Framed Violets stamp set in Peaceful Pine Ink on a panel of Basic White. Cut the sentiment out using the Scalloped Blooms Dies. Adhere the sentiment to the card front with Stampin’ Dimensionals. Add an Adhesive-Backed Bloom (available July 1) to the sentiment.
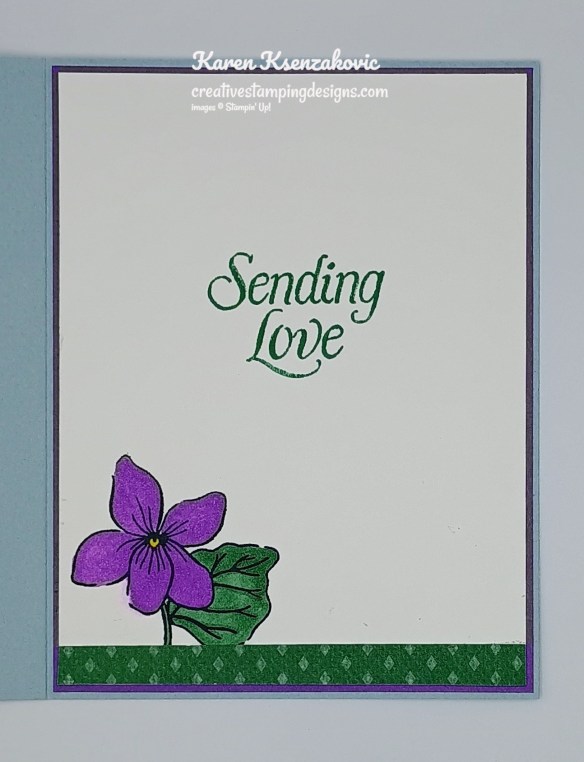
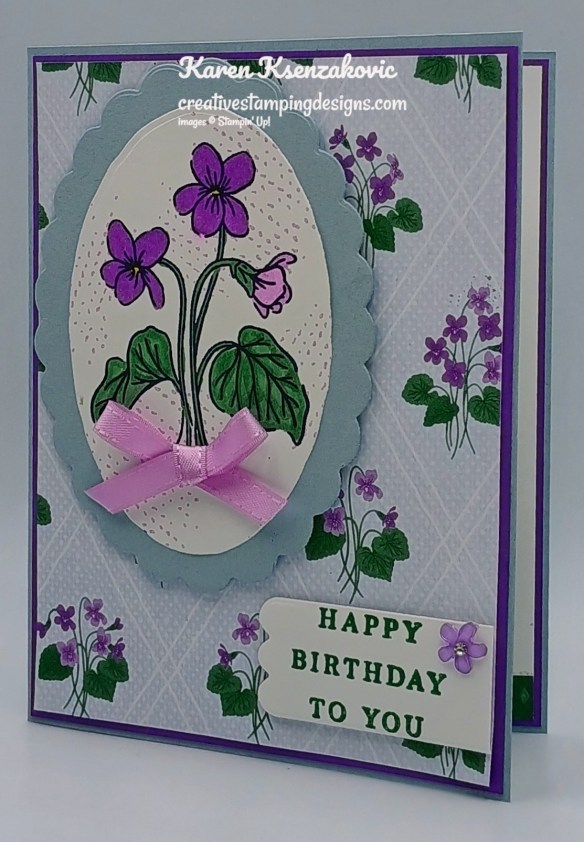
Stamp the sentiment from the Framed Violets stamp set in Peaceful Pine Ink on a panel of Basic White. Stamp the single flower image from the Framed Violets stamp set on the bottom of the panel in Secret Sea Ink. Color the image with Darling Duckling, Highland Heather and Peaceful Pine Stampin’ Blends Markers. Adhere a panel of Violet Dreams DSP to the bottom of the panel. Adhere the Basic White panel to a Gorgeous Grape mat then to the inside of the Cloud Cover card base.
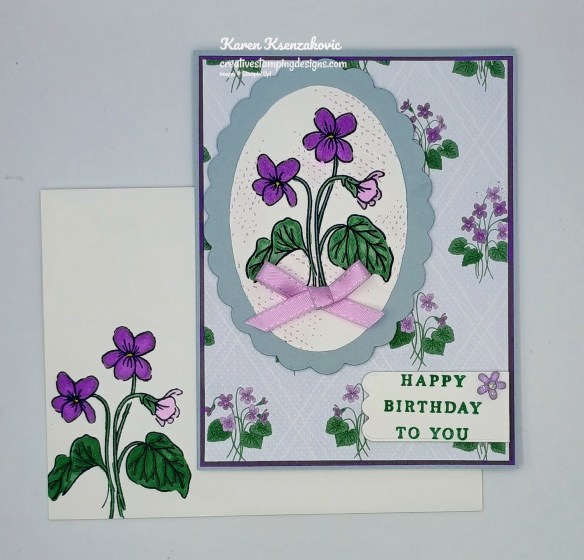
Decorate a Basic Whtie Medium Envelope to complete your card. Stamp the flower image from the Framed Violets stamp set in Secret Sea Ink on the envelope front. Color the image with Darling Duckling, Fresh Freesia, Highland Heather and Peaceful Pine Stampin’ Blends Markers. Adhere a panel of Violet Dreams DSP to the envelope flap.

Thank you for stopping by my blog today. Now that you’ve seen my card, let’s get on with the hop! Click on the Next Blog button to move on to Karen’s project. Happy Hopping.

Just in case you get lost along the way, here is a list of the team members involved in the hop today.
- Christie King
- Karen Ksenzakovic You Are Here
- Karen Finkle
- Tara Carpenter
- Nicole Bloxom
- Mary Deatherage
- Charlene Tackvic
- Ann Louise Fodgaard
- Amy Koenders
*********************************************************************************************************
If you need any stamping supplies, I’d love to be your Demonstrator. Just click HERE to go directly to my online store or drop me an email if you have any questions.
*********************************************************************************************************
Card stock cuts for this project:
- Basic White Cardstock 2 1/2″ x 3 3/4″(artwork), 1 3/4″ x 2 1//4″(sentiment), 4″ x 5 1/4″(inner liner)
- Cloud Cover Cardstock 5 1/2″ x 8 1/2″ (card base scored & folded at 4 1/4″), 3 1/4″ x 4 1/4″(die cut)
- Gorgeous Grape Cardstock (2) – 4 1/8″ x 5 3/8″(mats)
- Violet Dreams Specialty Designer Series Paper 4″ x 5 1/4″(card front), 1/2″ x 4″(inner liner), 2 1/4″ x 6″(envelope)
*********************************************************************************************************
Product List
![Basic White 8 1/2" X 11" Cardstock [ 166780 ]](https://assets1.tamsnetwork.com/images/EC042017NF/166780s.jpg "Basic White 8 1/2\" X 11\" Cardstock [ 166780 ]")
![Cloud Cover 8 1/2" X 11" Cardstock [ 165621 ]](https://assets1.tamsnetwork.com/images/EC042017NF/165621s.jpg "Cloud Cover 8 1/2\" X 11\" Cardstock [ 165621 ]")
![Gorgeous Grape 8-1/2" X 11" Cardstock [ 146987 ]](https://assets1.tamsnetwork.com/images/EC042017NF/146987s.jpg "Gorgeous Grape 8-1/2\" X 11\" Cardstock [ 146987 ]")
![Fresh Freesia Classic Stampin' Pad [ 155611 ]](https://assets1.tamsnetwork.com/images/EC042017NF/155611s.jpg "Fresh Freesia Classic Stampin' Pad [ 155611 ]")
![Secret Sea Classic Stampin' Pad [ 165285 ]](https://assets1.tamsnetwork.com/images/EC042017NF/165285s.jpg "Secret Sea Classic Stampin' Pad [ 165285 ]")
![Darling Duckling Stampin’ Blends Combo Pack [ 165288 ]](https://assets1.tamsnetwork.com/images/EC042017NF/165288s.jpg "Darling Duckling Stampin’ Blends Combo Pack [ 165288 ]")
![Fresh Freesia Stampin' Blends Combo Pack [ 155518 ]](https://assets1.tamsnetwork.com/images/EC042017NF/155518s.jpg "Fresh Freesia Stampin' Blends Combo Pack [ 155518 ]")
![Highland Heather Stampin' Blends Combo Pack [ 154887 ]](https://assets1.tamsnetwork.com/images/EC042017NF/154887s.jpg "Highland Heather Stampin' Blends Combo Pack [ 154887 ]")
![Peaceful Pine Stampin’ Blends Combo Pack [ 167668 ]](https://assets1.tamsnetwork.com/images/EC042017NF/167668s.jpg "Peaceful Pine Stampin’ Blends Combo Pack [ 167668 ]")
![Scalloped Blooms Dies [ 167646 ]](https://assets1.tamsnetwork.com/images/EC042017NF/167646s.jpg "Scalloped Blooms Dies [ 167646 ]")
![Basic White Medium Envelopes [ 159236 ]](https://assets1.tamsnetwork.com/images/EC042017NF/159236s.jpg "Basic White Medium Envelopes [ 159236 ]")
![Stampin' Cut & Emboss Machine [ 149653 ]](https://assets1.tamsnetwork.com/images/EC042017NF/149653s.jpg "Stampin' Cut & Emboss Machine [ 149653 ]")
![Mini Glue Dots [ 103683 ]](https://assets1.tamsnetwork.com/images/EC042017NF/103683s.jpg "Mini Glue Dots [ 103683 ]")
![Multipurpose Liquid Glue [ 110755 ]](https://assets1.tamsnetwork.com/images/EC042017NF/110755s.jpg "Multipurpose Liquid Glue [ 110755 ]")
![Stampin' Dimensionals [ 104430 ]](https://assets1.tamsnetwork.com/images/EC042017NF/104430s.jpg "Stampin' Dimensionals [ 104430 ]")
![Stampin' Seal [ 152813 ]](https://assets1.tamsnetwork.com/images/EC042017NF/152813s.jpg "Stampin' Seal [ 152813 ]")
![Paper Trimmer [ 152392 ]](https://assets1.tamsnetwork.com/images/EC042017NF/152392s.jpg "Paper Trimmer [ 152392 ]")
![Bone Folder [ 102300 ]](https://assets1.tamsnetwork.com/images/EC042017NF/102300s.jpg "Bone Folder [ 102300 ]")
![Take Your Pick [ 144107 ]](https://assets1.tamsnetwork.com/images/EC042017NF/144107s.jpg "Take Your Pick [ 144107 ]")


Such a pretty card! Love the violets image, perfect with the background paper! 🙂
LikeLiked by 1 person
Thank you so much Amy 🙂
LikeLike
Love love the violets, and here are plenty. Beautiful color combination too. 🙂
LikeLiked by 1 person
Thank you Ann Louise 🙂
LikeLiked by 1 person
Stunning card! Love all those purples! TFS
LikeLiked by 1 person
Thank you Tara 🙂
LikeLike
What a pretty card! The coloring is beautiful. I love that DSP!
LikeLiked by 1 person
Thank you so much Charlene 🙂
LikeLike