

Good Thursday morning stamping friends and welcome to our Happy Inkin’ Thursday Blog Hop. If you are starting with me, thank you. I hope you will stop by everyone’s blog to see what they have created this week. If you are hopping over from Akiko’s blog, thank you for stopping by. This week we have Sketch Challenge. If you’d like to see a quick video of how I made this card, Click Here to go to my Instagram Reels. Here is my card using this week’s sketch.

I used the Stampin’ Up! Online Exclusives Blooming Phrases Photopolymer Stamp Set, Beautiful Bokeh 6 x 6 Designer Series Paper and Stampin’ Up! cheers & Sips Photopolymer Stamp Set for my card today.

Here is our sketch for this week,
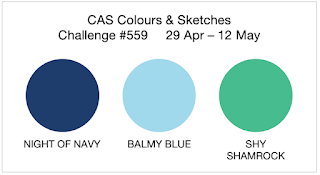
My colors are from the CAS Colour and Sketch Challenge #559

Stamp the sprig image from the Cheers & Sips stamp set in Shy Shamrock on the panel of Beautiful Bokeh DSP. Adhere the Beautiful Bokeh card front to a Shy Shamrock mat using Stampin’ Seal. Adhere the layered panel to a Night of Navy card base using Stampin’ Dimensionals.

On a panel of Basic White, stamp the sentiments from Blooming Phrase stamp set in Night of Navy Ink. Stamp the leaf image from Blooming Phrases stamp set in Shy Shamrock Ink on the sentiments. Stamp the flower image from Blooming Phrases stamp set in Balmy Blue Ink on the end of the sentiments

Adhere the Basic White panel to the Beautiful Bokeh card front using Stampin’ Seal. Add a few Holographic Resin Dots to the corner of the panel

On a panel of Basic White, stamp the sentiments from Cheers & Sips stamp set in Night of Navy Ink. Stamp the glass image from Cheers & Sips stamp set in Balmy Blue Ink. Color the inside of the glass using Balmy Blue Stampin’ Blends Markers. Stamp the ice cube image from Cheers & Sips stamp set in Balmy Blue Ink inside the glass. Stamp the berry image from Cheers & Sips stamp set in Night of Navy Ink on the bottom of the glass. Adhere the Basic White panel to Balmy Blue and Shy Shamrock mats then to the inside of the Night of Navy card base.

Decorate a Basic White Medium Envelope to complete your card. Stamp the glass and ice images from Cheers & Sip stamp set in Balmy Blue Ink on the envelope front. Color the inside of the glass using the Balmy Blue Stampin’ Blends Marker. Stamp the berry image from Cheers & Sips stamp set in Night of Navy Ink on the bottom of the glass. Adhere a panel of Beautiful Bokeh DSP to the envelope flap.

Thank you for stopping by my blog today. Now that you’ve seen my card, let’s get on with the hop! Click the button below to hop over to see what Tara has created. Happy Hopping!

Just in case you get lost along the way, here is a list of the team members involved in the hop today.
Karen Ksenzakovic You Are Here
*********************************************************************************************************
If you need any stamping supplies, I’d love to be your Demonstrator. Just click HERE to go directly to my online store or drop me an email if you have any questions.
*********************************************************************************************************
Mountain Majesties
Subscribe April 11 – May 10
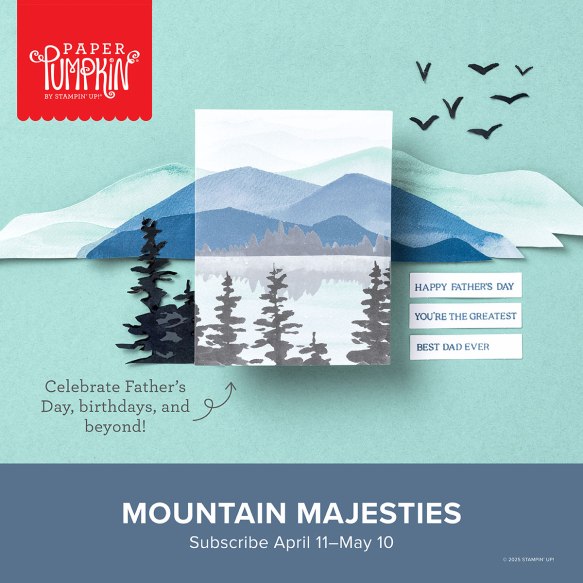
Create Father’s Day cards with layered mountain landscapes!
• Makes 9 cards: 3 each of 3 designs with 9 coordinating envelopes
• Precut vellum and paper pieces
• Watercolor card bases and coordinating envelopes
• Coordinating colors: Basic Black, Lost Lagoon, Misty Moonlight
(Classic Stampin’ Spot), Mossy Meadow, Pecan Pie, Petal Pink
Includes vellum pieces for layering and sentiments tailored to men!
Subscribe to the May Paper Pumpkin Kit between 11 April and 10 May by clicking here!
*********************************************************************************************************
Don’t miss the coordinating
Hugs Abloom Dies Add-On!

Make the most of your Paper Pumpkin kits with the Hugs Abloom Dies add-on! Quickly and cleanly cut out a flower, leaf sprig, sentiment label, or Hugs sentiment to elevate your crafting projects. These additional dies are designed to work with THREE Paper Pumpkin Kits: the Inked Occasions Paper Pumpkin Kit, the Mountain Majesties Paper Pumpkin Kit, and the Full of Charm Paper Pumpkin Kit. Pair these dies with other Stampin’ Up! products for even more creative options!
DETAILS
– 4 dies
– Largest die: 2-1/2″ x 1-1/4″ (6.4 x 3.2 cm)
– Use with a Stampin’ Cut & Emboss Machine (sold separately)
You must be a current Paper Pumpkin subscriber to purchase this item. To become a subscriber, visit www.stampinup.com/paperpumpkin.
Note: Supplies may be limited toward the end of the subscription period.
#166238 $12
*********************************************************************************************************
Card stock cuts for this project:
- Basic White Cardstock 1 1/2″ x 5 1/4″(artwork), 3 7/8″ x 5 1/8″(inner liner)
- Balmy Blue Cardstock 4″ x 5 1/4″(inner liner mat)
- Night of Navy Cardstock 5 1/2″ x 8 1/2″(card base scored & folded at 4 1/4″)
- Shy Shamrock Cardstock 2 – 4 1/8″ x 5 3/8″(card front & inner liner mats)
- Beautiful Bokeh 6 x 6 Designer Series Paper 4″ x 5 1/4″(card front), 2 1/4″ x 6″(envelope)
*********************************************************************************************************
Product List
![Blooming Phrases Photopolymer Stamp Set (English) [ 165523 ]](https://assets1.tamsnetwork.com/images/EC042017NF/165523s.jpg "Blooming Phrases Photopolymer Stamp Set (English) [ 165523 ]")
![Cheers & Sips Photopolymer Stamp Set (English) [ 165588 ]](https://assets1.tamsnetwork.com/images/EC042017NF/165588s.jpg "Cheers & Sips Photopolymer Stamp Set (English) [ 165588 ]")
![Balmy Blue 8-1/2" X 11" Cardstock [ 146982 ]](https://assets1.tamsnetwork.com/images/EC042017NF/146982s.jpg "Balmy Blue 8-1/2\" X 11\" Cardstock [ 146982 ]")
![Basic White 8 1/2" X 11" Cardstock [ 166780 ]](https://assets1.tamsnetwork.com/images/EC042017NF/166780s.jpg "Basic White 8 1/2\" X 11\" Cardstock [ 166780 ]")
![Night Of Navy 8-1/2" X 11" Cardstock [ 100867 ]](https://assets1.tamsnetwork.com/images/EC042017NF/100867s.jpg "Night Of Navy 8-1/2\" X 11\" Cardstock [ 100867 ]")
![Shy Shamrock 8 1/2" X 11" Cardstock [ 163795 ]](https://assets1.tamsnetwork.com/images/EC042017NF/163795s.jpg "Shy Shamrock 8 1/2\" X 11\" Cardstock [ 163795 ]")
![Beautiful Bokeh 6" X 6" (15.2 X 15.2 Cm) Designer Series Paper [ 164607 ]](https://assets1.tamsnetwork.com/images/EC042017NF/164607s.jpg "Beautiful Bokeh 6\" X 6\" (15.2 X 15.2 Cm) Designer Series Paper [ 164607 ]")
![Balmy Blue Classic Stampin' Pad [ 147105 ]](https://assets1.tamsnetwork.com/images/EC042017NF/147105s.jpg "Balmy Blue Classic Stampin' Pad [ 147105 ]")
![Night Of Navy Classic Stampin' Pad [ 147110 ]](https://assets1.tamsnetwork.com/images/EC042017NF/147110s.jpg "Night Of Navy Classic Stampin' Pad [ 147110 ]")
![Shy Shamrock Classic Stampin Pad [ 163808 ]](https://assets1.tamsnetwork.com/images/EC042017NF/163808s.jpg "Shy Shamrock Classic Stampin Pad [ 163808 ]")
![Holographic Resin Dots [ 165598 ]](https://assets1.tamsnetwork.com/images/EC042017NF/165598s.jpg "Holographic Resin Dots [ 165598 ]")


Such a sweet card! Love the combination of stamp sets! 😊
LikeLike
Thank you Akiko 🙂
LikeLike
Cute card Karen! Love the fun “floral” sentiments! 🙂
LikeLike
Thank you Amy 🙂
LikeLike
Great card Karen. I like how you used the colors of the CAS Challenge. Thanks for joining us.
LikeLike
Thank you Suzy 🙂 Love this color combo
LikeLike
That’s just so pretty! Thanks for playing with us at CAS Colours and Sketches
LikeLike
Thank you so much Deborah 🙂 Love this color combo
LikeLiked by 1 person
Pkease unsubsidized me.
LikeLike
I am very sorry, but I’m unable to unsubscribe you, you have to hit the button on your end.
LikeLike
Love the Beautiful Bokeh DSP and Blooming Phrases is a definition new ‘go to’ stamp set.
LikeLike
Thank you so much Terry Lynn 🙂 It’s a great pack of DSP
LikeLike