
Good Tuesday morning stamping friends. I hope everyone had a wonderful holiday weekend. It was gorgeous here in NJ. I opened all my windows to let the beautiful breeze go through my house. I have to admit, it got a little chilly during the night, I think it said it dropped to 48 during the night. That’s a little colder than I like.
I have a sneak peek for you today of a suite that you could purchase starting tomorrow, YAY!!! That’s right, the new September-December 2024 Mini Catalog goes live tomorrow morning. If you’d like to see a quick video of how I made this card, Click Here to go to my Instagram Reels. Here is my card for today.

I used the Stampin’ Up! Regal Flora Bundle, Regal Winter Designer Series Paper and the Stampin’ Up! Happiest Day Photopolymer Stamp Set for my card today.

Adhere a panel of regal Winter DSP to a Basic White Thick card base using Liquid Glue. Adhere a piece of Blackberry Bliss & Gold 1/2″ Textured Ribbon across the card front using Stampin’ Seal.
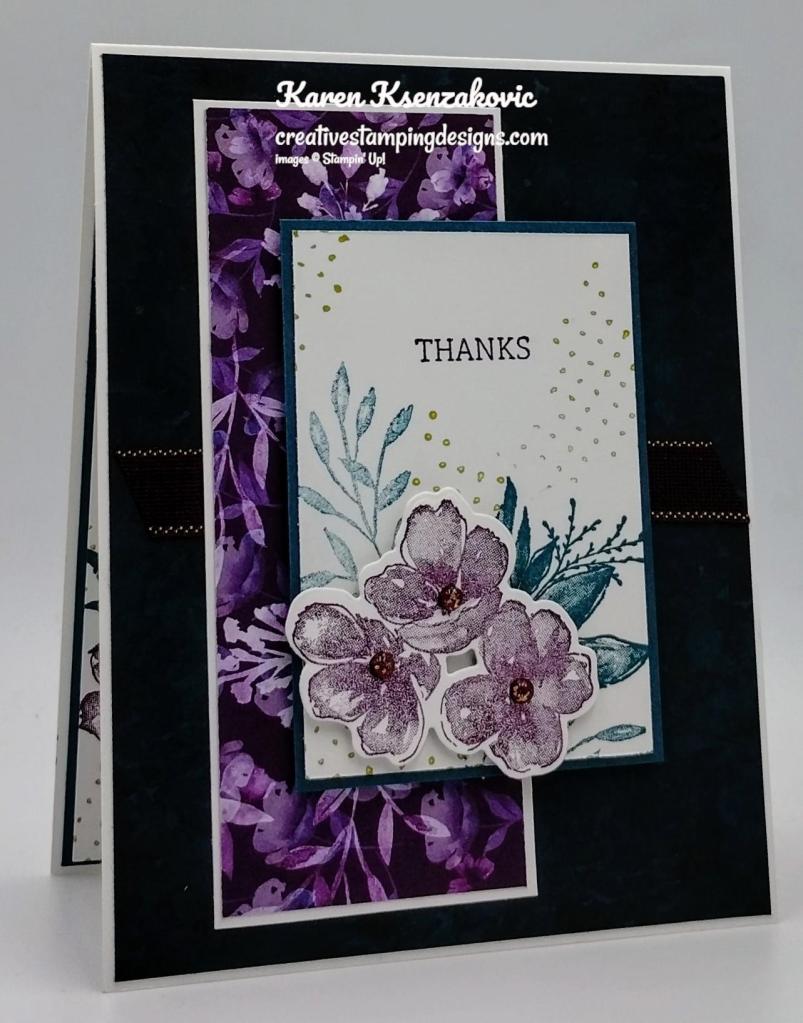
Adhere a panel of Regal Winter DSP to a Basic White mat using Stampin’ Seal. Adhere the layered panel to the card front using Liquid Glue. On a panel of Basic White, stamp the floral image from the Stampin’ Up! Regal Flora Cling Stamp Set in Blackberry Bliss Ink, stamping off once on scrap paper. Cut the image out using the Regal Flora Dies.

On a panel of Basic White, stamp the sentiment from the Regal Flora stamp set in Blackberry Bliss Ink on the top of the panel. Stamp the 2 leaf images from the Regal Flora stamp set in Pretty Peacock Ink on the bottom of the panel. Stamp the dotted image from the Regal Flora stamp set in Wild Wheat Ink on the panel, stamping off on scrap paper once. Adhere the Basic White panel to a Pretty Peacock mat. Adhere the layered panel to the card front using Stampin’ Dimensionals. Adhere the die cut flowers to the bottom of the panel over the stamped leaves using Stampin’ Dimensionals. Add a few Regal Foiled Adhesive-Backed Dots to the flower center.

Stamp the sentiment from the Happiest Day stamp set in Blackberry Bliss Ink on a panel of Basic White. Stamp the floral image from the Regal Flora stamp set in Blackberry Bliss Ink, stamping off once on scrap paper, on the bottom of the panel. Stamp the leaf images from the Regal Flora stamp set in Pretty Peacock Ink and the dotted image from the Regal Flora stamp set in Wild Wheat Ink. Adhere the Basic White panel to a Pretty Peacock mat then to the inside of the Basic White Thick card base.
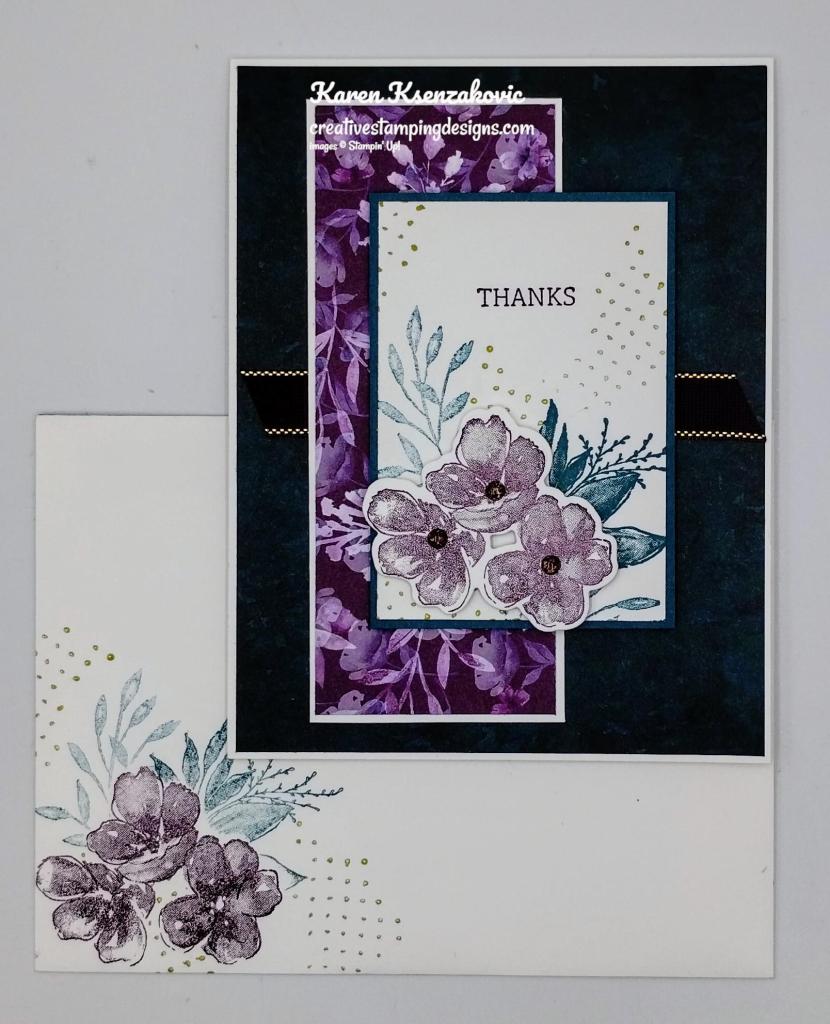
To finish the card, decorate a Basic White Medium Envelope. Stamp the floral image from the Regal Flora stamp set in Blackberry Bliss Ink on the envelope front. Stamp the leaf image from the Regal Floral stamp set in Pretty Peacock Ink. Stamp the dotted image from the Regal Flora stamp set in Wild Wheat Ink. Adhere a panel of Regal Winter DSP to the envelope flap.

Thank you for stopping by my blog today. I hope you like the card and will give it a try. Happy Stamping!!
*********************************************************************************************************
If you need any stamping supplies, I’d love to be your Demonstrator. Just click HERE to go directly to my online store or drop me an email if you have any questions.
MY CURRENT HOST CODE IS: EPRVU3FN
Use this Host Code when placing ALL orders with me up to $149. When you order $50 or greater you will receive a free gift from me but only if you remember the Host Code! If your order is over $150, please do not use this code, but you’ll still get the free gift. The free gift is your choice of any 1 item valued up to $10.00 from the 2024-2025 Annual Catalog, or from the Online Exclusives! You MUST use the Host Code to earn this!! For any orders $50 or more I will also send you my monthly class tutorials. Click HERE or go to my Customer Rewards for more details and to see what this month’s tutorials are.
Please remember to use my current Host Code and make sure that you can see my name on the final checkout page listed as your Demonstrator when you order so that you know that you’re ordering with me, and you’ll get my rewards!
Happy Stamping, Karen
********************************************************************************************************
Autumn Abundance
Subscribe August 11 – September 10
Subscribe to Paper Pumpkin for a monthly, all-inclusive crafting kit that’s a fun surprise! Each kit includes a photopolymer stamp set, Classic Stampin’ Spot, and step by step instructions to complete exclusive paper craft projects, including cards, tags, and gift
packaging. And don’t miss the special add-on that coordinates with the next three months!
Share your love for all things autumn with this kit! Don’t miss the whimsical, water colored ephemera pack with this month’s Paper Pumpkin!

• Makes 9 cards, 3 each of 3 designs
• Project includes printed cards and coordinating envelopes
• Laser cut card fronts, ephemera pack, and embellishments
• Coordinating colors: Cajun Craze (Classic Stampin’ Spot), Crushed Curry, Poppy
Parade, Pumpkin Pie, Very Vanilla, Wild Wheat
*********************************************************************************************************
Don’t miss the coordinating
Every Celebration Dies Add-On!

This exclusive add-on (item 164991) coordinates with the three upcoming kits! Paper Pumpkin subscribers can purchase it beginning 11 July. The add-on is available only while supplies last, so it’s best to shop early!
Subscribe to the September Paper Pumpkin Kit between 11 August and 10 September by clicking here!
Note: Supplies may be limited toward the end of the subscription period.
*********************************************************************************************************
Card stock cuts for this project:
- Basic White Cardstock 2″ X 4 7/8″ (dsp mat), 2 1/4″ X 3 1/4″(artwork), 2″ X 3″(flowers) 4″ X 5 1/4″(inner liner)
- Basic Whit thick Cardstock 4 1/4″ X 11″(card base scored & folded at 5 1/2″)
- Pretty Peacock Cardstock 2 3/8″ X 3 3/8″(artwork mat), 4 1/8″ X 5 3/8″(inner liner mat)
- Regal Winter Designer Series Paper 4 1/8″ X 5 3/8″(card front), 1 7/8″ X 4 3/4″(card front panel), 2 1/4″ x 6″(envelope flap)
*********************************************************************************************************
Product List
")


Such a pretty card Karen! Love the colors and the layout. 🙂
LikeLiked by 1 person
Thank you Amy 🙂
LikeLike
That’s so elegant! I thought the background was black at first, but it’s so effective!
LikeLiked by 1 person
Thank you so much Deborah. The dark colors always look black when I photograph them.
LikeLiked by 1 person