
Good Wednesday morning my stamping friends. How is everyone doing today? We’re halfway through the week and on our way to the weekend already. I’ve been busy getting my product shares cut up and packaged. I’m hoping to head over to the post office after work today to get them sent out to everyone.
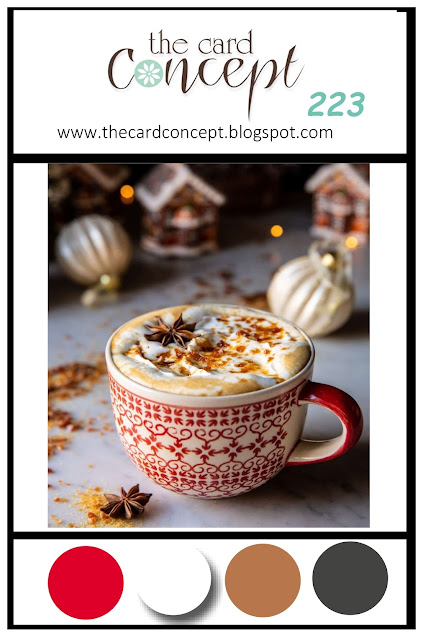
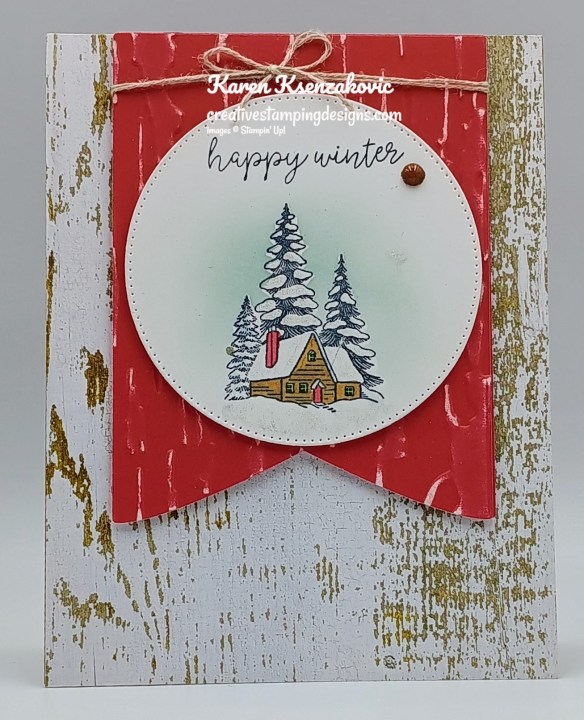
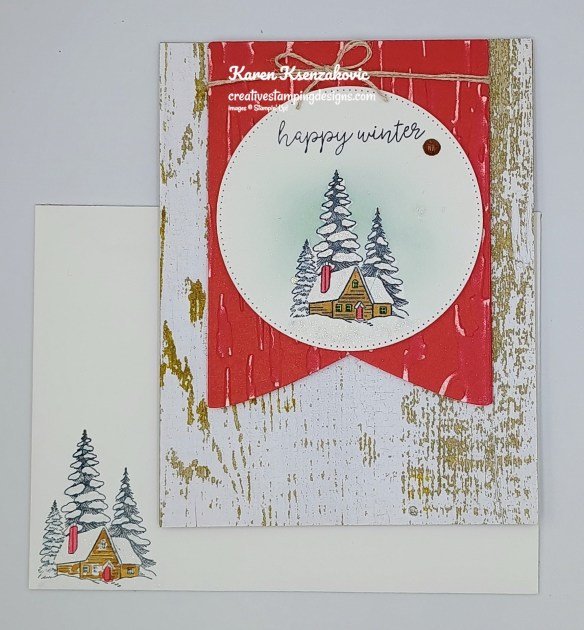
Today’s card is for the inspiration challenge from The Card Concepts. The inspiration photo #223 is Cozy New Year. I used lots of layered on my card, since that is one of my favorite kinds of cards to make. If you’d like to see a quick video of how I made this card, Click Here to go to my Instagram Reels. Here’s my card for today.
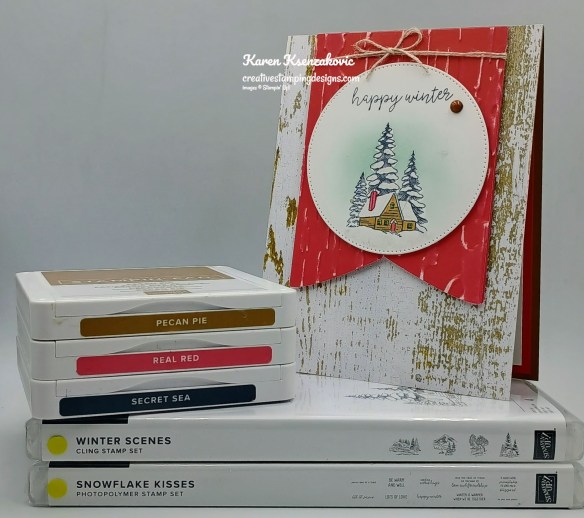
I used the Stampin’ Up! Winter Scenes Stamp Set along with the Stampin’ Up! Snowflake Kisses Stamp Set, Country Woods Designer Series Paper, Birch Wood 3D Embossing Folder, Party Banner Dies and Stylish Shapes Dies for my card today. I was inspired by the colors for my clean and layered card today.
I hope you will take a moment to visit The Card Concepts and join us for our challenge 223. How are you inspired by the photos?
Adhere a panel of Country Woods DSP to a Pecan Pie card base. Using the Party Banners Dies, cut the panel of Real Red Two-Tone cardstock. Emboss the banner using the Birch Wood EF, use a sanding block on the banner.

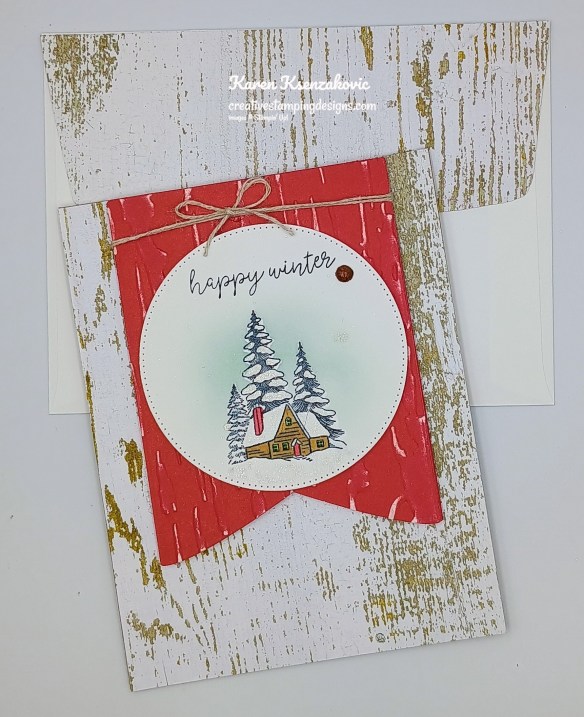
Wrap a piece of Linen Thread around the top of the banner and tie a bow. Adhere the banner to the card front with Stampin’ Dimensionals. Using the largest circle from the Stylish Shapes Dies, cut the panel of Basic White. Stamp the cabin image form the Winter Scenes stamp set in Secret Sea Ink on the die cut circle. Stamp the sentiment from the Snowflake Kisses stamp set in Secret Sea Ink on the top of the die cut circle. Mask the image with a sticky note and add Pool Party Ink using the Small Blending Brush.
Color the image using Pecan Pie and Real Red Stampin’ Blends Markers. Go over the snowy areas using the Wink of Stella Brush. Adhere the artwork to the banner using Stampin’ Dimensionals. Add a Streaked Dot to the card front.
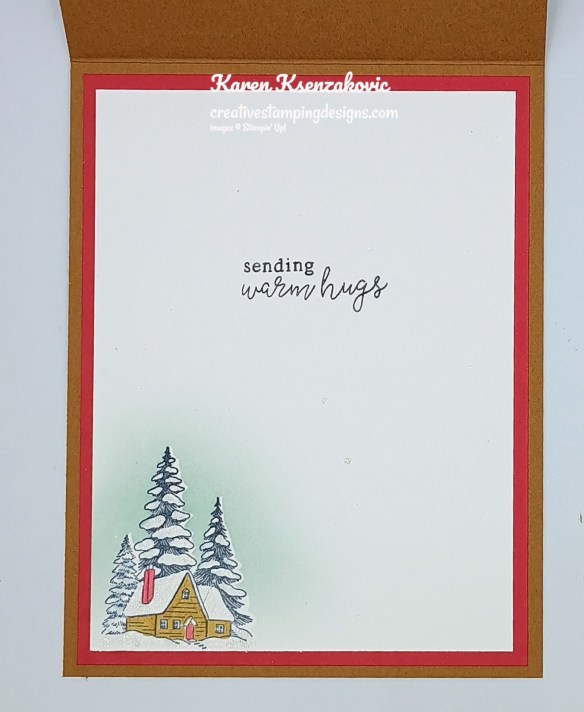
Stamp the sentiment form the Snowflake Kisses stamp set in Secret Sea Ink on the panel of Basic White. Stamp the cabin image from the Winter Scenes stamp set in Secret Sea Ink on the bottom of the panel. Mask and color the image the same as for the card front. Adhere the Basic White panel to a Real Red mat then to the inside of the Pecan Pie card base.
Decorate a Basic White Medium Envelope to complete your card. Stamp the cabin image from the Winter Scenes stamp set in Secret Sea Ink on the envelope front. Mask and color the image the same as for the card front. Adhere a panel of Country Woods DSP to the envelope flap.
Thank you for stopping by my blog today. I hope you like the card and will give it a try. Happy Stamping!!
*********************************************************************************************************
If you need any stamping supplies, I’d love to be your Demonstrator. Just click HERE to go directly to my online store or drop me an email if you have any questions.
*********************************************************************************************************
Registration Open for January Nature’s Symphony Online Class
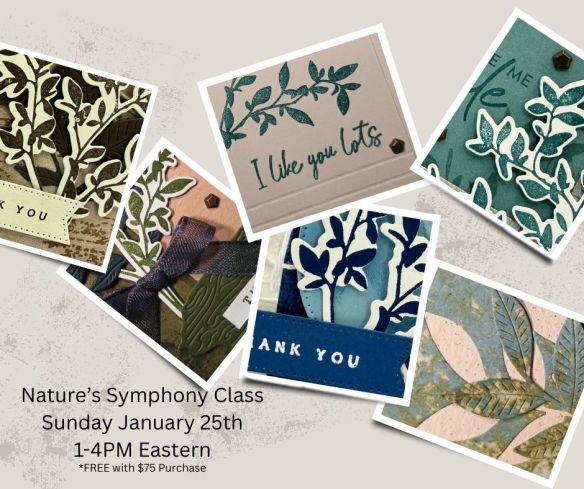
Tara Carpenter and I are teaming up to offer a fun Online Zoom Class featuring the new Stampin’ Up! Nature Walk Suite Collection. We will be creating 6 different cards 2 of which will be fun folds. This class is free with a $75 purchase from my Online Store. As an extra bonus if you make your purchase starting on Tuesday January 6, you will earn Bonus Coupons, and you’ll be eligible for the new Product of the Month.
The class requirements and what you will receive:
- Visit my Online Store and place a $75 or more order before tax and shipping.
- Once you have made the purchase, fill out this form and submit Click Here For Google Form
- Zoom class with complete step by step instructions to complete each card as we go.
- PDF with detailed directions and photos
- A Link to the recorded class after we are done so you can watch it again and make more cards.
A week before the class I will send you the complete PDF of the cards so you can cut all your cardstock gather your supplies, so you are ready to go. We will NOT be cutting cardstock live. Everyone’s cards will be unique since you will pick which color cardstock and ink you want to use for each card.
The class will be held on Sunday January 25th from 1pm – 4pm Eastern Time via Zoom. This will allow everyone all over the United States to participate live!
I will email you the Zoom link to the class a few days before the event.
Deadline to sign up is Sunday January 18th at 5pm ET
*********************************************************************************************************
Bonus Days Going On!!!

It’s almost time for BONUS DAYS! Because do you know what’s a great deal? Getting rewarded for all the crafting supplies you’re already going to buy! When you shop between January 6 and February 2 and spend $50 USD, you will earn a $5 USD coupon! Make sure you save all your coupons because you can redeem them (and we mean ALL of them) between February 3 and 28. And don’t forget—each purchase earns you Stampin’ Rewards, so that’s even more bang for your buck! There’s no limit to how many coupons you can earn!
Details:
- Earn a $5 USD coupon for every $50 USD spent (before shipping and tax).
- All coupon codes will be emailed right after a qualifying purchase has been made. You must have a customer account with a valid email address to earn coupons when you shop.
- If you earn multiple codes from a single order, you will receive one email with multiple codes. If you earn multiple codes from multiple orders, you will receive separate emails for each code earned.
- All order types qualify for this promotion.
- Orders started before the promotion begins will not count toward earning coupon codes. You must add items to your cart and complete your purchase during the earning period.
- There is no limit to the number of coupon codes participants can earn per order or throughout the duration of the earning period.
*********************************************************************************************************
New Stampin’ Up! Product of The Month
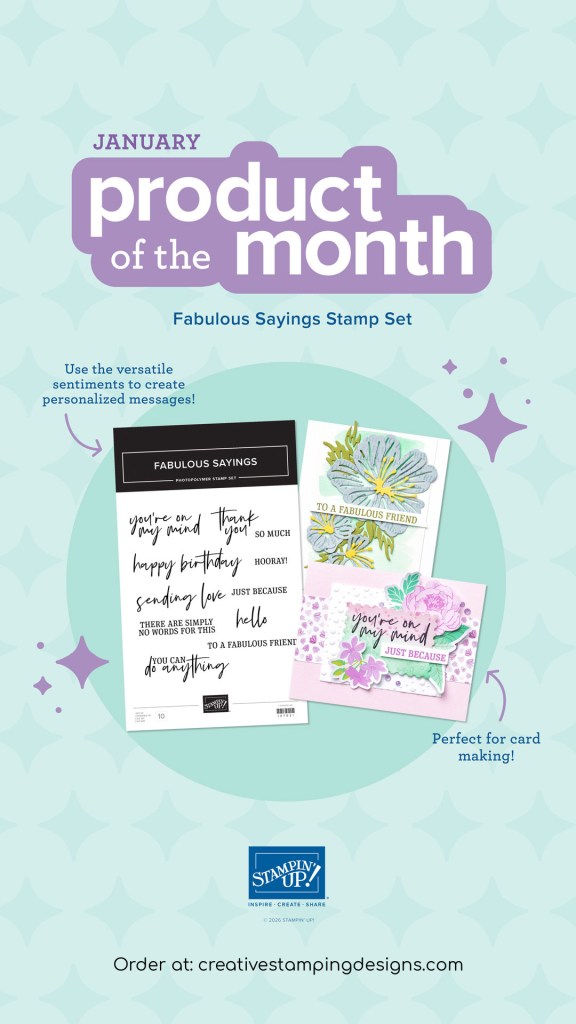
Send thoughtful messages with style using the Fabulous Sayings Stamp Set! This versatile stamp set features all-occasion sentiment stamps for birthdays, thank-you notes, love, friendship, and support cards. The mix of a handwritten script with a classic serif font pair beautifully with a wide range of card making and paper crafting styles. The Fabulous Sayings Stamp Set is the exclusive Product of the Month for January 2026! Only available until stocks run out—don’t wait to get yours! This is a Two-Step Stampin’ set; it allows you to layer two or more images to create one final image with extra texture and dimension in the colors you want.
DETAILS
– January 2026 Product of the Month
– 11 photopolymer stamps
– Suggested clear blocks (sold separately): c, h
– Two-Step
PRODUCT OF THE MONTH
– Is a new exclusive product released each month!
– Can be unlocked for just $5 with orders over $75 (after discounts and rewards).
– Is only available while supplies last—they can sell out quickly!
– Is limited to one per customer (including language versions).
*********************************************************************************************************
Card stock cuts for this project:
- Basic White Cardstock 3 1/4″ x 3 1/4″ (artwork), 3 3/4″ x 5″(inner liner)
- Pecan Pie Cardstock 4 1/4″ x 11″(card base scored & folded at 5 1/2″)
- Real Red Cardstock 4″ x 5 1/4″(inner liner mat)
- Real Red Two-Tone Cardstock 3 1/2″ x 4 1/2″(banner)
- Country Wood Designer Series Paper 4 1/4″ x 5 1/2″(card front), 2 1/4″ x 6″(envelope)
*********************************************************************************************************
Product List
![Winter Scenes Cling Stamp Set (English) [ 166088 ]](https://assets1.tamsnetwork.com/images/EC042017NF/166088s.jpg "Winter Scenes Cling Stamp Set (English) [ 166088 ]")
![Snowflake Kisses Photopolymer Stamp Set (English) [ 166018 ]](https://assets1.tamsnetwork.com/images/EC042017NF/166018s.jpg "Snowflake Kisses Photopolymer Stamp Set (English) [ 166018 ]")
![Basic White 8 1/2" X 11" Cardstock [ 166780 ]](https://assets1.tamsnetwork.com/images/EC042017NF/166780s.jpg "Basic White 8 1/2\" X 11\" Cardstock [ 166780 ]")
![Pecan Pie 8 1/2" X 11" Cardstock [ 161717 ]](https://assets1.tamsnetwork.com/images/EC042017NF/161717s.jpg "Pecan Pie 8 1/2\" X 11\" Cardstock [ 161717 ]")
![Real Red 8-1/2" X 11" Cardstock [ 102482 ]](https://assets1.tamsnetwork.com/images/EC042017NF/102482s.jpg "Real Red 8-1/2\" X 11\" Cardstock [ 102482 ]")
![Real Red 12" X 12" (30.5 X 30.5 Cm) Two Tone Cardstock [ 166696 ]](https://assets1.tamsnetwork.com/images/EC042017NF/166696s.jpg "Real Red 12\" X 12\" (30.5 X 30.5 Cm) Two Tone Cardstock [ 166696 ]")
![Country Woods 12" X 12" (30.5 X 30.5 Cm) Designer Series Paper [ 163393 ]](https://assets1.tamsnetwork.com/images/EC042017NF/163393s.jpg "Country Woods 12\" X 12\" (30.5 X 30.5 Cm) Designer Series Paper [ 163393 ]")
![Pool Party Classic Stampin' Pad [ 147107 ]](https://assets1.tamsnetwork.com/images/EC042017NF/147107s.jpg "Pool Party Classic Stampin' Pad [ 147107 ]")
![Small Blending Brushes [ 160518 ]](https://assets1.tamsnetwork.com/images/EC042017NF/160518s.jpg "Small Blending Brushes [ 160518 ]")
![Secret Sea Classic Stampin' Pad [ 165285 ]](https://assets1.tamsnetwork.com/images/EC042017NF/165285s.jpg "Secret Sea Classic Stampin' Pad [ 165285 ]")
![Pecan Pie Stampin’ Blends Combo Pack [ 161674 ]](https://assets1.tamsnetwork.com/images/EC042017NF/161674s.jpg "Pecan Pie Stampin’ Blends Combo Pack [ 161674 ]")
![Real Red Stampin' Blends Combo Pack [ 154899 ]](https://assets1.tamsnetwork.com/images/EC042017NF/154899s.jpg "Real Red Stampin' Blends Combo Pack [ 154899 ]")
![Clear Wink Of Stella Glitter Brush [ 141897 ]](https://assets1.tamsnetwork.com/images/EC042017NF/141897s.jpg "Clear Wink Of Stella Glitter Brush [ 141897 ]")
![Birch Wood 3 D Embossing Folder [ 164069 ]](https://assets1.tamsnetwork.com/images/EC042017NF/164069s.jpg "Birch Wood 3 D Embossing Folder [ 164069 ]")
![Party Banners Dies [ 165264 ]](https://assets1.tamsnetwork.com/images/EC042017NF/165264s.jpg "Party Banners Dies [ 165264 ]")
![Stylish Shapes Dies [ 159183 ]](https://assets1.tamsnetwork.com/images/EC042017NF/159183s.jpg "Stylish Shapes Dies [ 159183 ]")
![Linen Thread [ 104199 ]](https://assets1.tamsnetwork.com/images/EC042017NF/104199s.jpg "Linen Thread [ 104199 ]")
![Basic White Medium Envelopes [ 159236 ]](https://assets1.tamsnetwork.com/images/EC042017NF/159236s.jpg "Basic White Medium Envelopes [ 159236 ]")


![Tear & Tape Adhesive [ 154031 ]](https://assets1.tamsnetwork.com/images/EC042017NF/154031s.jpg "Tear & Tape Adhesive [ 154031 ]")

![Take Your Pick [ 144107 ]](https://assets1.tamsnetwork.com/images/EC042017NF/144107s.jpg "Take Your Pick [ 144107 ]")


![Streaked Dots [ 165902 ]](https://assets1.tamsnetwork.com/images/EC042017NF/165902s.jpg "Streaked Dots [ 165902 ]")


Such a pretty card! Love the winter scene and the woodgrain background is perfect! 🙂
LikeLike
Thank you Amy 🙂
LikeLike
Those woodgrain papers added such richness to your beautiful card design. Blessings!
LikeLike
Thank you Arnoldo 🙂
LikeLike