
Good Friday morning my stamping friends welcome to my Fun Fold Friday. How was everyone’s week? Are you ready for the weekend? I know I sure am. It’s been one of those weeks for me. My poor fur baby spent Monday at the ER, she was having seizures all day. She’s doing better, but it’s a long way off before she’s back to herself. She’s able to walk a little better now, but she’s still very wobbly, she’s walking like she’s drunk. On top of that on Monday, a very sentimental tree of mine had to come down. My dad planted a Bradford Pear tree in my front yard about 28-29 years ago, which was when we move into our house. The tree split down the middle. One bad storm, and the tree was coming down right onto my house. Unfortunately, we had to have it cut down and now my house is so bright inside. That tree was taller than my house and provided my entire front yard with shade. I’m ready for this week to end.
Today’s card I made on my Facebook Live video on Wednesday. If you were able to join me or watched the replay, thank you. If you’d like to watch my video and stamp along, the measurements are below along with the links to my Facebook page and my YouTube channel. I actually have 2 versions of the card to show you. Here are my cards for today.
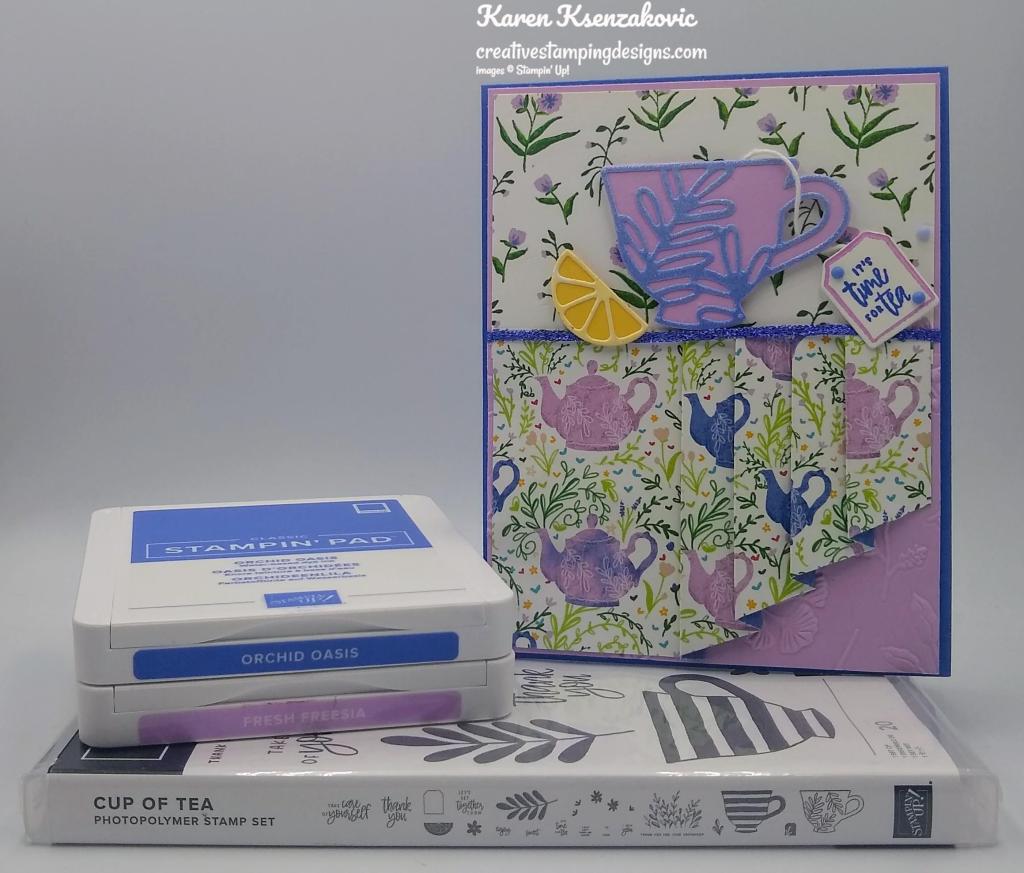
I used the Stampin’ Up! Cup of Tea Bundle along with the Tea Boutique 6 X 6 Designer Series Paper for my cards today.

I started by embossing a Fresh Freesia panel using the Twigs & Sprigs Embossing Folder. I adhered a panel of Tea Boutique DSP to the top of the panel. I scored a panel of Tea Boutique DSP at 2″, 2 1/4″, 3″, 3 1/4″, 4″, 4 1/4″, 5″ & 5 1/4″. Fold the 1/4″ score lines into Mountain Folds and the others into Valley Folds.

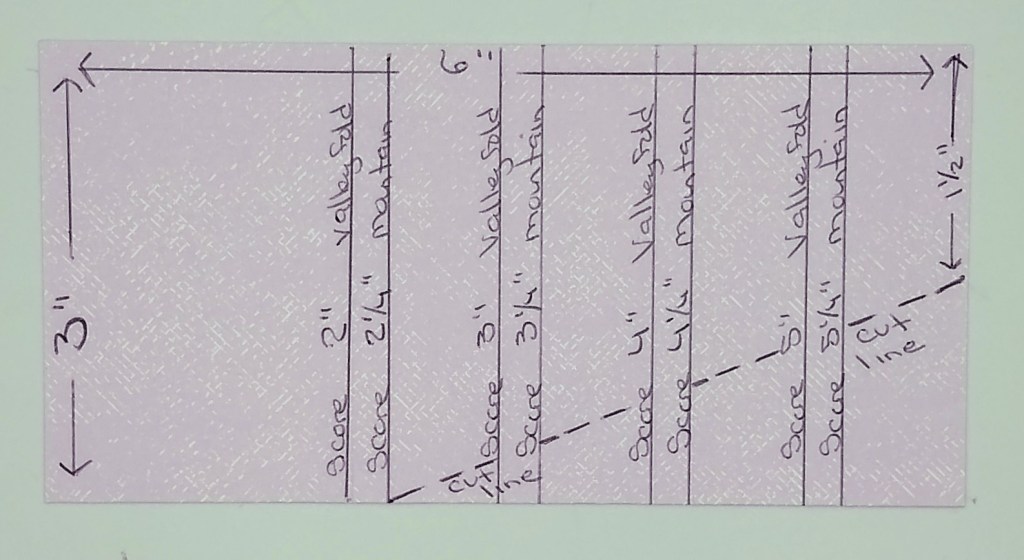
Here is the template for the half drapery fold panel.
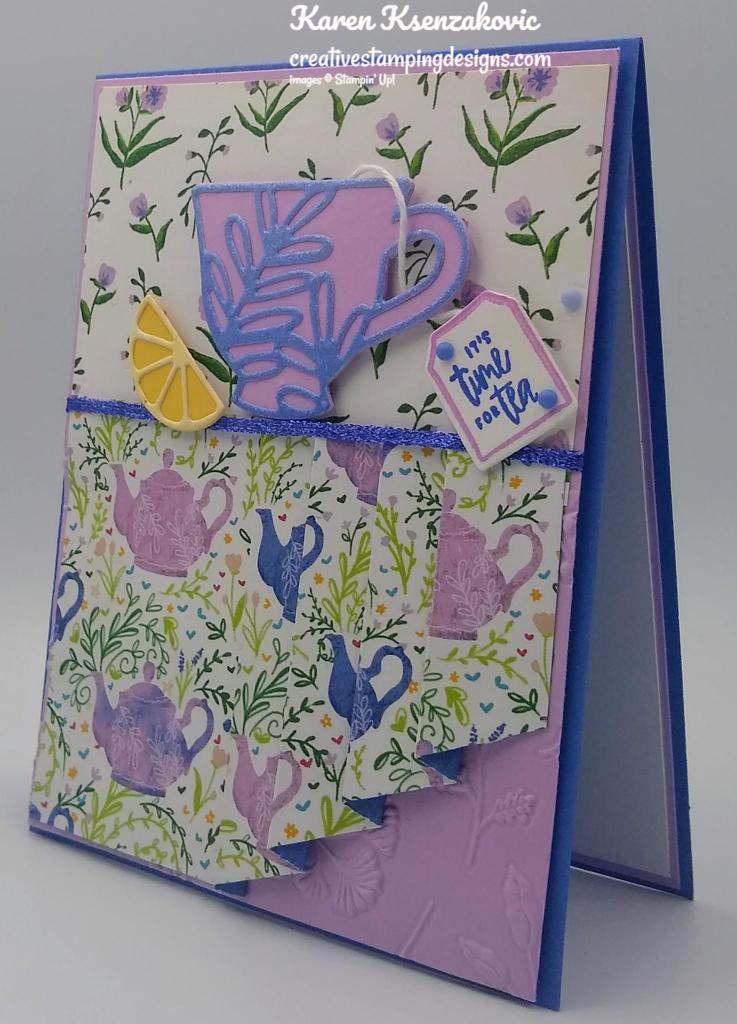
I adhered the drapery folded panel to the bottom of the embossed panel making sure to have the same edge as the top panel. I used a strip of Tear & Tape along the top edge of the drapery fold. This holds all the folds in place. I wrapped a piece of the Orchid Oasis 1/8″ Metallic Woven Ribbon around the layered panel securing it on the back with Stampin’ Seal. I adhered the card front to an Orchid Oasis card base using Stampin’ Dimensionals.


Using the Teacup Dies, I cut the solid cup from a panel of Fresh Freesia cardstock. I cut the detailed teacup from a panel of 2022-2024 In-Color Glimmer Paper. I cut the solid lemon from a panel of So Saffron cardstock. I cut the detailed lemon from a panel of Basic White cardstock that I colored with my So Saffron Stampin’ Blends Marker. On the panel of Basic White cardstock, I stamped the tea tag outline image from the Stampin’ Up! cup of Tea Photopolymer Stamp Set in Fresh Freesia Ink. I stamped the sentiment from the Cup of Tea stamp set in Orchid Oasis Ink inside the tag. I cut the tag using the Teacup Dies. I adhered the detailed teacup to the solid teacup die and the detailed lemon to the solid lemon die. I adhered a piece of White Bakers Twine from the Baker’s Twine Essential Pack to the back of the teacup and the tea tag using Stampin’ Seal. I adhered the teacup, tag and lemon to the card front using Stampin’ Dimensionals. I added a few 2022-2024 In-Color Matte Decorative Dots to the card front.


On the inside, I stamped the sentiment form the Cup of Tea stamp set in Orchid Oasis Ink on a Basic White panel. I stamped the teacup image from the Cup of Tea stamp set in Tuxedo Black Ink on the bottom of the panel. I colored the image using my Fresh Freesia and Orchid Oasis Stampin’ Blends Markers. I adhered the Basic White panel to a Fresh Freesia mat and then to the inside of the Orchid Oasis card base. If you watched my video, I had lost my lemon and had to make another one. I found my lemon and decided to add it to the inside of the card next to the teacup.

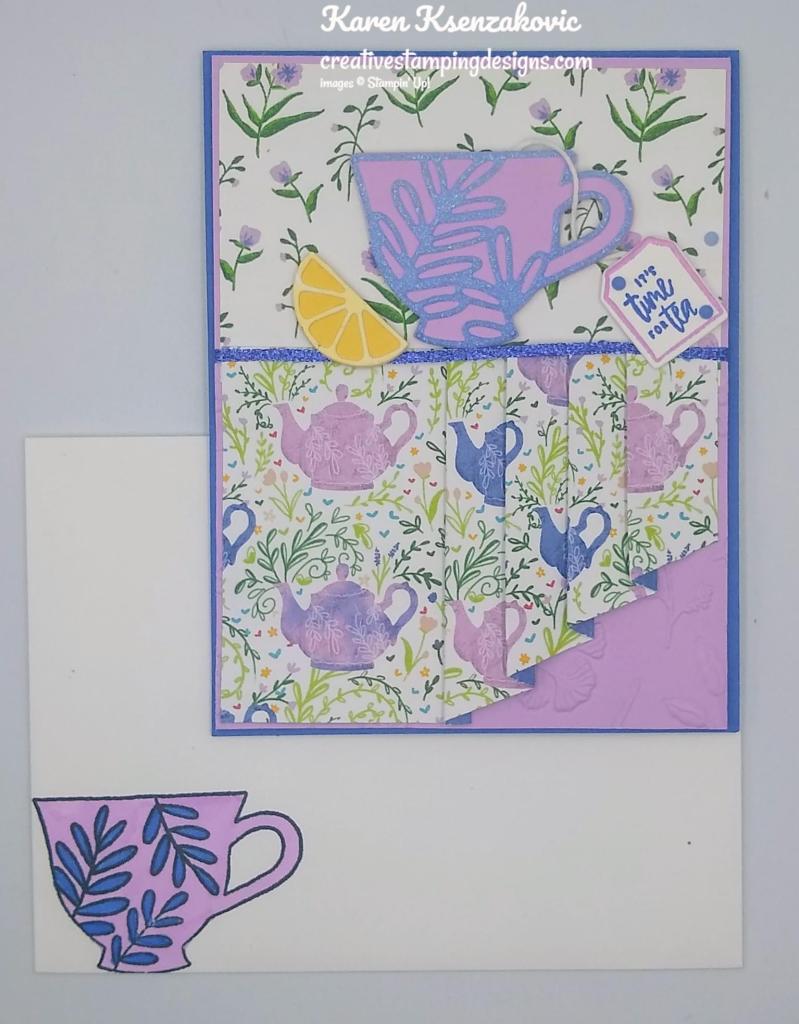
To complete my card, I decorated a Basic White Medium Envelope. I stamped the teacup image from the Cup of Tea stamp set on the envelope front in Tuxedo Black Ink and colored it using my Fresh Freesia and Orchid Oasis Stampin’ Blends Markers.


I adhered a panel of Tea Boutique DSP to the envelope flap.

Thank you for stopping by my blog today. I hope you liked my card and will give it a try. I hope you will CASE this card and please feel free to post it in the comments on my Facebook page under my post. I’d love to see your take on the card. The list of measurements are below if you’d like to stamp along while watching the video. You can watch my video on my Facebook page Here.
You can also view the video on my YouTube channel Here. Happy Stamping!!
*********************************************************************************************************
If you need any stamping supplies, I’d love to be your Demonstrator. Just click HERE to go directly to my online store or drop me an email if you have any questions.
MY CURRENT HOST CODE IS: KNZ2Y4WT
Use this host code when placing an order with me. When you order $50 or greater you will receive a free gift from me! If your order is over $150, please do not use this code, but you’ll still get the free gift. The free gift is your choice of any 1 item valued up to $10.00 from the 2021-2022 Annual Catalog or the January – June 2022 Mini Catalog! For any orders $50 or more I will also send you my monthly class tutorials. Click HERE or go to my Customer Rewards for more details and to see what this month’s tutorials are.
Please remember to use my current Host Code and make sure that you can see my name on the final checkout page listed as your Demonstrator when you order so that you know that you’re ordering with me and you’ll get my rewards!
Happy Stamping, Karen
*********************************************************************************************************
July – December 2022 Mini Catalog Designer Series Paper Share
Sign Up ends Tuesday June 28th
I’m offering a Designer Series Paper share from the July-December 2022 Mini Catalog, and I’d love to have you join in on it!! I’m placing my share order on July 1 and I’m going to use the expedited shipping option so I should be able to have the shares cut, bundled and back out to you during the week of July 11.
How shares work: I order full packs of all of the Designer Series Papers listed below, I cut them into 6″ x 6″ pieces (or 6″ x 12″ pieces for double shares) and give you one panel of each design from each pack on the list. I pack up the paper in a cellophane bag and mail it back out to you just as quickly as I can! Shares give you a good working sample of all of the papers so that you can decide which ones to order in full packs!
Here are the Designer Series Paper Shares that I am offering from the new Mini Catalog:
New Designer Series Paper Share – $29.00 plus $5.50 for First Class Mail shipping
You will receive one 6×6 sheet of each design from the following DSP and specialty paper packs (the number behind the name indicates how many 6×6 sheets of that paper pack you will receive):
- Black & White – 6
- Boughs Of Holly – 6
- Festive Foils Specialty – 3 (one of each color)
- Gingham Cottage – 12
- Lights Aglow Specialty 6″ x 6″ – 12
- Painted Christmas – 6
- Rustic Harvest – 6
- Santa Express – 6
- Splendid Day Specialty – 6
- Storybook Gnomes – 6
- Sweetest Christmas – 6
- Glimmer Specialty – 3 (one of each color)
- Metallic & Shimmer Specialty 6″ x 6″ – 3 (one of each color)
- Real Red & White 6″ x 6″ Glimmer Paper – 2 (one of each color)
- Snowflake Specialty Vellum – 6
- Snowy White Velvet Sheets – 1
In all, you’ll receive 90 – 6” x 6” sheets of designer or specialty paper!
Double DSP Share – $58.00 + $8.50 Shipping by Priority Mail – I’ll cut the designer paper sheets into 6×12 so that you’ll be able to get 3 A2 size card fronts from each sheet (except for the Lights Aglow, Metallic & Shimmer and Real Red & White Glimmer Paper, you’ll get double sheets of those since they’re already precut).
FREE Gift From Me! – As a bonus for joining my share, you’ll also get a sampler of the Rings Of Love and Silver & Gold Sale-a-bration Designer Series Paper Packs and a sampler of the Celebrate Everything host exclusive paper!
Anyone is welcome to join in my share (please note, I can only ship to addresses within the US). If you’d like to join email the following information to creativestampingdesigns
- Your first and last name
- The email address that is connected to your PayPal account. I only accept PayPal for payment. ***You do not need to have a PayPal account to pay the invoice, you can choose to pay by credit card without having a PayPal account.
Deadline to sign up for my share is Tuesday, June 28.
Let me know if you have any questions. Thanks!
*********************************************************************************************************
Sending Good Thoughts
Subscribe June 11 – July 10
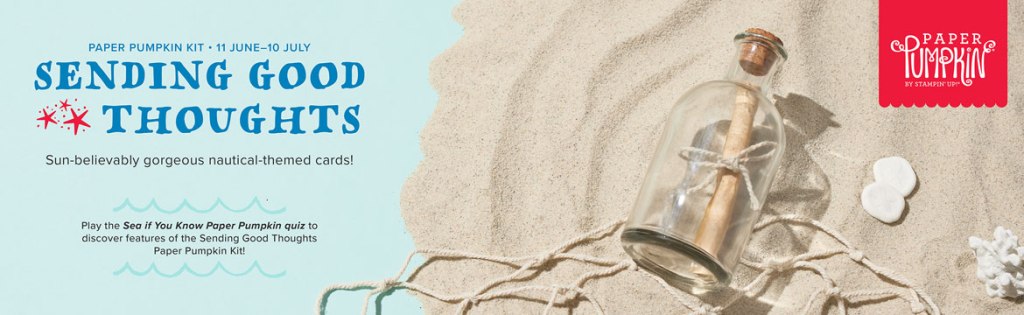
“Seas” the day and set sail with across the ocean the Sending Good Thoughts Paper Pumpkin Kit! With beautifully designed nautical imagery, a fun message in a bottle motif, and sentiments that are “shore” to please, this month’s kit is full of warmth and fun.
Each kit contains enough supplies to create 9 cards—3 each of 3 daring designs—and 9 coordinating envelopes. This month’s Paper Pumpkin kit will have your loved ones feeling sand-tastic!
We also have a special game for you to play—take part in the Sea if You Know Paper Pumpkin quiz to learn more about Paper Pumpkin and this month’s kit! Plus, subscribers to the Sending Good Thoughts Paper Pumpkin Kit will be entered to win a 1-month prepaid Paper Pumpkin code!
Play the Sea if You Know Paper Pumpkin quiz and share it with your friends! Good luck!
This kit includes:
- Sending Good Thoughts Photopolymer Stamp Set
- Bermuda Bay Classic Stampin’ Spot®
- Printed dry-embossed card bases
- Printed envelopes
- Printed die cuts
- Twine
- Mini glue dots
- Dimensionals
Card size: 4-1/4″ x 5-1/2″ (10.8 x 14 cm)
Coordinating Stampin’ Up! colors: Balmy Blue, Basic Gray, Bermuda Bay, Fresh Freesia, Pacific Point, Poppy Parade
Subscribe to the July Paper Pumpkin Kit between 11 June and 10 July at paperpumpkin.com!
Note: Supplies may be limited toward the end of the subscription period.
*********************************************************************************************************
Stampin’ Up! Buy One Get One 50% off Kits Collection Sale June 1-June 30!
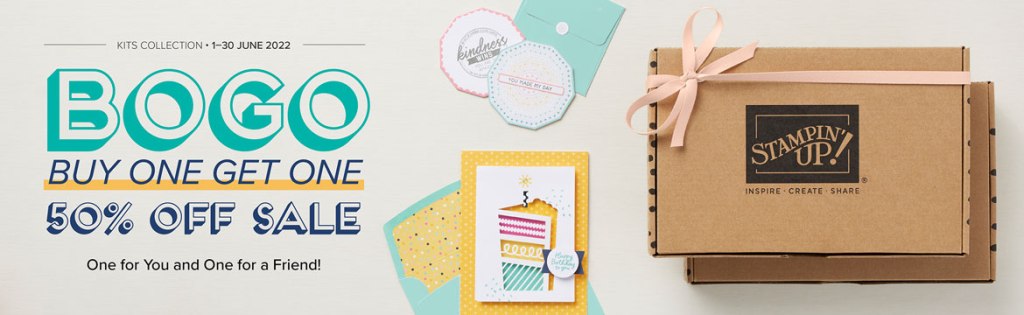
Share a Kit with a Friend with the Kits Collection BOGO 50% Off Promotion
Get ready—the Kits Collection is having a buy one, get one 50% off promotion. This is the perfect time to #ShareYourMoment and share a kit from the Kits Collection with a friend! As always, the kit selection is based on availability. You can see what’s available in the Kits Collection selection Here. Go to Shop Products and Kit Collections.
Ordering information:
- Sale runs June 1-30, 2022.
- All kits in the Kits Collection by Stampin’ Up! qualify for this sale.
- Kit selection is based on availability.
- You will need at least two kits in your cart for the discount to automatically apply to the more expensive kit (yes…the more expensive one!!) at checkout.
- There are no order limits on this promotion.
Let me know if you have any questions. And get ready to pick up some BOGO kits in June!
*********************************************************************************************************
Card stock cuts for this project:
- Basic White Cardstock 2 3/4″ X 1 1/4″ (tea tag & lemon), 4″ X 5 1/4″ (inner liner)
- Fresh Freesia Cardstock 2 – 4 1/8″ x 5 3/8″ (card front & inner liner mats), 2″ X 2 1/2″ (teacup)
- Orchid Oasis Cardstock 4 1/4″ X 11″ (card base scored & folded at 5 1/2″)
- So Saffron Cardstock 1 1/4″ X 1″ (lemon)
- 2022-2024 In-Color 6 X 6 Glimmer Paper 1 3/4″ X 2 1/2″ (detailed teacup)
- Tea Boutique 6 X 6 Designer Series Paper 2 1/2″ X 4″ (card front top), 3″ X 6″ (drapery), 2 1/4″ X 6″ (envelope flap)
*********************************************************************************************************
Product List
")
")


 Glimmer Paper")
 Designer Series Paper")


 Woven Metallic Ribbon")


So pretty Karen! That paper is perfect for that fold, fantastic colors! 🙂
LikeLiked by 1 person
Thank you so much Amy 🙂
LikeLike
Karen, I love your drapery folds. I haven’t done one in quite awhile. This DSP lends itself well for this fold. Sorry you had such a rough week emotionally with your fur baby and tree.
LikeLiked by 1 person
Thank you so much Karen 🙂 You need to give the fold a try again. Thank you, hopefully things will start looking up soon.
LikeLiked by 1 person
Enjoyed your video with drapery fun fold!
Thanks very much!
LikeLiked by 1 person
Thank you so much for watching my video. I hope you will give it a try.
LikeLike